The power went out halfway through my first attempt at baking this bread, leaving me in a dim kitchen with a bowl of mashed bananas and a growing sense of panic. I was standing there, spoon in hand, wondering if the oven’s digital display would ever light up again or if I’d have to settle for banana pancakes instead. It was one of those humid July evenings where the air feels heavy and the heat refuses to break, making the last thing you want to do is stand over a hot stove. But then, a knock on the back door broke my concentration, and it was Mrs. Gable from next door, holding a slightly dented Tupperware container. She didn’t say anything at first, just watched me stare blankly at my unmixed batter. Then she set the container down and pointed to the single bowl in front of me. “You’re overmixing it,” she said, her voice calm and steady. “And you’re forgetting the walnuts. They’re the soul of the thing.”
Mrs. Gable isn’t a chef; she’s a retired librarian who bakes only when the roses are blooming. She handed me her recipe, which was scribbled on the back of a utility bill, and told me to stop worrying about perfection. She explained that the key to a truly moist one-bowl banana bread with walnuts isn’t in the precision of your measurements, but in the patience you show while the ingredients come together. I remember feeling a bit skeptical at first, especially since I usually rely on elaborate, multi-step recipes that feel more like science experiments. But there was something about the simplicity of her approach that felt right. It wasn’t about showing off; it was about feeding people well with what you already have.
I went back to my kitchen, turned the oven back on, and followed her instructions. I mixed the wet and dry ingredients in just one bowl, as she suggested, and folded in the walnuts gently, almost lovingly. The smell that filled the house wasn’t just sweet; it was deep and earthy, like autumn leaves and warm honey. When I took the first bite the next morning, I closed my eyes and let the texture speak for itself. It was dense enough to be satisfying but light enough to not weigh you down. Maybe you’ve been there, standing in your kitchen at 10 PM, wondering what to do with those brown-spotted bananas before they go bad? This is the answer.
I keep making this recipe because it reminds me that cooking doesn’t have to be complicated to be good. Mrs. Gable’s moist one-bowl banana bread with walnuts has become a staple in my home, not because it’s fancy, but because it’s honest. It’s a bread that asks for very little from you but gives back so much in return. Every time I bake it, I think of that power outage and the neighbor who taught me that sometimes, the best things in life come in simple packages. You know that feeling when you just want comfort without the hassle? This bread delivers exactly that.
Why You’ll Love This Recipe
Let’s face it, we’ve all had our fair share of dry, crumbly banana bread disasters. I used to think that achieving that perfect moist crumb required a degree in food chemistry or a dozen different bowls scattered across the counter. But after years of testing and tweaking, I’ve found that the secret lies in simplicity and technique, not complexity. This recipe isn’t just another banana bread; it’s the result of countless trial-and-error sessions in my own kitchen, refined until it hit that sweet spot of texture and flavor. It’s the kind of recipe that feels like a hug in food form, and honestly, it’s become my go-to when I need to cheer someone up or just treat myself.
Here is why this recipe stands out from the crowd:
- Quick & Easy: Comes together in under 15 minutes of prep time, making it perfect for busy weeknights or when you suddenly crave something sweet. You really don’t need to spend hours in the kitchen.
- Simple Ingredients: No fancy grocery trips needed; you likely already have everything in your pantry and fridge. Flour, sugar, eggs, bananas, and walnuts are staples most of us keep on hand.
- Perfect for Gifting: Great for potlucks, neighbor gifts, or bringing to a friend’s house. The aroma alone is a welcome gift, and the loaf travels well if you wrap it tightly.
- Crowd-Pleaser: Always gets rave reviews from kids and adults alike. Even the pickiest eaters usually ask for seconds when walnuts add that nice crunch.
- Unbelievably Delicious: The texture and flavor combo is next-level comfort food. The walnuts add a bitter contrast to the sweet banana, creating a balanced taste profile.
What makes this recipe different from the rest is the focus on moisture retention without adding excessive fat. By using ripe bananas and a simple oil-to-butter ratio, we avoid the greasy texture that often plagues one-bowl recipes. Whether it is the specific technique of folding in the walnuts last to keep them from sinking, or the perfectly balanced seasoning profile that includes a pinch of salt to pop the flavors, this isn’t just another version—it’s my best version. It’s the kind that makes you close your eyes after the first bite and sigh with relief. It’s comfort food reimagined—faster, easier, but with the same soul-soothing satisfaction. Perfect for impressing guests without stress, or turning a simple meal into something memorable.
What Ingredients You Will Need
This recipe uses simple, wholesome ingredients to deliver bold flavor and satisfying texture without the fuss. The beauty of a one-bowl banana bread is that it relies on the quality of a few key components rather than a long list of exotic additives. Most of these items are likely sitting in your kitchen right now, which is part of the appeal. We’re focusing on pantry staples that work together to create that signature moist crumb and nutty depth.
Here is what you will need to get started:
- Ripe Bananas: 3 large, very ripe bananas (about 1 ½ cups mashed). The riper, the better. Black spots on the peel mean more sugar and flavor. (adds natural sweetness)
- Unsalted Butter: ½ cup (1 stick), melted. Using melted butter helps incorporate it evenly without overmixing. (provides rich flavor)
- Vegetable Oil: ¼ cup. This is the secret to extra moisture. Butter alone can sometimes lead to a denser loaf, so the oil keeps it tender. (ensures softness)
- Granulated Sugar: ¾ cup. You can reduce this to ½ cup if you prefer less sweetness, but the sugar also helps with browning. (balances flavor)
- Brown Sugar: ½ cup, packed. Adds a hint of molasses flavor and extra chewiness. (deepens taste)
- Eggs: 2 large eggs, room temperature. Room temp eggs emulsify better with the wet ingredients. (binds the loaf)
- Vanilla Extract: 1 teaspoon. Pure vanilla makes a huge difference compared to imitation. (enhances aroma)
- All-Purpose Flour: 1 ½ cups. Don’t scoop and pack; spoon it into the cup and level it off to avoid a dry loaf. (structure)
- Baking Soda: 1 teaspoon. Essential for the rise, especially with acidic bananas. (leavening agent)
- Salt: ½ teaspoon. Crucial for balancing the sweetness. (flavor enhancer)
- Walnuts: 1 cup, chopped. Toasting them first is optional but highly recommended for deeper flavor. (adds crunch)
- Optional: A pinch of cinnamon or nutmeg if you want a spicier profile, though the vanilla and banana shine on their own.
I recommend using high-quality walnuts, like those from Trader Joe’s or a local co-op, as they tend to be fresher and less bitter. Look for firm, small-curd cottage cheese if you decide to swap in a yogurt variation later, but for this classic version, stick to the basics. In summer, you might swap in fresh berries instead of walnuts for a fruity twist, but the nutty version is a timeless classic.
Equipment Needed
You don’t need a fancy kitchen to make this bread, but having the right tools makes the process smoother and the result better. The most important piece of equipment is a standard 9×5 inch loaf pan. I prefer metal pans over glass or dark non-stick because they conduct heat more evenly, preventing the bottom from burning while the middle remains undercooked. If you only have a glass pan, you may need to lower the oven temperature by 25 degrees Fahrenheit to prevent over-browning.
- 9×5 Inch Loaf Pan: A metal pan is ideal. Grease it well with butter or cooking spray, and line the bottom with parchment paper for easy removal.
- Mixing Bowl: A large bowl, wide enough to comfortably whisk the wet ingredients and fold in the dry ingredients without spilling.
- Whisk: A standard balloon whisk works best for breaking up lumps in the flour and emulsifying the eggs and sugars.
- Spatula: A silicone spatula is essential for scraping down the sides of the bowl and gently folding in the walnuts without deflating the batter.
- Mashing Tool: A potato masher or a sturdy fork. A masher gives a chunkier texture, while a fork creates a smoother puree.
- Cooling Rack: Allows air to circulate around the loaf, preventing the bottom from getting soggy from trapped steam.
If you don’t have a potato masher, a blender can work in a pinch, but be careful not to over-process the bananas into a liquid. I’ve also found that using a digital kitchen scale for measuring flour is the best way to ensure consistency, though volume measurements work fine if you are careful. For budget-friendly options, any basic metal loaf pan from a discount store will do the job perfectly well. Just avoid non-stick sprays with flour in them, as they can leave a gummy residue over time; plain butter or oil is safer for long-term pan maintenance.
Preparation Method
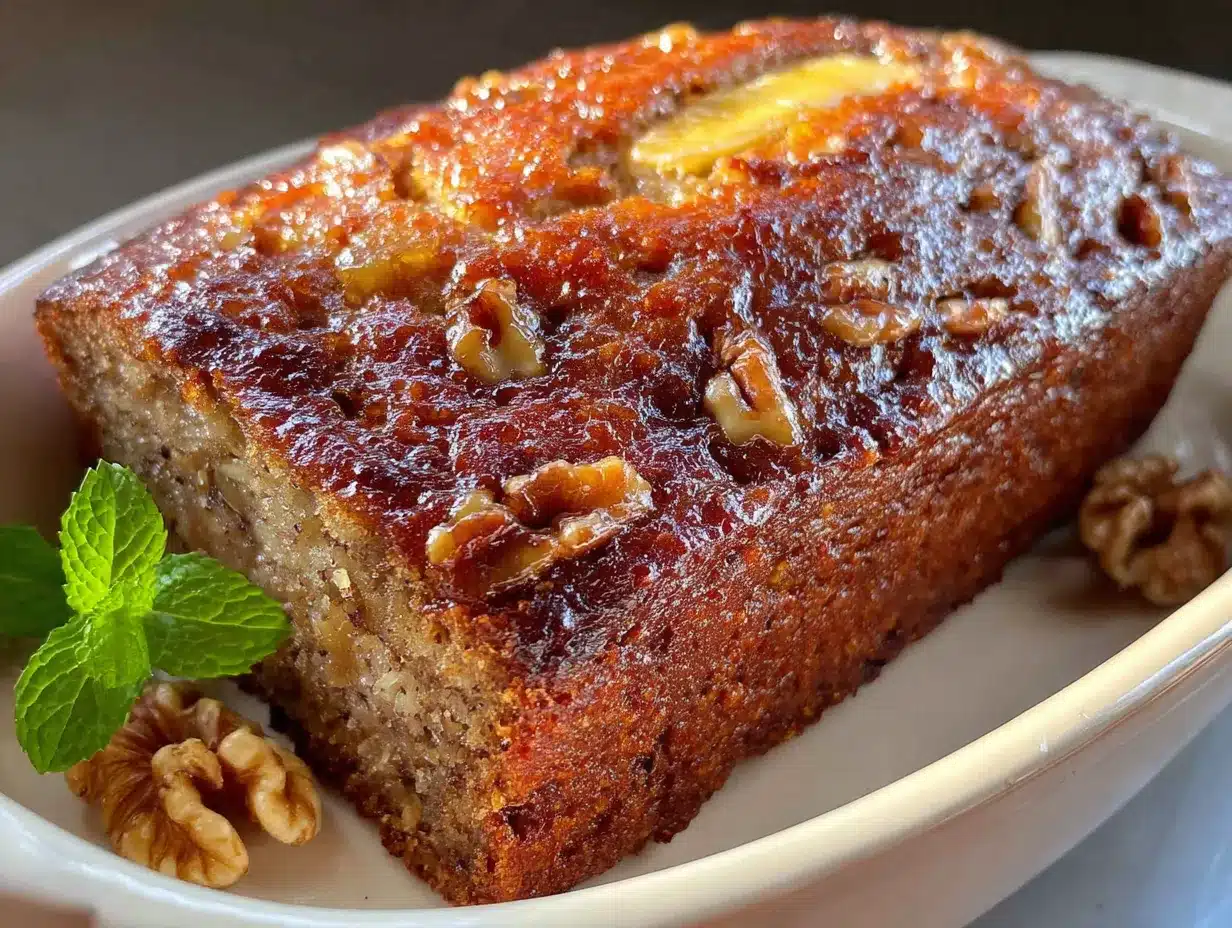
Making this moist one-bowl banana bread with walnuts is straightforward, but following the steps carefully ensures you get that perfect texture. Start by preheating your oven to 350°F (175°C). This is crucial because the oven needs to be at the right temperature before the batter goes in, ensuring an even rise from the start. While the oven heats, prepare your loaf pan by greasing it thoroughly with butter or non-stick spray. Lining the bottom with a strip of parchment paper is a smart move, as it guarantees easy removal once the bread is baked and cooled.
- Mash the Bananas: In your large mixing bowl, peel the ripe bananas and mash them with a fork or potato masher. You want about 1 ½ cups of mashed banana. It’s okay if there are small lumps; they add texture. Take about 2 minutes to get this done.
- Mix Wet Ingredients: To the mashed bananas, add the melted butter, vegetable oil, granulated sugar, and brown sugar. Whisk vigorously for about 1 minute until the mixture is smooth and combined. The sugars should mostly dissolve into the wet ingredients. This step takes patience, so don’t rush it.
- Add Eggs and Vanilla: Crack the two eggs into the bowl and add the vanilla extract. Whisk again until everything is fully incorporated. The mixture should look glossy and uniform. This usually takes another minute of whisking.
- Incorporate Dry Ingredients: Sprinkle the flour, baking soda, and salt over the wet mixture. Using your whisk, gently combine the ingredients until just combined. Do not overmix! It’s okay if there are a few small lumps of flour. Overmixing develops gluten, which leads to a tough, dense bread. Stop as soon as you no longer see dry flour. This should take less than a minute.
- Fold in Walnuts: Add the chopped walnuts to the batter. Use your silicone spatula to gently fold them in. Scrape the bottom and sides of the bowl to ensure even distribution. Be gentle here to keep the batter airy. This step is quick, about 30 seconds.
- Bake: Pour the batter into the prepared loaf pan and smooth the top with the spatula. Place it in the center of the preheated oven. Bake for 55 to 65 minutes. The bread is done when a toothpick inserted into the center comes out clean or with just a few moist crumbs. Do not rely solely on the timer; check the bread at the 50-minute mark.
- Cool: Once baked, remove the pan from the oven and let it cool in the pan for 10 minutes. Then, transfer the loaf to a wire rack to cool completely. This prevents the bottom from becoming soggy. Patience is key here; slicing it while hot can make it gummy.
I always recommend letting the bread cool for at least an hour before slicing, even if it smells irresistible. The structure sets as it cools, making slicing much cleaner. If you’re in a rush, let it cool for at least 20 minutes, but be prepared for a slightly messier slice.
Cooking Tips & Techniques
There are a few pro tips that can make the difference between a good banana bread and a great one. First and foremost, use the ripest bananas you can find. The brown spots on the peel are not a sign of spoilage; they are a sign of peak sweetness and flavor. If your bananas are still yellow, you can speed up the ripening process by baking them on a parchment-lined sheet at 300°F for 15-20 minutes until the skins turn completely black. This concentrates the sugars and adds depth to the bread.
Another common mistake is overmixing the batter. Once you add the flour, mix only until it is combined. I’ve learned this the hard way after several dense, brick-like loaves. The goal is tender crumb, not chewy bread. Also, consider toasting your walnuts before chopping them. Spread them on a dry skillet over medium heat for 3-5 minutes until fragrant. This brings out their natural oils and enhances their flavor, making them pop against the sweet banana.
Timing is everything in baking. Oven temperatures can vary, so use an oven thermometer to verify your oven’s accuracy. If your bread is browning too quickly on top, tent it loosely with aluminum foil for the last 15 minutes of baking. This allows the center to finish cooking without burning the crust. Multitasking is easy with this recipe since the prep is quick, but keep an eye on the bread during the last 15 minutes to ensure it doesn’t dry out. Consistency comes from practice, so don’t be afraid to adjust sugar or liquid slightly based on your banana’s moisture content.
Variations & Adaptations
While the classic version is a favorite, this recipe is versatile enough to accommodate various dietary needs and flavor preferences. Here are a few variations you can try:
- Gluten-Free Option: Swap the all-purpose flour for a 1:1 gluten-free baking flour blend. Ensure your baking soda and other ingredients are certified gluten-free if cross-contamination is a concern.
- Dairy-Free: Replace the butter with an equal amount of coconut oil or a vegan butter substitute. The vegetable oil already makes it dairy-free, so this is a simple swap.
- Nut-Free: Omit the walnuts entirely, or substitute them with sunflower seeds or pumpkin seeds for a similar crunch without the tree nut allergen.
- Chocolate Chip Twist: Add ½ cup of semi-sweet chocolate chips instead of walnuts. This turns the bread into a dessert-like treat that kids love.
- Spiced Version: Add 1 teaspoon of cinnamon and ½ teaspoon of nutmeg to the dry ingredients for a warmer, spicier flavor profile.
I personally love adding a swirl of cream cheese to the batter. Just mix 4 oz of softened cream cheese with 1 tablespoon of sugar and swirl it into the batter before baking for a marbled effect. These adaptations allow you to keep the recipe fresh and exciting, depending on what you have on hand or what your family prefers.
Serving & Storage Suggestions
This banana bread is best served at room temperature, where the flavors are most balanced. It pairs wonderfully with a cup of hot coffee or tea, making it an ideal breakfast or afternoon snack. For a special touch, serve it warm with a pat of butter melting on top, or pair it with a dollop of whipped cream for a dessert-style treat.
To store the bread, wrap it tightly in plastic wrap or aluminum foil once it has cooled completely. It can be kept at room temperature for up to 3 days, or in the refrigerator for up to a week. For longer storage, freeze the loaf (wrapped well) for up to 3 months. To reheat, simply thaw it at room temperature or warm slices in the microwave for 15-20 seconds. The flavors often develop and meld together over the first 24 hours, making it even better on the second day.
Nutritional Information & Benefits
This moist one-bowl banana bread with walnuts offers a balance of energy and nutrients. Bananas provide potassium and vitamin B6, while walnuts contribute healthy omega-3 fatty acids and protein. Each slice (assuming 8 slices per loaf) contains approximately 220 calories, 10g of fat, 30g of carbohydrates, and 3g of protein. It is naturally free of artificial preservatives, making it a wholesome choice for a snack. However, due to the sugar content, it should be enjoyed in moderation. It is not gluten-free unless modified, and it contains nuts, so please consider allergens when serving others.
Conclusion
This recipe is worth trying because it combines simplicity with incredible flavor, proving that you don’t need complicated techniques to make something special. I encourage you to customize it with your favorite add-ins or dietary swaps. I love this recipe because it brings me back to that rainy afternoon with Mrs. Gable, reminding me that cooking is about connection and comfort. Please share your results in the comments below, and let me know what variations you tried. Happy baking!
FAQs
Can I use frozen bananas for this recipe?
Yes, frozen bananas work well. Thaw them completely and drain any excess liquid before measuring. They are often very ripe, which is perfect for baking.
Why is my banana bread dense?
This usually happens if you overmix the batter after adding the flour, or if you pack the flour too tightly into the measuring cup. Spoon and level your flour, and mix gently.
How do I know when the bread is done?
Insert a toothpick into the center. If it comes out clean or with a few moist crumbs, it’s done. If wet batter clings to it, bake for 5 more minutes.
Can I substitute oil with butter?
You can use all butter instead of the oil, but the bread may be slightly denser. The oil helps keep it moist for several days.
How long does the bread last?
Stored at room temperature, it lasts 3 days. In the fridge, up to a week. In the freezer, up to 3 months.
Pin This Recipe!
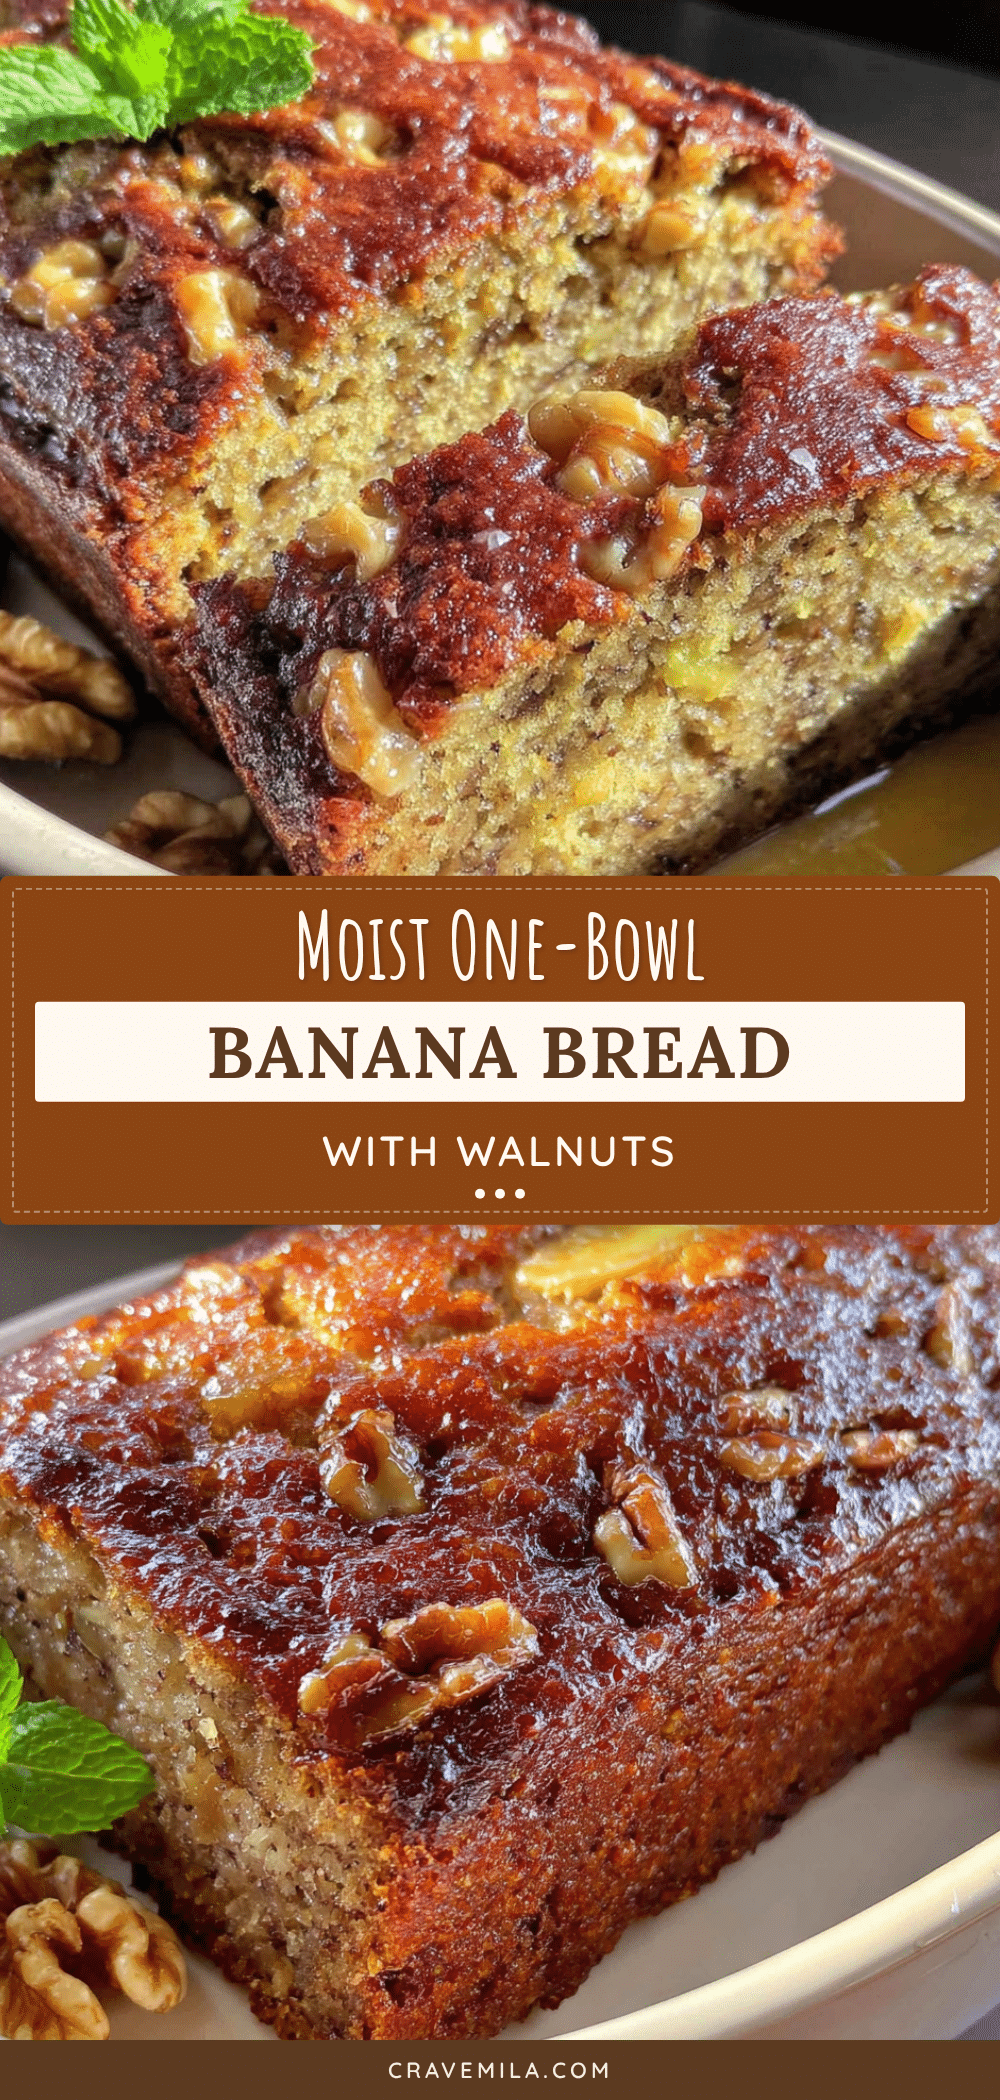
Moist One-Bowl Banana Bread with Walnuts
A simple, moist banana bread made in a single bowl with walnuts, perfect for using up ripe bananas and requiring minimal effort for maximum comfort.
- Prep Time: 15 minutes
- Cook Time: 55-65 minutes
- Total Time: 1 hour 15 minutes
- Yield: 8 servings 1x
- Category: Dessert
- Cuisine: American
Ingredients
- 3 large ripe bananas (about 1 ½ cups mashed)
- ½ cup (1 stick) unsalted butter, melted
- ¼ cup vegetable oil
- ¾ cup granulated sugar
- ½ cup packed brown sugar
- 2 large eggs, room temperature
- 1 teaspoon vanilla extract
- 1 ½ cups all-purpose flour
- 1 teaspoon baking soda
- ½ teaspoon salt
- 1 cup chopped walnuts
- Optional: Pinch of cinnamon or nutmeg
Instructions
- Preheat oven to 350°F (175°C). Grease a 9×5 inch loaf pan and line the bottom with parchment paper.
- In a large mixing bowl, mash the ripe bananas with a fork or potato masher until you have about 1 ½ cups. Small lumps are okay.
- Add the melted butter, vegetable oil, granulated sugar, and brown sugar to the bananas. Whisk vigorously for about 1 minute until smooth and combined.
- Crack the eggs into the bowl and add the vanilla extract. Whisk until fully incorporated and the mixture looks glossy.
- Sprinkle the flour, baking soda, and salt over the wet mixture. Gently combine with a whisk until just combined; do not overmix. Stop as soon as no dry flour is visible.
- Gently fold in the chopped walnuts using a silicone spatula, scraping the bottom and sides to ensure even distribution.
- Pour the batter into the prepared loaf pan and smooth the top. Bake for 55 to 65 minutes, or until a toothpick inserted into the center comes out clean or with a few moist crumbs.
- Let the bread cool in the pan for 10 minutes, then transfer to a wire rack to cool completely before slicing.
Notes
Use the ripest bananas possible for maximum sweetness. Do not overmix the batter once flour is added to avoid a dense texture. Toasting walnuts beforehand enhances flavor. If using a glass pan, lower oven temperature by 25°F. For gluten-free, use a 1:1 GF flour blend. For dairy-free, substitute butter with coconut oil or vegan butter.
Nutrition
- Serving Size: 1 slice
- Calories: 220
- Sugar: 20
- Sodium: 150
- Fat: 10
- Saturated Fat: 3
- Carbohydrates: 30
- Fiber: 2
- Protein: 3
Keywords: banana bread, walnut bread, one-bowl recipe, moist banana bread, easy baking, comfort food, gluten-free option, dairy-free option