I had a strict rule about candy corn. I refused to eat it. For years, I maintained this position with the kind of stubborn pride that only a self-respecting baker can muster. I thought it was too waxy, too sweet, and honestly, it felt like cheating at Halloween. Then last October, my friend Jen showed up at my door holding a pan of these layered bars. She said they were “just fudge,” but I saw the orange and yellow stripes. I took a tiny, skeptical square just to be polite. I ate three more before she even sat down. That was the moment I learned that candy corn has a higher calling, and it is living inside a no-bake fudge bar.
I still remember standing in my kitchen that night, staring at the empty pan, trying to figure out how three simple ingredients could create something that good. The texture was completely different from what I expected—creamy, dense, and almost truffle-like, with none of that waxy mouthfeel I hated. The candy corn had melted into something magical, blending with the chocolate to create a layered dessert that looked like it took hours. It took maybe ten minutes of hands-on work. Maybe you have been there, where a recipe completely rewrites your opinion on an ingredient you swore you would never touch. That is exactly what happened here.
Now I make these bars every fall, and they have become my secret weapon for last-minute gatherings. They look impressive on a plate, they satisfy every sweet tooth in the room, and they require zero oven time. I keep telling myself I will try other versions, but honestly, the original three-ingredient method is so perfect that I have never bothered. These bars changed my mind about candy corn, and I suspect they will do the same for you.
Why You Will Love This Recipe
Let me tell you why these fudge bars have earned a permanent spot in my dessert rotation. I have tested this recipe more times than I care to admit, and every single batch has disappeared within hours.
- Three Ingredients Only: Candy corn, white chocolate chips, and semi-sweet chocolate chips. Thats it. No heavy cream, no condensed milk, no complicated steps.
- No Oven Required: This is a true no-bake recipe. Perfect for hot days when you want dessert without heating up the kitchen, or for those times when your oven is already full of other things.
- Ready in Under 30 Minutes: The active prep time is about 10 minutes. The hardest part is waiting for the layers to set in the fridge.
- Perfect for Fall Gatherings: These bars look like they came from a fancy bakery, but they are so simple anyone can make them. Great for Halloween parties, Thanksgiving dessert tables, or just a cozy night in.
- Kid-Friendly to Make: No sharp knives, no hot ovens, no complicated techniques. My niece made these by herself when she was eight, and she was so proud she texted everyone in the family a photo.
What makes this recipe different from other candy corn desserts is the texture. The white chocolate layer stays soft and almost fudge-like, while the semi-sweet chocolate layer firms up with a slight snap. Together, they create a contrast that keeps you coming back for one more bite. I have tried other versions that use cream cheese or butter, but they always end up too soft or too greasy. This method is cleaner, simpler, and honestly, it tastes better. When you bite into one of these bars, you get that first hit of rich dark chocolate, followed by the sweet, creamy vanilla layer. It is comfort food at its most straightforward.
What Ingredients You Will Need
This recipe uses just three ingredients, but each one plays a specific role in creating the perfect texture and flavor. Here is what you need and why it matters.
- Candy Corn (about 3 cups): This is the star of the show. You want fresh, soft candy corn for the best results. Stale candy corn will be hard and wont melt as smoothly. I recommend buying a fresh bag from a brand like Brachs or a seasonal store brand. The orange and yellow pieces create the signature look, but honestly, the flavor is what matters. Candy corn is basically vanilla-flavored sugar with a hint of honey and marshmallow, and when melted, it transforms into something surprisingly sophisticated.
- White Chocolate Chips (2 cups): Use good-quality white chocolate chips, not white melting wafers or candy coating. I prefer Ghirardelli or Guittard for the smoothest melt. The white chocolate blends with the melted candy corn to create the creamy middle layer. If you use white melting wafers, the texture will be different—firmer and less creamy. Look for chips that contain cocoa butter on the ingredient list.
- Semi-Sweet Chocolate Chips (1 ½ cups): This creates the bottom layer and the top drizzle. I use semi-sweet rather than dark or milk chocolate. Semi-sweet balances the intense sweetness of the candy corn and white chocolate layers. If you use milk chocolate, the bars will be overwhelmingly sweet. If you use dark chocolate, the contrast might be too sharp. Semi-sweet hits that perfect middle ground. Nestle Toll House works great, but any brand you trust will do.
Optional Additions: You can add a pinch of flaky sea salt on top before the chocolate sets. It sounds strange, but the salt cuts through the sweetness and makes the flavors pop. I also sometimes add a teaspoon of vanilla extract to the white chocolate layer for extra depth, though it is not necessary.
Substitution Notes: If you need a dairy-free version, look for dairy-free white chocolate and semi-sweet chocolate chips. Enjoy Life makes good options. The texture will be slightly different, but the bars will still work. For a nut-free version, this recipe is naturally nut-free as long as you check your chocolate chip labels for cross-contamination warnings.
Sourcing Tips: Candy corn is most available in the fall, but you can often find it online year-round. If you cannot find candy corn, you can substitute candy corn pumpkins (the texture is the same) or even autumn mix harvest blend. Just pick out the orange and yellow pieces for the most authentic look.
Equipment Needed
You do not need any fancy equipment for this recipe, which is one of the reasons I love it so much. Here is what you will need:
- 8×8-inch Baking Pan: This is the perfect size for these bars. A 9×9 pan will work, but your layers will be thinner. Line it with parchment paper, leaving some overhang on two sides so you can lift the bars out easily.
- Parchment Paper: Do not skip this. The fudge is sticky, and without parchment, you will be scraping bars out of the pan. I learned this the hard way on my first attempt.
- Microwave-Safe Bowls: You will need two separate bowls for melting the chocolate layers. Glass or ceramic works best. Avoid plastic bowls, as they can retain heat unevenly.
- Spatula: A silicone spatula is ideal for spreading the layers evenly. Metal spatulas can scratch your pan if you are not careful.
- Measuring Cups: You will need dry measuring cups for the candy corn and liquid measuring cups if you use optional vanilla extract.
- Refrigerator Space: This is the most important piece of equipment. You need a flat spot in your fridge where the pan can sit undisturbed for at least an hour.
Budget-Friendly Alternatives: If you do not have an 8×8 pan, you can use a loaf pan or even a small casserole dish. Just adjust your expectations for the shape. You can also use wax paper instead of parchment in a pinch, though parchment is easier to work with. For melting, you can use a double boiler if you prefer, but the microwave method is faster and requires less cleanup.
Preparation Method
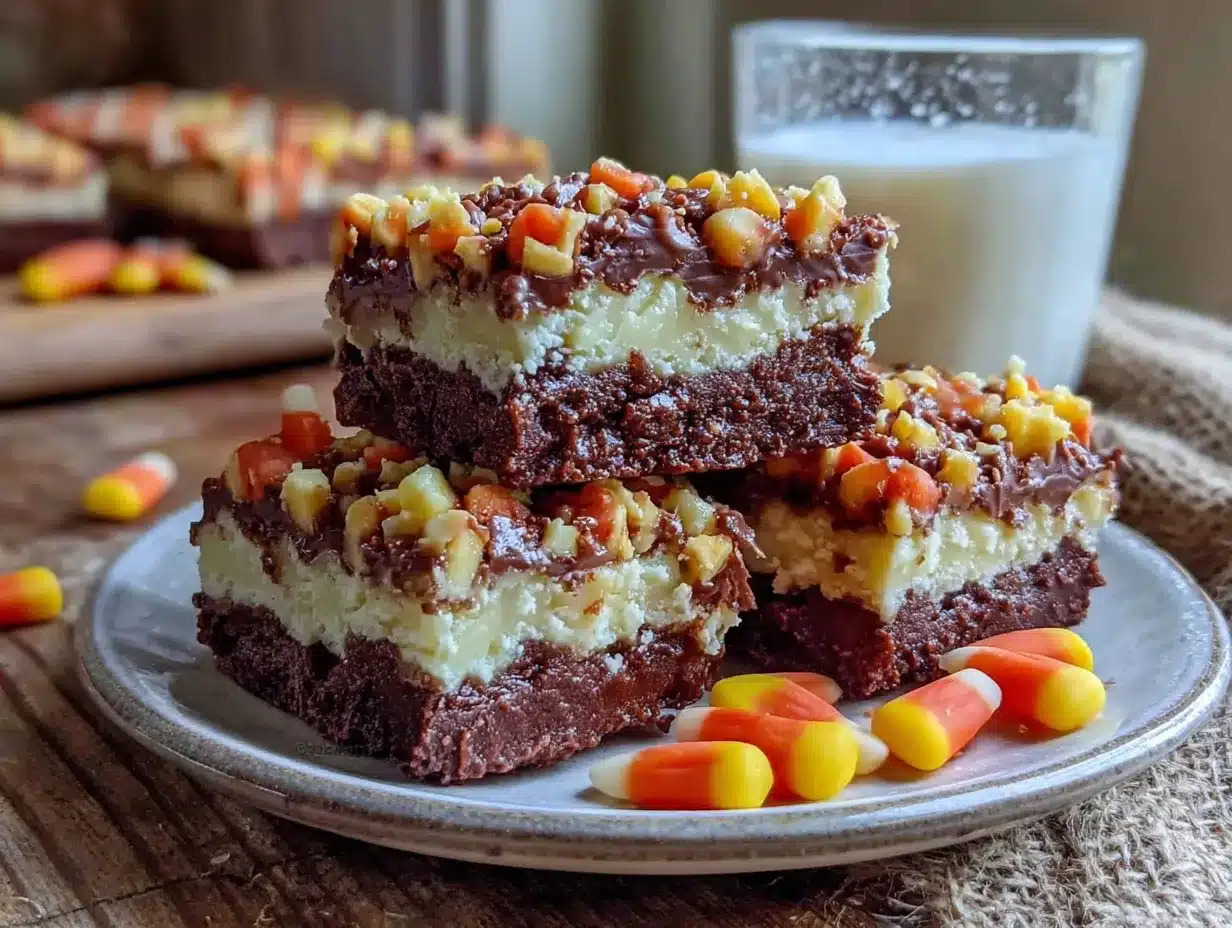
Follow these steps carefully, and you will have perfect layered fudge bars every time. I have included timing estimates and sensory cues to help you know exactly what to look for at each stage.
Step 1: Prepare Your Pan
Line your 8×8-inch baking pan with parchment paper. Leave about 2 inches of overhang on two opposite sides. This will create handles for lifting the finished bars out. Press the parchment into the corners so it lays flat against the sides. If the parchment keeps curling up, use a small piece of tape on the outside of the pan to hold it in place. Set the pan aside.
Step 2: Melt the Semi-Sweet Chocolate Layer
Place 1 ½ cups of semi-sweet chocolate chips in a microwave-safe bowl. Microwave in 30-second intervals, stirring well after each interval. The chocolate will look shiny and mostly melted after about 60 to 90 seconds total. Keep stirring even after it looks melted—the residual heat will finish the job. You want the chocolate to be smooth and pourable, not hot. If it seizes or becomes grainy, you overheated it. Start over with fresh chips and use shorter intervals. Pour the melted chocolate into your prepared pan and spread it into an even layer using your spatula. Tilt the pan gently to help it reach the corners. Place the pan in the refrigerator for 10 minutes to firm up the bottom layer.
Step 3: Make the Candy Corn White Chocolate Layer
While the bottom layer chills, combine 3 cups of candy corn and 2 cups of white chocolate chips in a separate microwave-safe bowl. This is the layer that makes the magic happen. Microwave in 30-second intervals, stirring thoroughly after each one. The first interval will make the candy corn look glossy and the chips will start to soften. After the second interval, the mixture will look messy and separated—do not panic, this is normal. Keep stirring. After the third interval, the candy corn should be mostly melted, and the mixture will start to come together into a thick, creamy paste. You may need a fourth interval depending on your microwave. The final texture should be smooth, thick, and slightly stretchy, like warm taffy. It will smell sweet and vanilla-forward. Do not overheat, or the sugar in the candy corn can seize.
Step 4: Assemble the Middle Layer
Remove the pan from the refrigerator. The semi-sweet chocolate layer should be firm but not rock hard. Spoon the candy corn mixture over the chocolate layer. It will be thick, so use your spatula to spread it gently and evenly. Work from the center outward to avoid disturbing the bottom layer. This takes a little patience, but it will smooth out. If the mixture is too stiff to spread, microwave it for another 10 seconds. Once the layer is even, return the pan to the refrigerator for 20 minutes.
Step 5: Add the Top Drizzle
After 20 minutes, the middle layer should be set but still slightly soft. Melt another ½ cup of semi-sweet chocolate chips in a small microwave-safe bowl. Use the same 30-second interval method. Once smooth, drizzle the melted chocolate over the top of the candy corn layer. You can spread it into a thin even layer if you prefer, or leave it as a decorative drizzle. I like to spread it thin so every bite has a little chocolate on top. Return the pan to the refrigerator for at least 1 hour, or until the top layer is firm to the touch.
Step 6: Slice and Serve
Once fully set, lift the fudge block out of the pan using the parchment overhang. Place it on a cutting board. Use a sharp knife to slice it into bars. I cut mine into 16 squares, but you can make them larger or smaller depending on your crowd. For clean cuts, wipe the knife clean between slices. The bars will be firm but creamy at room temperature. Serve immediately or store as directed below.
Cooking Tips & Techniques
I have made these bars at least a dozen times, and I have learned a few things the hard way. Here are my best tips to ensure your success.
Do Not Overheat the Chocolate
This is the most common mistake. Chocolate burns easily, and once it seizes, there is no saving it. Always use 30-second intervals and stir thoroughly between each one. The chocolate will continue to melt from residual heat even after you take it out of the microwave. If you see any signs of scorching or graininess, stop immediately and start over with fresh chips.
Use Fresh Candy Corn
Stale candy corn is hard and dry, and it will not melt smoothly. If your candy corn is more than a few months old, buy a fresh bag. You can test freshness by squeezing a piece—it should be soft and slightly pliable. Fresh candy corn melts into a smooth, creamy paste that blends perfectly with the white chocolate.
Let Each Layer Set Completely
Patience is key here. If you add the next layer before the previous one is firm, the layers will blend together, and you will lose that beautiful striped effect. The bottom layer needs at least 10 minutes in the fridge. The middle layer needs 20 minutes. The top layer needs a full hour. I set a timer for each step so I do not forget.
Use Parchment Paper Handles
I cannot stress this enough. The first time I made these, I did not use parchment, and I spent 20 minutes scraping fudge out of the pan with a butter knife. The parchment overhang makes lifting the entire block out effortless. You will thank yourself later.
Room Temperature is Your Friend
These bars are best served slightly chilled or at room temperature. Straight from the fridge, they will be very firm. Let them sit on the counter for 5 to 10 minutes before serving for the ideal fudge-like texture. They soften quickly, so do not leave them out for more than 30 minutes in a warm room.
Variations & Adaptations
This recipe is surprisingly flexible. Here are some ways to make it your own.
Chocolate Candy Corn Swap: Use chocolate candy corn instead of the classic orange and yellow variety. The flavor will be richer, and the bars will have a more uniform chocolate taste. I tried this once when I accidentally bought the wrong bag, and it turned out delicious—just less visually striking.
Add a Crunch Layer: Sprinkle crushed pretzels or graham crackers over the bottom chocolate layer before it sets. This adds a salty crunch that balances the sweetness. Start with about ½ cup of crushed pretzels and press them gently into the melted chocolate.
Peppermint Version: For the holidays, add ½ teaspoon of peppermint extract to the white chocolate layer. Crush a few candy canes and sprinkle them on top of the final chocolate drizzle. The peppermint cuts through the sweetness and makes these bars feel festive.
Nut Butter Swirl: Warm ¼ cup of peanut butter or almond butter and drizzle it over the white chocolate layer before adding the top chocolate. Use a knife to swirl it gently into the surface. The nutty flavor pairs beautifully with the sweet candy corn.
Dietary Adaptations: For a vegan version, use dairy-free white chocolate and semi-sweet chips. The candy corn itself is typically vegan, but check the label to be sure. For a lower-sugar version, use sugar-free white chocolate chips and sugar-free candy corn (available online). The texture will be slightly different, but the bars will still work.
My Favorite Variation: I love adding a teaspoon of flaky sea salt to the top chocolate drizzle. It sounds weird, but the salt brings out the vanilla notes in the candy corn and makes the whole bar taste more sophisticated. My neighbor tried this version and now requests it every year.
Serving & Storage Suggestions
These bars are incredibly versatile when it comes to serving. Here is how I handle them.
Serving Temperature: Serve these bars slightly chilled or at room temperature. Straight from the fridge, they are firm and fudge-like. At room temperature, they become softer and creamier. I prefer them after about 5 minutes on the counter—the texture is perfect, and the flavors are more pronounced.
Presentation Ideas: Arrange the bars on a platter in a single layer. For Halloween parties, I place them on a black or orange platter and sprinkle a few extra candy corn pieces around the edges. For Thanksgiving, I dust them lightly with powdered sugar and arrange them on a wooden board. They also look beautiful stacked in a small mason jar for gift-giving.
Complementary Pairings: These bars pair wonderfully with a cup of black coffee or a glass of cold milk. The bitterness of the coffee cuts through the sweetness, while the milk highlights the creamy texture. For a dessert board, serve them alongside fresh apple slices, salted nuts, and a cheese plate. The salty and tart elements balance the sweet fudge.
Storage Instructions: Store the bars in an airtight container in the refrigerator for up to 2 weeks. Place parchment paper between layers to prevent sticking. They will also keep at room temperature for up to 3 days, but they may soften too much in warm weather. I do not recommend freezing these bars, as the texture can become grainy when thawed. If you must freeze them, wrap each bar individually in plastic wrap and place them in a freezer bag. Thaw in the refrigerator overnight before serving.
Flavor Development: These bars actually taste better the next day. The flavors meld together overnight, and the texture becomes more uniform. I often make them a day ahead for parties. Just keep them refrigerated until serving.
Nutritional Information & Benefits
Let me be honest—these are a treat, not a health food. But here is what you should know.
Estimated Nutritional Values (per bar, based on 16 bars):
- Calories: 210
- Total Fat: 10g
- Saturated Fat: 6g
- Carbohydrates: 30g
- Sugar: 26g
- Protein: 2g
- Sodium: 45mg
Health Considerations: This recipe is naturally gluten-free and nut-free (check your chocolate chip labels for cross-contamination). It is not suitable for low-sugar or keto diets due to the high sugar content from the candy corn and white chocolate. If you have diabetes or are watching your sugar intake, this is probably not the recipe for you—or consider making a half batch for portion control.
Ingredient Benefits: Dark chocolate (semi-sweet) contains antioxidants called flavonoids, which can support heart health in small amounts. White chocolate has calcium from the milk solids. Candy corn is essentially sugar with no nutritional value, but it brings joy, and sometimes that counts for something. I believe in balance—enjoy these bars as an occasional treat, not an everyday snack.
My Perspective: I make these bars for celebrations and special occasions. They are not an everyday dessert, and they should not be. But for a Halloween party or a Thanksgiving dessert table, they are absolutely worth the sugar. One bar satisfies my sweet tooth completely, and I never feel the need to go back for seconds.
Conclusion
These Easy No-Bake Candy Corn Fudge Bars are the kind of recipe that surprises everyone who tries them. They look like they took hours of effort, but they come together in minutes with just three ingredients. They changed my mind about candy corn, and I have seen them change the minds of countless skeptics since then. The combination of creamy white chocolate, sweet candy corn, and rich semi-sweet chocolate creates something truly special—a dessert that is greater than the sum of its parts.
I love these bars because they remind me that sometimes the simplest recipes are the best. No complicated techniques, no fancy equipment, no stress. Just good ingredients and a little patience while they set. Whether you are making them for a Halloween party, a fall gathering, or just because you want something sweet, I promise you will be happy you did.
I would love to hear how yours turn out. Did you try any of the variations? Did you add your own twist? Leave a comment below and let me know. And if you share a photo on social media, tag me so I can see your beautiful creations. Happy cooking, and enjoy every single bite.
Frequently Asked Questions
Can I use white melting wafers instead of white chocolate chips?
You can, but the texture will be different. White melting wafers contain less cocoa butter and more oil, so the bars will be firmer and less creamy. White chocolate chips give a smoother, more fudge-like texture. If you only have melting wafers, add a tablespoon of coconut oil to help with creaminess.
How do I prevent the layers from mixing together?
Make sure each layer is fully set before adding the next one. The bottom chocolate layer needs at least 10 minutes in the fridge. The middle layer needs 20 minutes. If you rush this step, the layers will blend together, and you will lose the striped effect. Patience is your friend here.
Can I make these bars vegan or dairy-free?
Yes. Use dairy-free white chocolate chips and dairy-free semi-sweet chocolate chips. Candy corn is typically vegan, but check the label to be sure. The texture will be slightly different—dairy-free chocolate tends to be a bit softer—but the bars will still taste great.
How long do these bars last?
Store them in an airtight container in the refrigerator for up to 2 weeks. You can also keep them at room temperature for up to 3 days, but they may soften in warm weather. I do not recommend freezing them, as the texture can become grainy when thawed.
Can I use a different pan size?
An 8×8 pan is ideal for the perfect thickness. If you use a 9×9 pan, your layers will be thinner, and the bars will be more delicate. If you use a loaf pan, the layers will be thicker, and you will need to increase the setting time. Adjust your expectations accordingly.
Pin This Recipe!
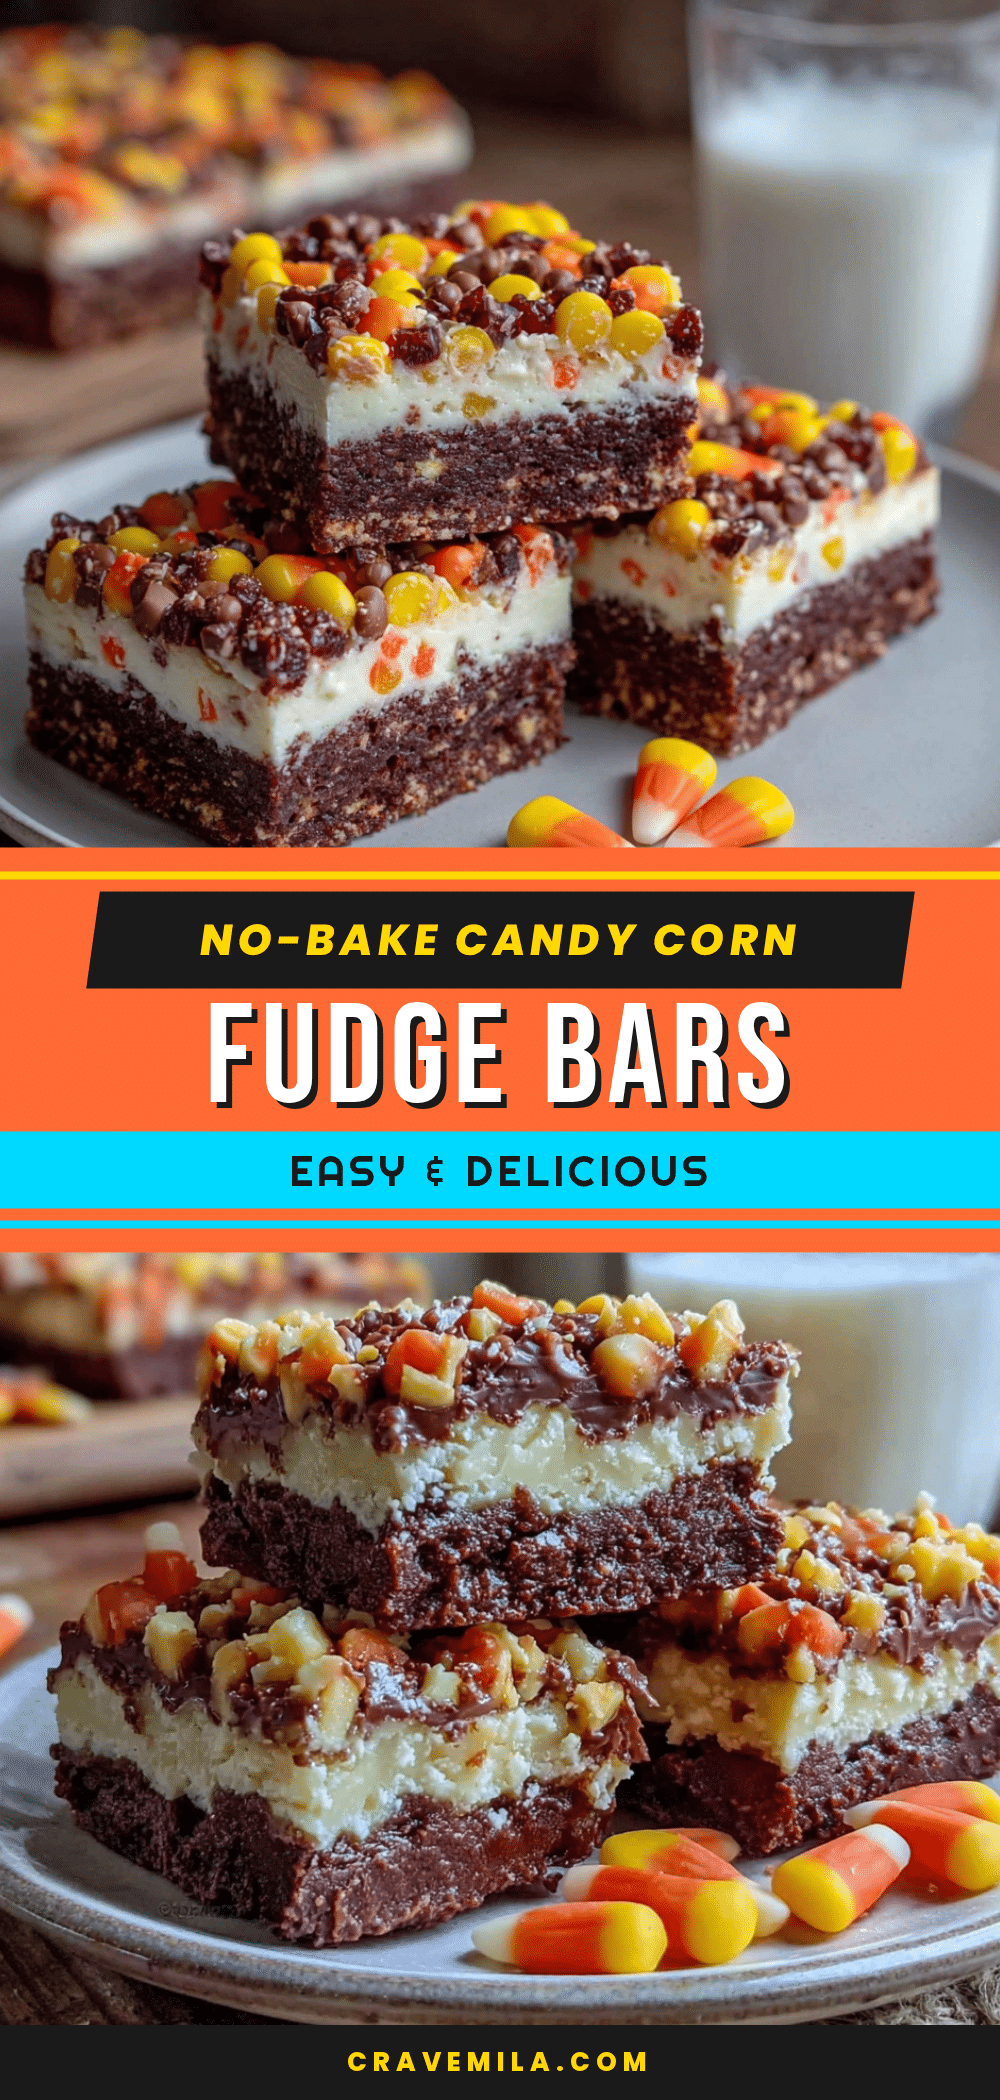
Easy No-Bake Candy Corn Fudge Bars: Best 3-Ingredient Dessert
These no-bake candy corn fudge bars are made with just three ingredients and come together in minutes. They are creamy, dense, and perfect for fall gatherings, Halloween parties, or any time you want a quick and impressive dessert.
- Prep Time: 10 minutes
- Cook Time: 0 minutes
- Total Time: 1 hour 30 minutes (includes chilling)
- Yield: 16 bars 1x
- Category: Dessert
- Cuisine: American
Ingredients
- 3 cups candy corn
- 2 cups white chocolate chips
- 1 ½ cups semi-sweet chocolate chips
- Optional: flaky sea salt for topping
- Optional: 1 teaspoon vanilla extract
Instructions
- Line an 8×8-inch baking pan with parchment paper, leaving overhang on two sides.
- Melt 1 ½ cups semi-sweet chocolate chips in a microwave-safe bowl in 30-second intervals, stirring after each, until smooth. Pour into the prepared pan and spread evenly. Refrigerate for 10 minutes.
- In a separate microwave-safe bowl, combine 3 cups candy corn and 2 cups white chocolate chips. Microwave in 30-second intervals, stirring thoroughly after each, until smooth and creamy (about 3-4 intervals).
- Remove pan from fridge. Spoon the candy corn mixture over the chocolate layer and spread evenly. Refrigerate for 20 minutes.
- Melt another ½ cup semi-sweet chocolate chips in a small bowl using the same method. Drizzle or spread over the candy corn layer. Refrigerate for at least 1 hour until firm.
- Lift the fudge block out using parchment overhang. Slice into 16 bars with a sharp knife, wiping clean between cuts. Serve slightly chilled or at room temperature.
Notes
Use fresh, soft candy corn for best melting. Do not overheat chocolate; use 30-second intervals. Let each layer set fully before adding the next to maintain distinct layers. For clean cuts, wipe knife between slices. Bars taste even better the next day. Store in an airtight container in the fridge for up to 2 weeks or at room temperature for up to 3 days. Freezing is not recommended.
Nutrition
- Serving Size: 1 bar
- Calories: 210
- Sugar: 26
- Sodium: 45
- Fat: 10
- Saturated Fat: 6
- Carbohydrates: 30
- Protein: 2
Keywords: candy corn fudge, no-bake dessert, 3-ingredient dessert, Halloween dessert, fall dessert, easy fudge bars



