Last Thursday afternoon, Mrs. Jenkins from next door watched me wrestling with my cookie cutters and a sticky batch of sugar dough, and she didn’t say a word at first. Then, with a knowing smile, she pulled out a small tin from her basket filled with colorful royal icing tubes and said, “You know, these pencil-shaped cookies are just the thing for the kids going back to school.” Honestly, I was skeptical—pencils as cookies? But she shared the recipe casually, like passing a favorite book, not making a big deal. I scribbled down her notes on a crumpled napkin while my youngest tried to sneak some dough, and suddenly the kitchen felt alive with that back-to-school buzz we all know.
That afternoon turned into an impromptu cookie decorating session filled with laughter and a few icing mishaps (I won’t lie, some pencils looked more like colorful popsicles at first). This recipe stuck with me not just because it’s simple and fun, but because it’s a little tradition born out of neighborly kindness and a shared love for making school mornings sweeter. If you’ve ever found yourself scrambling for a quick, charming treat as the school bell approaches, you might just feel the same way I do about these Easy Iced Back-to-School Pencil Sugar Cookies with Royal Icing.
Why You’ll Love This Recipe
After testing this recipe multiple times (and yes, eating my fair share of “practice” pencils), I can confidently say it’s one of those gems you’ll want on repeat every school season.
- Quick & Easy: The dough comes together in under 15 minutes, and decorating these fun pencil shapes is surprisingly straightforward—even with little helpers around.
- Simple Ingredients: You probably have all the pantry staples on hand—flour, sugar, butter—nothing fancy required.
- Perfect for Back-to-School: These cookies make a delightful lunchbox surprise or a festive after-school snack that kids actually look forward to.
- Crowd-Pleaser: Whether it’s classmates, teachers, or neighbors, these cookies get plenty of smiles (and requests for more).
- Unbelievably Delicious: The buttery sugar cookie base paired with smooth royal icing creates a satisfying mix of crisp and sweet that’s hard to beat.
What makes this recipe stand out? It’s the balance—the cookie isn’t too sweet, and the royal icing dries just firm enough to hold those pencil details without cracking. Plus, the coloring and piping techniques are beginner-friendly, so no fancy decorating skills needed. Honestly, this recipe feels like a little celebration of the school year ahead, turning a simple sugar cookie into a canvas for creativity and joy.
What Ingredients You Will Need
This recipe uses simple, wholesome ingredients to deliver bold flavor and that classic sugar cookie texture, plus a smooth royal icing that hardens perfectly for decorating. You can easily find these in your pantry or local grocery store.
- For the Sugar Cookies:
- All-purpose flour, 3 cups (360g) – provides structure
- Baking powder, 1 teaspoon – adds lightness
- Salt, ½ teaspoon – enhances flavor
- Unsalted butter, 1 cup (226g), softened – for richness (I prefer Land O Lakes for consistent texture)
- Granulated sugar, 1 cup (200g) – sweetness
- Large eggs, 2, at room temperature – binds the dough
- Vanilla extract, 2 teaspoons – adds warmth and depth
- For the Royal Icing:
- Powdered sugar, 4 cups (480g), sifted – smooth finish
- Meringue powder, 3 tablespoons – helps icing dry firm
- Warm water, about 6 tablespoons – adjust for consistency
- Food coloring gels (yellow, pink, green, black) – for pencil colors
You can swap all-purpose flour for a gluten-free blend if needed, and I’ve found that using gel food colors (like AmeriColor) gives the best vibrant hues without thinning the icing. In summer months, you might want to refrigerate the dough for a bit before rolling to avoid stickiness. This recipe is forgiving—you can tweak the icing thickness by adding a little more water for flooding or less for piping details.
Equipment Needed
Here’s what you’ll want handy to make these pencil sugar cookies come to life:
- Mixing bowls – one large for dough, one medium for icing
- Electric hand mixer or stand mixer – makes creaming butter and sugar a breeze
- Rolling pin – a smooth one helps with even dough thickness (I have a wooden one I love, but silicone works too)
- Pencil-shaped cookie cutters – if you don’t have these, a rectangle cutter plus a paring knife can help shape pencils by hand
- Piping bags and small round piping tips (#1 or #2) – for detailed royal icing work
- Spatula and bench scraper – for handling dough and cleanup
- Wire rack – to cool cookies evenly
If you don’t want to invest in piping bags, disposable ones work just as well for this recipe, and you can always use a small plastic sandwich bag with a corner snipped off. For cleaning royal icing tips, a toothpick or pin is handy to keep them from clogging. Honestly, these tools aren’t complicated and can be found pretty affordably, so it’s worth having them in your baking arsenal.
Preparation Method

- Mix Dry Ingredients: In a medium bowl, whisk together 3 cups (360g) all-purpose flour, 1 teaspoon baking powder, and ½ teaspoon salt. Set aside. This keeps all the dry stuff evenly distributed.
- Cream Butter and Sugar: In a large bowl, beat 1 cup (226g) softened unsalted butter with 1 cup (200g) granulated sugar on medium speed until light and fluffy—about 3-4 minutes. This step is key for tender cookies.
- Add Eggs and Vanilla: Beat in 2 large eggs, one at a time, then stir in 2 teaspoons vanilla extract. The mixture might look a little curdled, but that’s okay.
- Combine Wet and Dry: Gradually add the flour mixture in two batches, mixing on low speed just until incorporated. Avoid overmixing here; the dough should come together and feel soft but not sticky.
- Chill the Dough: Divide dough into two discs, wrap in plastic, and chill for at least 1 hour (or overnight). This step helps prevent spreading during baking and makes rolling easier.
- Preheat Oven and Prepare Baking Sheets: Heat oven to 350°F (175°C). Line baking sheets with parchment paper or silicone mats.
- Roll and Cut: On a lightly floured surface, roll one dough disc to about ¼-inch (6mm) thickness. Use pencil-shaped cookie cutters to cut out shapes. Transfer carefully to baking sheets—leave about 1 inch (2.5 cm) between cookies.
- Bake: Bake for 8-10 minutes or until edges just start to turn golden. Don’t overbake; cookies should be pale with firm edges.
- Cool: Let cookies cool on baking sheets for 5 minutes, then transfer to wire racks to cool completely before icing.
- Prepare Royal Icing: In a medium bowl, combine 4 cups (480g) sifted powdered sugar, 3 tablespoons meringue powder, and 6 tablespoons warm water. Beat on high speed until glossy and stiff peaks form—about 5-7 minutes. Adjust water as needed for flood or piping consistency.
- Color and Decorate: Divide icing into separate bowls. Tint with gel colors: yellow for pencil bodies, pink for erasers, black for tips, green for metal ferrules. Use piping bags with small round tips for precise lines and flooding techniques. Let each layer dry 15-20 minutes before adding details to avoid colors bleeding.
- Dry and Store: Allow decorated cookies to dry at room temperature for several hours (overnight is best) before storing in airtight containers.
Pro tip: If your icing feels too stiff while piping, add water drop by drop. And if you’re new to piping, practice on parchment first to get the hang of pressure and speed. Maybe you’ll find your own creative spin on these pencils, just like I did after a few tries!
Cooking Tips & Techniques
Decorating with royal icing sounds intimidating, but it’s really about layering patience with creativity. Here are some tips I picked up after my first icing fiasco (the one where all the colors ran together):
- Consistency is Key: Flood icing should be thin enough to spread but thick enough to hold shape. Piping icing should hold a peak. Test on parchment to find your sweet spot.
- Use Gel Food Colors: They don’t thin the icing the way liquid colors do, so your details stay sharp and vibrant.
- Work in Layers: Let each color dry before adding the next. This prevents smudging and keeps edges clean.
- Keep Icing Covered: Royal icing dries fast when exposed. Cover bowls with damp cloths or plastic wrap when not in use.
- Practice Piping: Don’t rush. Hold the bag steady, and use your dominant hand for control. Remember, imperfect lines add charm!
Avoid common mistakes like overbaking cookies, which makes them dry and crumbly, or rushing the drying time, which causes smearing. I learned the hard way that letting cookies cool fully before icing is non-negotiable. Also, multitasking by preparing icing while cookies bake saves time and keeps the momentum going.
Variations & Adaptations
Feel like mixing things up? Here are a few ways to customize these pencil sugar cookies:
- Gluten-Free: Swap the all-purpose flour for a 1:1 gluten-free baking blend. I recommend Bob’s Red Mill for best results.
- Flavor Twists: Add lemon zest or almond extract to the dough for a subtle flavor boost. You might find lemon zest especially refreshing in springtime batches.
- Different Icing Styles: Instead of royal icing, try a simple glaze made from powdered sugar and milk for a softer finish that’s easier to customize with sprinkles.
- Seasonal Colors: For fall, swap yellow icing for orange and brown tones. Or for a holiday vibe, try red and green pencils with festive sprinkles.
- Vegan Option: Use a vegan butter substitute and aquafaba (chickpea water) instead of eggs and meringue powder in the icing.
I once made a batch with my niece using natural food colors from beet juice and spinach powder—it was a fun experiment, though the colors were a bit muted. Still, the kids loved the taste and hands-on fun.
Serving & Storage Suggestions
These pencil sugar cookies make such a cheerful sight on a back-to-school platter. Serve them at room temperature alongside a glass of cold milk or a warm cup of tea for an after-school pick-me-up. They pair beautifully with fresh fruit or a simple yogurt parfait for a balanced snack.
Store cookies in an airtight container at room temperature for up to 5 days. If you want to keep them longer, freeze undecorated cookies in a single layer for up to 3 months; just thaw completely before icing. Decorated cookies freeze best after the icing is fully dried—wrap them gently in parchment paper to protect the delicate designs.
When reheating, avoid microwaving decorated cookies as the icing can soften and smudge. Instead, let them come to room temperature naturally. Over time, the flavors meld nicely, making them taste even better the next day.
Nutritional Information & Benefits
Each cookie (based on a batch of 24) contains approximately 150 calories, with 7 grams of fat and 18 grams of carbohydrates. These pencil sugar cookies are a treat best enjoyed in moderation, but they do bring the benefit of homemade ingredients without preservatives.
The butter provides some vitamin A and contributes to the rich flavor, while the eggs add a touch of protein. Compared to store-bought decorated cookies, this recipe gives you control over quality and freshness, which feels better for your family’s health.
For those with dietary considerations, the recipe can be adapted to gluten-free or vegan needs, making it accessible for various lifestyles. Plus, baking together encourages mindful eating and joyful moments around the kitchen table.
Conclusion
Whether you’re a seasoned baker or a kitchen newbie, these Easy Iced Back-to-School Pencil Sugar Cookies bring a little extra joy to those busy mornings. They’re simple, fun, and carry a story worth sharing—one of neighborly kindness and the little celebrations that make school days special.
Feel free to customize the colors, flavors, and even shapes to suit your family’s style. I love how this recipe turns cookie baking into a shared experience that’s as sweet as the treats themselves.
Give this recipe a try, and please leave a comment to share your decorating triumphs, tips, or tweaks. Let’s keep this back-to-school tradition alive, one pencil cookie at a time!
Frequently Asked Questions
- Can I make these cookies ahead of time? Yes! The dough can be refrigerated for up to 3 days before baking, and decorated cookies keep well for about 5 days at room temperature.
- How do I prevent royal icing from cracking? Avoid adding too much water to your icing, and let each layer dry completely before adding the next. Working in a dry environment helps too.
- What if I don’t have pencil-shaped cookie cutters? You can use a rectangle cutter and trim one end with a knife to create a pencil shape. It doesn’t have to be perfect to look adorable!
- Can I use store-bought royal icing? Absolutely, but homemade icing tends to dry firmer and is easier to color and customize.
- How do I fix icing that is too runny? Add more powdered sugar a little at a time until you reach the desired thickness.
For those interested in other fun school-themed treats, you might enjoy my crispy garlic chicken recipe for easy weeknight dinners or the classic chocolate chip cookies that are always a hit with kids after school. Both complement the sweet pencil cookies perfectly for a full back-to-school snack spread.
Pin This Recipe!
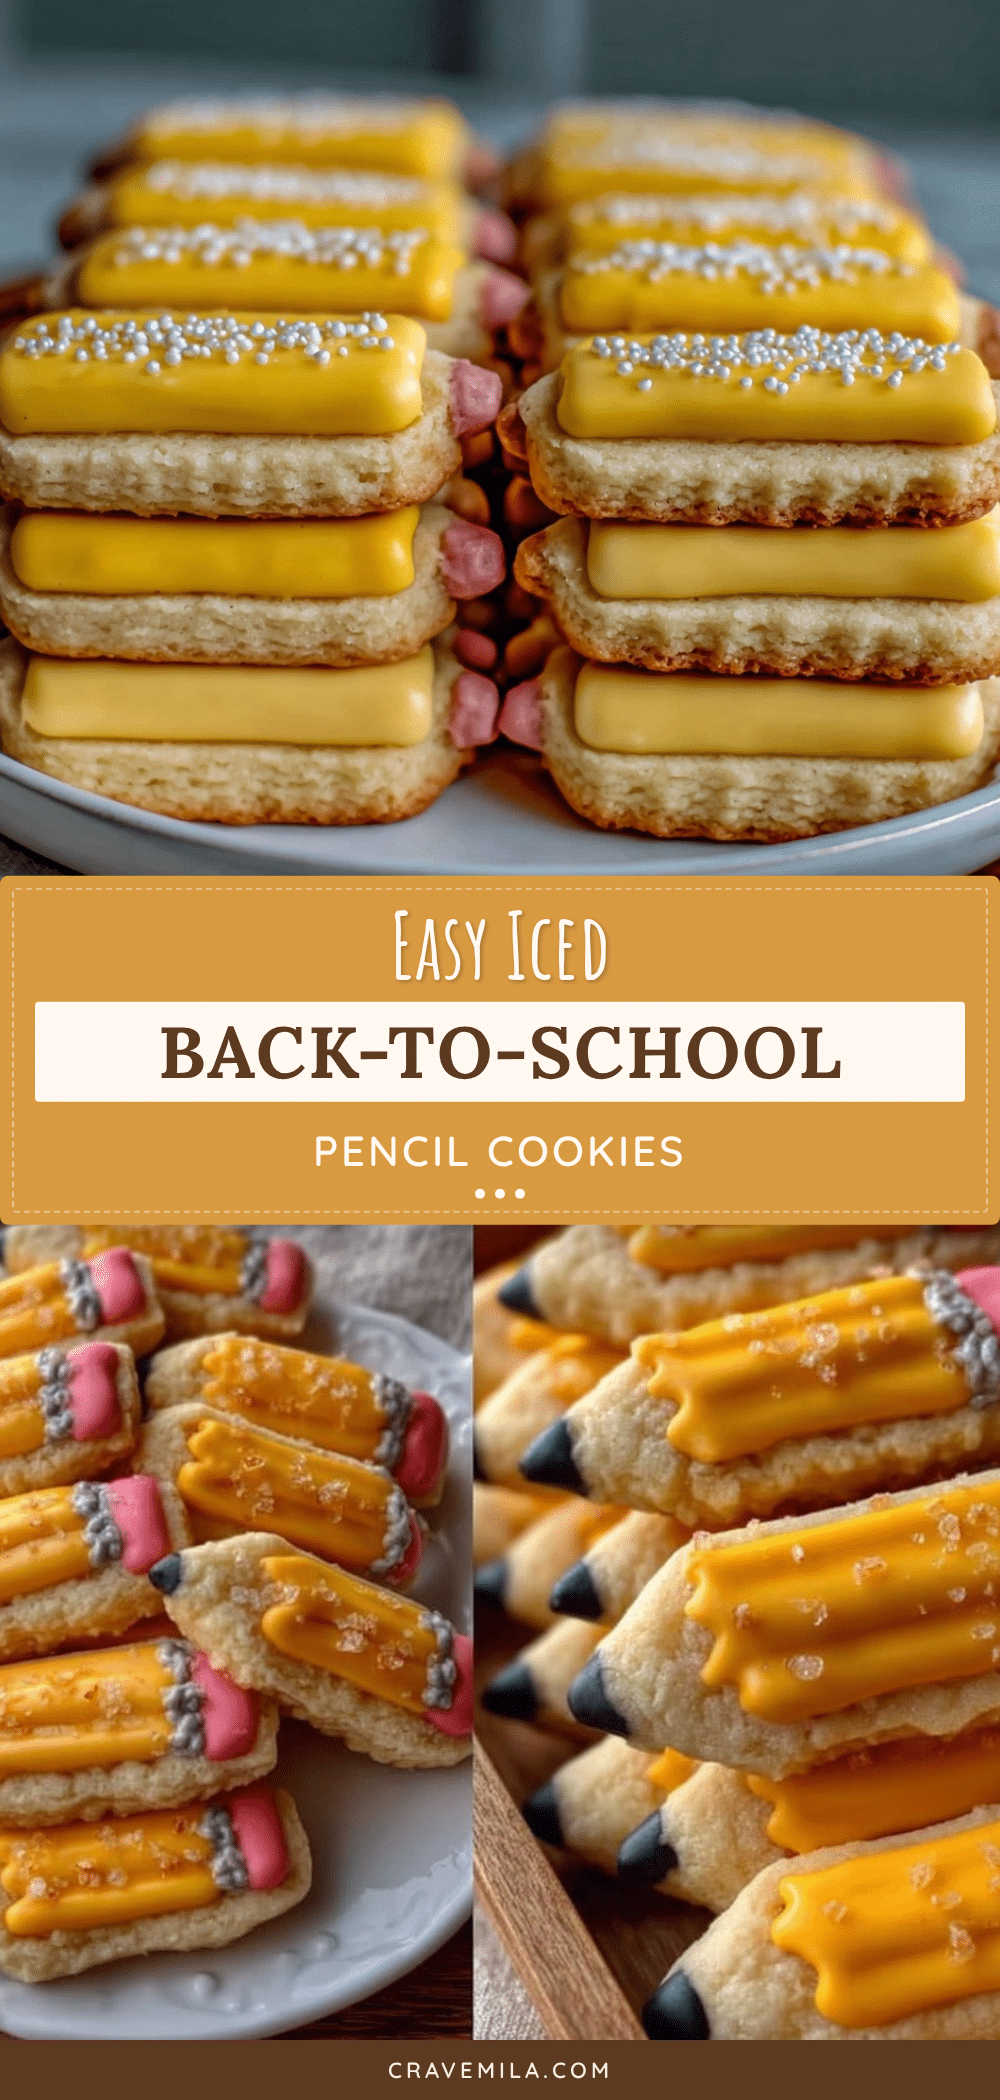
Easy Iced Back-to-School Pencil Sugar Cookies Recipe for Perfect School Treats

These pencil-shaped sugar cookies are quick and easy to make, perfect for back-to-school treats. The buttery sugar cookie base pairs beautifully with smooth royal icing for fun and festive decorating.
- Prep Time: 15 minutes
- Cook Time: 10 minutes
- Total Time: 1 hour 25 minutes
- Yield: 24 cookies 1x
- Category: Dessert
- Cuisine: American
Ingredients
- 3 cups (360g) all-purpose flour
- 1 teaspoon baking powder
- ½ teaspoon salt
- 1 cup (226g) unsalted butter, softened
- 1 cup (200g) granulated sugar
- 2 large eggs, at room temperature
- 2 teaspoons vanilla extract
- 4 cups (480g) powdered sugar, sifted
- 3 tablespoons meringue powder
- about 6 tablespoons warm water
- Food coloring gels (yellow, pink, green, black)
Instructions
- In a medium bowl, whisk together 3 cups all-purpose flour, 1 teaspoon baking powder, and ½ teaspoon salt. Set aside.
- In a large bowl, beat 1 cup softened unsalted butter with 1 cup granulated sugar on medium speed until light and fluffy, about 3-4 minutes.
- Beat in 2 large eggs, one at a time, then stir in 2 teaspoons vanilla extract.
- Gradually add the flour mixture in two batches, mixing on low speed just until incorporated. Avoid overmixing.
- Divide dough into two discs, wrap in plastic, and chill for at least 1 hour or overnight.
- Preheat oven to 350°F (175°C). Line baking sheets with parchment paper or silicone mats.
- On a lightly floured surface, roll one dough disc to about ¼-inch thickness. Use pencil-shaped cookie cutters to cut out shapes. Transfer to baking sheets, leaving about 1 inch between cookies.
- Bake for 8-10 minutes or until edges just start to turn golden. Do not overbake.
- Let cookies cool on baking sheets for 5 minutes, then transfer to wire racks to cool completely before icing.
- Prepare royal icing by combining 4 cups sifted powdered sugar, 3 tablespoons meringue powder, and 6 tablespoons warm water. Beat on high speed until glossy and stiff peaks form, about 5-7 minutes. Adjust water for desired consistency.
- Divide icing into separate bowls and tint with gel colors: yellow for pencil bodies, pink for erasers, black for tips, green for metal ferrules.
- Use piping bags with small round tips for precise lines and flooding techniques. Let each layer dry 15-20 minutes before adding details.
- Allow decorated cookies to dry at room temperature for several hours or overnight before storing in airtight containers.
Notes
Use gel food colors for vibrant hues without thinning the icing. Chill dough before rolling to avoid stickiness. Let each icing layer dry before adding the next to prevent smudging. Practice piping on parchment paper if new to decorating. Store cookies in airtight containers at room temperature for up to 5 days or freeze undecorated cookies for up to 3 months.
Nutrition
- Serving Size: 1 cookie
- Calories: 150
- Sugar: 12
- Sodium: 90
- Fat: 7
- Saturated Fat: 4
- Carbohydrates: 18
- Protein: 2
Keywords: sugar cookies, pencil cookies, back to school treats, royal icing, easy cookies, decorated cookies, kid-friendly baking



