My neighbor, Dave, wasn’t trying to impress anyone. I had stopped by to borrow a ladder on a random Tuesday in October, and the smell hit me before I even got through the screen door. Something warm, buttery, and distinctly savory was drifting out of his kitchen. I found him at the counter with a package of hot dogs, a block of cheddar, and a can of crescent rolls. He was wrapping strips of dough around the hot dogs like he was making little presents, and he had this goofy grin on his face. He said his kids had begged for “mummy dogs” for their Halloween party, and he was just trying to get it done before the school bus arrived.
I’ll be honest, I stood there watching him for a solid five minutes. He wasn’t following some fancy food blog. He was just making it up as he went along, using whatever cheese he had left in the fridge. The whole thing felt so wonderfully low-stakes. He didn’t even measure anything. He just tore off strips of dough, wrapped them around the hot dogs, and poked little mustard eyes on top. It was the most casual, unpretentious cooking I had seen in a long time. Maybe you’ve been there, standing in someone else’s kitchen, watching them do something simple that suddenly looks genius.
That’s how this recipe for Easy Halloween Mummy Hot Dogs with Cheese became a staple in my house. It wasn’t a big production. It was just a dad making a snack for his kids on a Tuesday. But the way those little mummies came out of the oven—golden, crispy, with the cheese bubbling out of the cracks—I knew I had to recreate it. Now, every October, I make these for every party, every movie night, and honestly, sometimes just for a fun dinner. It’s the kind of recipe that proves you don’t need to be a professional chef to make something memorable.
Why You’ll Love This Recipe
Let’s face it, Halloween can be stressful. Between the costumes, the decorations, and the candy, the last thing you want to do is spend hours in the kitchen. That’s where these Easy Halloween Mummy Hot Dogs with Cheese come in. They are the ultimate shortcut to a festive snack that looks impressive but takes almost no effort. I’ve tested this recipe more times than I can count, tweaking the bake time and the cheese placement to get it just right. Trust me, this is the version you want.
- Quick & Easy: From fridge to table in just 15 minutes. Perfect for last-minute Halloween parties or a quick after-school snack that feels special.
- Simple Ingredients: You only need four things—hot dogs, cheese, crescent roll dough, and mustard. No trips to a specialty store required.
- Perfect for Halloween: These little mummies are the star of any spooky spread. Kids and adults alike go crazy for them.
- Crowd-Pleaser: I have never, ever had leftovers. They disappear faster than the candy bowl.
- Unbelievably Delicious: The combination of salty hot dog, melty cheese, and flaky, buttery dough is pure comfort food magic.
What makes this recipe different from all the others? It’s the cheese. Most recipes just wrap the hot dog in dough, but I cut a slit down the center and stuff it with a strip of cheddar. When it bakes, the cheese oozes out like a little mummy secret. It adds a creamy, savory element that takes these from “cute snack” to “can’t-stop-eating-them” delicious. This isn’t just another Halloween recipe—it’s your new go-to.
What Ingredients You Will Need
This recipe uses incredibly simple, everyday ingredients to create something that feels special. The magic is all in the assembly and the cheese. Here is everything you need to gather.
- Hot Dogs: 8 standard-sized hot dogs. I prefer beef hot dogs for richer flavor, but any brand works. You can also use turkey or chicken hot dogs for a lighter option.
- Cheddar Cheese: 4 ounces, cut into 8 thin strips about 3 inches long. Use a block of sharp cheddar and cut it yourself. Pre-shredded cheese won’t melt as smoothly inside the hot dog. I recommend Tillamook or Cabot for the best melt.
- Refrigerated Crescent Roll Dough: 1 can (8 ounces). This is your mummy wrapping. Pillsbury is the classic choice and works perfectly. Look for the sheet-style crescent dough if you want to cut your own strips, but the perforated triangles work just fine.
- Yellow Mustard: For the mummy eyes. A squeeze bottle makes it easy to dot two small eyes on each mummy.
- Optional Garnishes: A sprinkle of everything bagel seasoning or flaky sea salt on the dough before baking adds a nice crunch.
For the best results, make sure your hot dogs are at room temperature before you start. Cold hot dogs straight from the fridge can make the dough cook unevenly. If you are using a different type of cheese, like mozzarella or pepper jack, just know that the melt consistency will be slightly different. Mozzarella will be stretchier, while pepper jack will add a little heat. I’ve tried both, and cheddar is still my favorite for that classic, sharp flavor.
Equipment Needed
You don’t need any fancy gadgets for this recipe. I made these in my tiny apartment kitchen with the most basic tools, and they came out perfect.
- Baking Sheet: A standard half-sheet pan (13×18 inches) works best. Line it with parchment paper for easy cleanup.
- Parchment Paper: Non-negotiable. It prevents the cheese from sticking to the pan and makes cleanup a breeze.
- Sharp Knife: A paring knife is perfect for cutting the slit in the hot dogs.
- Cutting Board: For prepping your hot dogs and cheese.
- Small Bowl: For holding your cheese strips as you work.
- Pastry Brush (optional): If you want to brush the dough with an egg wash or melted butter for extra golden color. I skip this step most of the time because the dough browns nicely on its own.
If you don’t have a baking sheet, you can use a cast iron skillet or even an oven-safe cooling rack set on top of a pan. Just watch the cooking time closely, as metal surfaces can heat differently. I’ve also made these in an air fryer (see the variations section), which is a game-changer for speed.
Preparation Method
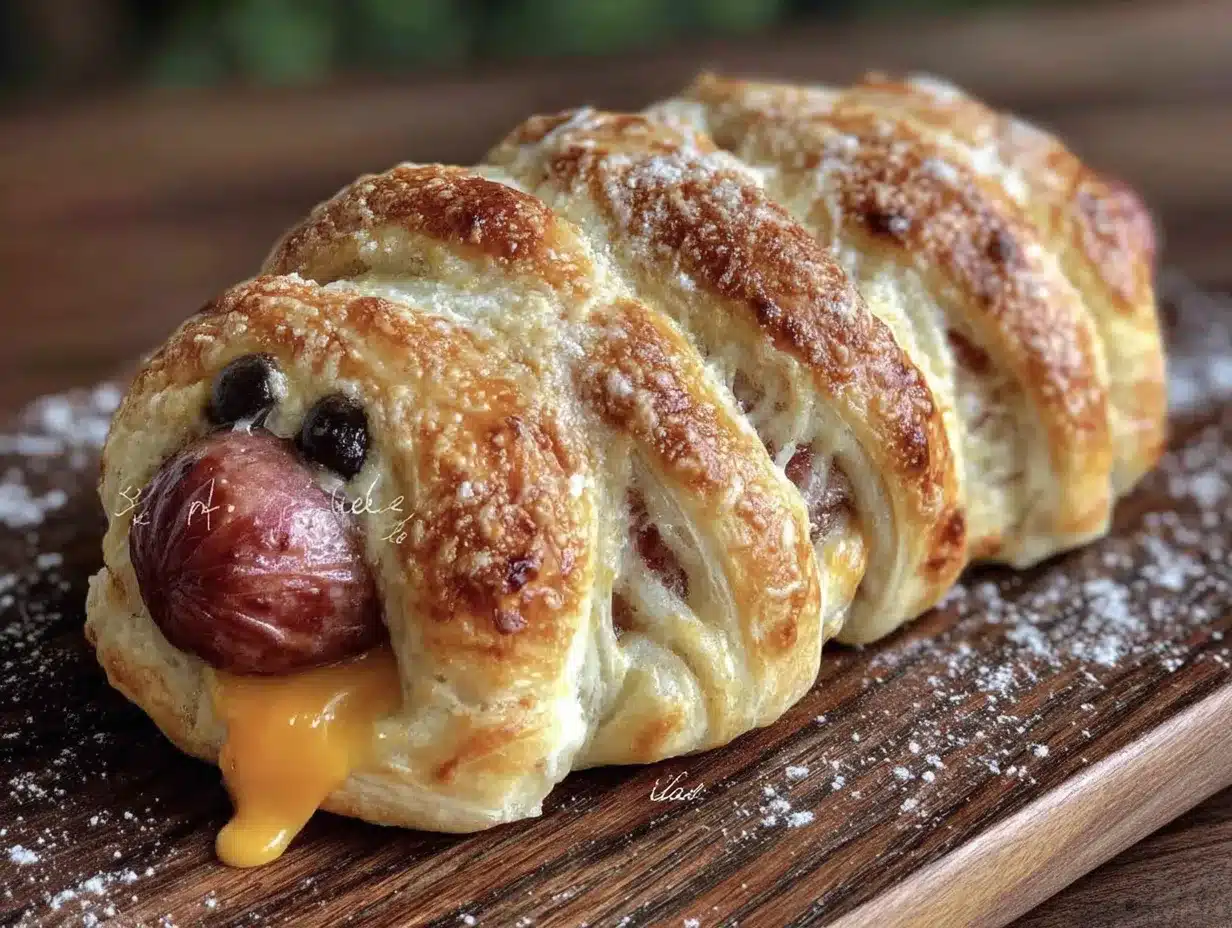
This is where the fun begins. The whole process takes less than 15 minutes, and it’s so simple that kids can help with almost every step. Just follow these instructions, and you’ll have a tray of adorable, delicious mummy hot dogs in no time.
- Preheat your oven to 375°F (190°C). Line a baking sheet with parchment paper. This is a crucial step—don’t skip the parchment paper, or the melted cheese will glue your mummies to the pan.
- Prepare the hot dogs. Take each hot dog and use a sharp knife to cut a slit lengthwise down the center. Be careful not to cut all the way through—you want to create a pocket, not split the hot dog in half. I usually cut about 80% of the way through. This pocket is where the magic happens.
- Stuff with cheese. Take a strip of cheddar cheese and press it firmly into the slit you just made. Let a little bit of the cheese peek out the top—this will create that beautiful, oozy mummy effect when it bakes. Repeat for all 8 hot dogs.
- Prepare the dough. Open the can of crescent rolls. If you are using the perforated triangle sheets, carefully separate them along the perforations. You should have 8 triangles. Now, take each triangle and cut it lengthwise into 3 long, thin strips. You will have 24 strips total. They don’t have to be perfectly even—slightly uneven strips give the mummies a more rustic, wrapped look.
- Wrap the mummies. Take one stuffed hot dog and start wrapping a dough strip at one end. Overlap the strip slightly as you go, leaving a small gap at the top for the eyes. You want the wrapping to look a little messy, like a mummy that has been unraveling for centuries. Don’t wrap too tightly, or the dough will tear as it expands. Use about 2-3 strips per hot dog, depending on how much dough you like.
- Place on baking sheet. Arrange the wrapped mummies on the prepared baking sheet, leaving about 1 inch of space between each one. They will puff up a little, but they don’t spread much.
- Bake. Pop the tray into the preheated oven and bake for 10-12 minutes. You are looking for the dough to be golden brown and puffed, and the cheese should be visibly melted and bubbling out of the hot dog. Every oven is different, so start checking at the 10-minute mark.
- Add the eyes. Remove the tray from the oven and let the mummies cool on the pan for 2-3 minutes. This is important—if you add the mustard eyes immediately, the heat will make the mustard runny and messy. Once they are cool enough to handle, use a squeeze bottle of yellow mustard to dot two small eyes on the exposed hot dog at the top of each mummy.
- Serve immediately. These are best eaten warm, right when the cheese is still gooey and the dough is crispy. Arrange them on a platter and watch them disappear.
One thing I learned the hard way—don’t overbake these. The first time I made them, I left them in for 14 minutes because I wanted the dough extra crispy. The cheese dried out and the hot dogs split. Ten to twelve minutes is the sweet spot. The dough will be golden and flaky, the cheese will be molten, and the hot dog will be perfectly juicy.
Cooking Tips & Techniques
Over the years, I have made these mummy hot dogs more times than I can count. I’ve had my share of failures—soggy dough, dried-out cheese, and mummies that looked more like sad slugs than spooky snacks. But with each batch, I learned something new. Here are the tips that made all the difference.
- Don’t overwork the dough. Crescent roll dough is delicate. When you are cutting it into strips, use a sharp, clean knife and cut with a gentle sawing motion. If you press down too hard, you will squish the dough together, and it won’t puff up properly in the oven.
- Leave room for the eyes. When you are wrapping the dough around the hot dog, stop about half an inch from the top. You need a clean surface of hot dog to stick the mustard eyes onto. If you wrap too high, the eyes will slide off the dough.
- Use a squeeze bottle for the mustard. I tried using a toothpick to dot the eyes once. It was a disaster. A squeeze bottle gives you perfect control and makes two tiny, round dots in seconds. You can find squeeze bottles at any grocery store near the condiments.
- Let them rest before serving. I know it’s tempting to eat them right out of the oven, but the cheese inside is molten lava hot. Let them rest on the pan for at least 2-3 minutes. This also helps the dough set, so it doesn’t fall apart when you pick it up.
- Toast the hot dogs first (optional). For extra flavor, you can pan-sear the hot dogs in a skillet for 2 minutes before stuffing them with cheese. This adds a nice char and deepens the savory taste. I do this when I’m feeling fancy, but it’s totally optional.
I once forgot to cut the slit deep enough, and the cheese just sat on top of the hot dog instead of going inside. It was a sad, cheesy mess. Now, I always double-check my slit depth. It should be deep enough to hold the cheese strip securely without it falling out during wrapping.
Variations & Adaptations
One of the best things about this recipe is how easy it is to adapt. You can change the flavors, the fillings, and even the cooking method to suit your mood or dietary needs. Here are some of my favorite variations.
- Spicy Mummy Dogs: Swap the cheddar for pepper jack cheese and add a thin slice of jalapeño inside the slit. For the eyes, use sriracha or hot sauce instead of mustard. These have a nice kick that adults love.
- Air Fryer Method: Preheat your air fryer to 350°F (175°C). Place the wrapped mummies in the basket in a single layer (you may need to work in batches). Cook for 6-8 minutes, flipping halfway through, until the dough is golden and the cheese is bubbly. The air fryer makes the dough extra crispy, and it’s even faster than the oven.
- Gluten-Free Option: Use gluten-free hot dogs and a gluten-free crescent roll dough. I’ve used the brand “My Bread” for the dough, and it works surprisingly well. Just be aware that gluten-free dough can be more fragile, so handle it gently.
- Veggie Mummy Dogs: Swap the hot dogs for vegetarian or vegan sausages. Use a dairy-free cheddar-style shred for the cheese. I like the brand “Daiya” for a melty, stretchy texture. This version is perfect for plant-based eaters at your Halloween party.
- Breakfast Mummy Dogs: Use breakfast sausages instead of hot dogs, and stuff them with a thin slice of American cheese. Wrap in the crescent dough and bake as directed. Serve with a side of maple syrup for dipping. It’s a fun, spooky breakfast treat.
I tried the air fryer version last Halloween, and honestly, I don’t think I will ever go back to the oven. The dough gets so crispy and flaky in just 8 minutes. It’s perfect for when you need a quick batch for a hungry crowd.
Serving & Storage Suggestions
These mummy hot dogs are best served warm, right out of the oven. The cheese is at its gooiest, and the dough is at its crispiest. But they are still delicious at room temperature, which makes them perfect for parties.
For serving, arrange the mummies on a large platter. You can add some “spooky” dipping sauces on the side. Ketchup works great for “blood,” and ranch dressing looks like “mummy slime.” I also like to serve them with a bowl of honey mustard or barbecue sauce. The sweet and savory combo is fantastic.
If you have leftovers (which almost never happens in my house), store them in an airtight container in the refrigerator for up to 3 days. The dough will soften as it sits, but the flavor is still great. To reheat, pop them in the air fryer at 300°F (150°C) for 3-4 minutes. This will bring back some of the crispiness. You can also reheat them in the oven at 350°F (175°C) for 5 minutes. Avoid the microwave—it makes the dough soggy and the hot dogs rubbery.
I don’t recommend freezing these mummy dogs. The dough gets weird when it thaws, and the cheese can become grainy. If you want to prep ahead, you can assemble the mummies up to the baking step, cover them with plastic wrap, and refrigerate for up to 4 hours. Then just bake them when you are ready. This is a lifesaver for Halloween parties.
Nutritional Information & Benefits
While these mummy hot dogs are definitely a treat, they aren’t as bad for you as you might think. Here is a rough estimate of the nutritional breakdown for one mummy dog (based on standard ingredients).
| Nutrient | Amount per Serving |
|---|---|
| Calories | 220 |
| Total Fat | 14g |
| Saturated Fat | 6g |
| Cholesterol | 35mg |
| Sodium | 680mg |
| Total Carbohydrates | 16g |
| Protein | 9g |
The hot dogs provide a decent amount of protein, which helps keep you full. The cheese adds calcium and a little extra protein. If you are watching your sodium intake, you can use low-sodium hot dogs and reduced-fat cheese. I’ve also used turkey hot dogs to cut the fat content in half, and they still taste amazing.
This recipe is not gluten-free or dairy-free in its standard form, but as I mentioned in the variations section, you can easily adapt it. It is a nut-free recipe, which makes it safe for school parties and events where allergies are a concern. I always bring these to our neighborhood Halloween block party, and they are always a hit with both kids and adults.
Conclusion
These Easy Halloween Mummy Hot Dogs with Cheese are more than just a snack—they are a little moment of joy. They remind me of that Tuesday afternoon in Dave’s kitchen, where something simple turned into something special. The best recipes don’t need complicated techniques or exotic ingredients. They just need a little creativity and a willingness to have fun.
I hope you make these for your next Halloween gathering, or even just for a random weeknight dinner when you need a smile. Customize them with your favorite cheese, add some spice, or let the kids help with the wrapping. That’s the beauty of this recipe—it’s forgiving, it’s fast, and it’s absolutely delicious.
If you try this recipe, I would love to hear about it. Leave a comment below and tell me how your mummies turned out. Did you add any fun variations? Did the kids help? Share your photos and tag me on social media—I always love seeing your creations. Now go on, get wrapping, and have a spooktacular Halloween!
Frequently Asked Questions
Can I use puff pastry instead of crescent roll dough?
Yes, you can! Puff pastry will give you a flakier, more buttery texture. Just thaw the pastry sheet, cut it into thin strips, and wrap it the same way. The baking time may be slightly longer—about 12-14 minutes at 375°F (190°C).
How do I keep the dough from unraveling during baking?
Make sure you overlap the dough strips slightly as you wrap. The dough will stick to itself as it bakes, creating a secure seal. If a strip is loose, you can press the end gently against the dough underneath. Also, placing the mummies seam-side down on the baking sheet helps hold everything together.
Can I make these in advance for a party?
Absolutely. You can assemble the mummies up to 4 hours ahead of time and keep them covered in the refrigerator. When you are ready to serve, just bake them as directed. You can also bake them fully, let them cool, and reheat them in the air fryer for 3-4 minutes.
What other types of cheese work well?
Sharp cheddar is my go-to, but you can use mozzarella for a stretchy, stringy cheese pull. Pepper jack adds heat, and Gouda gives a smoky flavor. Avoid using soft cheeses like brie or goat cheese, as they can become too runny and leak out of the hot dog.
My mustard eyes always look messy. Any tips?
Use a squeeze bottle with a fine tip for the most control. If you don’t have one, you can dip a toothpick into the mustard and dot it onto the hot dog. Let the mummies cool for at least 2-3 minutes before adding the eyes, or the heat will cause the mustard to spread and lose its shape.
Pin This Recipe!
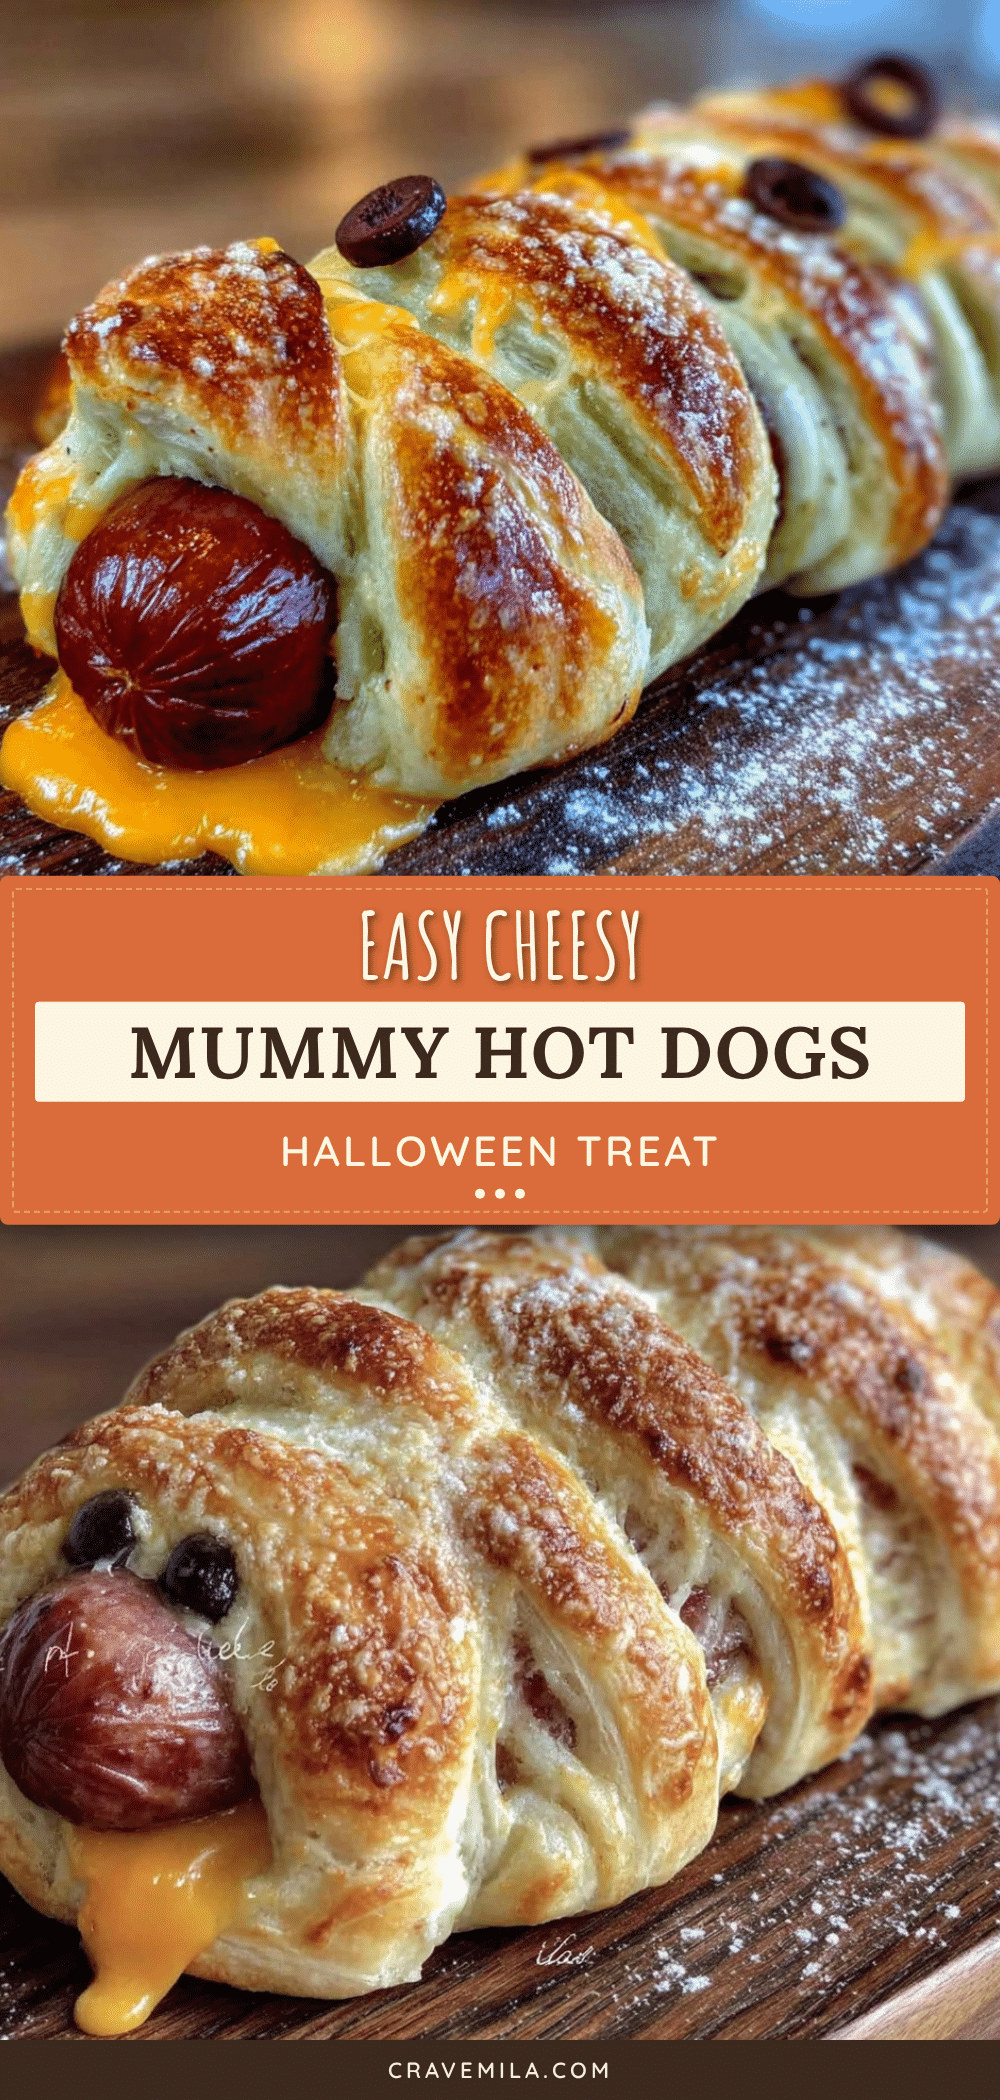
Easy Halloween Mummy Hot Dogs with Cheese: Best 15-Minute Snack

These Easy Halloween Mummy Hot Dogs with Cheese are the ultimate shortcut to a festive snack that looks impressive but takes almost no effort. With just four simple ingredients and 15 minutes, you can create adorable, delicious mummy hot dogs that are perfect for Halloween parties or a fun weeknight dinner.
- Prep Time: 5 minutes
- Cook Time: 10-12 minutes
- Total Time: 15 minutes
- Yield: 8 servings 1x
- Category: Appetizer
- Cuisine: American
Ingredients
- 8 standard-sized hot dogs (beef recommended)
- 4 ounces sharp cheddar cheese, cut into 8 thin strips about 3 inches long
- 1 can (8 ounces) refrigerated crescent roll dough (Pillsbury recommended)
- Yellow mustard (for eyes)
- Optional: everything bagel seasoning or flaky sea salt for garnish
Instructions
- Preheat oven to 375°F (190°C). Line a baking sheet with parchment paper.
- Cut a slit lengthwise down the center of each hot dog, about 80% of the way through, to create a pocket.
- Press a strip of cheddar cheese firmly into the slit of each hot dog, letting a little cheese peek out the top.
- Open the can of crescent rolls. If using perforated triangles, separate them. Cut each triangle lengthwise into 3 long, thin strips (24 strips total).
- Wrap each stuffed hot dog with 2-3 dough strips, overlapping slightly and leaving a small gap at the top for the eyes. Do not wrap too tightly.
- Place wrapped mummies on the prepared baking sheet, about 1 inch apart.
- Bake for 10-12 minutes, until dough is golden brown and puffed, and cheese is melted and bubbling.
- Remove from oven and let cool on the pan for 2-3 minutes.
- Using a squeeze bottle, dot two small mustard eyes on the exposed hot dog at the top of each mummy.
- Serve immediately while warm and gooey.
Notes
For best results, use room temperature hot dogs. Do not overbake; 10-12 minutes is the sweet spot. Let mummies rest 2-3 minutes before adding mustard eyes to prevent runniness. To reheat leftovers, use an air fryer at 300°F (150°C) for 3-4 minutes or oven at 350°F (175°C) for 5 minutes. Avoid microwaving. Assemble up to 4 hours ahead and refrigerate before baking if needed.
Nutrition
- Serving Size: 1 mummy hot dog
- Calories: 220
- Sugar: 2
- Sodium: 680
- Fat: 14
- Saturated Fat: 6
- Carbohydrates: 16
- Protein: 9
Keywords: Halloween, mummy hot dogs, easy snack, 15-minute recipe, crescent roll, cheese, hot dog, party food



