I wasn’t expecting cooking advice from a stranger, but there I was, sitting in the back of a yellow cab in downtown Chicago, listening to him describe exactly how to make crispy air fryer chicken breast tenders. It was raining sideways that evening, the kind of wet, miserable November chill that makes you want to order pizza and never leave the house. My phone was dead, my wallet was light, and I was starving. The driver, a guy named Marcus with hands like shovels and a smile that didn’t quite reach his tired eyes, noticed me shivering in the backseat. He didn’t offer me a jacket. Instead, he started talking about his kitchen.
Marcus had just gotten off a twelve-hour shift and was heading home to feed his kids. He told me he had no time to stand over a hot stove, but he couldn’t serve them anything less than good. So, he had started using an air fryer for everything. I rolled my eyes, honestly. I thought it was just another gadget gathering dust in the back of a cupboard, like the pasta maker I bought in 2018. But then he described the crunch. He talked about how the hot air circulates and crisps the coating without making the house smell like fried oil for days. He said it was the only way to get that “fried” taste without the guilt or the grease.
I got out of the cab and went straight home, feeling ridiculous. I had chicken breasts in the freezer and a bag of panko breadcrumbs in the pantry. I threw them in the air fryer at 380 degrees, following a rough mental map Marcus had given me. The result? I sat at my kitchen table, staring at the golden-brown strips, and took a bite. It was shocking. It was crispy. It was tender. I mean, seriously, how had I been living my whole life ignoring this method?
Maybe you’ve been there, too. You know that feeling when you’re too tired to cook, but you’re too hungry to order out? That was me. I made them again the next night. And the night after that. Now, this recipe for crispy air fryer chicken breast tenders is my go-to emergency meal. It’s fast, it’s healthy, and it tastes like a cheat day. Marcus didn’t know it, but that rainy Tuesday ride saved my weeknight dinner routine for the next year.
Why You’ll Love This Recipe
Let’s be real for a second. We all have that one weeknight where we just want food that tastes like comfort but doesn’t leave us feeling sluggish. This recipe hits that sweet spot perfectly. I’ve tested this method dozens of times, tweaking the breading and the temperature, and I can tell you with confidence that this is the best way to cook chicken breast without drying it out. Most people think air frying chicken means rubbery, dry meat. But when you get the coating right and the heat just right, you get something completely different.
Here is why this recipe is a total game-changer for your kitchen:
- Quick & Easy: From freezer to plate in under 20 minutes. This is perfect for busy weeknights when you have zero energy left to chop vegetables or manage a complex sauce.
- Simple Ingredients: You likely already have everything in your kitchen. Chicken, eggs, breadcrumbs, and spices. No fancy grocery trips needed.
- Perfect for Meal Prep: These tenders reheat surprisingly well. I make a big batch on Sunday and grab two for lunch during the week. They stay crispy even after being in the fridge.
- Crowd-Pleaser: Kids love the familiar shape and dip-ability. Adults love that it isn’t deep-fried. It’s a win-win for family dinners.
- Unbelievably Delicious: The texture is next-level. The panko creates a shatteringly crisp exterior while the chicken stays juicy inside. It’s comfort food reimagined—healthier, faster, but with the same soul-soothing satisfaction.
What makes this specific version different from the rest? It’s the double-dip technique. I use a simple flour dredge first, then an egg wash, then the seasoned panko. This creates a barrier that locks in moisture. Many recipes skip the flour, and that’s why their chicken turns out dry. This method ensures every bite is tender. It’s not just good—it’s the kind that makes you close your eyes after the first bite. It’s perfect for impressing guests without stress, or turning a simple meal into something memorable.
What Ingredients You Will Need
This recipe uses simple, wholesome ingredients to deliver bold flavor and satisfying texture without the fuss. The key here is quality and texture. You don’t need anything exotic, but you do need to pay attention to the state of your ingredients. For instance, cold chicken straight from the fridge doesn’t bind as well, so let it sit out for ten minutes while you prep your station.
Here is what you need to gather:
- Chicken Breasts: Use large, boneless, skinless chicken breasts. I prefer buying them when they are on sale and freezing them individually. Look for uniform sizes so they cook evenly. If your pieces are very thick, pound them slightly to about half-inch thickness.
- All-Purpose Flour: This is your first layer of defense. It helps the egg wash stick. I use standard white flour, but almond flour works if you are going gluten-free. It absorbs excess moisture from the chicken surface.
- Eggs: Large eggs, beaten. The protein in the egg acts as the glue for the breadcrumbs. Make sure they are whisked well so there are no lumps of white or yolk.
- Panko Breadcrumbs: This is non-negotiable for crispiness. Regular breadcrumbs are too dense. Panko flakes are larger and airier, creating that signature crunch. I recommend Seattle Brand or any Japanese-style panko you find at the grocery store. It makes a huge difference.
- Spices: Garlic powder, onion powder, paprika, salt, and black pepper. These are pantry staples. Don’t skip the paprika; it adds that beautiful golden color and a subtle smokiness.
- Cooking Spray or Oil: A light mist of avocado oil or olive oil spray helps the browning process. It’s not strictly necessary, but it enhances the color.
- Dipping Sauce: Optional, but highly recommended. Ranch, honey mustard, or BBQ sauce pairs perfectly. I usually keep a bottle of honey mustard in the fridge for this exact purpose.
If you want to vary the flavor profile, you can add some dried parsley or Italian seasoning to the breadcrumbs. For a spicy kick, add a pinch of cayenne pepper. The beauty of this recipe is its flexibility. You can swap the panko for crushed cornflakes if you want a different texture, though it won’t be as light. Just keep in mind that the flour-egg-breadcrumb sequence is the most important part of the process.
Equipment Needed
You don’t need a fancy kitchen to make this recipe. In fact, the beauty of air frying is that it requires minimal equipment. Here is what you need to get started:
- Air Fryer: Obviously, this is the star of the show. Any standard basket-style air fryer works. If you have a larger family, make sure your basket is big enough to hold the tenders in a single layer. Overcrowding is the enemy of crispiness.
- Three Shallow Bowls: You will need three bowls for the breading station. One for flour, one for eggs, and one for breadcrumbs. Glass or ceramic bowls work best because they are stable and easy to clean.
- Meat Mallet or Rolling Pin: If your chicken breasts are uneven, you need to pound them. A meat mallet is ideal, but a heavy rolling pin or even a clean skillet works in a pinch.
- Tongs: Use tongs to handle the chicken. It keeps your hands clean and makes flipping easier. Forks work, but tongs give you better control.
- Cutting Board and Knife: To trim any excess fat or slice the breasts into strips. A sharp chef’s knife is best for this.
If you don’t have an air fryer, you can bake these in the oven at 400 degrees for 15-18 minutes, flipping halfway through. The texture won’t be quite as crispy, but it will still be good. For the air fryer, keep the basket clean. If you are making multiple batches, wipe out the basket between batches to prevent burnt crumbs from smoking. This simple maintenance tip ensures your next batch stays crisp and doesn’t taste like burnt toast.
Preparation Method
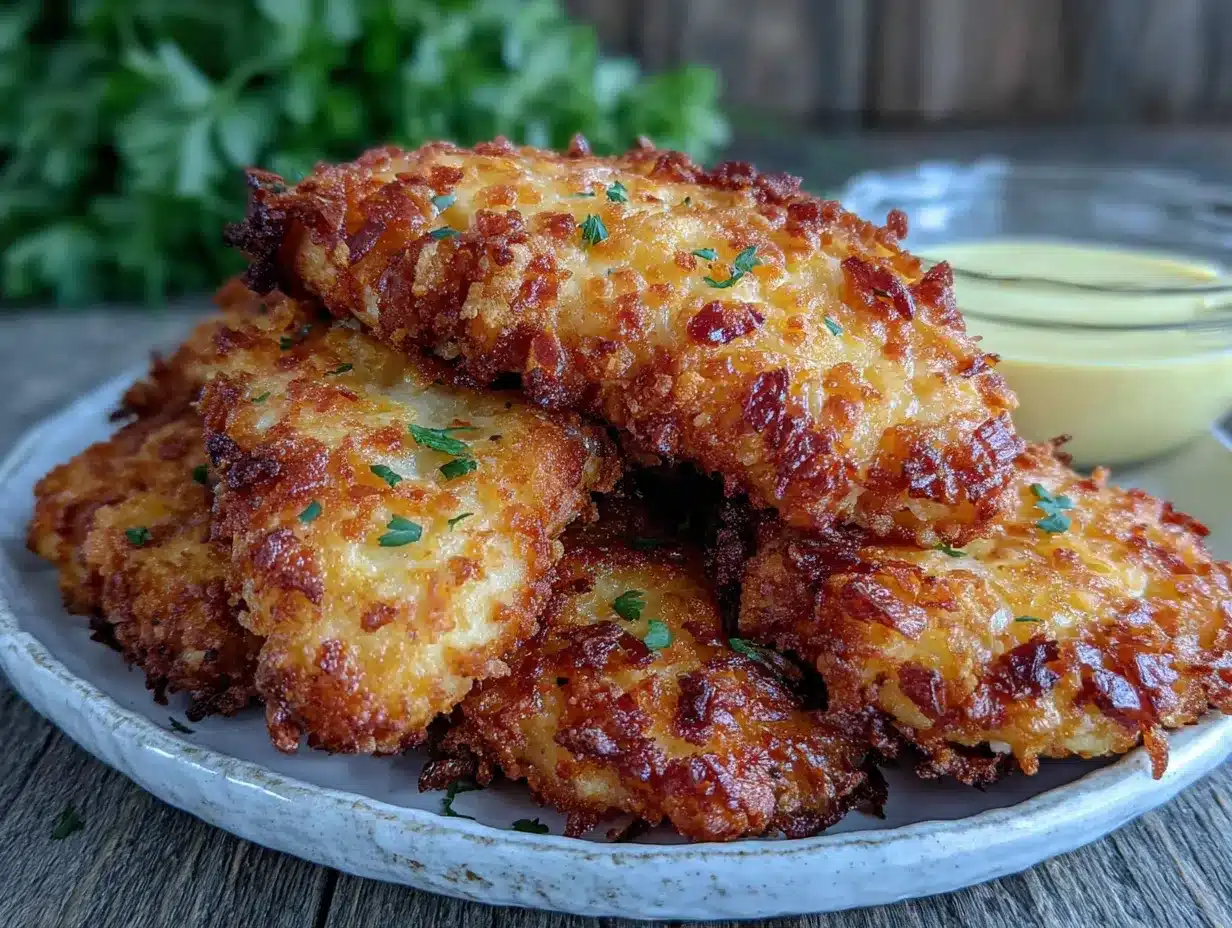
Getting the chicken ready is the most important step. If you rush this part, the coating won’t stick, and you’ll end up with a mess in your air fryer basket. Follow these steps carefully for the best results.
Step 1: Prep the Chicken (5 Minutes)
Take your chicken breasts out of the fridge. If they are very thick, place them between two sheets of plastic wrap or in a Ziploc bag. Use a meat mallet to pound them until they are about ½ inch thick. This ensures even cooking. Slice the pounded breasts into strips that are about 1 inch wide. You want them uniform in size so they all finish at the same time. Pat them dry with paper towels. This step is crucial because moisture is the enemy of crispiness.
Step 2: Set Up the Breading Station (5 Minutes)
Get your three shallow bowls ready. In the first bowl, add the all-purpose flour along with half of your spices (salt, pepper, garlic powder). Whisk it together. In the second bowl, beat the eggs with a fork until smooth. Add a splash of milk or water if you want a thinner wash, but it’s not necessary. In the third bowl, mix the panko breadcrumbs with the remaining spices. Make sure the spices are evenly distributed in the panko so every bite is flavorful.
Step 3: Bread the Chicken (10 Minutes)
Take a chicken strip and dredge it in the flour mixture. Shake off any excess flour. You want a light coating, not a thick clump. Next, dip it into the egg wash, making sure it is fully coated. Let any excess egg drip off for a second. Finally, press it into the panko mixture. Use your hands to press the crumbs firmly onto the chicken. This pressure is what makes the coating stick during cooking. Place the breaded tenders on a clean plate or wire rack. Repeat with the remaining chicken.
Step 4: Air Fry (10-12 Minutes)
Preheat your air fryer to 380 degrees Fahrenheit (190 degrees Celsius). This preheating step is important for immediate crisping. Lightly spray the basket with cooking oil. Place the chicken tenders in the basket in a single layer. Do not overlap them. Air needs to circulate around each piece. Cook for 10-12 minutes, flipping them halfway through. Spray the tops with a little more oil halfway through if you want them extra golden. The chicken is done when the internal temperature reaches 165 degrees Fahrenheit (74 degrees Celsius) and the coating is golden brown.
Step 5: Rest and Serve (2 Minutes)
Remove the tenders from the air fryer and let them rest on a wire rack for two minutes. This allows the juices to redistribute. If you cut into them immediately, the juices will run out, and the chicken will be dry. Serve immediately with your favorite dipping sauce.
Cooking Tips & Techniques
I’ve made a few mistakes along the way, so you don’t have to. Here are some professional tips to ensure your crispy air fryer chicken breast tenders turn out perfect every time.
- Don’t Skip the Drying: If the chicken is wet, the flour won’t stick. Always pat it dry with paper towels. It seems minor, but it makes a huge difference.
- Press the Crumbs: When you bread the chicken, don’t just sprinkle the panko on top. Press it in. Think of it like planting a seed. You need good contact between the chicken and the breadcrumb.
- Single Layer Only: This is the most common mistake. If you stack the chicken, the bottom pieces will steam instead of fry. They will be soggy. Cook in batches if necessary.
- Preheat Your Air Fryer: Just like an oven, an air fryer needs time to heat up. If you throw cold chicken into a cold basket, the coating will slide off. Always preheat for 3-5 minutes.
- Flip Midway: Even with good air circulation, flipping ensures even browning. Use tongs to flip them gently so you don’t knock the crumbs off.
Timing can vary depending on the size of your air fryer and the thickness of your chicken. If your tenders are thin, check them at 8 minutes. If they are thick, they might need 14 minutes. Use a meat thermometer to be sure. The visual cue is golden brown and crispy, but the temperature is the safety cue.
Variations & Adaptations
One of the best things about this recipe is how easy it is to customize. You can adapt it to fit your dietary needs or just switch up the flavors.
Gluten-Free Option
Swap the all-purpose flour for a gluten-free flour blend. For the panko, you can use crushed gluten-free cornflakes or almond flour. Almond flour browns quickly, so keep an eye on it. It adds a nice nutty flavor that pairs well with chicken.
Spicy Kick
Add cayenne pepper, chili powder, or crushed red pepper flakes to the panko mixture. If you like heat, mix some hot sauce into the egg wash. This creates a spicy crust that is addictive.
Baked Version
If you don’t have an air fryer, you can bake these at 400 degrees Fahrenheit (200 degrees Celsius) for 15-18 minutes. Flip halfway through. They won’t be as crispy as the air-fried version, but they are still delicious and much healthier than deep-fried.
Dairy-Free
This recipe is naturally dairy-free, but if you want to change the egg wash, you can use a flax egg (1 tablespoon ground flaxseed mixed with 3 tablespoons water) for a vegan option. The coating won’t be as golden, but it will still stick.
I personally love adding a little Parmesan cheese to the panko mixture. It adds a savory, umami depth that is incredible. Just be careful not to add too much, or it might burn.
Serving & Storage Suggestions
These tenders are best served immediately while they are hot and crispy. I like to serve them with a side of steamed broccoli or a fresh green salad. The crispiness of the chicken contrasts nicely with the fresh vegetables. For dipping, honey mustard is my personal favorite, but ranch, BBQ sauce, or even ketchup works well.
Storage
Leftovers can be stored in an airtight container in the refrigerator for up to 3 days. The chicken will stay moist, but the coating will soften. To reheat, place them back in the air fryer at 375 degrees Fahrenheit for 3-4 minutes. This will restore the crispiness. Avoid the microwave, as it will make the coating soggy.
Freezing
You can freeze the breaded tenders before cooking. Place them on a baking sheet in the freezer until solid, then transfer them to a freezer bag. Cook from frozen, adding 2-3 minutes to the cooking time. This is a great meal prep hack. Just make sure they are completely frozen before cooking to prevent the coating from falling off.
The flavors actually develop over time if you marinate the chicken overnight, but for this quick recipe, fresh is best. The simplicity is what makes it shine.
Nutritional Information & Benefits
This recipe is a great option for those watching their calorie intake. Chicken breast is a lean protein source, and air frying uses little to no oil, significantly reducing the fat content compared to deep frying.
- Protein: High in protein, which helps with muscle repair and satiety.
- Low Carb: By skipping the flour and using panko, you can keep the carb count moderate. For low-carb, use almond flour and crushed pork rinds.
- Gluten-Free: Easily adaptable for gluten-free diets.
Always check the nutritional labels of your specific ingredients for accurate counts. This recipe is generally healthy, but be mindful of the dipping sauces, which can add significant sugar and sodium. Using homemade sauces or low-sodium options keeps the meal balanced. I find that eating these with a large salad makes it a complete, nutritious meal.
Conclusion
I still think about that rainy Tuesday in Chicago and Marcus, the taxi driver who changed my life one chicken tender at a time. This recipe for crispy air fryer chicken breast tenders is not just about convenience. It’s about finding joy in simple, well-executed food. It’s about realizing that you don’t need to be a professional chef to make something delicious. You just need the right technique and a little bit of curiosity.
I encourage you to try this recipe and make it your own. Add your favorite spices, try different dipping sauces, or experiment with different breading options. Share your results in the comments below. I love reading about how you adapt recipes to fit your life. And if you have a story about an unexpected source of cooking inspiration, please share it. We all learn from each other.
So, go ahead and fire up that air fryer. Your weeknight dinners are about to get a whole lot better.
Frequently Asked Questions
Can I use chicken thighs instead of breasts?
Yes, you can use boneless, skinless chicken thighs. They will be juicier and more flavorful, but they cook slightly faster. Check them at 8 minutes to ensure they don’t dry out.
Why is my chicken coating falling off?
This usually happens if the chicken wasn’t patted dry or if you didn’t press the breadcrumbs firmly. Make sure to use the three-step breading method and press the crumbs on with your hands.
How do I keep the chicken moist?
Don’t overcook the chicken. Use a meat thermometer to ensure it reaches 165 degrees Fahrenheit. Removing it from the heat at exactly 165 degrees prevents dryness. Also, pounding the chicken to an even thickness helps it cook evenly.
Can I make these in the oven?
Yes, bake at 400 degrees Fahrenheit for 15-18 minutes, flipping halfway through. They won’t be as crispy as air-fried, but they will still be tasty.
What is the best dipping sauce for these tenders?
Honey mustard, ranch, and BBQ sauce are classic choices. For a healthier option, try Greek yogurt mixed with lemon juice and herbs.
Pin This Recipe!
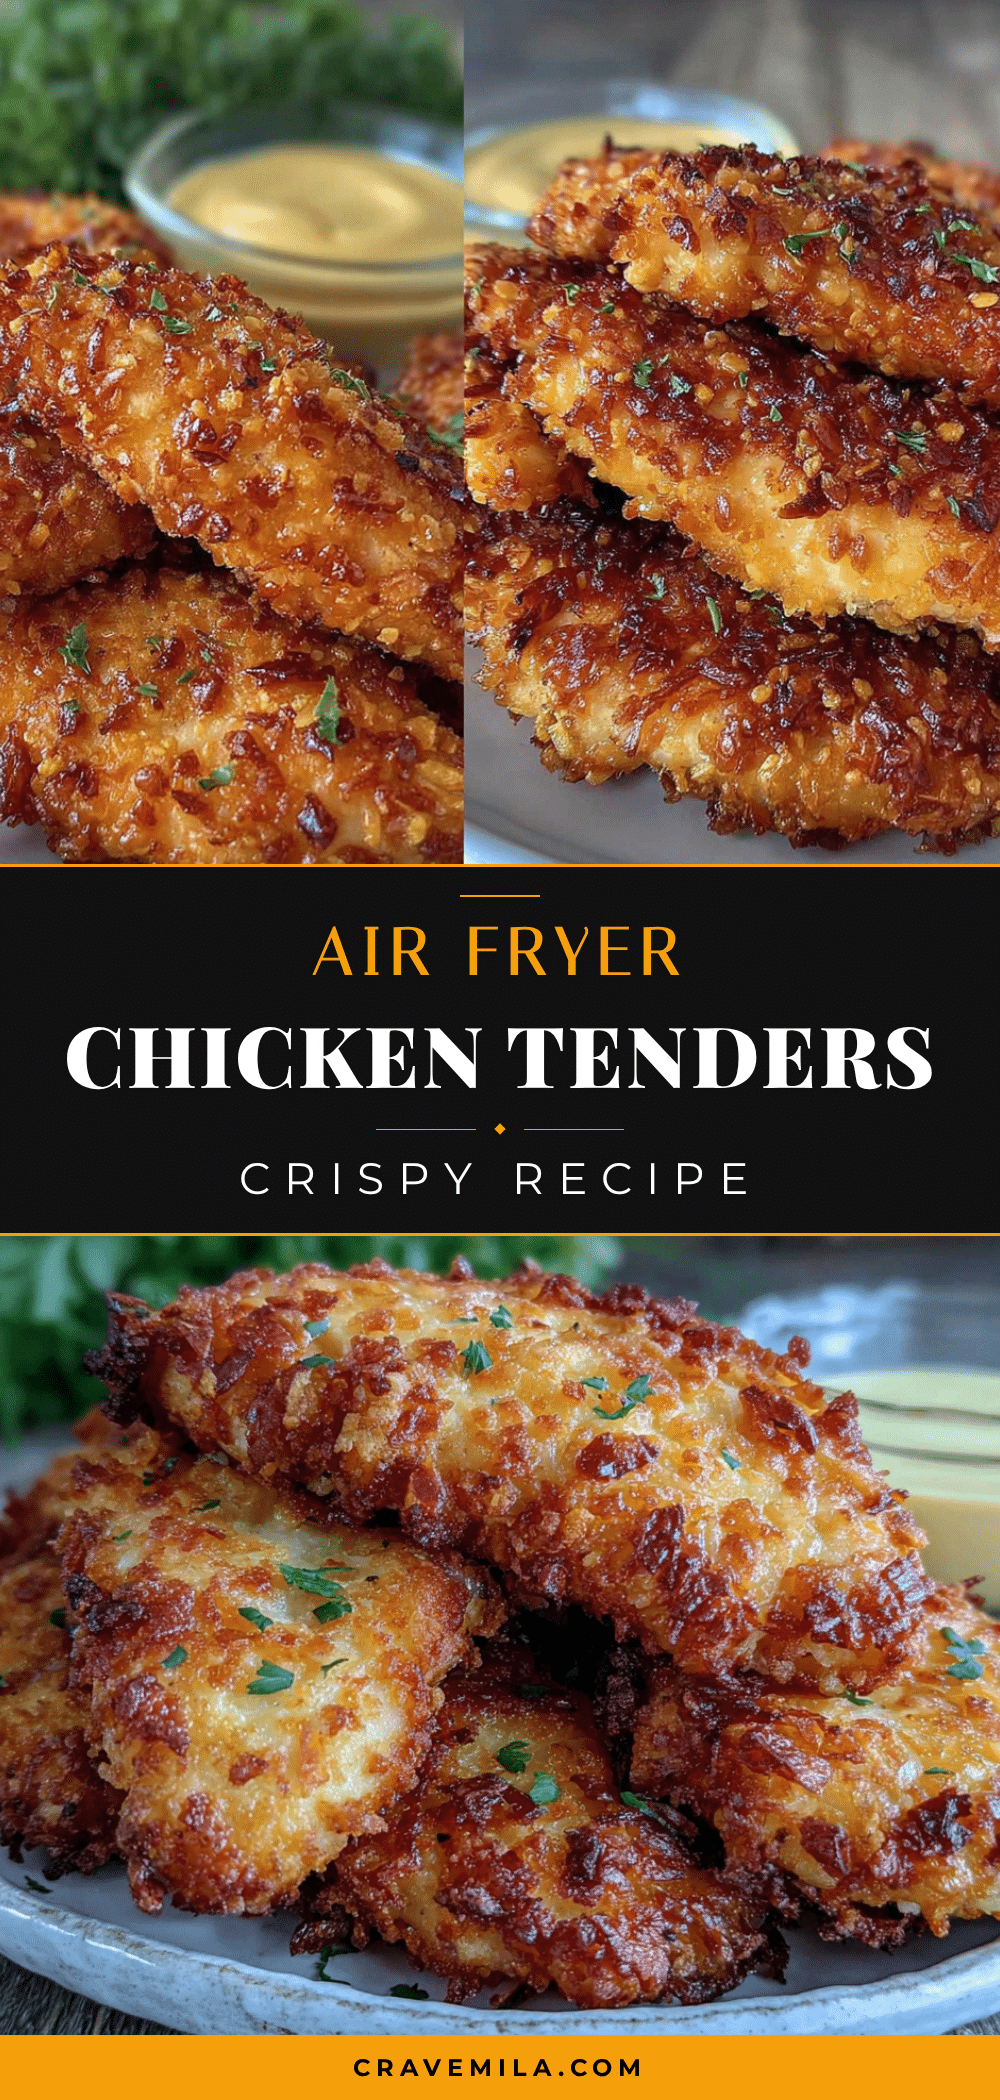
Crispy Air Fryer Chicken Breast Tenders
A quick and easy recipe for crispy, golden-brown chicken tenders made in the air fryer. Using a double-dip breading technique with panko, these tenders are juicy inside and crunchy outside, ready in under 20 minutes.
- Prep Time: 20 minutes
- Cook Time: 10-12 minutes
- Total Time: 30-32 minutes
- Yield: 4 servings 1x
- Category: Main Course
- Cuisine: American
Ingredients
- 2 large boneless, skinless chicken breasts
- 1 cup all-purpose flour (or gluten-free blend)
- 2 large eggs, beaten
- 1 cup panko breadcrumbs
- 1 tsp garlic powder
- 1 tsp onion powder
- 1 tsp paprika
- 1 tsp salt
- 1/2 tsp black pepper
- Cooking spray or avocado oil spray
Instructions
- Preheat the air fryer to 380°F (190°C).
- Pat chicken breasts dry with paper towels. If thick, pound to 1/2 inch thickness and slice into 1-inch wide strips.
- Set up three shallow bowls: one with flour mixed with half the spices, one with beaten eggs, and one with panko mixed with remaining spices.
- Dredge each chicken strip in the flour mixture, shaking off excess.
- Dip the floured chicken into the egg wash, letting excess drip off.
- Press the chicken firmly into the panko mixture to coat evenly.
- Lightly spray the air fryer basket with oil.
- Place tenders in the basket in a single layer, ensuring they do not overlap.
- Cook for 10-12 minutes, flipping halfway through and spraying tops with oil if desired.
- Cook until internal temperature reaches 165°F and coating is golden brown.
- Remove and rest on a wire rack for 2 minutes before serving.
Notes
Ensure chicken is patted dry before breading to help the coating stick. Do not overcrowd the air fryer basket; cook in batches if necessary. For a spicy kick, add cayenne pepper to the panko. Can be baked at 400°F for 15-18 minutes if an air fryer is not available.
Nutrition
- Serving Size: 4 tenders per servin
- Calories: 350
- Sugar: 1
- Sodium: 600
- Fat: 12
- Saturated Fat: 2
- Carbohydrates: 25
- Fiber: 1
- Protein: 35
Keywords: air fryer chicken, chicken tenders, crispy chicken, healthy dinner, quick recipes, weeknight meals, gluten-free option



