The PTA Halloween bake sale was in twelve hours, and I’d completely forgotten. I mean, I’d signed up weeks ago, but between work and, you know, life, it had slipped my mind entirely. Everyone else would be bringing elaborate haunted gingerbread houses and professionally decorated cupcakes that looked like little works of art. I had a half-used stick of butter, a bag of chocolate chips I’d bought for a different recipe, and a vague memory of my grandmother’s sugar cookie recipe. Honestly, my kitchen counter looked like a crime scene of good intentions and poor planning. I was already mentally drafting my apology text to the room mom when I spotted a leftover squeeze bottle of black icing from my kid’s birthday party. And that’s when the panic turned into something like a plan. These aren’t just any sugar cookies—they’re my secret weapon for when you need to show up and knock it out of the park without spending three days in the kitchen. The best part? They look incredibly intricate, but the spider web design is so easy a kid can do it. I pulled it off at 10 PM on a Tuesday, and you know what? They sold out first. Let me tell you, there’s something deeply satisfying about winning a bake sale with a recipe that took you less than an hour to decorate. Maybe you’ve been there—staring down a blank calendar and a growing sense of dread. This is the recipe that saves you every single time.
Why You’ll Love This Recipe
Let’s be real—Halloween baking can be a whole production. You need something that looks impressive but doesn’t require a pastry degree or a trip to a specialty baking store. These spooky chocolate spider web cookies hit that sweet spot perfectly. I’ve tested this recipe through three different Halloween seasons, two classroom parties, and one particularly intense cookie swap, and it never lets me down.
- Quick & Easy: From mixing bowl to decorated cookie in under an hour. The dough comes together in 10 minutes flat.
- Simple Ingredients: You probably have everything already—butter, sugar, flour, cocoa powder, and powdered sugar. No weird extracts or hard-to-find decorations.
- Perfect for Halloween Parties: Classroom celebrations, office potlucks, trunk-or-treat events—these cookies are always the star of the dessert table.
- Crowd-Pleaser: Kids love the spooky design, adults appreciate the rich chocolate flavor, and everyone grabs at least two.
- Unbelievably Delicious: The cookie base is tender and buttery with deep cocoa flavor, and the royal icing has just the right amount of sweetness. It’s not just a pretty face—it actually tastes amazing.
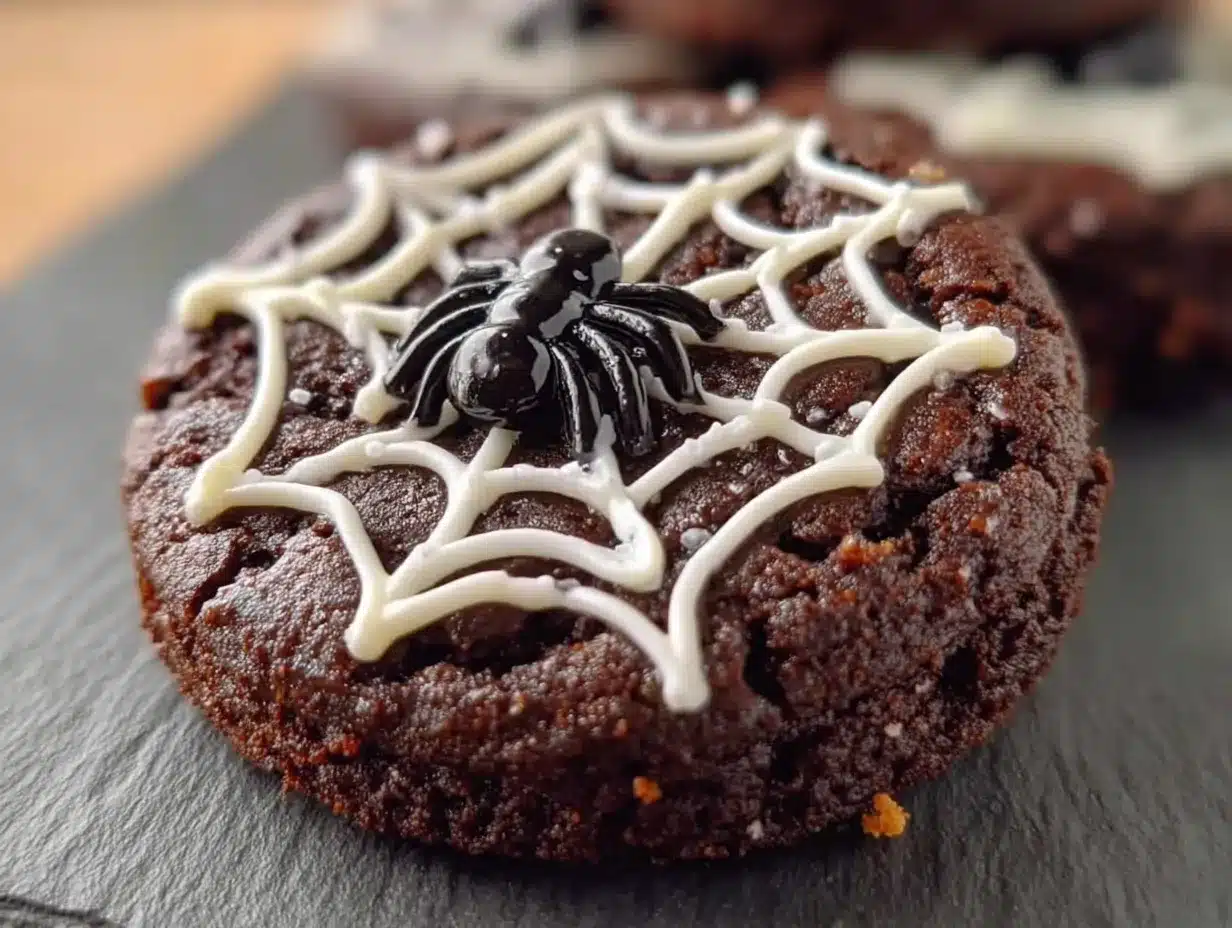
What makes this different from every other cut-out cookie recipe? It’s the texture. We’re using a combination of butter and shortening, which gives you a cookie that holds its shape perfectly during baking but still melts in your mouth. No spreading, no puffing up into unrecognizable blobs. And the spider web technique? It’s pure genius—you just pipe concentric circles and drag a toothpick through them. That’s it. No steady hands required. This is the kind of recipe that makes you close your eyes after the first bite because it tastes like childhood and Halloween magic all rolled into one.
What Ingredients You Will Need
This recipe uses simple, pantry-friendly ingredients to deliver a rich chocolate cookie with a crisp edge and tender center. The icing is a basic royal icing that dries hard and shiny—perfect for that glossy spider web look.
For the Chocolate Sugar Cookies
- 1 cup (226g) unsalted butter, softened (I prefer Land O’Lakes for consistent results)
- 1/2 cup (100g) shortening (Crisco works great—this helps the cookies hold their shape)
- 1 1/2 cups (300g) granulated sugar
- 2 large eggs, room temperature
- 2 teaspoons vanilla extract
- 3 cups (375g) all-purpose flour
- 3/4 cup (75g) unsweetened cocoa powder (I use Hershey’s Special Dark for a deeper color)
- 1 teaspoon baking powder
- 1/2 teaspoon salt
For the Royal Icing
- 3 cups (360g) powdered sugar, sifted
- 2 tablespoons meringue powder (this gives the icing that hard, glossy finish)
- 4-5 tablespoons water (add slowly—you might need a little more or less)
- 1/2 teaspoon vanilla extract (or clear vanilla if you want pure white icing)
- Black gel food coloring (AmeriColor Super Black is my go-to—it’s concentrated and doesn’t thin the icing)
Ingredient Tips: Make sure your butter is truly softened—leave it on the counter for at least an hour. Cold butter won’t cream properly and will give you dense cookies. For the cocoa powder, regular unsweetened works fine, but dark cocoa powder gives a more dramatic, spooky look. If you can’t find meringue powder, you can substitute with 2 egg whites and skip the water, but meringue powder is more stable and safer for kids to eat. For the black food coloring, avoid the liquid kind from the grocery store—it’s too watery and will mess with your icing consistency. Gel colors are the way to go.
Equipment Needed
You don’t need a ton of fancy equipment for these cookies, which is honestly my favorite part. Here’s what you’ll need:
- Stand mixer or hand mixer—for creaming the butter and sugar. Hand mixer works fine, just takes a little longer.
- Rolling pin—I use a standard wooden one, but a French rolling pin gives you more control over even thickness.
- Round cookie cutters—2.5-inch and 3-inch sizes work best. If you don’t have round cutters, you can use a drinking glass.
- Parchment paper—essential for easy cleanup and preventing sticking.
- Piping bags or squeeze bottles—squeeze bottles are actually easier for the spider web design, but piping bags with a small round tip work too.
- Toothpicks—the secret weapon for creating the web pattern.
- Cooling rack—cookies need to cool completely before icing.
Budget Tip: If you don’t have piping bags, a zip-top bag with the corner snipped off works perfectly. Just be careful not to cut too big of a hole—start small and go bigger if needed. I learned that one the hard way after flooding a cookie with way too much icing.
Preparation Method
- Cream the butter and shortening. In a large mixing bowl, beat the softened butter, shortening, and granulated sugar together on medium speed for 3-4 minutes until light and fluffy. You want it to look pale and airy—this is where the tenderness comes from. Scrape down the sides of the bowl halfway through.
- Add eggs and vanilla. Beat in the eggs one at a time, mixing well after each addition. Add the vanilla extract and mix until combined. The mixture might look slightly curdled at this point—don’t panic, that’s normal.
- Mix dry ingredients. In a separate bowl, whisk together the flour, cocoa powder, baking powder, and salt. Gradually add this to the wet mixture, mixing on low speed just until the dough comes together. Don’t overmix! Stop as soon as you don’t see any more streaks of flour. The dough will be soft but not sticky.
- Chill the dough. Divide the dough in half, flatten each half into a disc, wrap in plastic wrap, and refrigerate for at least 30 minutes. This step is non-negotiable—chilled dough is way easier to roll and cut, and it helps the cookies hold their shape in the oven. If you’re in a hurry, 20 minutes in the freezer works too.
- Preheat and prep. Preheat your oven to 350°F (175°C). Line two baking sheets with parchment paper. Lightly flour your work surface and rolling pin.
- Roll and cut. Roll one disc of dough to about 1/4-inch thickness. Cut out rounds using your cookie cutter and place them 2 inches apart on the prepared baking sheets. Gather the scraps, re-roll, and cut again. Pro tip: If the dough gets too soft, pop it back in the fridge for 10 minutes.
- Bake. Bake for 8-10 minutes. The cookies are done when the edges are set and the tops look dry. They might still feel soft in the center—that’s okay, they’ll firm up as they cool. Let them cool on the baking sheet for 5 minutes, then transfer to a cooling rack to cool completely. Do not ice warm cookies—the icing will melt and slide right off.
- Make the royal icing. While the cookies cool, make the icing. In a medium bowl, whisk together the powdered sugar and meringue powder. Add 4 tablespoons of water and the vanilla extract, then beat on medium speed for 4-5 minutes until the icing is thick and glossy. It should hold a ribbon trail on the surface for a few seconds. If it’s too thick, add water a teaspoon at a time. If it’s too thin, add more powdered sugar.
- Color the icing. Divide the icing into two bowls. Leave one bowl white. Add black gel food coloring to the other bowl—start with a tiny amount and add more until you reach your desired darkness. Transfer each color to separate piping bags or squeeze bottles fitted with small round tips.
- Pipe the base layer. Outline each cookie with white icing, then fill it in (this is called flooding). Use a toothpick to spread the icing into the corners if needed. Let the base layer dry completely—about 30-45 minutes. This is important because the web design needs a dry surface to sit on.
- Pipe the spider web. Once the base is dry, pipe a small dot of black icing in the center of each cookie. Pipe 3-4 concentric circles around the center dot, spacing them about 1/4 inch apart. While the black icing is still wet, use a toothpick to drag lines from the center outward through all the circles. Wipe the toothpick clean between each drag. You’ll see the web pattern appear immediately—it’s honestly so satisfying.
- Let set. Allow the icing to set completely, about 1-2 hours. The royal icing will harden to a shiny, snappy finish.
Cooking Tips & Techniques
I’ve made these cookies more times than I can count, and I’ve definitely learned some things the hard way. Let me save you some trouble.
Don’t skip the chilling step. I know, I know—you’re in a hurry. But warm dough spreads like crazy in the oven, and you’ll end up with flat, misshapen cookies that look more like blobs than rounds. I once tried to rush it and ended up with cookies that merged together into one giant chocolate mass. Not my finest moment.
Flour your rolling pin generously. Chocolate dough is stickier than regular sugar cookie dough because of the cocoa powder. If it starts sticking, don’t be shy with the flour. Just dust lightly and keep going. You can also roll the dough between two sheets of parchment paper—that’s my preferred method now.
Test your icing consistency. The perfect royal icing should flow like honey—it should drizzle off a spoon but hold its shape for a second before melting back in. If it’s too thick, it won’t spread evenly. Too thin, and it’ll run off the edges of your cookies. Do a test squirt on a piece of parchment paper before you start decorating.
Work in batches. Only ice a few cookies at a time. If you pipe the base layer on too many cookies at once, the icing might start crusting before you get to the web design. I usually work in groups of 4-5 cookies.
Keep toothpicks handy. You’ll need fresh toothpicks for each web. Once the icing starts building up on the toothpick, it won’t drag cleanly through the circles. I keep a little cup of toothpicks next to my workspace and swap them out frequently.
Multitask wisely. While the base layer of icing is drying, you can clean up your kitchen or prep the next batch of dough. The drying time is a good opportunity to get ahead of the mess.
Variations & Adaptations
One of the best things about this recipe is how easy it is to change up. Here are some variations I’ve tried and loved:
Gluten-Free Version: Swap the all-purpose flour for a 1:1 gluten-free baking flour blend. I’ve used Bob’s Red Mill with great results. Just add an extra tablespoon of milk to the dough since gluten-free flour tends to be more absorbent.
Different Web Colors: Instead of black on white, try orange icing with a white web, or purple with a green web. You can match your school colors or go full rainbow for a fun twist. I made orange webs on purple cookies for a Halloween party last year and they were a huge hit.
Spider Addition: If you want to go full spooky, pipe a small black spider on top of each web. Just pipe a small oval body and eight little legs radiating out. It takes an extra 30 seconds per cookie and kids absolutely lose their minds over it.
Flavor Twist: Add 1/2 teaspoon of peppermint extract to the dough for a chocolate mint version. Or swap the vanilla in the icing for almond extract—it gives a subtle, sophisticated flavor that pairs beautifully with the chocolate.
Make It Dairy-Free: Use vegan butter sticks (I like Earth Balance) and skip the shortening—use all vegan butter instead. The texture will be slightly different but still delicious.
Cut-Out Shapes: Don’t limit yourself to rounds! Use Halloween-shaped cookie cutters—pumpkins, ghosts, bats—and pipe the web design on top. The web pattern works on any flat surface.
Serving & Storage Suggestions
These cookies are best served at room temperature. The royal icing needs to be fully set and hard—that’s when it has that satisfying snap when you bite into it. I like to arrange them on a platter with a few fake plastic spiders scattered around for maximum spooky effect.
For parties: Stack them on a cake stand or arrange them in a single layer on a large tray. They look gorgeous next to a bowl of candy corn or caramel apples. If you’re doing a Halloween dessert table, these cookies add a fantastic pop of contrast against orange and purple decorations.
Storage: Store the cookies in an airtight container at room temperature for up to one week. Layer them between sheets of parchment paper to prevent the icing from sticking together. Do not refrigerate—the moisture in the fridge can make the icing soft and sticky.
Freezing: You can freeze the undecorated baked cookies for up to three months. Just wrap them tightly in plastic wrap and then foil. When you’re ready to decorate, thaw them at room temperature and ice as directed. I do this all the time—bake a double batch, freeze half, and decorate them fresh for the next event.
Make Ahead: The royal icing can be made a day in advance and stored in an airtight container at room temperature. Just give it a good stir before using—it might separate slightly overnight. You can also prepare the cookie dough up to three days ahead and keep it wrapped in the fridge.
Reheating: These cookies don’t really need reheating, but if you want that just-baked taste, pop them in a 300°F oven for 3-4 minutes. Let them cool completely before serving—the icing will get soft in the oven.
Nutritional Information & Benefits
Let’s be honest—these are a treat, not a health food. But here’s the breakdown so you know what you’re working with. Per cookie (based on a 2.5-inch round):
- Calories: 185
- Total Fat: 9g
- Saturated Fat: 5g
- Carbohydrates: 26g
- Sugar: 18g
- Protein: 2g
- Fiber: 1g
Health Highlights: The cocoa powder in these cookies is actually a decent source of antioxidants—flavonoids, specifically, which are good for heart health. The butter provides vitamin A, and eggs add a small amount of protein. Obviously, this isn’t a daily snack, but for a holiday treat, it’s not the worst thing you could eat.
Dietary Considerations: This recipe contains dairy, eggs, and gluten. For a dairy-free version, use vegan butter. For gluten-free, use a 1:1 gluten-free flour blend. The royal icing is naturally dairy-free and gluten-free if you use meringue powder. The cookies can be made nut-free—just check your cocoa powder and vanilla extract labels for cross-contamination warnings if that’s a concern.
My personal philosophy? Life is short. Eat the cookie. But I also believe in balance—these are a special occasion treat, and that’s exactly what makes them special.
Conclusion
Look, I’m not saying these spooky chocolate spider web cookies will change your life. But they might just save your Halloween. They’re the kind of recipe that looks like you spent hours fussing over them when really, you just followed a few simple steps and let the magic happen. The rich chocolate flavor, the buttery tender texture, the gorgeous spider web design—it all comes together in a way that feels both impressive and totally doable.
What I love most about this recipe is how forgiving it is. If your circles aren’t perfectly round, that’s okay. If your web lines wobble a little, that’s even better—spider webs aren’t perfect in nature either. The imperfections are what make them look handmade and charming. So don’t stress about making them look like they came from a bakery. Make them look like they came from your kitchen, with love and maybe a little bit of chocolate on your fingers.
I’d love to hear how yours turn out! Drop a comment below and tell me about your Halloween baking adventures. Did you try a different color combo? Add a spider? Forget to chill the dough and end up with flat cookies? (Been there.) Share your wins and your learning moments—that’s what makes this community so great. Happy Halloween, and happy baking!
Frequently Asked Questions
Can I use a different type of icing for the spider web design?
Absolutely! While royal icing gives you that hard, glossy finish that looks professional, you can also use melted chocolate or candy melts. Just thin them with a little coconut oil to piping consistency. The technique works the same way—pipe concentric circles and drag through with a toothpick.
How far in advance can I make these cookies?
You can make the dough up to three days ahead and keep it in the fridge. Baked, undecorated cookies can be frozen for up to three months. Decorated cookies will stay fresh in an airtight container at room temperature for up to one week. Just don’t refrigerate them—the moisture will ruin the icing.
My cookies spread too much in the oven. What went wrong?
Most likely, your dough wasn’t chilled enough. Make sure you refrigerate the dough for at least 30 minutes before rolling and cutting. Also, check that your butter wasn’t too soft—it should be softened but still cool to the touch. If your kitchen is warm, pop the cut-out cookies on the baking sheet in the fridge for 10 minutes before baking.
Can I make these cookies without a mixer?
Yes, but your arm will get a workout! You can cream the butter and sugar by hand with a wooden spoon—just make sure your butter is very soft. For the royal icing, a whisk works fine, but you’ll need to whisk vigorously for a few minutes to get the right consistency. A hand mixer is definitely easier, but not strictly necessary.
The black food coloring tastes bitter. How do I fix that?
Some black gel food colorings can have a slightly bitter aftertaste, especially if you use a lot. To avoid this, use a concentrated gel like AmeriColor Super Black—you need much less to achieve a deep black color. You can also add a tiny pinch of salt to the icing to balance any bitterness. If you’re still concerned, use dark cocoa powder in the icing instead of black food coloring for a naturally dark color.
Pin This Recipe!
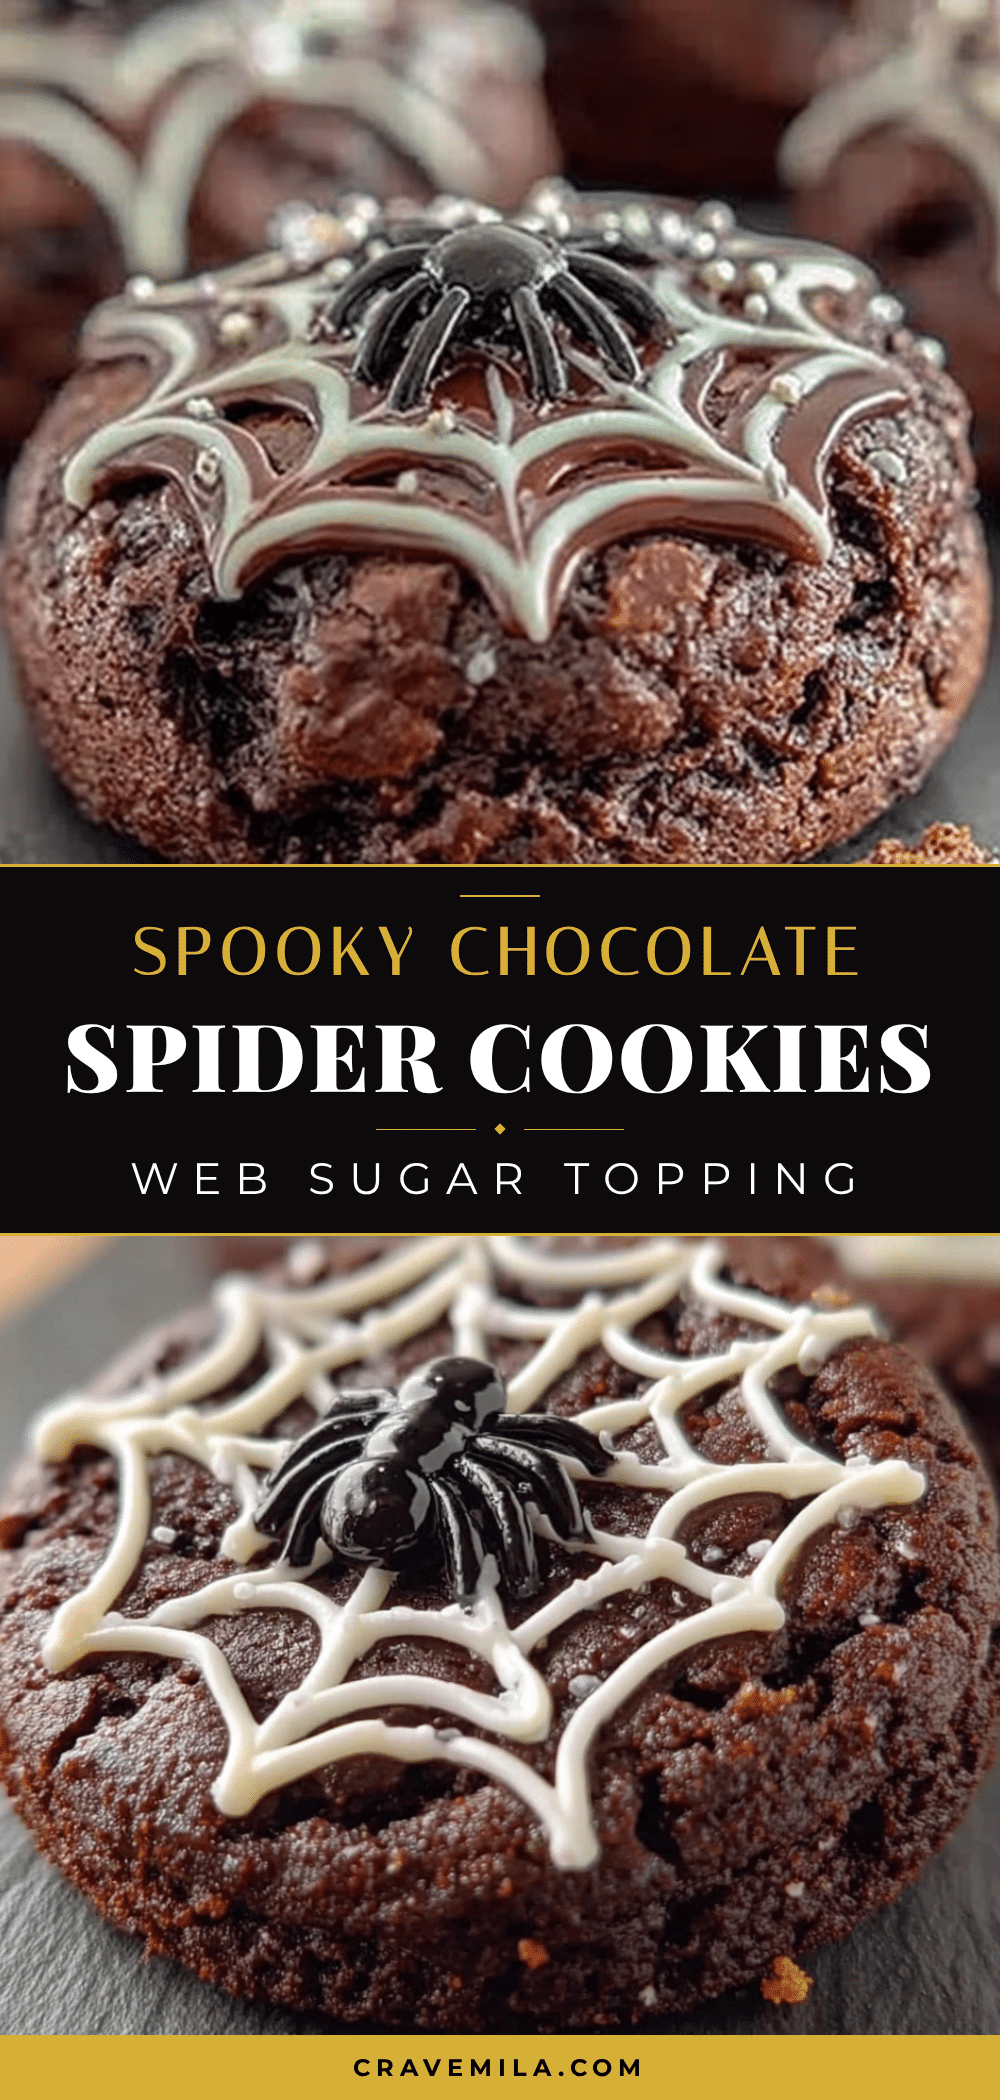
Spooky Spider Web Cookies: Easy Halloween Sugar Cookies
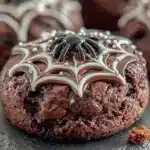
These spooky chocolate spider web cookies are the perfect Halloween treat—quick to make, easy to decorate, and always a crowd-pleaser. With a tender chocolate cookie base and a glossy royal icing spider web design, they look impressive but require no special skills.
- Prep Time: 20 minutes
- Cook Time: 10 minutes
- Total Time: 1 hour 30 minutes (includes chilling and decorating time)
- Yield: 24 cookies 1x
- Category: Dessert
- Cuisine: American
Ingredients
- 1 cup (226g) unsalted butter, softened
- 1/2 cup (100g) shortening
- 1 1/2 cups (300g) granulated sugar
- 2 large eggs, room temperature
- 2 teaspoons vanilla extract
- 3 cups (375g) all-purpose flour
- 3/4 cup (75g) unsweetened cocoa powder
- 1 teaspoon baking powder
- 1/2 teaspoon salt
- 3 cups (360g) powdered sugar, sifted
- 2 tablespoons meringue powder
- 4–5 tablespoons water
- 1/2 teaspoon vanilla extract
- Black gel food coloring
Instructions
- Cream the butter and shortening. In a large mixing bowl, beat the softened butter, shortening, and granulated sugar together on medium speed for 3-4 minutes until light and fluffy. Scrape down the sides of the bowl halfway through.
- Add eggs and vanilla. Beat in the eggs one at a time, mixing well after each addition. Add the vanilla extract and mix until combined.
- Mix dry ingredients. In a separate bowl, whisk together the flour, cocoa powder, baking powder, and salt. Gradually add this to the wet mixture, mixing on low speed just until the dough comes together. Do not overmix.
- Chill the dough. Divide the dough in half, flatten each half into a disc, wrap in plastic wrap, and refrigerate for at least 30 minutes.
- Preheat and prep. Preheat your oven to 350°F (175°C). Line two baking sheets with parchment paper. Lightly flour your work surface and rolling pin.
- Roll and cut. Roll one disc of dough to about 1/4-inch thickness. Cut out rounds using your cookie cutter and place them 2 inches apart on the prepared baking sheets. Gather the scraps, re-roll, and cut again.
- Bake. Bake for 8-10 minutes. The cookies are done when the edges are set and the tops look dry. Let them cool on the baking sheet for 5 minutes, then transfer to a cooling rack to cool completely.
- Make the royal icing. In a medium bowl, whisk together the powdered sugar and meringue powder. Add 4 tablespoons of water and the vanilla extract, then beat on medium speed for 4-5 minutes until the icing is thick and glossy. Adjust consistency with additional water or powdered sugar as needed.
- Color the icing. Divide the icing into two bowls. Leave one bowl white. Add black gel food coloring to the other bowl until desired darkness is reached. Transfer each color to separate piping bags or squeeze bottles fitted with small round tips.
- Pipe the base layer. Outline each cookie with white icing, then fill it in (flooding). Use a toothpick to spread the icing into the corners if needed. Let the base layer dry completely, about 30-45 minutes.
- Pipe the spider web. Once the base is dry, pipe a small dot of black icing in the center of each cookie. Pipe 3-4 concentric circles around the center dot, spacing them about 1/4 inch apart. While the black icing is still wet, use a toothpick to drag lines from the center outward through all the circles. Wipe the toothpick clean between each drag.
- Let set. Allow the icing to set completely, about 1-2 hours, until hard and shiny.
Notes
Chill the dough for at least 30 minutes to prevent spreading. Use gel food coloring for the icing, not liquid, to maintain consistency. Work in batches of 4-5 cookies when decorating to prevent the icing from crusting. For a gluten-free version, use a 1:1 gluten-free flour blend. For dairy-free, use vegan butter.
Nutrition
- Serving Size: 1 cookie
- Calories: 185
- Sugar: 18
- Sodium: 85
- Fat: 9
- Saturated Fat: 5
- Carbohydrates: 26
- Fiber: 1
- Protein: 2
Keywords: Halloween cookies, spider web cookies, sugar cookies, chocolate cookies, royal icing, easy Halloween dessert, spooky cookies