A neighbor asked why I couldn’t just skip the flour coating on my chicken thighs. I started to explain why that wouldn’t work—then stopped. She was holding a jar of honey, looking at me like I was making things harder than they needed to be. And honestly? I was.
I’d been making sticky chicken for years, always dusting each piece in flour, then cornstarch, then pan-frying until my kitchen looked like a flour bomb went off. It tasted good, sure. But the cleanup? A nightmare. The process? Way too fussy for a Tuesday night.
So I tried it her way. No flour, no cornstarch. Just chicken thighs, a hot pan, and a sticky honey garlic sauce that does all the heavy lifting. You know that moment when something works so well you almost feel stupid for not trying it sooner? That was this recipe. The chicken gets this beautiful caramelized crust straight from the sauce itself—no dredging required.
I made it on a Wednesday, which is saying something because Wednesdays are my “I have nothing left” days. The sauce bubbled up, got all thick and glossy, and clung to every piece of chicken like it was meant to be there. My partner walked in and asked what smelled so good. I pointed at the pan and said, “Dinner in twenty minutes.”
That was three months ago. I haven’t floured a chicken thigh since. This is the kind of recipe that makes you wonder why you ever complicated things in the first place. Maybe you’ve been there—standing in your kitchen, overthinking something that could be so simple. This one’s for you.
Why You’ll Love This Recipe
Let me tell you why this Quick Sticky Honey Garlic Chicken Thighs recipe has become my weeknight hero. I’ve tested it about seven times now, tweaking the sauce ratio, playing with cooking times, and even burning a batch (don’t ask). What I landed on is genuinely foolproof.
- Ready in 30 Minutes: From fridge to table in half an hour. No marinating, no complicated steps, just dinner that happens fast.
- Pantry Ingredients: Honey, soy sauce, garlic, chicken thighs. That’s basically it. You probably have all of this right now.
- One Pan, Minimal Mess: The sauce does the work, and you only dirty one skillet. My sink thanks me every time.
- Kid-Approved: The sweet-savory combo is basically magic for picky eaters. My niece calls it “candy chicken.”
- Restaurant Quality at Home: That glossy, sticky finish looks like something from a takeout menu. But you made it. In your kitchen. In your pajamas.
What makes this version different? It’s the sauce reduction technique. Most recipes tell you to simmer the sauce separately or add it at the end. I cook the chicken first, then build the sauce right in the same pan, letting it reduce and thicken around the meat. This means every bite is coated in that concentrated, sticky goodness. No watery sauce, no bland chicken—just pure flavor.
This isn’t just another honey garlic chicken recipe. It’s the one you’ll make on autopilot, the one you’ll text your friends about, the one that makes a regular Tuesday feel a little special. And honestly? That’s exactly what weeknight cooking should be.
What Ingredients You Will Need
This recipe uses simple, honest ingredients to create something that tastes way more complex than it is. Here’s what you’ll need and why each one matters.
- Chicken Thighs (boneless, skinless): About 1.5 pounds (680 grams). Thighs stay juicy and forgiving even if you cook them a minute too long. I prefer boneless for faster cooking, but bone-in works too—just add 8-10 minutes to the cooking time. Look for thighs that are similar in size so they cook evenly.
- Honey (⅓ cup / 110 grams): The star of the show. Use a runny honey, not crystallized, for the smoothest sauce. Local honey adds a nice floral note, but any good-quality honey works. If your honey is thick, microwave it for 10 seconds to loosen it up.
- Soy Sauce (¼ cup / 60 ml): Use low-sodium soy sauce so you control the salt level. Regular soy sauce works too, but cut back on any added salt. For a gluten-free version, swap in tamari or coconut aminos—they both work beautifully here.
- Garlic (4-5 cloves, minced): Fresh garlic makes a difference here. Pre-minced jarred garlic works in a pinch, but fresh gives that punchy, aromatic quality that makes the sauce sing. I use about 4 large cloves, but if you love garlic, go ahead and add 6.
- Rice Vinegar (2 tablespoons / 30 ml): This brightens the sauce and balances the sweetness. Apple cider vinegar works as a substitute, or even fresh lime juice in a pinch. Don’t skip it—the acidity is what keeps the dish from being cloying.
- Olive Oil (2 tablespoons / 30 ml): For searing the chicken. Avocado oil or vegetable oil also work great. Use something with a neutral flavor and a high smoke point.
- Salt and Black Pepper: To season the chicken. Go easy on the salt since the soy sauce adds plenty. Freshly ground black pepper adds a little warmth.
- Red Pepper Flakes (½ teaspoon, optional): For a tiny kick of heat. Totally optional, but I love the little tingle it adds. You can also skip it for a kid-friendly version.
- Green Onions (for garnish): Sliced thinly for a fresh, oniony finish. They add color and a slight crunch that contrasts nicely with the sticky sauce.
- Sesame Seeds (for garnish): Optional, but they make it look like you tried really hard. Toasted sesame seeds add a nutty flavor.
I buy my chicken thighs from Costco—the pack of boneless, skinless thighs is usually a great deal and freezes well. For the honey, I like the local stuff from the farmer’s market, but honestly, the store brand works just fine. The soy sauce I use is Kikkoman low-sodium because it’s consistent and available everywhere.
One note on substitutions: if you’re out of rice vinegar, don’t stress. Lemon juice works, or even a splash of white wine. The key is just having something acidic to balance the honey’s sweetness.
Equipment Needed
- Large Skillet (12-inch / 30 cm): A non-stick or well-seasoned cast iron skillet works best. You need enough surface area to sear the chicken without crowding. If your pan is too small, the chicken will steam instead of brown.
- Tongs: For flipping the chicken and moving it around. Metal tongs with silicone tips are my favorite—they grip well and won’t scratch non-stick pans.
- Measuring Cups and Spoons: For the sauce ingredients. A liquid measuring cup for the soy sauce and vinegar, dry measuring cups for the honey.
- Small Bowl: To mix the sauce ingredients together before adding them to the pan. This saves time and ensures everything is combined evenly.
- Sharp Knife and Cutting Board: For mincing garlic and slicing green onions. A good chef’s knife makes prep faster and safer.
- Wooden Spoon or Silicone Spatula: For stirring the sauce as it reduces. Wooden spoons are great because they don’t scratch your pan and they handle high heat well.
If you don’t have a 12-inch skillet, use the largest one you have. Just cook the chicken in batches if needed—crowding the pan is the enemy of a good sear. And if you’re using a cast iron skillet, make sure it’s well-seasoned so the sticky sauce doesn’t stick to the pan. I learned that one the hard way.
Preparation Method
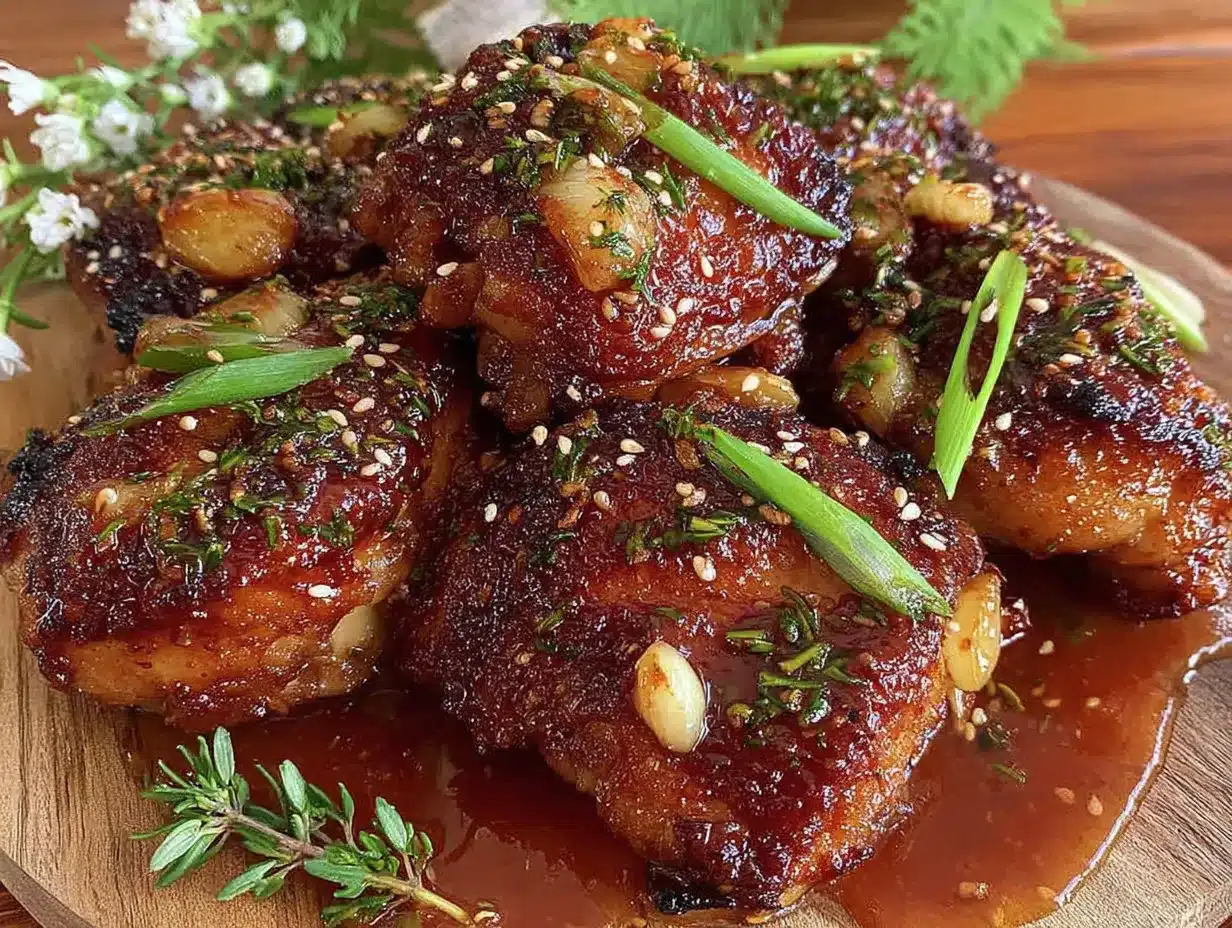
- Pat the chicken dry with paper towels. This is crucial—wet chicken won’t brown properly. Season both sides generously with salt and black pepper. Set aside while you make the sauce.
- In a small bowl, whisk together the honey, soy sauce, rice vinegar, minced garlic, and red pepper flakes (if using). Stir until the honey is fully incorporated. The mixture should be smooth and slightly runny.
- Heat your skillet over medium-high heat for about 2 minutes. Add the olive oil and swirl to coat the bottom. The oil should shimmer but not smoke—that’s your signal that the pan is ready.
- Place the chicken thighs in the pan in a single layer. Don’t move them for 4-5 minutes. You want a deep golden-brown crust to form. If you try to flip too early, the chicken will stick. Trust the process—it will release when it’s ready.
- Flip the chicken thighs using tongs. Cook for another 4-5 minutes on the second side. The chicken should be golden brown on both sides and almost cooked through. It’s okay if it’s not fully done—it will finish cooking in the sauce.
- Pour the sauce mixture into the pan around the chicken. It will sizzle and bubble immediately—that’s good. Reduce the heat to medium-low so the sauce doesn’t burn.
- Let the sauce simmer gently for 5-7 minutes, stirring occasionally with a wooden spoon. As it cooks, the sauce will thicken and become glossy. You’ll notice it coating the back of your spoon—that’s when you know it’s ready.
- Spoon the sauce over the chicken as it simmers to coat every piece. Flip the chicken once or twice to ensure even coverage. The sauce should be thick enough to cling to the chicken without running off.
- Check for doneness using an instant-read thermometer. The internal temperature should reach 165°F (74°C). If it’s not there yet, let it simmer for another 2-3 minutes.
- Remove from heat and let the chicken rest in the pan for 2 minutes. This allows the sauce to set slightly and the juices to redistribute.
- Transfer to a serving platter and spoon any remaining sauce from the pan over the top. Garnish with sliced green onions and sesame seeds.
One thing I learned the hard way: don’t walk away during step 7. The sauce can go from perfectly sticky to burnt sugar in about 30 seconds. Keep an eye on it, and if it starts looking too thick, add a tablespoon of water to loosen it up.
The smell at this point is unreal. Sweet, savory, garlicky—your kitchen will smell like a restaurant kitchen. And the best part? You’re about 25 minutes in with 5 minutes to go.
Cooking Tips & Techniques
I’ve made this Quick Sticky Honey Garlic Chicken Thighs recipe more times than I can count, and I’ve definitely made my share of mistakes. Here’s what I’ve learned so you don’t have to make them yourself.
Don’t skip drying the chicken. I know it seems like an extra step, but moisture is the enemy of browning. If your chicken is wet, it will steam instead of sear, and you’ll lose that beautiful golden crust. Pat it dry, season it, and let it sit for a minute before hitting the pan.
Use medium-high heat for searing. I used to be scared of high heat, worried I’d burn everything. But the truth is, you need that heat to get a good sear. The sugar in the sauce will caramelize later, but the initial browning comes from the heat of the pan and the oil. Trust the heat.
Watch the sauce like a hawk. Honey burns fast. I learned this when I answered my phone while the sauce was reducing and came back to a pan of blackened, bitter goo. Set a timer if you need to. Once the sauce starts bubbling and thickening, stay close.
If your sauce gets too thick too fast, add a splash of water or chicken broth. It will loosen up and continue reducing without burning. This saved me more than once.
Let the chicken rest. I know you’re hungry. I know it smells amazing. But giving the chicken those 2 minutes off the heat allows the sauce to set and the juices to redistribute. Cut into it too soon, and all that sticky goodness will run off onto the cutting board.
Double the sauce if you like extra. This recipe makes just enough to coat the chicken nicely. If you’re like me and want extra sauce for rice or vegetables, make 1.5 times the sauce ingredients. Just be prepared for a slightly longer reduction time.
Variations & Adaptations
One of the best things about this recipe is how flexible it is. Here are some ways to make it your own.
Spicy Honey Garlic Chicken: Add 1-2 teaspoons of sriracha or gochujang to the sauce for a spicy kick. The heat balances beautifully with the sweet honey. I tried this version when I had a cold and wanted something that would clear my sinuses—it worked.
Garlic Lovers Version: Double the garlic. Use 8-10 cloves instead of 4-5. Roast half of them first for a mellow, sweet garlic flavor, then add the rest fresh for that punchy kick. My garlic-loving friend begged me for this version, and now it’s her go-to.
Gluten-Free Adaptation: Swap the soy sauce for tamari or coconut aminos. That’s the only change needed. Everything else is naturally gluten-free. Serve with rice or quinoa for a complete meal.
Chicken Breast Option: Use boneless, skinless chicken breasts instead of thighs. Slice them in half horizontally to create thinner cutlets that cook faster. Reduce the searing time to 3 minutes per side. Watch the internal temperature carefully—breasts dry out faster than thighs.
Baked Version: Sear the chicken as directed, then transfer everything to a baking dish. Bake at 400°F (200°C) for 15-20 minutes, basting halfway through. This is great if you’re cooking for a crowd and don’t want to stand at the stove.
Vegetable Add-In: Add broccoli florets, bell pepper strips, or snap peas during the last 3 minutes of simmering. They’ll cook in the sauce and absorb all that sticky goodness. I did this on a night when I needed more vegetables, and it turned into a one-pan meal.
I tried the spicy version last week and honestly, it might be my new favorite. The heat sneaks up on you—subtle at first, then warm and lingering. Perfect for cold evenings.
Serving & Storage Suggestions
This Quick Sticky Honey Garlic Chicken Thighs is best served hot, right after the sauce has thickened and coated every piece. But here’s how to make the most of it.
Serving Temperature: Serve immediately while the sauce is still glossy and warm. The sauce will thicken as it cools, so don’t let it sit too long. If you need to keep it warm, cover loosely with foil and place in a 200°F (90°C) oven for up to 20 minutes.
What to Serve With It: Steamed jasmine rice is my go-to—it soaks up all that extra sauce perfectly. For a low-carb option, try cauliflower rice or a simple green salad. Roasted broccoli or green beans add color and crunch. I also love serving it with a side of quick-pickled cucumbers for a fresh, tangy contrast.
Storage Instructions: Store leftovers in an airtight container in the refrigerator for up to 4 days. The sauce will continue to absorb into the chicken, making it even more flavorful the next day. I actually look forward to leftovers—the flavors meld together beautifully overnight.
Reheating Tips: Reheat in a skillet over medium-low heat with a splash of water or chicken broth to loosen the sauce. Microwave works too, but the sauce can get a bit gummy. For best results, reheat gently and stir occasionally. Avoid high heat—it will burn the honey before the chicken is warm.
Freezer Instructions: This freezes surprisingly well. Place cooled chicken and sauce in a freezer-safe container for up to 3 months. Thaw overnight in the refrigerator, then reheat in a skillet. The sauce might separate slightly, but a good stir will bring it back together.
One thing I’ve noticed: the flavors actually get better after a day in the fridge. The garlic mellows out, the honey sinks into the chicken, and everything becomes more cohesive. So if you can wait, make it a day ahead.
Nutritional Information & Benefits
Here’s the approximate nutritional breakdown for one serving (about 2 chicken thighs with sauce, not including rice or sides):
| Nutrient | Amount Per Serving |
|---|---|
| Calories | 380-420 |
| Protein | 35g |
| Fat | 18g |
| Saturated Fat | 4g |
| Carbohydrates | 22g |
| Sugar | 18g |
| Sodium | 680mg |
| Fiber | 0g |
Chicken thighs are a great source of protein, iron, and B vitamins. They have more fat than chicken breasts, which is exactly why they stay juicy and flavorful during quick cooking. The honey provides quick energy, while the garlic offers anti-inflammatory benefits. If you’re watching your sugar intake, you can reduce the honey to ¼ cup—the sauce will still be sticky and delicious, just less sweet.
This recipe is naturally dairy-free and can be made gluten-free with a simple swap. It’s also nut-free, making it a safe option for many dietary needs. Just be mindful of the sodium content if you’re on a low-sodium diet—using low-sodium soy sauce helps, but the total is still moderate.
From my perspective, this is a balanced weeknight meal. It’s not “health food,” but it’s real food made with real ingredients. And sometimes, that’s exactly what we need.
Conclusion
This Quick Sticky Honey Garlic Chicken Thighs recipe has become my weeknight secret weapon. It’s fast, it’s forgiving, and it tastes like you spent way more time than you actually did. The sauce is that perfect balance of sweet and savory, the chicken stays juicy, and the whole thing comes together in one pan with minimal cleanup.
What I love most about this recipe is how adaptable it is. Make it spicy, make it mild, add vegetables, swap the protein—it works every time. It’s the kind of recipe you’ll memorize after making it twice, and then it becomes part of your regular rotation without you even realizing it.
I want to hear how it goes for you. Did you add extra garlic? Try it with broccoli? Burn the sauce like I did that one time? Drop a comment below and let me know. And if you loved it, share it with a friend who needs an easy dinner win. We all deserve meals that make us feel like we’ve got this cooking thing figured out.
Now go make some sticky chicken. Your weeknight self will thank you.
Frequently Asked Questions
Can I use chicken breasts instead of thighs?
Absolutely. Just slice them in half horizontally so they cook faster, and reduce the searing time to about 3 minutes per side. Keep an eye on the internal temperature—breasts dry out faster than thighs.
How do I prevent the sauce from burning?
Keep the heat at medium-low once you add the sauce, and stir it frequently. If it starts looking too thick, add a tablespoon of water to loosen it up. And don’t walk away—honey burns fast.
Can I make this ahead of time?
Yes! It actually tastes even better the next day. Store it in an airtight container in the fridge for up to 4 days. Reheat gently in a skillet with a splash of water to loosen the sauce.
Is this recipe gluten-free?
As written, it contains soy sauce which has gluten. But you can easily make it gluten-free by swapping the soy sauce for tamari or coconut aminos. Everything else is naturally gluten-free.
Can I freeze this dish?
Yes, it freezes well for up to 3 months. Let it cool completely, then transfer to a freezer-safe container. Thaw overnight in the refrigerator and reheat in a skillet. The sauce might separate slightly, but a good stir brings it back together.
Pin This Recipe!
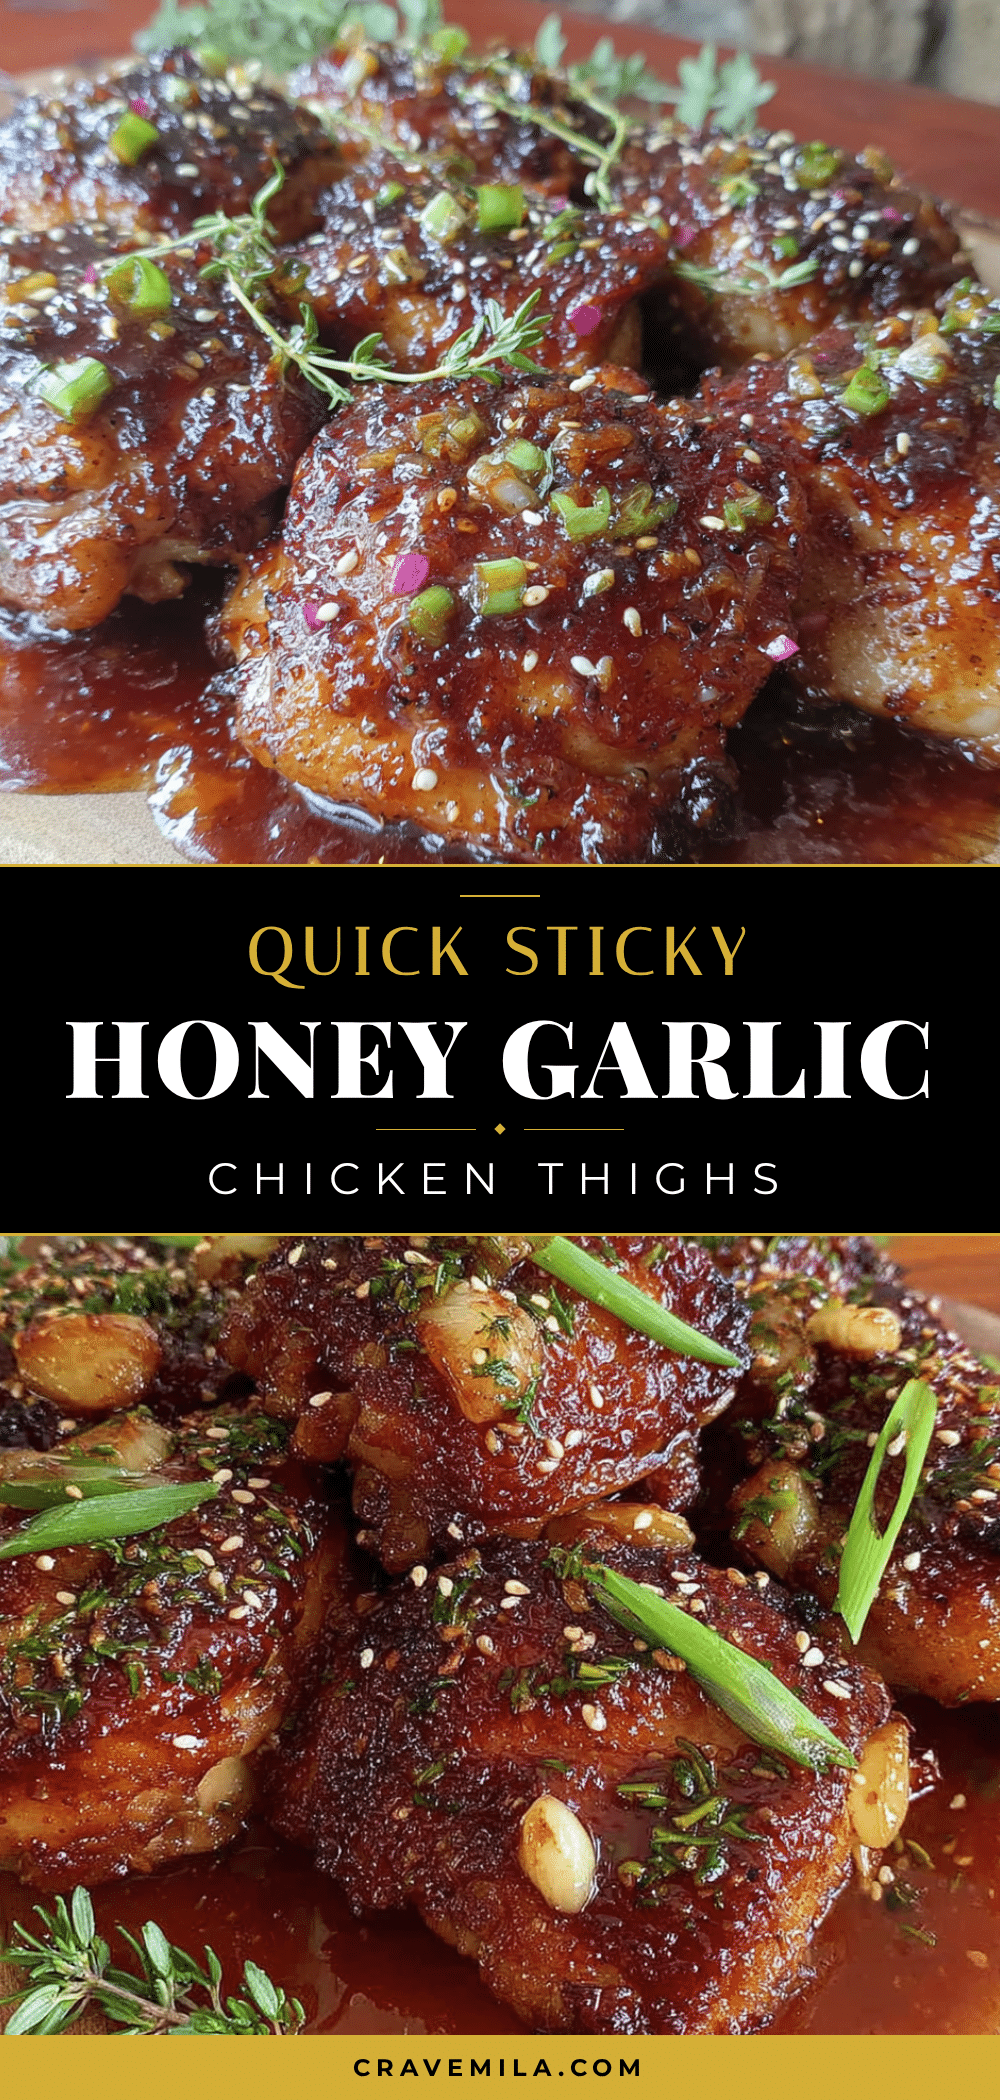
Quick Sticky Honey Garlic Chicken Thighs – Easy 30-Minute Dinner
Juicy chicken thighs are seared to perfection and coated in a glossy, sweet-savory honey garlic sauce. This one-pan, 30-minute dinner is a weeknight hero that requires no flour dredging and minimal cleanup.
- Prep Time: 10 minutes
- Cook Time: 20 minutes
- Total Time: 30 minutes
- Yield: 4 servings 1x
- Category: Main Course
- Cuisine: Asian-inspired
Ingredients
- 1.5 pounds (680 grams) boneless, skinless chicken thighs
- 1/3 cup (110 grams) honey
- 1/4 cup (60 ml) low-sodium soy sauce
- 4–5 cloves garlic, minced
- 2 tablespoons (30 ml) rice vinegar
- 2 tablespoons (30 ml) olive oil
- Salt and black pepper, to taste
- 1/2 teaspoon red pepper flakes (optional)
- Green onions, sliced (for garnish)
- Sesame seeds (for garnish)
Instructions
- Pat the chicken dry with paper towels. Season both sides generously with salt and black pepper. Set aside.
- In a small bowl, whisk together honey, soy sauce, rice vinegar, minced garlic, and red pepper flakes (if using) until smooth.
- Heat a large skillet over medium-high heat for 2 minutes. Add olive oil and swirl to coat.
- Place chicken thighs in the pan in a single layer. Cook without moving for 4-5 minutes until deep golden brown.
- Flip the chicken using tongs. Cook for another 4-5 minutes on the second side until golden brown and almost cooked through.
- Pour the sauce mixture into the pan around the chicken. Reduce heat to medium-low.
- Let the sauce simmer gently for 5-7 minutes, stirring occasionally, until thickened and glossy. Spoon sauce over chicken as it simmers.
- Check for doneness with an instant-read thermometer (internal temperature should reach 165°F / 74°C). If needed, simmer 2-3 more minutes.
- Remove from heat and let chicken rest in the pan for 2 minutes.
- Transfer to a serving platter, spoon remaining sauce over the top, and garnish with sliced green onions and sesame seeds.
Notes
Pat chicken dry for best browning. Watch the sauce closely as honey burns quickly; if it gets too thick, add a splash of water. Let chicken rest 2 minutes before serving. Double the sauce if you like extra for rice or vegetables.
Nutrition
- Serving Size: 2 chicken thighs wit
- Calories: 400
- Sugar: 18
- Sodium: 680
- Fat: 18
- Saturated Fat: 4
- Carbohydrates: 22
- Protein: 35
Keywords: honey garlic chicken, sticky chicken, quick chicken dinner, 30-minute meal, one-pan chicken, boneless chicken thighs, easy weeknight dinner



