I was at the hardware store, of all places, picking up a new furnace filter last December. The guy at the counter, an older man named Frank who I’d only ever exchanged nods with, was carefully writing something on a scrap of register tape. I figured it was a part number or a measurement. Nope. He slid it across the counter and said, “My wife makes these every year. You look like you could use some.” It was a recipe for gingerbread cheesecake bars, scribbled in shaky handwriting with a note at the bottom: “Don’t skip the foil.” I laughed, thanked him, and stuffed the tape in my pocket, honestly not expecting much. I mean, a recipe from a hardware store counter?
But later that week, with a fridge full of cream cheese and a serious craving for something spiced and sweet, I pulled that scrap of paper out. I was skeptical. The instructions were barely three lines long. But let me tell you, I was not prepared for how good they turned out. The crust was buttery and crisp, the cheesecake layer was impossibly smooth, and that gingerbread flavor—warm, snappy, and deep—hit every single note. I made a second batch the very next day. These quick gingerbread cheesecake bars with cream cheese frosting have become a non-negotiable part of my holiday baking, and they start with a story I never saw coming. Maybe you’ve been there, finding a gem in the most unlikely place. Trust me on this one.
Why You’ll Love This Recipe
Let’s be real—the holidays are chaotic. You’re juggling work, family, and trying to make everything feel magical, which usually means you’re exhausted. That’s exactly why these quick gingerbread cheesecake bars with cream cheese frosting are the answer you didn’t know you needed. They look like you spent hours in the kitchen, but the truth is, they come together in under an hour with mostly pantry staples. No water bath, no fussy crust, no stress.
- Quick & Easy: From start to finish, you’re looking at about 45 minutes of active time. The hardest part is waiting for them to chill. Perfect for a Tuesday night baking spree.
- Simple Ingredients: You probably already have molasses, ginger, cinnamon, and cream cheese in your fridge. No need for a specialty grocery run.
- Perfect for Holiday Gatherings: These bars are a showstopper on a cookie platter or dessert table. They cut cleanly, travel well, and everyone asks for the recipe.
- Crowd-Pleaser: The combo of tangy cheesecake and spiced gingerbread is a flavor marriage that works for kids and adults alike. I’ve seen people who “don’t like cheesecake” go back for seconds.
- Unbelievably Delicious: The texture is what gets you. That crisp, buttery crust gives way to a silky, creamy center with just the right amount of spice. It’s comfort food, but make it fancy.
What makes this different from every other gingerbread bar out there? It’s the balance. Most versions are either too sweet or too heavy. This one uses a clever trick—a combination of brown sugar and molasses in the crust, and a cream cheese layer that’s not overly sweetened. The cream cheese frosting on top adds just enough richness without making it cloying. It’s not just another recipe; it’s the one I’ve tested six times to get the ratios perfect. Honestly, it’s the kind of dessert that makes you close your eyes after the first bite. That’s the goal.
What Ingredients You Will Need
This recipe uses simple, wholesome ingredients to deliver big flavor. Most of these are pantry staples, which is exactly what you want when you’re short on time. I’ve tested this with a few different brands, and here’s what I recommend for the best texture and taste.
For the Gingerbread Crust
- 1 ½ cups (180g) all-purpose flour – Spoon and level it for accuracy. Too much flour makes the crust dry.
- ½ cup (100g) packed light brown sugar – Adds moisture and a deeper molasses note. Dark brown sugar works too, but it’ll be more intense.
- 1 teaspoon ground ginger – Use a fresh jar for the best punch. Old ginger can taste flat.
- 1 teaspoon ground cinnamon – The backbone of the spice blend.
- ¼ teaspoon ground cloves – Just a pinch. It’s strong, so don’t overdo it.
- ¼ teaspoon salt – Balances the sweetness.
- ½ cup (113g) unsalted butter, melted – I use Land O’Lakes. Let it cool slightly so it doesn’t cook the sugar.
- 2 tablespoons molasses – Use unsulphured molasses. Blackstrap is too bitter here. Grandma’s brand is my go-to.
For the Cheesecake Layer
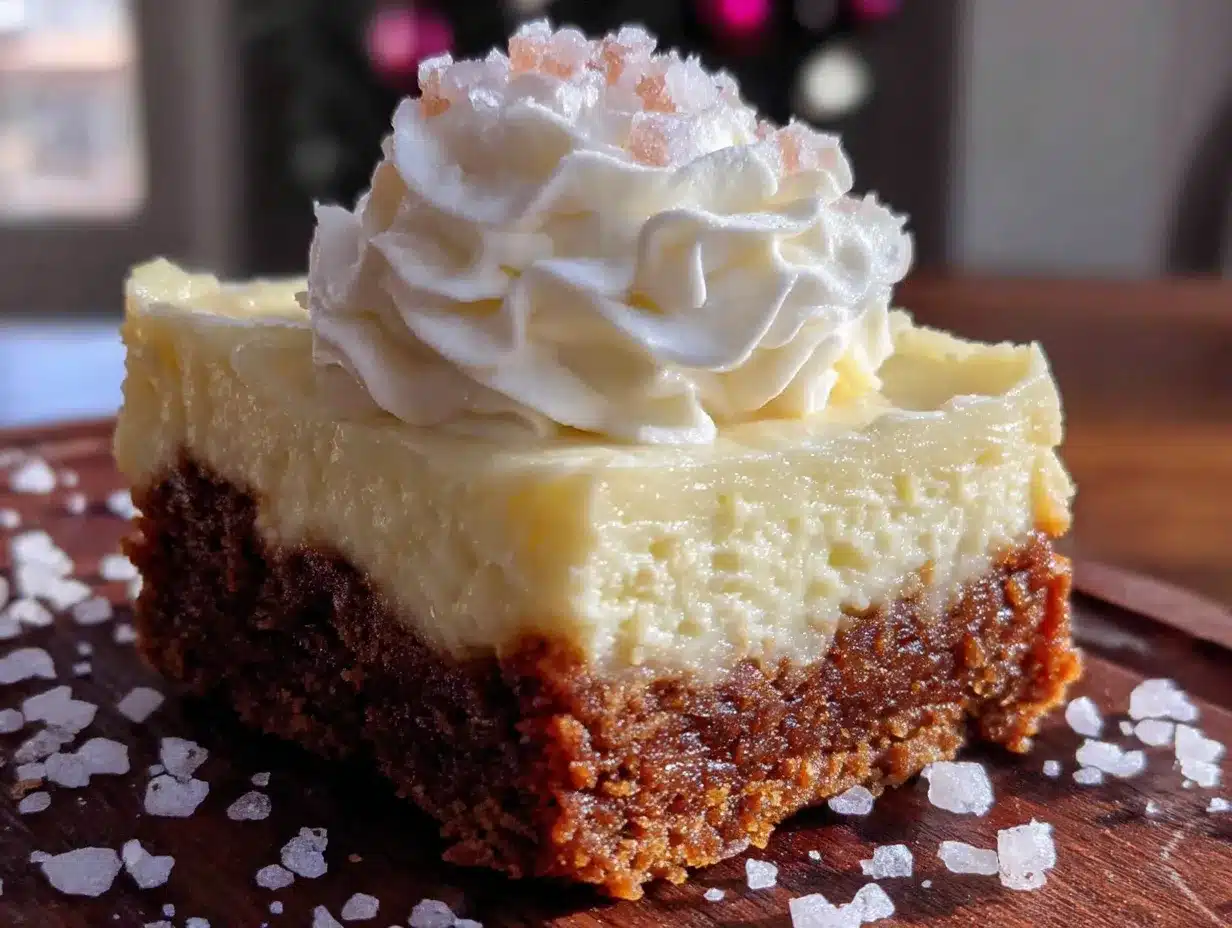
- 16 oz (450g) cream cheese, softened – Full-fat is non-negotiable for that silky texture. Set it out for 30 minutes beforehand. Philadelphia is my trusted brand.
- ½ cup (100g) granulated sugar – Just enough to sweeten without overpowering the spice.
- 2 large eggs, room temperature – Cold eggs can curdle the batter. Let them sit in warm water for 5 minutes if you’re in a rush.
- 1 teaspoon vanilla extract – Pure, not imitation. It makes a difference.
- 1 tablespoon all-purpose flour – This stabilizes the cheesecake and prevents cracking.
For the Cream Cheese Frosting
- 4 oz (113g) cream cheese, softened – Again, full-fat and softened.
- ¼ cup (56g) unsalted butter, softened – Not melted. Softened is key for a fluffy texture.
- 1 cup (120g) powdered sugar – Sift it if it’s lumpy. Nobody wants a gritty frosting.
- ½ teaspoon vanilla extract – Adds warmth.
- Pinch of salt – Cuts the sweetness.
Ingredient Selection Tip: For the cream cheese, avoid the low-fat or whipped versions. They have too much water, which makes the cheesecake layer runny and the frosting thin. Trust me, I learned that the hard way. If you need a dairy-free option, use a high-quality plant-based cream cheese block, not the spreadable kind. Kite Hill works well.
Equipment Needed
You don’t need a fancy kitchen to pull these off. Here’s what you’ll need:
- 9×9-inch baking pan – Glass or metal works. I prefer metal for a crisper crust, but glass is fine. If you use ceramic, you might need to add 5 minutes to the bake time.
- Parchment paper or aluminum foil – Frank was right. Don’t skip the foil. You need an overhang to lift the bars out cleanly. I use parchment paper now because it’s less likely to tear.
- Electric hand mixer or stand mixer – A hand mixer is totally fine. A stand mixer is a luxury. You can mix the crust by hand, but the cheesecake layer needs a bit of power to get smooth.
- Mixing bowls – One medium, one large.
- Spatula – For scraping every last bit of batter. A rubber spatula is your best friend here.
- Measuring cups and spoons – Accurate measurements matter, especially for the flour and sugar.
- Sharp knife – For clean cuts. Run it under hot water and wipe it between slices.
Budget-Friendly Tip: Don’t have a 9×9 pan? Use an 8×8 pan, but expect thicker bars and a slightly longer bake time. Just keep an eye on it. An 11×7 pan works too, but the bars will be thinner and bake faster. Adjust accordingly.
Preparation Method
Let’s get baking. I’ve broken this down into clear steps so you don’t miss a beat. Take your time with the cream cheese—it’s the star of the show.
- Preheat your oven to 350°F (175°C). Line your 9×9-inch pan with parchment paper or foil, leaving a 2-inch overhang on two opposite sides. This is your handle for lifting the bars out later. Lightly grease the paper or foil with cooking spray.
- Make the crust. In a medium bowl, whisk together the flour, brown sugar, ginger, cinnamon, cloves, and salt. Make sure there are no lumps of brown sugar. Pour in the melted butter and molasses. Stir with a fork until it looks like wet sand and holds together when pressed. Don’t overmix—it’ll get tough.
- Press the crust into the pan. Dump the mixture into your prepared pan. Use the bottom of a measuring cup or a flat glass to press it down firmly and evenly. Pop it in the oven and bake for 12 minutes. It should look set and smell amazing. Set it aside to cool while you make the filling. Don’t turn off the oven.
- Make the cheesecake layer. In a large bowl, beat the softened cream cheese with an electric mixer on medium speed until smooth and creamy—about 2 minutes. Scrape down the sides and the bottom of the bowl. Add the sugar and beat for another minute until fluffy. Add the eggs one at a time, beating on low after each just until combined. Overmixing at this stage adds too much air, which can cause cracks. Mix in the vanilla and the tablespoon of flour until just smooth.
- Pour the filling over the crust. Use your spatula to spread it evenly. Tap the pan gently on the counter a few times to release any air bubbles. Bake for 25 to 30 minutes. The edges should be set, but the center should still jiggle slightly when you shake the pan. That’s the sweet spot. Overbaking makes it dry.
- Cool the cheesecake. Place the pan on a wire rack and let it cool completely at room temperature. This takes about an hour. Then, cover it loosely with plastic wrap and refrigerate for at least 4 hours, but overnight is best. Patience pays off here—the texture gets so much better after a full chill.
- Make the frosting. When you’re ready to serve, beat the softened cream cheese and butter together until smooth and fluffy. Add the powdered sugar, vanilla, and salt. Beat on low until combined, then crank it up to medium-high for 2 minutes until it’s light and airy. If it’s too thick, add a teaspoon of milk. Too thin? Add a tablespoon more powdered sugar.
- Frost and slice. Spread the frosting evenly over the chilled cheesecake. Use a sharp knife to cut into 16 squares. For the cleanest cuts, wipe the knife with a damp paper towel between slices. Serve cold or let them sit at room temperature for 10 minutes for a softer texture.
Personal Tip: The first time I made these, I was in a hurry and didn’t let the cream cheese soften. The batter was lumpy, and the cheesecake layer had weird pockets of cold cream cheese. It still tasted good, but the texture was off. Set your cream cheese out 30 minutes before you start. It’s worth it.
Cooking Tips & Techniques
I’ve made these bars more times than I can count, and I’ve learned a few things the hard way. Here’s how to nail it every time.
Don’t overmix the crust. I know it’s tempting to keep stirring until it’s perfectly uniform, but overmixing develops the gluten in the flour, making the crust tough. You want it to be tender and crumbly, not like a hockey puck. Mix just until it’s combined and holds together when pinched.
The water bath shortcut. Traditional cheesecake recipes call for a water bath to prevent cracks. I don’t use one here. The crust is sturdy enough, and the short bake time means cracks are less likely. But if you’re nervous, place a shallow pan of hot water on the lower oven rack while baking. The steam keeps the cheesecake moist. I’ve done it both ways, and honestly, the steam pan trick works just as well without the risk of water leaking into your crust.
Watch the center. The biggest mistake people make is overbaking. The center should still jiggle when you take it out of the oven. It will continue to set as it cools. If you wait until the center is completely firm, you’ll end up with a dry, cracked cheesecake. I learned this after ruining a batch for a party. It was still edible, but not pretty.
Chill time is non-negotiable. I know you want to eat them right away. I get it. But if you cut into them too soon, the cheesecake layer will be soft and messy. Four hours is the minimum. Overnight is ideal. The flavors meld, the texture firms up, and the frosting sets beautifully. Trust the process.
Multitasking tip: While the crust is baking, wash your mixing bowl. You’ll need it for the cheesecake layer. Also, set your cream cheese and eggs out to warm up while the crust cools. It saves time and keeps your workflow smooth.
Variations & Adaptations
One of the best things about these bars is how flexible they are. Here are a few ways I’ve switched things up over the years.
Gluten-Free Version
Swap the all-purpose flour in the crust with a 1:1 gluten-free baking flour blend. I use Bob’s Red Mill. The texture is slightly more crumbly, but the flavor is spot on. For the tablespoon of flour in the cheesecake layer, use the same blend or cornstarch. It works perfectly.
Spice It Up
If you love a bold gingerbread flavor, add a pinch of black pepper and a dash of nutmeg to the crust. It sounds weird, but black pepper actually enhances the warmth of the ginger. I tried it after reading about it in an old cookbook, and it’s now my go-to. Also, swap the ground ginger for 1 tablespoon of finely grated fresh ginger. It adds a sharp, zesty kick that’s incredible.
Chocolate Gingerbread
For a richer twist, add ¼ cup of cocoa powder to the crust mixture and reduce the flour by 2 tablespoons. The chocolate and gingerbread combo is surprisingly good. I made this for a friend who’s a chocoholic, and she said it was the best dessert I’ve ever made. High praise.
Pumpkin Cheesecake Bars
Not a gingerbread fan? Replace the molasses in the crust with 2 tablespoons of maple syrup, and add ½ cup of pumpkin puree to the cheesecake layer. Increase the flour in the cheesecake to 2 tablespoons to absorb the extra moisture. It’s a fall favorite in my house.
Personal Variation: I once made these with a gingersnap cookie crust instead of the homemade one. I crushed about 1 ½ cups of store-bought gingersnaps, mixed them with ¼ cup melted butter, and pressed it into the pan. It was delicious, but the crust was a bit sweeter and less sturdy. If you’re in a huge rush, it’s a fine shortcut, but the homemade crust is worth the extra 5 minutes.
Serving & Storage Suggestions
These bars are versatile, and how you serve them can change the whole experience. Here’s what I recommend.
Serving Temperature: I like them cold straight from the fridge. The cheesecake layer is firm and almost fudge-like, and the frosting is thick and creamy. But if you prefer a softer texture, let them sit at room temperature for 15 minutes before serving. They become luscious and melt-in-your-mouth.
Presentation: For a pretty finish, dust the tops with a little ground cinnamon or cocoa powder. Add a few candied ginger pieces on top for a pop of color and texture. If you’re serving them for a holiday party, arrange them on a platter with fresh rosemary sprigs and cranberries. It looks festive and costs almost nothing.
Complementary Pairings: These bars are amazing with a cup of strong black coffee or a spiced chai latte. For a boozy option, a glass of bourbon or a dark rum cocktail cuts through the sweetness beautifully. If you’re serving them as a dessert, a dollop of lightly sweetened whipped cream on the side is never a bad idea.
Storage: Store the bars in an airtight container in the refrigerator for up to 5 days. Place a layer of wax paper between the bars to prevent the frosting from sticking. They actually taste better on day two, after the flavors have had time to meld. I’ve tested this, and it’s true.
Freezing: These freeze beautifully. Wrap the entire pan or individual bars tightly in plastic wrap, then in a layer of aluminum foil. Freeze for up to 3 months. To thaw, move them to the refrigerator overnight. The texture remains perfect. I often make a double batch and freeze one pan for later. It’s a lifesaver during the holiday rush.
Reheating: I don’t recommend microwaving these. It melts the frosting and makes the cheesecake layer weepy. If you want them warm, let them sit at room temperature. The only exception is if you’re serving them with a warm sauce, like a caramel or chocolate drizzle. That works beautifully.
Nutritional Information & Benefits
Let’s be honest—these are a treat, not a health food. But knowing what’s in them helps you enjoy them mindfully. Here’s the breakdown for one bar (based on 16 servings).
| Nutrient | Amount per Serving |
|---|---|
| Calories | 310 |
| Total Fat | 20g |
| Saturated Fat | 12g |
| Cholesterol | 85mg |
| Sodium | 210mg |
| Total Carbohydrates | 30g |
| Dietary Fiber | 0.5g |
| Sugars | 22g |
| Protein | 5g |
Health Benefits: The ginger in this recipe isn’t just for flavor. It’s known for its anti-inflammatory properties and can help with digestion. The cinnamon adds antioxidants, and the cream cheese provides a decent amount of calcium and protein. Of course, these benefits are overshadowed by the sugar and fat content, but hey, it’s a dessert. Everything in moderation, right?
Dietary Considerations: This recipe contains gluten, dairy, and eggs. For a gluten-free version, see the variations section. For a dairy-free version, use plant-based cream cheese and butter. I’ve tried it with Kite Hill cream cheese, and it works, but the texture is slightly less creamy. For an egg-free version, you can try a flax egg (1 tablespoon flaxseed meal + 3 tablespoons water per egg), but I haven’t tested it personally. If you do, let me know how it turns out.
Personal Perspective: I believe in enjoying food without guilt. These bars are a holiday tradition in my house, and I make them knowing they’re a special-occasion treat. I pair them with a healthy meal earlier in the day and savor every bite. That’s balance.
Conclusion
So there you have it—quick gingerbread cheesecake bars with cream cheese frosting that came to me from a hardware store counter and a guy named Frank. They’ve become a staple in my kitchen, and I honestly can’t imagine the holidays without them. The combination of that spiced, buttery crust, the silky cheesecake, and the tangy frosting is just unbeatable. It’s the kind of dessert that makes you slow down and actually taste every layer.
I hope you give these a try. Customize them however you like—add chocolate, go gluten-free, or pile on the candied ginger. Make them your own. That’s the beauty of a good recipe. It’s a starting point, not a rulebook. If you make a batch, I’d love to hear about it. Leave a comment below and tell me how they turned out. Did you add a twist? Did your family devour them in one sitting? Share your wins and your lessons. We’re all learning together here.
Happy baking, and remember—sometimes the best recipes come from the most unexpected places. Keep your eyes open, and maybe ask the next person you meet for their secret. You never know what you’ll find.
Frequently Asked Questions
Can I use a different pan size?
Yes, but the bake time will change. An 8×8 pan makes thicker bars and needs about 5 extra minutes. An 11×7 pan makes thinner bars and needs about 5 fewer minutes. Keep an eye on the center jiggle as your guide.
Why did my cheesecake layer crack?
Cracks usually happen from overbaking or overmixing. Make sure you pull the bars when the center still jiggles slightly. Also, beat the cream cheese and sugar just until smooth—don’t whip in too much air. A steam pan on the lower rack can also help prevent cracks.
Can I make these ahead of time?
Absolutely. These bars actually taste better after a day in the fridge. You can make them up to 3 days in advance. Store them covered in the refrigerator, and add the frosting just before serving for the freshest look.
Can I skip the frosting?
Sure, but the frosting adds a lovely tangy creaminess that balances the spice. If you want a lighter option, dust the bars with powdered sugar instead. Or try a drizzle of caramel sauce. It’s your call.
How do I get clean slices?
Use a sharp knife and run it under hot water between cuts. Wipe the blade clean with a damp paper towel after each slice. Chilling the bars for at least 4 hours (or overnight) is essential for clean edges. Patience is key here.
Pin This Recipe!
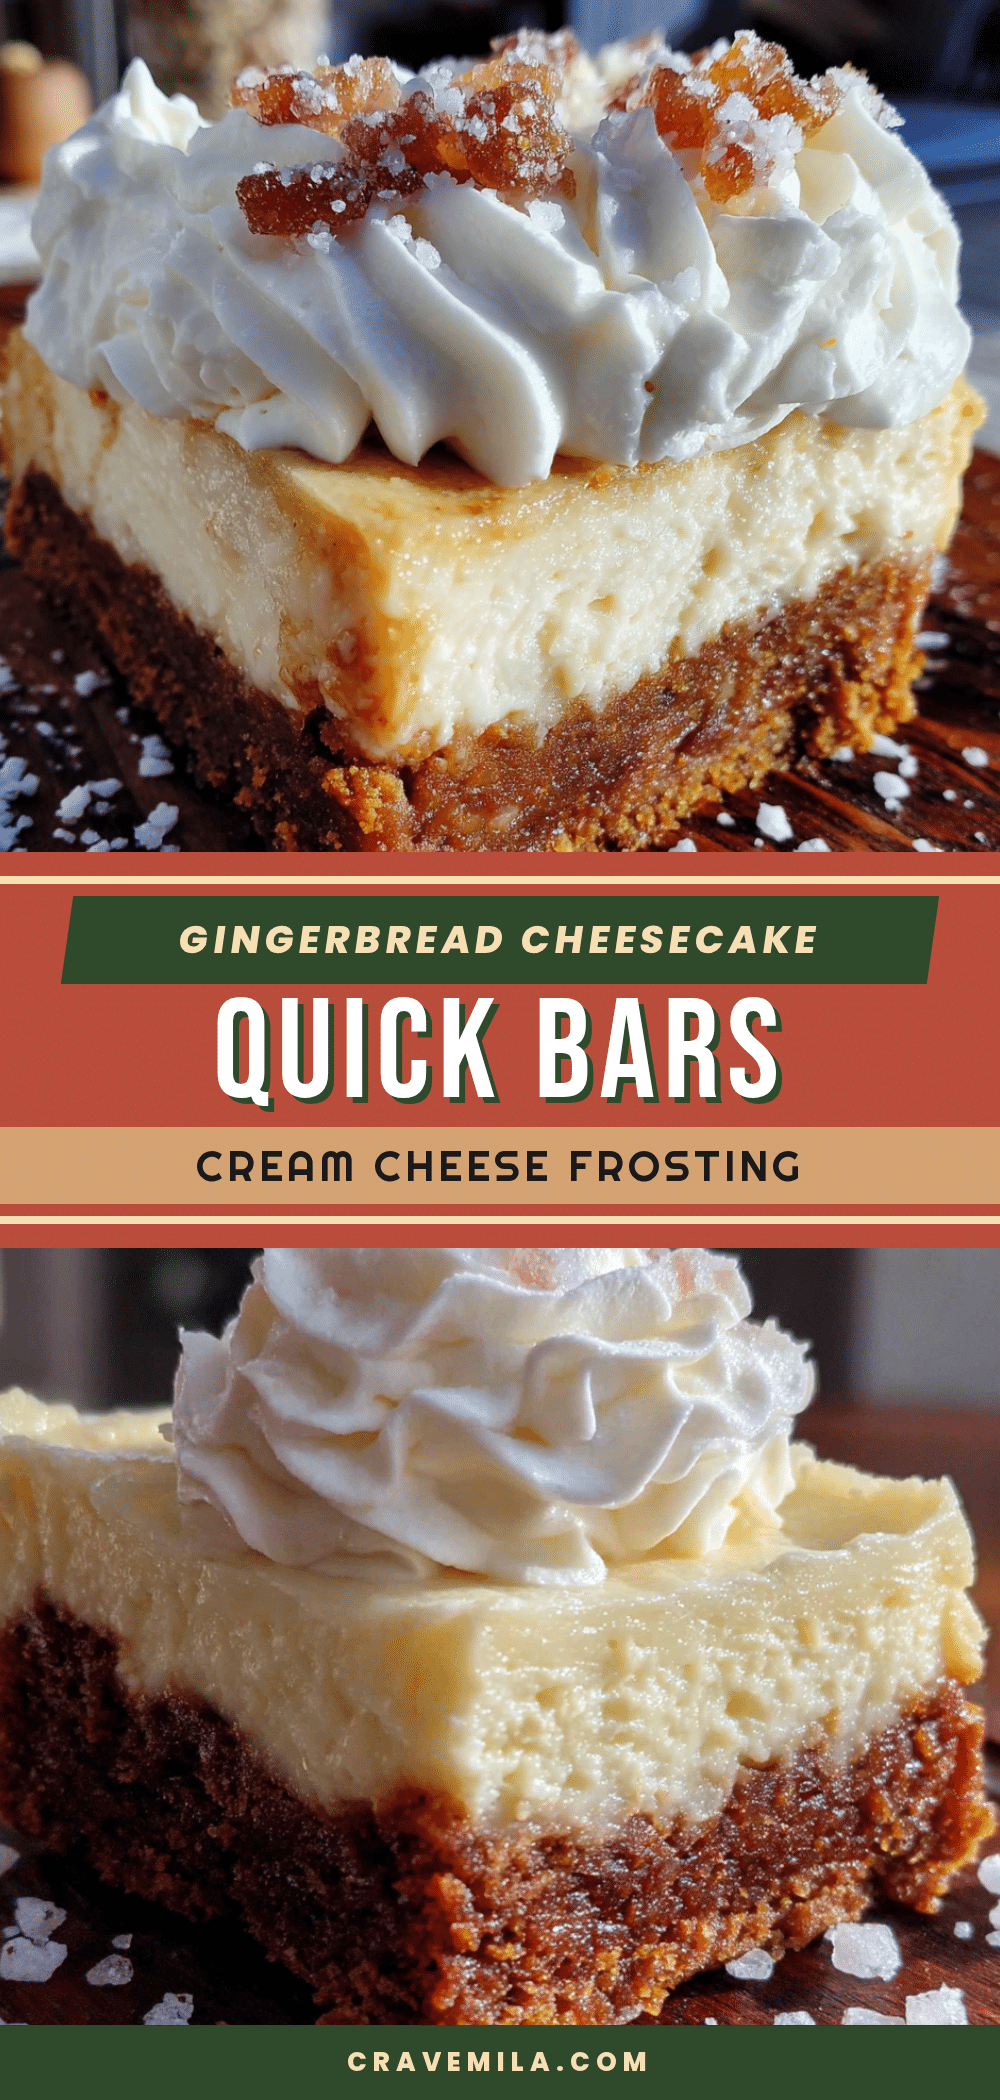
Quick Gingerbread Cheesecake Bars with Easy Cream Cheese Frosting
These quick gingerbread cheesecake bars feature a buttery, spiced crust, a silky smooth cheesecake layer, and a tangy cream cheese frosting. They come together in under an hour with simple ingredients, making them a perfect holiday treat.
- Prep Time: 15 minutes
- Cook Time: 30 minutes
- Total Time: 45 minutes
- Yield: 16 servings 1x
- Category: Dessert
- Cuisine: American
Ingredients
- 1 ½ cups (180g) all-purpose flour
- ½ cup (100g) packed light brown sugar
- 1 teaspoon ground ginger
- 1 teaspoon ground cinnamon
- ¼ teaspoon ground cloves
- ¼ teaspoon salt
- ½ cup (113g) unsalted butter, melted
- 2 tablespoons molasses
- 16 oz (450g) cream cheese, softened
- ½ cup (100g) granulated sugar
- 2 large eggs, room temperature
- 1 teaspoon vanilla extract
- 1 tablespoon all-purpose flour
- 4 oz (113g) cream cheese, softened
- ¼ cup (56g) unsalted butter, softened
- 1 cup (120g) powdered sugar
- ½ teaspoon vanilla extract
- Pinch of salt
Instructions
- Preheat your oven to 350°F (175°C). Line your 9×9-inch pan with parchment paper or foil, leaving a 2-inch overhang on two opposite sides. Lightly grease the paper or foil with cooking spray.
- Make the crust: In a medium bowl, whisk together the flour, brown sugar, ginger, cinnamon, cloves, and salt. Pour in the melted butter and molasses. Stir with a fork until it looks like wet sand and holds together when pressed.
- Press the crust into the pan. Use the bottom of a measuring cup or a flat glass to press it down firmly and evenly. Bake for 12 minutes. Set aside to cool while you make the filling. Do not turn off the oven.
- Make the cheesecake layer: In a large bowl, beat the softened cream cheese with an electric mixer on medium speed until smooth and creamy—about 2 minutes. Scrape down the sides and bottom. Add the sugar and beat for another minute until fluffy. Add the eggs one at a time, beating on low after each just until combined. Mix in the vanilla and the tablespoon of flour until just smooth.
- Pour the filling over the crust. Use a spatula to spread it evenly. Tap the pan gently on the counter a few times to release air bubbles. Bake for 25 to 30 minutes. The edges should be set, but the center should still jiggle slightly when you shake the pan.
- Cool the cheesecake: Place the pan on a wire rack and let it cool completely at room temperature (about 1 hour). Then, cover loosely with plastic wrap and refrigerate for at least 4 hours, but overnight is best.
- Make the frosting: Beat the softened cream cheese and butter together until smooth and fluffy. Add the powdered sugar, vanilla, and salt. Beat on low until combined, then on medium-high for 2 minutes until light and airy. If too thick, add a teaspoon of milk; if too thin, add a tablespoon more powdered sugar.
- Frost and slice: Spread the frosting evenly over the chilled cheesecake. Use a sharp knife to cut into 16 squares. For clean cuts, wipe the knife with a damp paper towel between slices. Serve cold or let sit at room temperature for 10 minutes for a softer texture.
Notes
Don’t skip the foil or parchment overhang for easy removal. Let cream cheese soften for 30 minutes before starting. Chill for at least 4 hours, preferably overnight, for best texture. For clean slices, run knife under hot water and wipe between cuts.
Nutrition
- Serving Size: 1 bar
- Calories: 310
- Sugar: 22
- Sodium: 210
- Fat: 20
- Saturated Fat: 12
- Carbohydrates: 30
- Fiber: 0.5
- Protein: 5
Keywords: gingerbread cheesecake bars, cream cheese frosting, holiday dessert, quick dessert, easy cheesecake bars