This was supposed to be a pumpkin pie. I had the evaporated milk, the eggs, the whole nine yards. My daughter, Mia, was “helping” by handing me ingredients, and somewhere between her asking for the fifth time if the pie was done yet and me realizing I had forgotten to buy a pie crust, everything fell apart. I was already running late for a family dinner, the kitchen was a disaster, and I had a bowl of spiced pumpkin filling with nowhere to go. In a moment of pure desperation—and maybe a little bit of stubbornness—I grabbed a box of gingersnaps from the pantry, crushed them up with some melted butter, and pressed them into a springform pan. What came out was nothing like the plan, and honestly, it was so much better. That first bite had this unexpected crunch from the spiced cookie crust, followed by a silky, creamy pumpkin filling that was way less fussy than any baked pie I had ever made. The kids at dinner didn’t even look at the store-bought pie on the counter—they went straight for this no-bake version. I mean, maybe you’ve been there, staring at a kitchen fail and wondering how to salvage it. This recipe is proof that sometimes the best things happen when you stop trying so hard.
Why You’ll Love This Recipe
This kid-approved no-bake pumpkin cheesecake with gingersnap crust is a total game-changer for busy families. It’s the kind of dessert that makes you look like a hero without spending hours in the kitchen.
- No Oven Required: Perfect for those days when the oven is already full or when you just don’t want to deal with the heat. It comes together in about 20 minutes of active time.
- Simple Ingredients: You probably already have most of what you need in your pantry and fridge. No fancy grocery store runs for obscure ingredients.
- Perfect for Family Gatherings: Whether it’s a Thanksgiving potluck, a fall birthday party, or just a regular Tuesday night, this cheesecake always gets rave reviews from kids and adults alike.
- Crowd-Pleaser: The combination of spicy gingersnaps and creamy pumpkin is a match made in heaven. Even picky eaters go back for seconds.
- Make-Ahead Friendly: You can prepare this the night before and just pull it out when you’re ready to serve. One less thing to worry about on a busy day.
What makes this recipe different from the rest is the texture. The no-bake method creates a filling that’s incredibly light and mousse-like, not dense or heavy like a traditional baked cheesecake. Plus, the gingersnap crust adds a warmth and spice that perfectly complements the pumpkin without overpowering it. This isn’t just another pumpkin dessert—it’s the one that will have everyone asking for the recipe.
What Ingredients You Will Need
This recipe uses simple, wholesome ingredients to deliver that comforting pumpkin flavor without any fuss. Most of these are pantry staples, especially during the fall season.
- For the Gingersnap Crust:
- 2 cups (about 200g) gingersnap cookies, finely crushed (I recommend Nabisco or a store-brand version for consistent texture)
- 6 tablespoons (85g) unsalted butter, melted
- 2 tablespoons (25g) granulated sugar (optional, if your cookies are not very sweet)
- For the Pumpkin Cheesecake Filling:
- 16 ounces (450g) cream cheese, softened to room temperature (full-fat works best for creaminess)
- 1 cup (200g) packed light brown sugar
- 1 cup (240g) pumpkin puree (not pumpkin pie filling—make sure it’s 100% pure pumpkin)
- 1 teaspoon vanilla extract
- 1 teaspoon ground cinnamon
- ½ teaspoon ground ginger
- ¼ teaspoon ground nutmeg
- ⅛ teaspoon ground cloves
- Pinch of salt
- 1 ½ cups (360ml) heavy whipping cream, cold
- ¼ cup (30g) powdered sugar
- For the Topping (optional but recommended):
- Whipped cream (store-bought or homemade)
- Extra crushed gingersnaps for sprinkling
- Caramel sauce (for drizzling)
When selecting your cream cheese, I’ve found that Philadelphia brand gives the smoothest results, but any block-style cream cheese works. Just avoid the spreadable kind in a tub—it has too much air and water, which can make your filling grainy. For the pumpkin puree, Libby’s is my go-to because it’s consistently thick and not watery. If you’re using a different brand, you might need to blot the pumpkin with a paper towel to remove excess moisture.
Equipment Needed
You don’t need a lot of fancy equipment for this recipe, which is part of its charm. Here’s what you’ll need:
- 9-inch springform pan: This makes removing the cheesecake so much easier. If you don’t have one, you can use a deep-dish pie plate, but the slices won’t be as neat.
- Food processor or zip-top bag and rolling pin: For crushing the gingersnaps. I prefer the food processor because it gives a more even crumb, but a bag and a heavy pan work just fine.
- Electric hand mixer or stand mixer: You’ll need this to whip the cream and beat the cream cheese until smooth. A whisk and some elbow grease will work, but it takes forever.
- Large mixing bowls: At least two—one for the crust mixture and one for the filling.
- Rubber spatula: For folding the whipped cream into the cream cheese mixture without deflating it.
- Measuring cups and spoons: Accuracy matters, especially with the spices.
If you’re on a budget, skip the springform pan and use a regular 9-inch pie dish. The presentation won’t be as tall, but it tastes exactly the same. I’ve also made this in a 9×9 square baking dish for a more casual, bar-style dessert—works like a charm.
Preparation Method
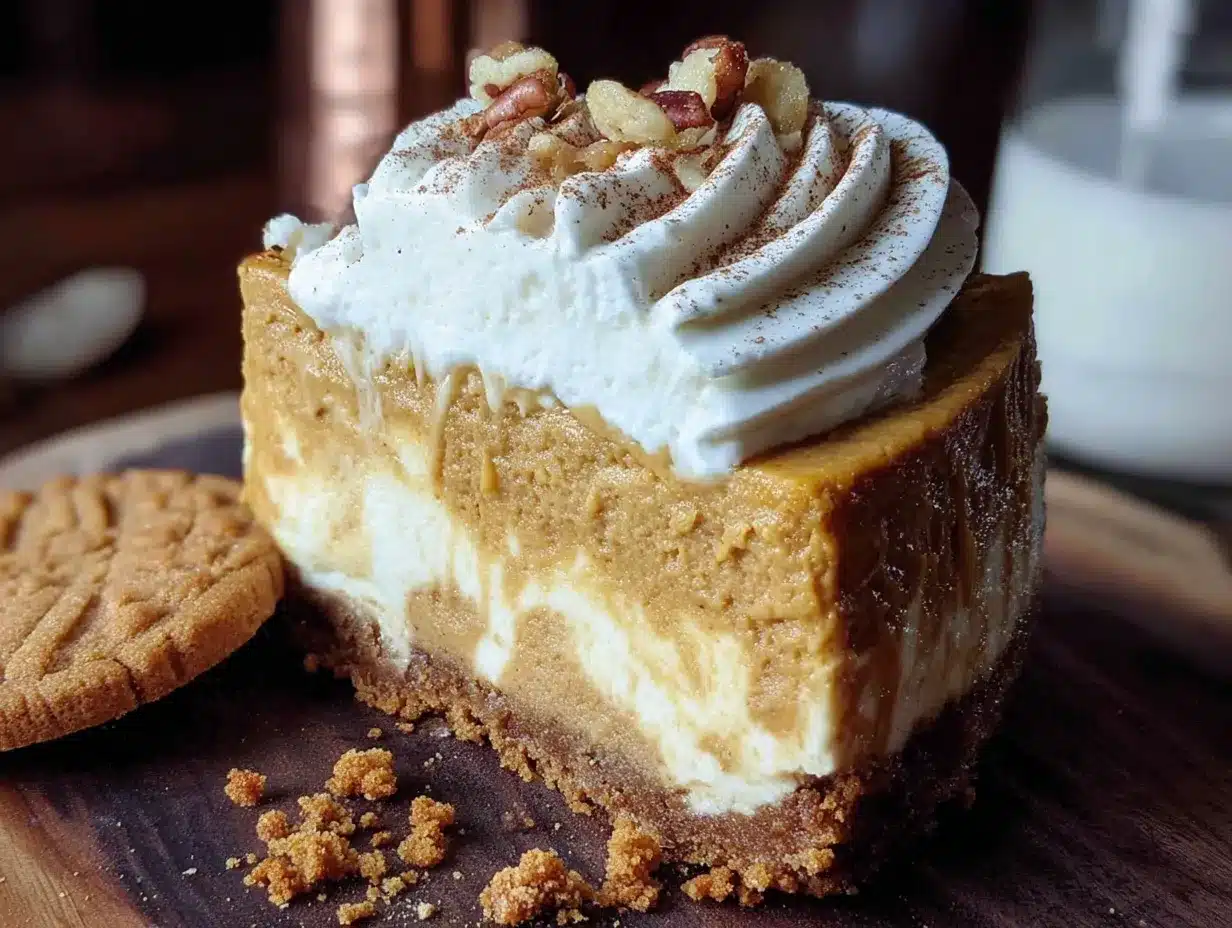
Let’s get to the fun part. Follow these steps carefully, and you’ll have a gorgeous no-bake pumpkin cheesecake that will impress everyone.
- Make the crust: Place the gingersnap cookies in a food processor and pulse until you have fine crumbs. You should have about 2 cups of crumbs. Transfer to a medium bowl and pour in the melted butter. Stir with a fork until all the crumbs are moistened. If your cookies aren’t very sweet, add the 2 tablespoons of sugar here. Press the mixture firmly into the bottom of your 9-inch springform pan. I use the bottom of a flat measuring cup to really pack it down. Place the pan in the refrigerator to set while you make the filling—at least 15 minutes.
- Whip the cream: In a large, chilled bowl, pour the cold heavy whipping cream. Add the powdered sugar. Using an electric hand mixer on medium-high speed, whip the cream until stiff peaks form. This takes about 3-4 minutes. Be careful not to over-whip, or you’ll end up with butter. Set the bowl aside in the refrigerator.
- Beat the cream cheese: In another large bowl, beat the softened cream cheese with an electric mixer on medium speed until smooth and creamy, about 2 minutes. Scrape down the sides of the bowl with a rubber spatula. Add the brown sugar and beat for another 2 minutes until well combined and fluffy.
- Add the pumpkin and spices: Add the pumpkin puree, vanilla extract, cinnamon, ginger, nutmeg, cloves, and salt to the cream cheese mixture. Beat on low speed until just combined. Scrape the bowl again. You want everything to be uniform, but don’t overmix at this stage.
- Fold in the whipped cream: Take the whipped cream out of the refrigerator. Using a rubber spatula, gently fold about one-third of the whipped cream into the pumpkin mixture. This lightens the batter. Then, add the remaining whipped cream and fold gently until no white streaks remain. The key here is to be gentle—you want to keep as much air in the mixture as possible for that light, mousse-like texture.
- Assemble the cheesecake: Remove the springform pan from the refrigerator. Spoon the pumpkin cheesecake filling over the set crust. Spread it evenly with the spatula. Give the pan a gentle tap on the counter to release any air bubbles.
- Chill: Cover the pan with plastic wrap and refrigerate for at least 6 hours, but overnight is best. This allows the cheesecake to set properly. The filling will be soft after just a few hours, but after a full night, it slices beautifully.
- Serve: When you’re ready to serve, run a thin knife around the edge of the pan to loosen the cheesecake. Release the springform latch and remove the ring. Top with whipped cream, a sprinkle of crushed gingersnaps, and a drizzle of caramel sauce if you’re feeling fancy.
Cooking Tips & Techniques
I’ve made this recipe more times than I can count, and I’ve learned a few things along the way. Here are my best tips for success:
- Room temperature cream cheese is non-negotiable. If you try to beat cold cream cheese, you’ll end up with lumps that never smooth out. Take it out of the fridge at least 30 minutes before you start. In a pinch, you can microwave it in 10-second bursts, but be careful not to melt it.
- Don’t skip the powdered sugar in the whipped cream. It stabilizes the cream and helps it hold its shape longer. Granulated sugar can make the cream weepy over time.
- Press the crust firmly. A loose crust will crumble when you try to slice the cheesecake. Use the bottom of a glass or a measuring cup to really compact those crumbs. I once didn’t press hard enough, and my crust fell apart into a sandy mess—still tasted good, but it wasn’t pretty.
- Let it set overnight. I know it’s tempting to rush, but the texture really benefits from a full 8-12 hours in the fridge. The flavors meld together, and the filling firms up perfectly. If you only give it 4 hours, it will be more like a mousse than a cheesecake.
- Blot your pumpkin puree. If your pumpkin puree looks watery, spread it on a paper towel-lined plate and blot it dry. Too much moisture can make the filling soggy and prevent it from setting properly.
Variations & Adaptations
This recipe is super versatile, and I’ve tried several variations over the years. Here are some of my favorites:
- Gluten-Free Version: Use gluten-free gingersnap cookies for the crust. Most brands are naturally gluten-free, but double-check the label. The filling is already gluten-free, so this is an easy swap.
- Dairy-Free Adaptation: Substitute the cream cheese with a high-quality dairy-free cream cheese (I like Miyoko’s or Kite Hill). Use coconut cream instead of heavy whipping cream—chill a can of full-fat coconut milk overnight, then scoop out the solid cream and whip it just like regular cream. Use vegan butter for the crust.
- Pumpkin Spice Cheesecake: If you love a stronger spice flavor, add an extra teaspoon of pumpkin pie spice to the filling. You can also add a teaspoon of orange zest for a bright, citrusy note that cuts through the richness.
- Chocolate Twist: Melt 4 ounces of semisweet chocolate and swirl it into the filling before pouring it into the crust. The chocolate and pumpkin combo is surprisingly good—my nephew calls it “Halloween cheesecake.”
- Mini Cheesecakes: Press the crust into a muffin tin lined with paper liners, then spoon the filling on top. These set in about 4 hours and are perfect for lunchboxes or portion control.
I once tried making this with a pecan shortbread crust instead of gingersnaps, and it was delicious but a bit too sweet for my taste. Stick with the gingersnaps—they really make the recipe special.
Serving & Storage Suggestions
This cheesecake is best served cold, straight from the refrigerator. The texture is perfect when it’s chilled—firm enough to slice cleanly but still creamy and luscious.
For presentation, I like to run a hot knife under warm water before each slice. This gives you those clean, professional-looking pieces. Top each slice with a generous dollop of whipped cream, a sprinkle of crushed gingersnaps, and a drizzle of caramel sauce. If you’re serving this at a fall gathering, a few candied pecans on top add a nice crunch.
This cheesecake pairs beautifully with a cup of hot apple cider or a warm chai latte. For a more indulgent dessert, serve it alongside a slice of classic apple pie for a double dessert situation—trust me, it’s a hit at Thanksgiving.
Storage: Cover the cheesecake tightly with plastic wrap or store it in an airtight container in the refrigerator. It will keep for up to 5 days, but it’s best within the first 3 days. The crust may soften slightly over time, but it still tastes great.
Freezing: This cheesecake freezes beautifully. Once it’s fully set, wrap the entire cheesecake (still in the springform pan) in a layer of plastic wrap, then a layer of aluminum foil. Freeze for up to 2 months. To thaw, transfer it to the refrigerator overnight. Do not thaw at room temperature, or the texture will become watery.
Reheating: This is a no-bake dessert, so there’s no need to reheat it. However, if you like a slightly softer texture, let it sit at room temperature for 10-15 minutes before serving.
Nutritional Information & Benefits
While this is definitely a treat, it does have some redeeming qualities. Here’s the approximate nutritional breakdown per slice (based on 12 servings):
- Calories: 385
- Fat: 26g
- Saturated Fat: 15g
- Carbohydrates: 34g
- Sugar: 24g
- Fiber: 2g
- Protein: 5g
- Sodium: 280mg
Pumpkin is packed with vitamin A, which is great for eye health and immune function. It’s also a good source of fiber, which helps keep you full. The cream cheese and heavy cream add calcium and protein, though they also bring the fat content up. If you’re watching your sugar intake, you can reduce the brown sugar to ¾ cup without sacrificing too much sweetness.
This recipe is not gluten-free unless you use gluten-free gingersnaps, and it contains dairy. For a lower-calorie version, you can use reduced-fat cream cheese and swap half the heavy cream for Greek yogurt, though the texture will be slightly less creamy.
Conclusion
This kid-approved no-bake pumpkin cheesecake with gingersnap crust is proof that the best recipes often come from happy accidents. It’s easy enough for a weeknight dessert but impressive enough for a holiday table. The no-bake method saves you time and oven space, and the gingersnap crust adds a warmth that makes this taste like fall in every bite.
I love this recipe because it brings people together. Every time I make it, someone asks for the recipe, and I love telling them the story of how it was a complete accident. It’s become a staple in our home, and I hope it becomes one in yours too.
Have you tried this recipe? I’d love to hear how it turned out! Leave a comment below and let me know if you made any fun variations. Don’t forget to share this post with your friends who love easy, delicious desserts. Happy baking—or rather, happy no-baking!
Frequently Asked Questions
Can I use pumpkin pie filling instead of pumpkin puree?
No, I wouldn’t recommend it. Pumpkin pie filling already has sugar and spices added, which will throw off the sweetness and spice balance of this recipe. Stick with 100% pure pumpkin puree for the best results.
How long does this cheesecake need to set?
At least 6 hours, but overnight is ideal. The longer it sits, the firmer and more sliceable it becomes. If you’re in a rush, you can serve it after 4 hours, but it will be more like a mousse than a cheesecake.
Can I make this without a springform pan?
Absolutely. You can use a deep-dish pie plate or a 9×9 square baking dish. Just note that the slices won’t be as tall and neat, but it will taste exactly the same. If using a pie plate, you might have a little extra filling—just pile it on.
Why is my cheesecake filling runny?
This usually happens for one of two reasons: either your cream cheese wasn’t softened properly, or your whipped cream wasn’t stiff enough. Make sure your cream cheese is at room temperature and your heavy cream is very cold before whipping. Also, blot your pumpkin puree if it looks watery.
Can I use a different cookie for the crust?
Yes! Graham crackers, vanilla wafers, or even shortbread cookies work well. If you use a less spicy cookie, you might want to add an extra ½ teaspoon of cinnamon or ginger to the crust mixture to keep that warm fall flavor.
Pin This Recipe!
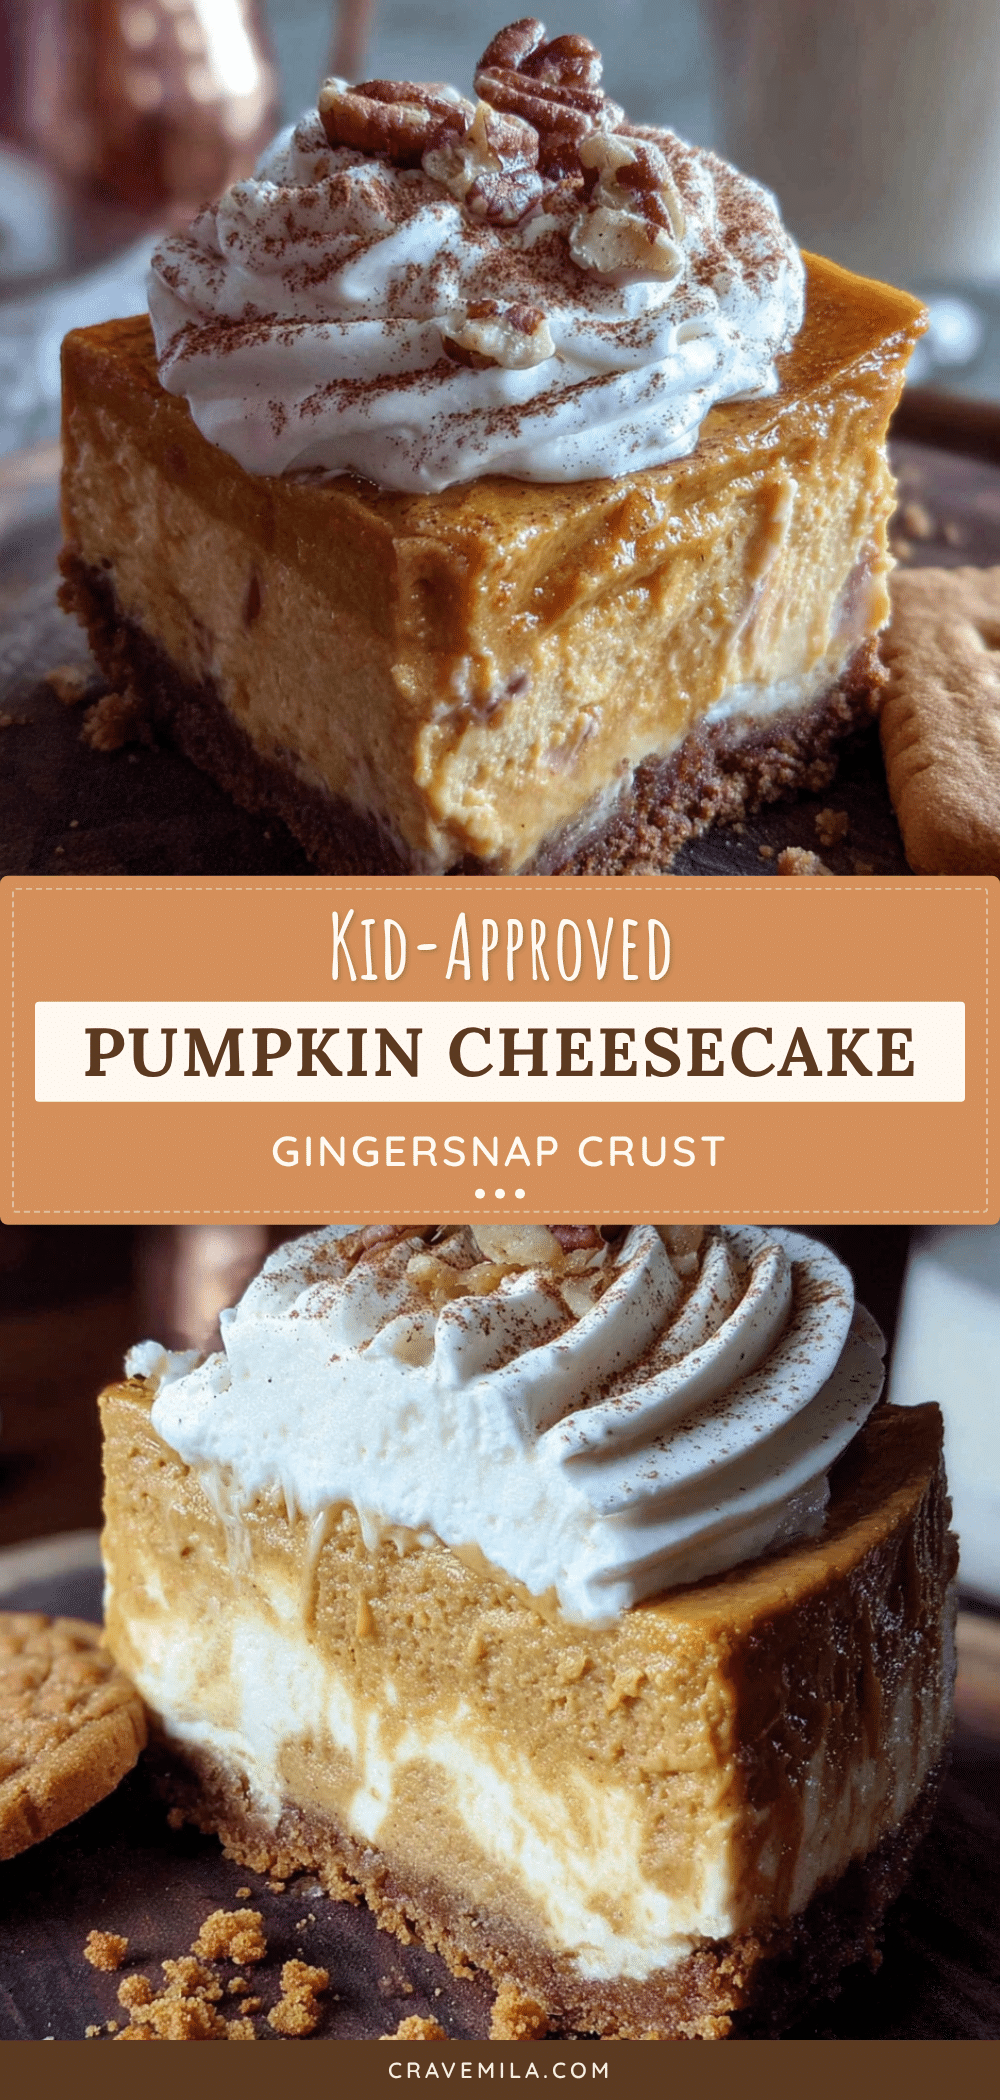
Kid-Approved No-Bake Pumpkin Cheesecake: Easy Gingersnap Dessert
This no-bake pumpkin cheesecake with a gingersnap crust is a game-changer for busy families. It’s easy, creamy, and packed with fall flavors, perfect for any gathering.
- Prep Time: 20 minutes
- Cook Time: 0 minutes
- Total Time: 6 hours 20 minutes (includes chilling)
- Yield: 12 servings 1x
- Category: Dessert
- Cuisine: American
Ingredients
- 2 cups (about 200g) gingersnap cookies, finely crushed
- 6 tablespoons (85g) unsalted butter, melted
- 2 tablespoons (25g) granulated sugar (optional)
- 16 ounces (450g) cream cheese, softened to room temperature
- 1 cup (200g) packed light brown sugar
- 1 cup (240g) pumpkin puree (not pumpkin pie filling)
- 1 teaspoon vanilla extract
- 1 teaspoon ground cinnamon
- ½ teaspoon ground ginger
- ¼ teaspoon ground nutmeg
- ⅛ teaspoon ground cloves
- Pinch of salt
- 1 ½ cups (360ml) heavy whipping cream, cold
- ¼ cup (30g) powdered sugar
- Whipped cream (for topping, optional)
- Extra crushed gingersnaps (for topping, optional)
- Caramel sauce (for drizzling, optional)
Instructions
- Make the crust: Place the gingersnap cookies in a food processor and pulse until you have fine crumbs. Transfer to a medium bowl and pour in the melted butter. Stir with a fork until all the crumbs are moistened. If your cookies aren’t very sweet, add the 2 tablespoons of sugar. Press the mixture firmly into the bottom of a 9-inch springform pan. Place the pan in the refrigerator to set while you make the filling—at least 15 minutes.
- Whip the cream: In a large, chilled bowl, pour the cold heavy whipping cream. Add the powdered sugar. Using an electric hand mixer on medium-high speed, whip the cream until stiff peaks form, about 3-4 minutes. Set the bowl aside in the refrigerator.
- Beat the cream cheese: In another large bowl, beat the softened cream cheese with an electric mixer on medium speed until smooth and creamy, about 2 minutes. Scrape down the sides of the bowl. Add the brown sugar and beat for another 2 minutes until well combined and fluffy.
- Add the pumpkin and spices: Add the pumpkin puree, vanilla extract, cinnamon, ginger, nutmeg, cloves, and salt to the cream cheese mixture. Beat on low speed until just combined. Scrape the bowl again.
- Fold in the whipped cream: Take the whipped cream out of the refrigerator. Using a rubber spatula, gently fold about one-third of the whipped cream into the pumpkin mixture. Then, add the remaining whipped cream and fold gently until no white streaks remain.
- Assemble the cheesecake: Remove the springform pan from the refrigerator. Spoon the pumpkin cheesecake filling over the set crust. Spread it evenly with the spatula. Give the pan a gentle tap on the counter to release any air bubbles.
- Chill: Cover the pan with plastic wrap and refrigerate for at least 6 hours, but overnight is best.
- Serve: When ready to serve, run a thin knife around the edge of the pan to loosen the cheesecake. Release the springform latch and remove the ring. Top with whipped cream, a sprinkle of crushed gingersnaps, and a drizzle of caramel sauce if desired.
Notes
Room temperature cream cheese is non-negotiable for a smooth filling. Don’t skip the powdered sugar in the whipped cream—it stabilizes it. Press the crust firmly to prevent crumbling. Let the cheesecake set overnight for best texture. Blot pumpkin puree if watery to avoid a runny filling.
Nutrition
- Serving Size: 1 slice
- Calories: 385
- Sugar: 24
- Sodium: 280
- Fat: 26
- Saturated Fat: 15
- Carbohydrates: 34
- Fiber: 2
- Protein: 5
Keywords: no-bake pumpkin cheesecake, gingersnap crust, easy pumpkin dessert, kid-friendly, fall dessert, Thanksgiving dessert



