It was 11:47 PM on a particularly damp Tuesday in late October, and I had a very specific craving for something that tasted like butter and looked like a crime scene. I didn’t have the energy for a full-blown Halloween baking project—the kind with royal icing and piping bags that inevitably ends with me covered in food coloring at 2 AM. But I had a stick of butter that had been sitting out for exactly the right amount of time, a bag of slivered almonds I’d bought for a salad I never made, and the weird idea that maybe, just maybe, I could make something that felt both cozy and creepy without trying too hard. The power flickered once, the wind howled outside my kitchen window, and I found myself elbow-deep in dough at midnight, laughing at how ridiculous this whole thing was. Let me tell you—there’s something about the late hour that just loosens the usual rules. You stop overthinking. You just do. And that’s exactly how these witch finger cookies were born: from a craving, a constraint, and a little bit of midnight madness.
I mean, honestly, have you ever looked at a slivered almond and not thought it looked like a tiny fingernail? Because I haven’t. It’s one of those things you notice once and can never unsee. So when I found myself staring at that bag of almonds at nearly midnight, the connection was immediate. These weren’t going to be perfect, pristine cookies. They were going to be lumpy, knobby, slightly misshapen—exactly like real witch fingers, if you think about it. And that’s what makes them so perfect. They’re not trying to be beautiful; they’re trying to be fun. And let me tell you, when you bite into one of these buttery, slightly crumbly cookies with that unexpected crunch of almond on top, you forget they look like something out of a fairy tale nightmare. You just reach for another one. And another one. And then suddenly, you’ve eaten four witch fingers while standing over the kitchen counter at midnight, and you realize this is exactly the kind of cozy chaos you needed.
You know that feeling when you want to do something festive but don’t want to spend three hours on it? That’s this recipe. It’s for the people who love Halloween but also love their couch. It’s for the bakers who want to show up to the party with something that makes people laugh and say “wait, those are cookies?” before devouring half the plate. It’s for the late-night kitchen experiments that somehow turn into family traditions. And honestly? It’s for anyone who’s ever looked at a bag of almonds and thought, “You know what, you’re going to be a fingernail.”
Why You’ll Love This Recipe
After testing these cookies in four different batches (including one where the “fingers” looked disturbingly like actual fingers and I had to text my sister a photo at 10 PM), I can confidently say this is the Halloween recipe you didn’t know you needed. Here’s why these cookies have become my go-to for every spooky season gathering:
- Quick & Easy: From start to finish, you’re looking at about 45 minutes. The dough comes together in one bowl, no electric mixer required, and the chilling time is minimal. Perfect for those last-minute Halloween party invites or when the craving hits at—you guessed it—11 PM.
- Simple Ingredients: You probably already have everything except the almonds in your pantry right now. Butter, sugar, flour, an egg, vanilla extract—the usual suspects for a good shortbread-style cookie.
- Perfect for Halloween: Whether it’s a costume party, a spooky movie night, or just a Tuesday that feels like it needs some weird energy, these cookies deliver the creepy factor without any artificial colors or complicated decorating.
- Crowd-Pleaser: I’ve brought these to parties where people were skeptical at first, then watched them disappear within the first hour. Kids love the gross factor, adults love the buttery, not-too-sweet flavor. It’s a win-win.
- Unbelievably Delicious: Here’s the thing—these aren’t just a gimmick. The almond extract in the dough gives them this subtle, almost marzipan-like flavor that pairs perfectly with the buttery shortbread base. And that almond “nail” on top? It gets slightly toasted in the oven, adding a nutty crunch that makes every bite interesting.
What makes this recipe different from all the other witch finger cookies out there? It’s the texture. I spent a lot of time testing the ratio of butter to flour to get that perfect shortbread consistency—firm enough to hold the finger shape, but tender enough to crumble slightly when you bite into it. No dry, hard cookies here. No dough that cracks and falls apart when you try to shape it. Just a reliable, foolproof recipe that works every time, even if your fingers are a little wonky-looking. And honestly? The wonky ones are the best ones. They look more like real witch fingers that way.
These cookies are the kind that make you close your eyes after the first bite. Not because they’re mind-blowingly complex or fancy, but because they’re exactly what a buttery shortbread cookie should be—with a fun twist that makes you smile. It’s comfort food with a side of spooky. It’s nostalgia for Halloween past, baked into a shape that makes everyone at the party do a double-take. And it’s the kind of recipe that, once you make it once, you’ll find yourself reaching for every October.
What Ingredients You Will Need
This recipe uses simple, pantry-friendly ingredients to create a buttery shortbread cookie with just the right amount of creepy charm. No fancy extracts, no hard-to-find decorations—just good, honest ingredients that work together beautifully.
- 1 cup (226g) unsalted butter, softened — This is the backbone of your cookie. Make sure it’s truly softened, not melted. I usually leave mine out for about an hour before I start. If you’re in a rush, cut it into small cubes and let it sit for 20 minutes. The butter should give slightly when you press it with your finger but still hold its shape.
- 1 cup (200g) granulated sugar — Regular white sugar works perfectly here. It gives the cookies a nice, clean sweetness without making them too sugary. I’ve tried this with coconut sugar for a deeper flavor, but the color turns darker and the fingers look less pale and witch-like.
- 1 large egg — Room temperature is ideal, but honestly? I’ve used cold eggs straight from the fridge and the cookies turned out fine. It just takes a little more mixing to incorporate.
- 1 teaspoon vanilla extract — Pure vanilla extract makes a difference here. The imitation stuff has a chemical aftertaste that doesn’t play well with the almond extract. Trust me on this one—I learned the hard way in batch number two.
- 1 teaspoon almond extract — This is the secret weapon. It gives the cookies that subtle marzipan flavor that makes them taste so much more interesting than plain shortbread. If you’re not a fan of almond extract, you can reduce it to ½ teaspoon, but I really recommend keeping it. It’s what makes these cookies special.
- 2 ½ cups (312g) all-purpose flour — Spoon and level your flour for the most accurate measurement. Scooping directly from the bag can pack in too much flour and make your cookies dry. If you’re feeling lazy (I’ve been there), just fluff the flour with a fork before you scoop.
- 1 teaspoon baking powder — This gives the cookies just a tiny bit of lift. Not enough to puff up and lose their finger shape, but enough to keep them from being too dense.
- ½ teaspoon salt — Don’t skip this. Salt balances the sweetness and enhances all the other flavors. I use fine sea salt, but regular table salt works fine too.
- About 40-50 slivered almonds — These become your fingernails. Look for whole slivered almonds, not the chopped ones. You want each almond to have that rounded end that looks like the tip of a nail. I recommend Blue Diamond or any brand where the almonds are relatively uniform in size.
- Red jam or food coloring (optional) — For that “bloody cuticle” effect. I like using raspberry jam thinned with a tiny bit of water, but strawberry jam works too. If you’re going for maximum gross-out factor, a little red gel food coloring brushed around the nail bed does the trick.
Substitution Guidance: Need a dairy-free option? Use vegan butter sticks (not the tub kind, they have too much water) and make sure your sugar is vegan-friendly. For a gluten-free version, I’ve had success with a 1:1 gluten-free baking flour blend—just add an extra tablespoon of flour to account for the different absorption rates. And if you don’t have almond extract? You can use an extra teaspoon of vanilla extract, but honestly, the cookies won’t have that same magical flavor. The almond extract really is worth buying for this recipe.
Equipment Needed
Nothing too fancy here—this is a low-tech recipe that’s perfect for bakers of all skill levels. Here’s what you’ll need:
- Large mixing bowl — Any bowl will do, but I prefer a wide, shallow one for easier mixing. My go-to is a ceramic bowl I got from a thrift store for $3. It’s ugly but it works perfectly.
- Wooden spoon or rubber spatula — You can do this entirely by hand, no electric mixer required. I actually prefer the wooden spoon method—it gives you more control and feels more like real baking.
- Measuring cups and spoons — For accurate measurements. If you have a kitchen scale, even better. Weighing your flour is the most reliable way to get consistent results.
- Baking sheets — Two standard-sized baking sheets will work perfectly. Line them with parchment paper for easy cleanup. I’ve used silicone baking mats too, and they work great—just keep an eye on the baking time, as they can slightly affect browning.
- Parchment paper — Non-negotiable for this recipe. The cookies have a decent amount of butter, and parchment prevents sticking without adding extra grease.
- Sharp knife or bench scraper — For cutting the dough into finger-sized pieces. A bench scraper is ideal because it gives you clean cuts without dragging the dough.
- Cooling rack — Optional but helpful. If you don’t have one, you can let the cookies cool on the baking sheet for a few minutes, then transfer them to a plate. I used to do that before I bought a cooling rack, and it worked fine.
- Pastry brush (optional) — For applying the red jam or food coloring. A clean, unused paintbrush works in a pinch. Just make sure it’s never been used for actual painting.
Budget-Friendly Tip: Don’t have a pastry brush? Use the back of a small spoon to dab on the “blood” effect. It looks more rustic and honestly, more convincing that way. And if you don’t have a bench scraper, a butter knife works perfectly fine—just wipe it clean between cuts.
Preparation Method
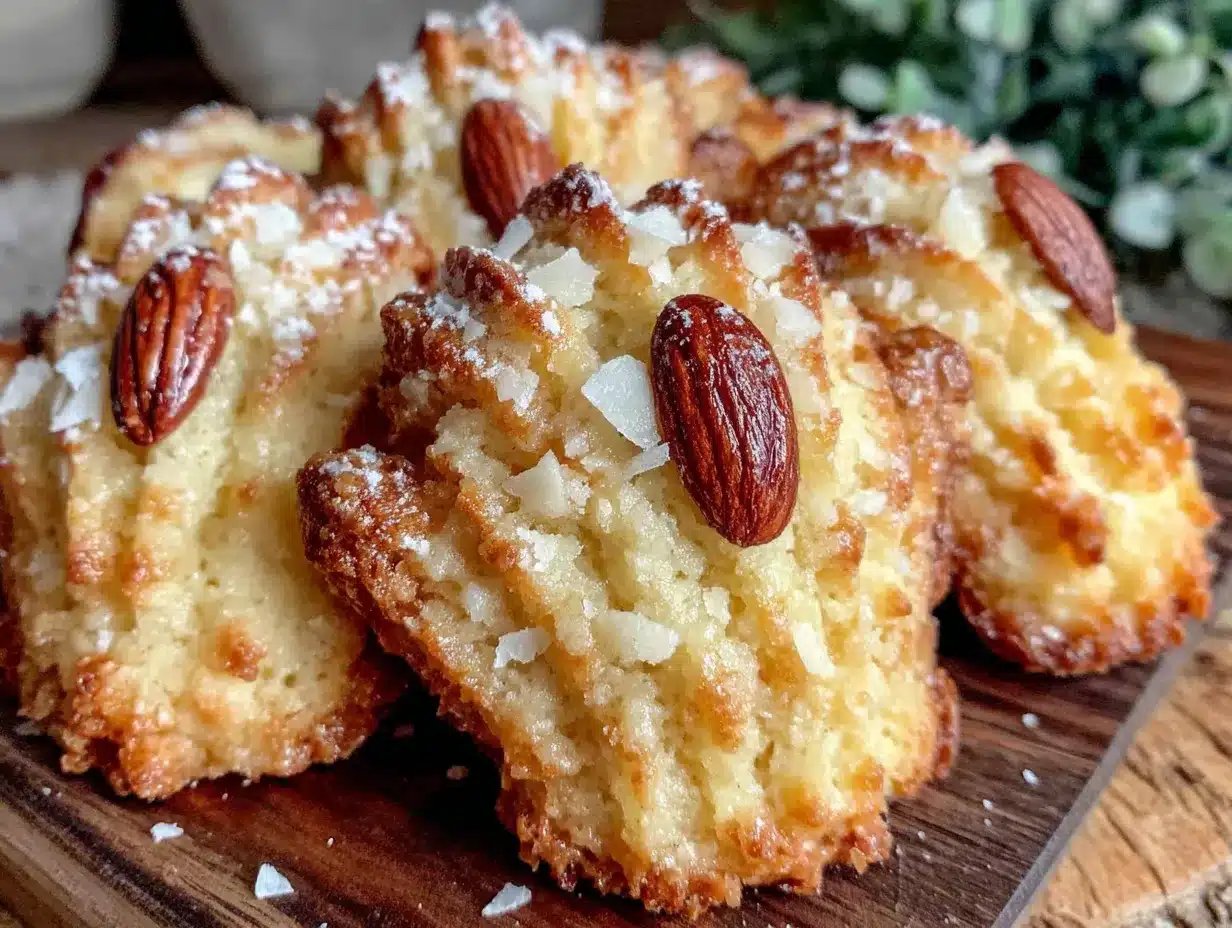
Alright, let’s make some witch fingers. I’ve broken this down into clear steps with all the little details I’ve learned from making these cookies more times than I care to admit.
- Cream the butter and sugar. In your large mixing bowl, beat the softened butter and granulated sugar together until light and fluffy. This should take about 2-3 minutes with a wooden spoon, or 1 minute if you’re using an electric mixer. You’re looking for a pale, creamy mixture that looks almost like frosting. Don’t rush this step—proper creaming incorporates air into the dough, which gives the cookies a lighter texture.
- Add the wet ingredients. Crack in the egg, then add the vanilla extract and almond extract. Mix until everything is well combined. At this point, the mixture might look slightly curdled or separated—that’s totally normal. It’ll come back together once you add the flour. If you’re using cold eggs, you might notice little bits of butter separating. Just keep mixing; it’ll be fine.
- Mix the dry ingredients separately. In a separate bowl, whisk together the all-purpose flour, baking powder, and salt. This ensures the baking powder is evenly distributed throughout the dough. I used to skip this step and just dump everything in together, but I ended up with pockets of baking powder that made some cookies taste metallic. Lesson learned.
- Combine wet and dry. Gradually add the dry ingredients to the wet mixture, mixing until a soft dough forms. Don’t overmix—stop as soon as you can’t see any more streaks of flour. Overmixing develops the gluten and makes the cookies tough. The dough should be soft but not sticky. If it feels too sticky to handle, refrigerate it for 15 minutes.
- Chill the dough. Cover the bowl with plastic wrap and refrigerate for at least 30 minutes. This step is crucial. Chilled dough is much easier to shape into fingers without it sticking to your hands. I’ve tried skipping this step when I was impatient, and let me tell you—it was a sticky, frustrating mess. Just wait the 30 minutes. Trust me.
- Preheat and prepare. While the dough chills, preheat your oven to 350°F (175°C). Line your baking sheets with parchment paper. This gives the dough time to firm up while the oven heats.
- Shape the fingers. Now for the fun part. Take a small piece of dough—about 1 tablespoon or the size of a walnut—and roll it into a log shape about 3-4 inches long. Gently taper one end to make it narrower, like the tip of a finger. Place it on the prepared baking sheet. Using the back of a knife or your finger, gently press lines into the dough to create knuckle creases. Don’t press too hard—you want indentations, not cuts. Make about 2-3 creases per finger.
- Add the almond nails. Take a slivered almond and press it gently into the tapered end of the finger. The rounded end of the almond should point outward, like a fingernail. Press firmly enough that it stays in place, but not so hard that it sinks completely into the dough. You want it to look like a nail growing out of the finger. Creepy, right?
- Bake. Bake the cookies for 12-15 minutes, or until the edges are just barely golden. The cookies will look pale, which is exactly what you want—witch fingers shouldn’t look too toasted. If you’re using silicone baking mats, add 1-2 minutes to the baking time. The cookies are done when they feel firm to the touch but not hard.
- Cool and decorate. Let the cookies cool on the baking sheet for 5 minutes, then transfer them to a cooling rack. If you’re adding the “bloody cuticle” effect, wait until the cookies are completely cool, then use a pastry brush to dab a tiny bit of thinned red jam or food coloring around the base of the almond nail. Less is more here—you want it to look like a small cut, not a massacre.
Pro Tip: If your dough cracks while you’re shaping the fingers, just press it back together with your fingers. The warmth of your hands will help it meld. And if a finger breaks during baking? Congratulations, you’ve made a “severed finger.” Just eat it yourself and tell everyone it’s a limited edition.
Cooking Tips & Techniques
After making these cookies for three Halloweens straight, I’ve collected a few tricks that make the process smoother and the results more convincing. Here’s what I’ve learned (sometimes the hard way):
Keep your hands cool. Warm hands will soften the dough and make it sticky. If you find the dough getting too soft while you’re shaping, run your hands under cold water for a few seconds and dry them thoroughly. I’ve also been known to stick my hands in the freezer for 30 seconds when things get really sticky. Desperate times, you know?
Don’t overthink the shapes. Real fingers aren’t perfectly uniform, so neither should your cookies be. Some can be thicker, some thinner, some with more knuckle creases, some with fewer. The variety actually makes them look more realistic. I had one batch where all the fingers looked exactly the same, and honestly? They looked fake. The wonky ones are the ones that make people do a double-take.
Watch the almond placement. The almond “nails” can burn if they’re too exposed. I try to nestle them slightly into the dough so only the rounded tip is visible. If you notice the almonds browning too quickly during baking, cover them loosely with a small piece of foil for the last 5 minutes.
My biggest failure: The first time I made these, I forgot to add the almond extract. The cookies tasted fine, but they were just… plain shortbread fingers. No magic. No “what is that flavor?” moment. I actually remade them the next day because I was so disappointed. The almond extract is what makes people say “these are the best Halloween cookies I’ve ever had” instead of “oh, those are cute.” Don’t skip it.
Timing strategy: I like to make the dough the night before and let it chill overnight. This makes the shaping process much easier the next day, and the flavors have more time to meld. Then I just bake them off fresh before the party. If you’re short on time, 30 minutes of chilling is the absolute minimum—any less and the dough will be too soft to work with.
Consistency tip: Use a cookie scoop or measuring spoon to portion the dough. This ensures all your fingers are roughly the same size, which means they’ll bake evenly. I use a 1-tablespoon scoop, and it works perfectly. If you don’t have one, just eyeball it—but try to keep the portions consistent.
Variations & Adaptations
One of the best things about this recipe is how easy it is to customize. Here are some variations I’ve tried and loved:
Chocolate Witch Fingers: Replace ¼ cup of the flour with ¼ cup of unsweetened cocoa powder. The chocolate version looks even more realistic, like dirty witch fingers that have been digging in the garden. Plus, chocolate and almond is a classic combination. I made these for a friend’s Halloween party and they disappeared twice as fast as the regular ones.
Matcha Green Witch Fingers: Add 1 tablespoon of matcha powder to the dry ingredients for a green-tinted cookie that looks like it belongs in a fairy tale. The earthy flavor of matcha pairs surprisingly well with the almond extract. This version is perfect for a more whimsical, less scary Halloween vibe.
Gluten-Free Version: Substitute the all-purpose flour with a 1:1 gluten-free baking blend. I’ve tested this with Bob’s Red Mill 1:1 Baking Flour and King Arthur Measure for Measure, and both worked well. The texture is slightly more crumbly, so handle the dough gently. Add an extra tablespoon of flour to compensate for the different absorption rate of gluten-free flours.
Vegan Version: Use vegan butter sticks and a flax egg (1 tablespoon ground flaxseed mixed with 3 tablespoons water, let sit for 5 minutes). The dough will be slightly softer, so increase the chilling time to 1 hour. The flavor is still fantastic—I actually prefer the texture of the vegan version sometimes because it’s even more tender.
Spiced Witch Fingers: Add 1 teaspoon of pumpkin pie spice or cinnamon to the dry ingredients. This gives the cookies a warm, autumnal flavor that’s perfect for Thanksgiving-adjacent Halloween parties. I made these for a “Halloween Friendsgiving” and they were a hit.
Personal Variation: My favorite twist is adding a pinch of smoked paprika to the dough. It doesn’t make the cookies spicy, but it adds this subtle, smoky depth that makes people say “what is that flavor?” in the best way. I discovered this by accident when I grabbed the wrong jar from my spice rack, and now it’s the only way I make them.
Serving & Storage Suggestions
These cookies are best served at room temperature, which is perfect for parties because you can make them ahead and just set them out. Here’s everything you need to know about serving and storing them:
Serving Temperature: Room temperature is ideal. The cookies are at their peak about 30 minutes after baking, when they’ve cooled completely but are still fresh. If you’re serving them at a party, arrange them on a platter in a way that looks like a pile of hands. I like to scatter a few loose almonds around for extra creepiness.
Presentation Ideas: For maximum impact, serve them on a dark platter or a black cake stand. You can also “bury” the bottom ends in chocolate pudding or crushed Oreos to look like dirt. I once served them sticking out of a bowl of chocolate mousse, and people actually screamed before they realized it was cookies. Peak Halloween moment, honestly.
Complementary Dishes: These cookies pair beautifully with a cup of hot apple cider, a pumpkin spice latte, or a glass of cold milk. If you’re serving them at a party, consider adding other Halloween treats like spider web dip or mummy meatballs for a full spread.
Storage Instructions: Store the cookies in an airtight container at room temperature for up to 5 days. Layer them between sheets of parchment paper to prevent the almond nails from getting knocked off. Do not refrigerate—the fridge will dry them out and make them hard.
Freezing Instructions: These cookies freeze beautifully. Place the baked, cooled cookies in a single layer on a baking sheet and freeze for 1 hour. Then transfer them to a freezer-safe bag or container. They’ll keep for up to 3 months. To serve, thaw at room temperature for about 30 minutes. You can also freeze the unbaked dough—shape the fingers, place them on a parchment-lined baking sheet, freeze until solid, then transfer to a freezer bag. Bake from frozen, adding 2-3 minutes to the baking time.
Flavor Development: Here’s something interesting—these cookies actually taste better on day two. The almond flavor mellows and melds with the butter, creating a more complex taste. So don’t stress about making them the day of your party. In fact, I recommend making them a day ahead.
Nutritional Information & Benefits
Let’s be real—these are cookies. They’re a treat, not a health food. But I believe in being transparent about what’s in your food, so here’s the breakdown:
Estimated Nutritional Values (per cookie, based on 48 cookies):
- Calories: ~95
- Total Fat: 5g
- Saturated Fat: 3g
- Cholesterol: 18mg
- Sodium: 55mg
- Total Carbohydrates: 11g
- Sugars: 5g
- Protein: 1.5g
Health Highlights: The almonds on top provide a small amount of vitamin E, healthy fats, and magnesium. The butter contains vitamin A and butyrate, which is beneficial for gut health in small amounts. And honestly? The biggest benefit is the joy these cookies bring. There’s something genuinely therapeutic about making something that looks scary but tastes comforting. It’s a little moment of playfulness in a busy world.
Dietary Considerations: This recipe contains gluten, dairy, eggs, and tree nuts (almonds). For a gluten-free version, see the variations section above. For a dairy-free version, use vegan butter. For an egg-free version, use a flax egg. The almond extract can be replaced with vanilla extract for a nut-free version, though the flavor profile will be different.
My Personal Take: I don’t believe in demonizing treats. A cookie is a cookie, and that’s okay. The problem isn’t the occasional indulgence—it’s the mindset that you have to be “perfect” all the time. So make these cookies. Enjoy them. Share them with people you love. And don’t stress about the nutritional content. Life’s too short for that.
Conclusion
These cozy witch finger cookies are everything I love about Halloween baking—they’re fun, they’re slightly ridiculous, and they taste genuinely amazing. They’re the kind of recipe that makes people smile, that sparks conversations at parties, that turns a regular Tuesday into something memorable. And honestly? They’re proof that you don’t need fancy equipment or professional decorating skills to create something that impresses people. All you need is butter, sugar, a bag of almonds, and a little bit of imagination.
I love this recipe because it reminds me that baking doesn’t have to be serious. It can be playful. It can be weird. It can be the thing that makes your friends laugh and say “you’re insane” in the most loving way possible. These cookies have become a Halloween tradition in my house, and I hope they become one in yours too.
So go ahead—make a batch. Get your hands dirty. Laugh at how ridiculous they look. And then watch them disappear faster than any “normal” cookie ever could. If you make these, I’d love to hear about it. Leave a comment below, tag me in your photos, tell me about the reactions you got. Did anyone scream? Did anyone refuse to eat one? Did anyone ask for the recipe? I want to know all of it.
Until next time, happy baking—and happy haunting.
Frequently Asked Questions
Can I make these cookies ahead of time?
Absolutely! You can make the dough up to 3 days ahead and keep it refrigerated, or freeze the baked cookies for up to 3 months. I actually prefer making them a day ahead—the flavors meld together and they taste even better on day two.
Why did my cookies spread out and lose their finger shape?
This usually happens when the dough isn’t chilled enough before baking. Make sure you refrigerate the shaped fingers for at least 30 minutes before they go in the oven. Also, check that your butter was softened but not melted—too-soft butter will cause spreading.
Can I use a different nut for the fingernails?
You can, but almonds work best because of their shape. Whole cashews or macadamia nuts could work, but they’ll look less like fingernails. If you’re avoiding nuts, you can use a small piece of white chocolate or a blanched almond for a similar effect.
How do I get the almond nails to stay on?
Press the almond firmly into the dough before baking—the dough will grip it as it bakes. If you’re still having trouble, you can dab a tiny bit of water on the almond before pressing it in. And if some fall off after baking, just press them back on with a dab of royal icing or melted white chocolate.
Can I make these cookies without almond extract?
You can, but they won’t have that same magical flavor. Replace the almond extract with an equal amount of vanilla extract. The cookies will still be delicious buttery shortbread—just without that subtle marzipan note that makes them so special.
Pin This Recipe!
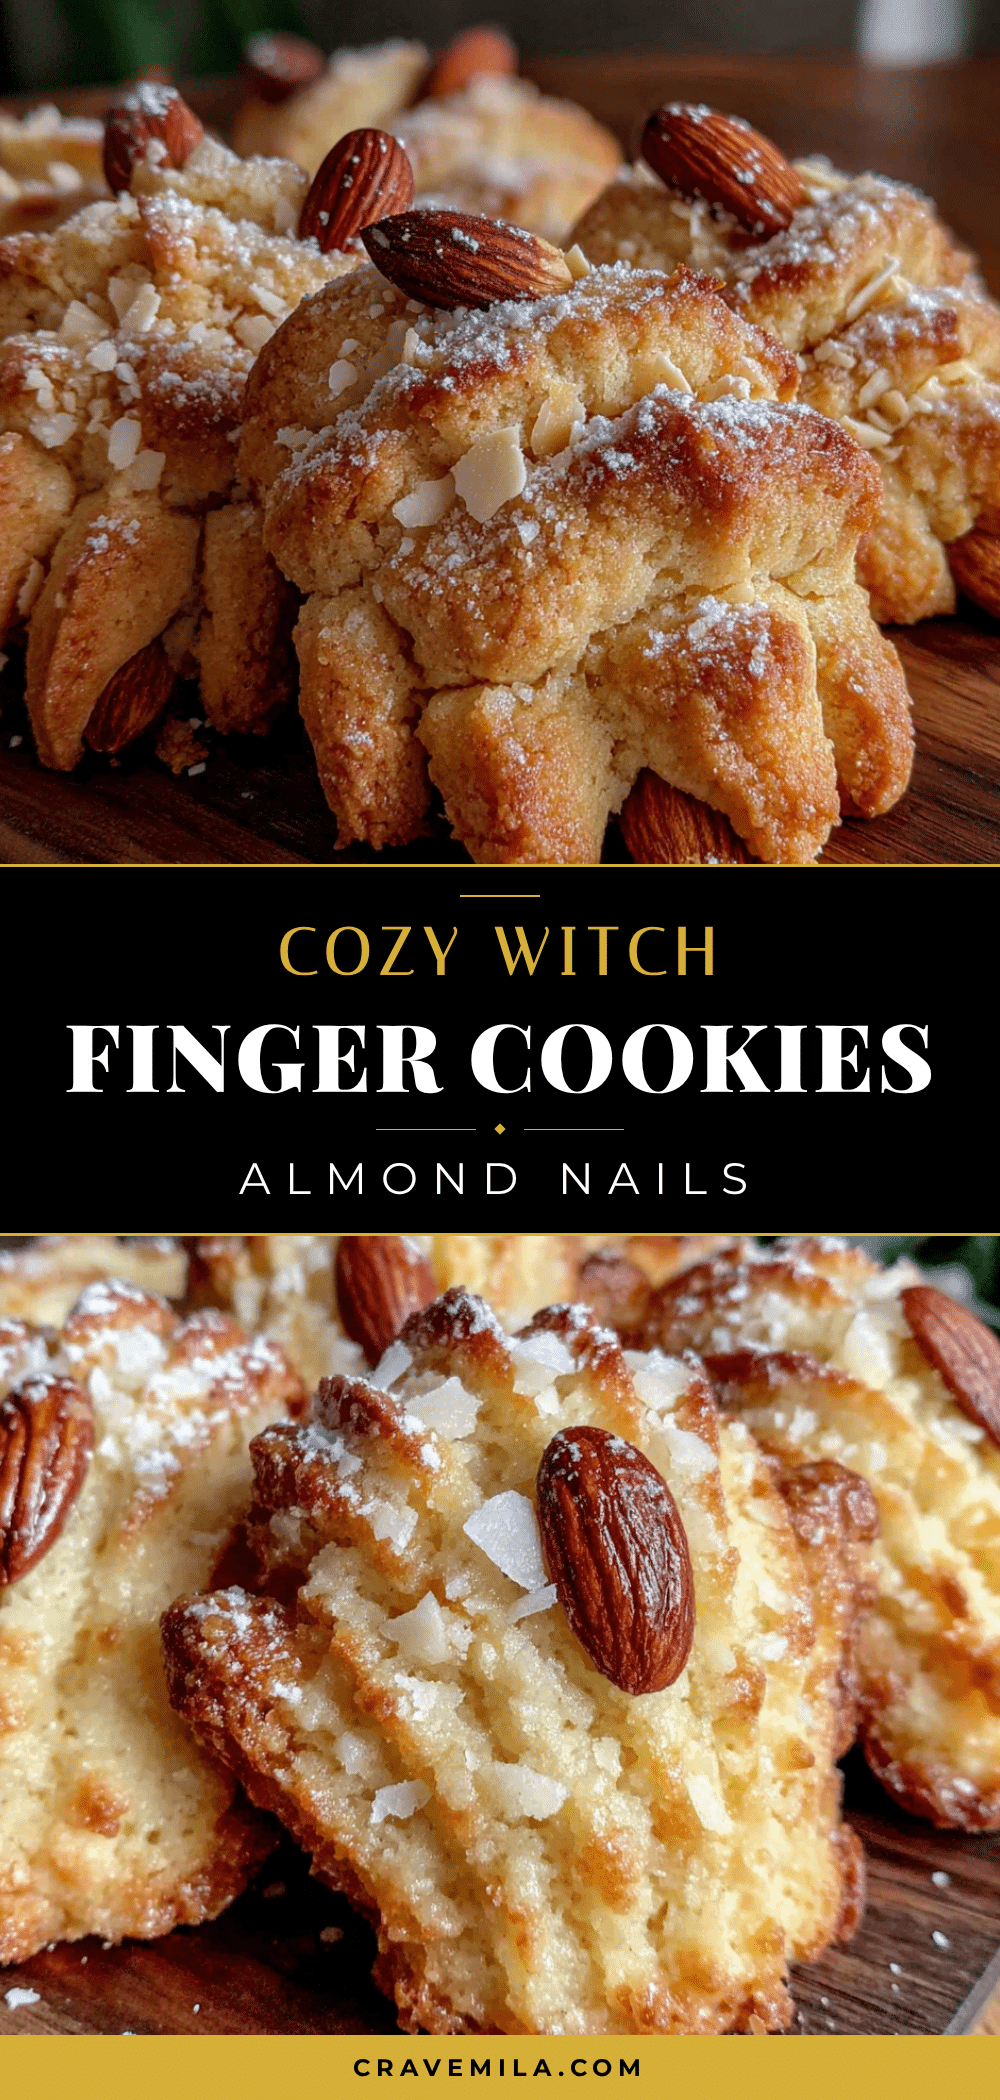
Eerie Cozy Witch Finger Cookies with Almond Nails
Buttery shortbread cookies shaped like witch fingers with almond fingernails, perfect for Halloween. Quick, easy, and delightfully creepy.
- Prep Time: 15 minutes
- Cook Time: 15 minutes
- Total Time: 45 minutes
- Yield: 48 cookies 1x
- Category: Dessert
- Cuisine: American
Ingredients
- 1 cup (226g) unsalted butter, softened
- 1 cup (200g) granulated sugar
- 1 large egg
- 1 teaspoon vanilla extract
- 1 teaspoon almond extract
- 2 ½ cups (312g) all-purpose flour
- 1 teaspoon baking powder
- ½ teaspoon salt
- About 40–50 slivered almonds
- Red jam or food coloring (optional)
Instructions
- Cream the butter and sugar together until light and fluffy, about 2-3 minutes.
- Add the egg, vanilla extract, and almond extract; mix until well combined.
- In a separate bowl, whisk together the flour, baking powder, and salt.
- Gradually add the dry ingredients to the wet mixture, mixing until a soft dough forms. Do not overmix.
- Cover the dough and refrigerate for at least 30 minutes.
- Preheat oven to 350°F (175°C). Line baking sheets with parchment paper.
- Shape the dough into finger-sized logs about 3-4 inches long, tapering one end. Press knuckle creases with the back of a knife.
- Press a slivered almond into the tapered end for the fingernail.
- Bake for 12-15 minutes, until edges are just barely golden.
- Cool on the baking sheet for 5 minutes, then transfer to a cooling rack. Optionally, dab red jam or food coloring around the nail base for a ‘bloody’ effect.
Notes
Chill the dough thoroughly for easier shaping. Keep hands cool to prevent sticking. Almond extract is key for the signature flavor. Cookies taste even better the next day.
Nutrition
- Serving Size: 1 cookie
- Calories: 95
- Sugar: 5
- Sodium: 55
- Fat: 5
- Saturated Fat: 3
- Carbohydrates: 11
- Protein: 1.5
Keywords: Halloween cookies, witch finger cookies, shortbread cookies, almond cookies, spooky treats, easy Halloween baking



