I was standing in the baking aisle last October, staring at a bag of candy corn I had absolutely no intention of buying, when the weirdest thing happened. The fluorescent lights hummed, a kid two carts over was having a full meltdown about sprinkles, and I caught a whiff of something—vanilla extract from a tester strip, maybe mixed with the dusty smell of the store. And just like that, I was seven years old again, standing on a step stool in my Aunt Rita’s kitchen.
Aunt Rita wasn’t a fancy baker. She used store-bought crusts and Cool Whip like it was a religious requirement. But every Halloween, she’d let me help her make these ridiculous, messy, wonderful cheesecake bars. She’d pipe the chocolate spider web herself—freehand, no stencil, no fuss—and always let me put the plastic spider on top, even though it was clearly a choking hazard for my little cousin. I haven’t thought about those bars in twenty years, honestly. But standing there in that aisle, I could feel the cold metal of the step stool under my bare feet. I could hear her telling me to “just drizzle it, don’t overthink it.” Maybe you’ve had that feeling—where a recipe isn’t just a recipe, it’s a time machine. That’s what these Easy No-Bake Halloween Spider Web Cheesecake Bars are for me. No oven required, no stress required, just a little bit of nostalgia and a whole lot of chocolate. I made them that same weekend, and let me tell you—they were even better than I remembered.
Why You’ll Love This Recipe
Let’s be real for a second. Halloween baking can be a total chore. Between the messy frosting, the sticky candy melts, and the sheer amount of time it takes to make something look “spooky,” it’s easy to just buy a bag of candy and call it a day. But these bars? They’re the exception. I’ve tested this recipe at three different Halloween parties now, and it’s the first thing to disappear every single time. Here’s why this one is different:
- No Oven Required: Seriously. Zero baking. If you can stir and press, you can make these. Perfect for hot October days or when your oven is full of other goodies.
- Simple Ingredients: You’re not hunting for obscure extracts or specialty flours. Cream cheese, butter, vanilla wafers, and chocolate chips. That’s the backbone of this whole operation.
- Perfect for Halloween Parties: They look incredibly impressive—that spider web design is a showstopper—but they take about 20 minutes of active work. The rest is just chilling time.
- Crowd-Pleaser: I brought these to my neighbor’s Halloween block party last year, and a guy who swore he “didn’t do sweets” ate three. Three.
- Unbelievably Delicious: The texture is what gets people. It’s creamy, but it’s not too heavy. The crust is buttery and slightly crunchy. And that chocolate web on top? It’s the perfect sweet finish.
This isn’t just another no-bake cheesecake bar. The trick here is in the texture—I use a specific ratio of cream cheese to whipped topping that gives you that dense, almost mousse-like feel without being gloopy. Plus, the spider web technique is foolproof. You don’t need a piping bag or a steady hand. You just need a zip-top bag and a little bit of confidence. It’s comfort food with a spooky twist, and honestly? It’s the kind of dessert that makes you close your eyes after the first bite.
What Ingredients You Will Need
This recipe relies on simple, pantry-friendly ingredients that come together to create something that tastes far more complicated than it is. I’ve tested this with different brands and substitutions, so I’ll share what works best. Here’s your shopping list:
For the Crust:
- 2 cups (about 200g) vanilla wafer crumbs — I use Nilla Wafers. You can crush them in a food processor or just put them in a zip-top bag and go to town with a rolling pin. The latter is more satisfying, honestly.
- 6 tablespoons (85g) unsalted butter, melted — Salted butter works in a pinch, just skip the added salt in the crust. Let it cool slightly so it doesn’t make the crumbs soggy.
- 2 tablespoons (25g) granulated sugar — Just a touch to help the crust hold together and add a little sweetness.
- Pinch of salt — Balances the sweetness. Don’t skip it.
For the Cheesecake Filling:
- 16 ounces (450g) full-fat cream cheese, softened — This is non-negotiable for texture. Low-fat cream cheese gets grainy and won’t set properly. Let it sit out for at least an hour before you start. Trust me on this.
- 1/2 cup (100g) granulated sugar — Just enough to sweeten without making it cloying.
- 1 teaspoon vanilla extract — Pure vanilla, not imitation, if you can swing it. It makes a difference in the overall flavor.
- 1 1/2 cups (360ml) cold heavy whipping cream — Or use a 8-ounce tub of frozen whipped topping (like Cool Whip), thawed. The homemade whipped cream gives a lighter, fluffier texture. The store-bought version is more stable for parties. I’ve used both—choose your own adventure.
For the Spider Web Topping:
- 1/2 cup (90g) semi-sweet chocolate chips — I prefer Ghirardelli or Guittard for melting. They’re smooth and don’t seize up as easily.
- 2 tablespoons (30ml) heavy cream — This helps thin the chocolate to the perfect drizzling consistency. You can use coconut cream for a dairy-free option.
- Optional: 1-2 tablespoons vegetable shortening or coconut oil — If your chocolate is too thick, this helps it flow better for the web design.
For Decoration (Optional but Fun):
- Plastic spider rings — The classic touch. Just make sure to warn people before they bite into one!
- Orange and black sprinkles — For extra Halloween flair.
- Edible glitter or luster dust — Because why not?
Equipment Needed
You don’t need a fully stocked bakery to make these bars. Here’s what you’ll actually use:
- 9×9-inch square baking pan — An 8×8 works too, your bars will just be slightly thicker. Line it with parchment paper with overhang for easy lifting. I learned this the hard way after a cheesecake bar extraction disaster that involved a butter knife and some very choice words.
- Food processor or zip-top bag and rolling pin — For crushing the wafers. The bag method is more fun and gives you a better arm workout.
- Electric hand mixer or stand mixer — You need this for the cream cheese filling. Whisking by hand is possible but your arm will hate you.
- Medium mixing bowls — Two or three. One for the crust, one for the filling, one for the chocolate.
- Small zip-top bag or piping bag — For the chocolate spider web. A zip-top bag with the tiniest corner snipped off works perfectly. Don’t cut too much off—you want a thin line.
- Rubber spatula — For scraping every last bit of filling into the pan. Waste not, want not.
- Refrigerator space — These need at least 4 hours to set, preferably overnight. Clear a shelf beforehand.
Preparation Method
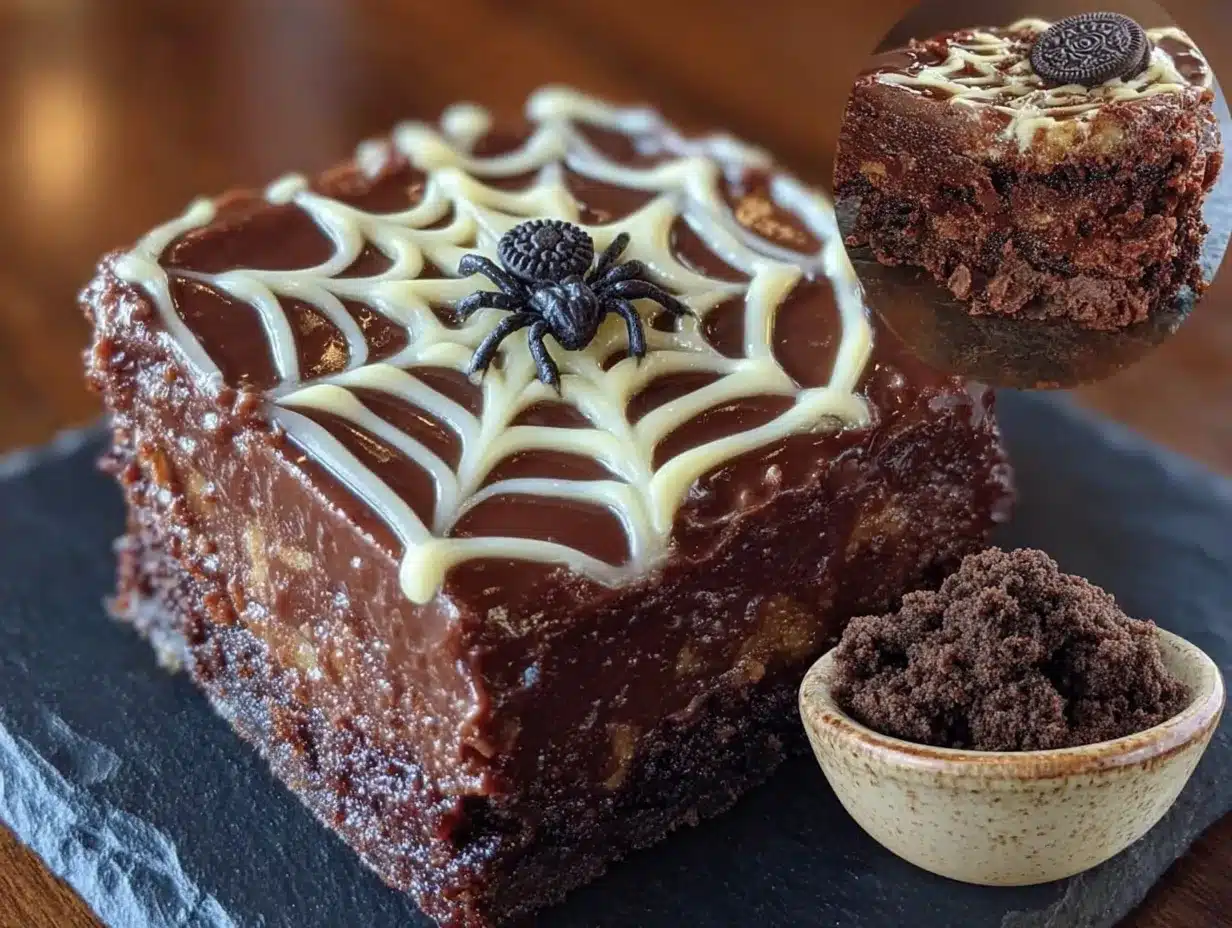
Alright, let’s get into it. This is going to be easy, I promise. Here’s the step-by-step breakdown:
-
Make the crust. In a medium bowl, combine the vanilla wafer crumbs, melted butter, sugar, and salt. Stir until the mixture looks like wet sand and holds together when you squeeze it. Press it firmly and evenly into the bottom of your parchment-lined 9×9 pan. Use the bottom of a measuring cup to really pack it down. Pop it in the fridge while you make the filling. (Time: 10 minutes)
-
Whip the cream. If you’re using heavy cream, pour it into a chilled bowl and beat with an electric mixer on medium-high speed until stiff peaks form. This takes about 3-4 minutes. You want it thick enough that it holds its shape when you lift the beaters. Don’t over-whip or you’ll end up with butter. If you’re using Cool Whip, just thaw it and skip this step. (Time: 5 minutes)
-
Make the cheesecake filling. In a large bowl, beat the softened cream cheese with an electric mixer until smooth and creamy—about 2 minutes. Add the sugar and vanilla extract, and beat until combined, scraping down the sides of the bowl as needed. The mixture should be completely smooth with no lumps. (Time: 3 minutes)
-
Fold in the whipped cream. Gently fold the whipped cream (or Cool Whip) into the cream cheese mixture using a rubber spatula. Start with about a third of the whipped cream, mixing until just combined, then add the rest. Fold gently—you want to keep the air in the mixture for that light, mousse-like texture. Don’t stir vigorously or you’ll deflate it. (Time: 3 minutes)
-
Assemble the bars. Spread the cheesecake filling evenly over the chilled crust. Use an offset spatula or the back of a spoon to smooth the top. It doesn’t need to be perfect—the spider web will cover any imperfections. Tap the pan gently on the counter to release any air bubbles. (Time: 5 minutes)
-
Make the chocolate spider web. In a small microwave-safe bowl, combine the chocolate chips and heavy cream. Microwave in 20-second intervals, stirring between each, until the chocolate is completely melted and smooth. If it’s too thick, stir in a teaspoon of coconut oil or shortening. Let it cool for 2-3 minutes—you don’t want it hot, just warm. (Time: 5 minutes)
-
Pipe the web. Transfer the melted chocolate to a small zip-top bag. Snip off the tiniest corner—seriously, start smaller than you think you need. You can always cut more off. Starting from the center of the cheesecake, pipe a spiral outwards, leaving about an inch between each ring. Then, take a toothpick or a thin knife and drag it from the center outwards through the chocolate rings, creating the web effect. Wipe the toothpick clean between each drag for clean lines. (Time: 5 minutes)
-
Chill. Place the pan in the refrigerator for at least 4 hours, but overnight is best. The filling needs time to set completely. If you’re in a rush, you can pop it in the freezer for 2 hours, but watch it—you don’t want it frozen solid. (Time: 4+ hours)
-
Slice and serve. Once set, lift the bars out of the pan using the parchment overhang. Use a sharp knife to cut into squares—9 or 16, depending on how generous you’re feeling. Wipe the knife clean between cuts for neat edges. Add a plastic spider ring to each bar if you’re feeling festive. (Time: 5 minutes)
Cooking Tips & Techniques
I’ve made these bars about a dozen times now, and I’ve learned a few things the hard way. Here’s what I wish someone had told me:
Room temperature cream cheese is not optional. I know, I know—you’re in a rush, you think you can just microwave it for 10 seconds and call it a day. Don’t. Cold cream cheese creates lumps that you’ll never fully beat out, and those lumps will show up in your final bars. Let it sit on the counter for a full hour. Set a timer if you have to.
The chocolate web technique takes practice. My first attempt looked less like a spider web and more like a toddler’s art project. The key is to pipe the spiral slowly and evenly, and to use a clean toothpick for each outward drag. If your chocolate is too thick, it won’t flow properly. If it’s too thin, it’ll just pool. The heavy cream helps get that perfect consistency—it should be thick enough to hold its shape but thin enough to pipe smoothly.
Patience is your friend. I once tried to cut these after only 2 hours in the fridge. It was a disaster. The knife dragged through the filling, the crust crumbled, and I ended up with a bowl of cheesecake mush that was still delicious but not exactly presentable. Give them the full 4 hours, or better yet, make them the night before. They actually taste better the next day—the flavors meld together beautifully.
Multitasking strategy: Make the crust first and get it chilling. While it’s in the fridge, whip your cream and set it aside. Then make the filling. Everything flows together nicely if you prep your ingredients ahead of time.
Variations & Adaptations
One of the best things about this recipe is how easy it is to customize. Here are some variations I’ve tried and loved:
Gluten-Free Version: Swap the vanilla wafers for gluten-free vanilla cookies or shortbread. I’ve used Schär’s vanilla cookies with great results. The texture is slightly different—a bit more crumbly—but the flavor is spot on.
Pumpkin Spice Twist: Add 1/4 cup pumpkin puree and 1 teaspoon pumpkin pie spice to the cream cheese mixture. Reduce the sugar to 1/3 cup. This gives you a fall-flavored version that’s perfect for Thanksgiving or Friendsgiving. The pumpkin adds moisture, so make sure to fold gently.
Chocolate Lover’s Version: Swap the vanilla wafer crust for chocolate wafer cookies or Oreo crumbs (filling removed). Add 2 tablespoons of cocoa powder to the cheesecake filling. Use white chocolate for the spider web design instead of dark chocolate—it pops beautifully against the dark filling.
Dairy-Free Adaptation: Use dairy-free cream cheese (I like Kite Hill or Miyoko’s) and coconut cream instead of heavy cream. The texture will be slightly softer, so I recommend freezing for 2 hours before slicing. The flavor is still incredible, and no one will know it’s dairy-free.
Peanut Butter Web: Swirl in 1/2 cup of creamy peanut butter into the filling before adding the chocolate web. Use milk chocolate for the web design. This version disappears fastest at parties, I’ve found.
Serving & Storage Suggestions
These bars are best served cold, straight from the fridge. The filling is firm but creamy, and the crust holds together perfectly at this temperature. If they sit out too long, the filling will soften and the web might start to blur. I recommend taking them out of the fridge about 10 minutes before serving—just enough to take the chill off, but not long enough to lose structure.
Presentation ideas: Arrange the bars on a black or orange platter for maximum Halloween effect. Add a few plastic spiders scattered around the plate. A dusting of powdered sugar “cobwebs” around the edges looks amazing. You can also drizzle extra chocolate over the top for a more rustic look.
Storage: Store any leftovers in an airtight container in the refrigerator for up to 5 days. Place a sheet of parchment paper between layers to prevent the webs from sticking together. I’ve never had these last more than 3 days in my house, but theoretically they’ll keep.
Freezing: These bars freeze beautifully. Wrap individual squares in plastic wrap, then place them in a freezer-safe bag or container. They’ll keep for up to 3 months. Thaw in the refrigerator overnight before serving. The texture is slightly softer after freezing, but still delicious. I actually prefer the frozen version straight from the freezer on a hot day—it’s like cheesecake ice cream bars.
Flavor development: These bars actually taste better on day two. The crust softens slightly, absorbing some moisture from the filling, and the flavors meld together. If you can resist the urge to eat them immediately, you’ll be rewarded.
Nutritional Information & Benefits
Let’s be honest—these are a treat, not a health food. But here’s the breakdown per bar (based on 16 servings):
- Calories: Approximately 290-320 per bar
- Fat: 22g (12g saturated)
- Carbohydrates: 24g (16g sugar)
- Protein: 4g
- Fiber: 1g
The cream cheese provides a decent amount of calcium and protein, and the dark chocolate in the web offers a small dose of antioxidants. The vanilla wafers add some iron from enrichment. But honestly, this is a dessert for your soul, not your macros. It’s about enjoying the moment, sharing something special with people you care about, and maybe reliving a little bit of that childhood magic. If you want to lighten it up, use reduced-fat cream cheese and light whipped topping—the texture will be slightly different, but it’ll still be good.
Frequently Asked Questions
Can I make these spider web cheesecake bars ahead of time?
Absolutely! In fact, I recommend it. Make them the day before your party and let them chill overnight. The flavors meld together and the texture sets perfectly. Just add the plastic spider decorations right before serving to keep them looking fresh.
My chocolate web looks messy. What did I do wrong?
Don’t worry—it happens to everyone. The most common issue is chocolate that’s too thick. Add a little more heavy cream or coconut oil to thin it out. Also, make sure you’re wiping your toothpick clean between each outward drag. A messy web can actually look more authentic and spooky, so embrace the imperfection!
Can I use a different crust?
Yes! Graham cracker crumbs, Oreo crumbs, or shortbread cookies all work beautifully. Just adjust the butter slightly—Oreo crumbs might need a little less butter since they’re already oily. Start with 4 tablespoons and add more if needed.
How do I get clean slices without the filling sticking to the knife?
Use a sharp knife and wipe it clean between each cut. You can also dip the knife in hot water, dry it off, and then slice. The heat helps the knife glide through the filling. Just make sure to wipe and re-dip between cuts for the cleanest edges.
My cheesecake filling turned out lumpy. Can I fix it?
If the cream cheese wasn’t fully softened, lumps can happen. Try beating the mixture on high speed for an extra minute—sometimes that breaks them up. If not, you can strain the filling through a fine-mesh sieve before folding in the whipped cream. It’s a bit of a pain, but it saves the batch.
Conclusion
These Easy No-Bake Halloween Spider Web Cheesecake Bars are everything I want in a holiday dessert—they’re fun, they’re forgiving, and they taste like a memory I didn’t even know I was holding onto. Whether you’re making them for a Halloween party, a cozy night in with the kids, or just because you want something sweet and spooky, they deliver every single time. They’re the kind of recipe that makes you look like a hero without actually having to work that hard, and honestly? That’s my favorite kind of recipe.
So go ahead—grab those vanilla wafers, soften that cream cheese, and get ready to make something that’ll have everyone asking for the recipe. And when you do, I’d love to hear about it. Drop a comment below and tell me how your spider web turned out, or share a photo on Pinterest and tag me. Did you try the pumpkin version? The peanut butter twist? Did your kids fight over the plastic spiders? I want to hear it all. Happy Halloween, and happy baking—or rather, happy no-baking!
Pin This Recipe!
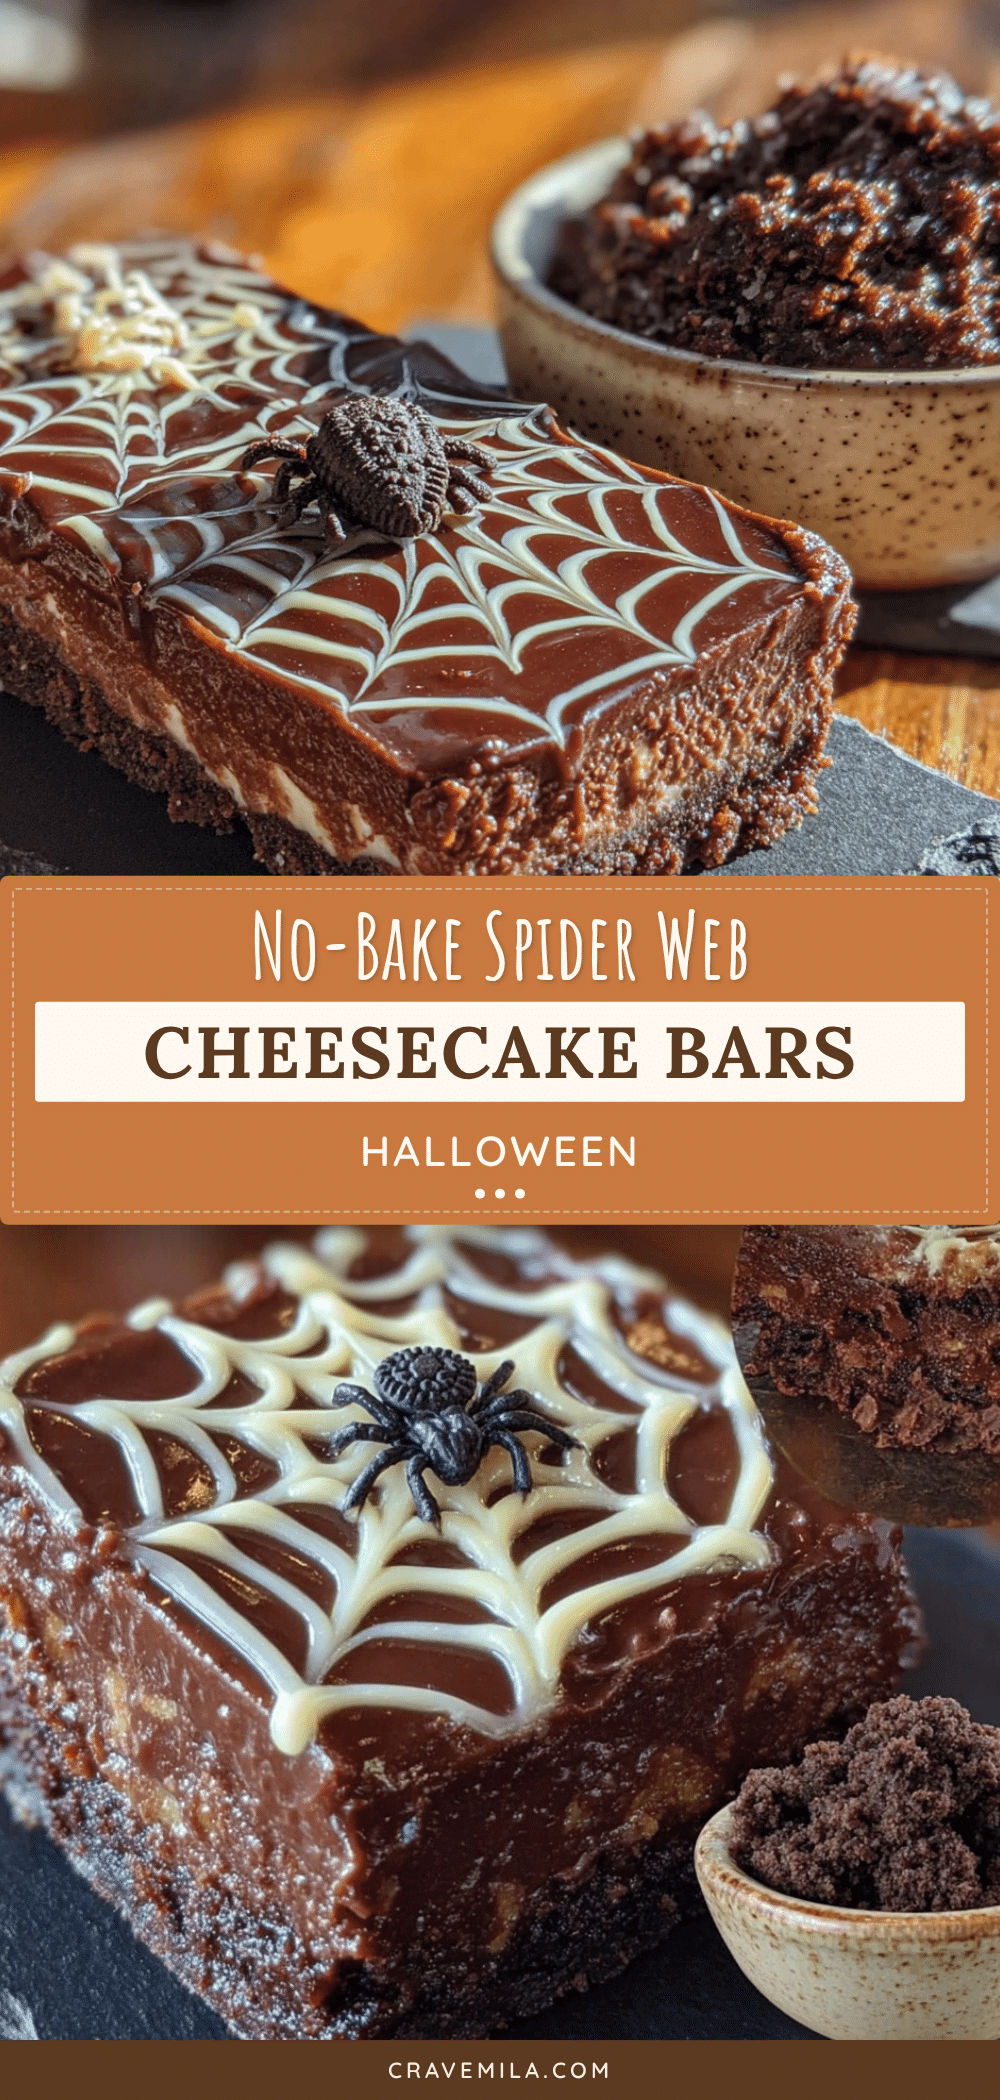
Easy No-Bake Spider Web Cheesecake Bars
These no-bake cheesecake bars feature a buttery vanilla wafer crust, a creamy mousse-like filling, and a chocolate spider web topping. Perfect for Halloween parties, they require no oven and come together in just 20 minutes of active work.
- Prep Time: 20 minutes
- Cook Time: 0 minutes
- Total Time: 4 hours 20 minutes (includes chilling)
- Yield: 16 servings 1x
- Category: Dessert
- Cuisine: American
Ingredients
- 2 cups (about 200g) vanilla wafer crumbs
- 6 tablespoons (85g) unsalted butter, melted
- 2 tablespoons (25g) granulated sugar
- Pinch of salt
- 16 ounces (450g) full-fat cream cheese, softened
- 1/2 cup (100g) granulated sugar
- 1 teaspoon vanilla extract
- 1 1/2 cups (360ml) cold heavy whipping cream (or 8-ounce tub frozen whipped topping, thawed)
- 1/2 cup (90g) semi-sweet chocolate chips
- 2 tablespoons (30ml) heavy cream
- 1–2 tablespoons vegetable shortening or coconut oil (optional, for thinning chocolate)
- Plastic spider rings (optional, for decoration)
- Orange and black sprinkles (optional)
- Edible glitter or luster dust (optional)
Instructions
- Make the crust: In a medium bowl, combine vanilla wafer crumbs, melted butter, sugar, and salt. Stir until mixture resembles wet sand and holds together when squeezed. Press firmly and evenly into the bottom of a parchment-lined 9×9-inch pan. Refrigerate while making the filling.
- Whip the cream: In a chilled bowl, beat heavy cream with an electric mixer on medium-high speed until stiff peaks form, about 3-4 minutes. If using Cool Whip, thaw and skip this step.
- Make the cheesecake filling: In a large bowl, beat softened cream cheese until smooth and creamy, about 2 minutes. Add sugar and vanilla extract, beat until combined, scraping down sides as needed.
- Fold in the whipped cream: Gently fold whipped cream into cream cheese mixture using a rubber spatula, adding in thirds. Fold gently to keep the mixture light and airy.
- Assemble the bars: Spread cheesecake filling evenly over chilled crust. Smooth the top with an offset spatula or spoon. Tap pan gently to release air bubbles.
- Make the chocolate spider web: In a small microwave-safe bowl, combine chocolate chips and 2 tablespoons heavy cream. Microwave in 20-second intervals, stirring between each, until melted and smooth. If too thick, stir in a teaspoon of coconut oil or shortening. Let cool 2-3 minutes.
- Pipe the web: Transfer melted chocolate to a small zip-top bag. Snip off a tiny corner. Starting from the center of the cheesecake, pipe a spiral outward, leaving about an inch between rings. Use a toothpick to drag from center outward through the rings, creating a web effect. Wipe toothpick clean between each drag.
- Chill: Refrigerate for at least 4 hours, preferably overnight, until set.
- Slice and serve: Lift bars out of pan using parchment overhang. Cut into squares (9 or 16) with a sharp knife, wiping clean between cuts. Add plastic spider rings if desired.
Notes
Cream cheese must be at room temperature for smooth filling. For best results, chill overnight. The chocolate web technique takes practice; start with a small cut in the bag. Bars can be frozen for up to 3 months.
Nutrition
- Serving Size: 1 bar
- Calories: 305
- Sugar: 16
- Sodium: 180
- Fat: 22
- Saturated Fat: 12
- Carbohydrates: 24
- Fiber: 1
- Protein: 4
Keywords: no-bake cheesecake bars, spider web cheesecake, Halloween dessert, easy Halloween recipe, no-bake dessert, cheesecake bars, spider web dessert



