The school bake sale was in six hours and I’d completely forgotten. Not just a little forgot—I mean, I walked right past the reminder note on the fridge for three days straight. Everyone else would be bringing those elaborate themed cupcakes with hand-piped frosting roses and custom sprinkles. Meanwhile, I had a half-used can of pumpkin puree from last week’s pancakes, a bag of cinnamon that was dangerously close to empty, and two sticks of butter that had been sitting on the counter since breakfast. Honestly, my kitchen looked like a cooking show disaster reel.
I stood there staring into my pantry like it might magically produce a winning bake sale contribution. My four-year-old was tugging on my shirt asking for a snack—which, let me tell you, added a whole other layer of pressure. And then I spotted it. The bag of cream of tartar I’d bought for a recipe I never actually made. Snickerdoodles. I could make snickerdoodles. But plain snickerdoodles felt boring, you know? Everyone makes snickerdoodles. I needed something that would make the other moms pause mid-bite and raise an eyebrow.
So I did something a little reckless. I dumped the pumpkin puree into the dough. I added extra cinnamon and a pinch of nutmeg because, well, why not? The dough looked suspiciously orange and I was genuinely worried I’d just ruined my only chance at not showing up empty-handed. I rolled those cookies in cinnamon sugar, popped them in the oven, and held my breath.
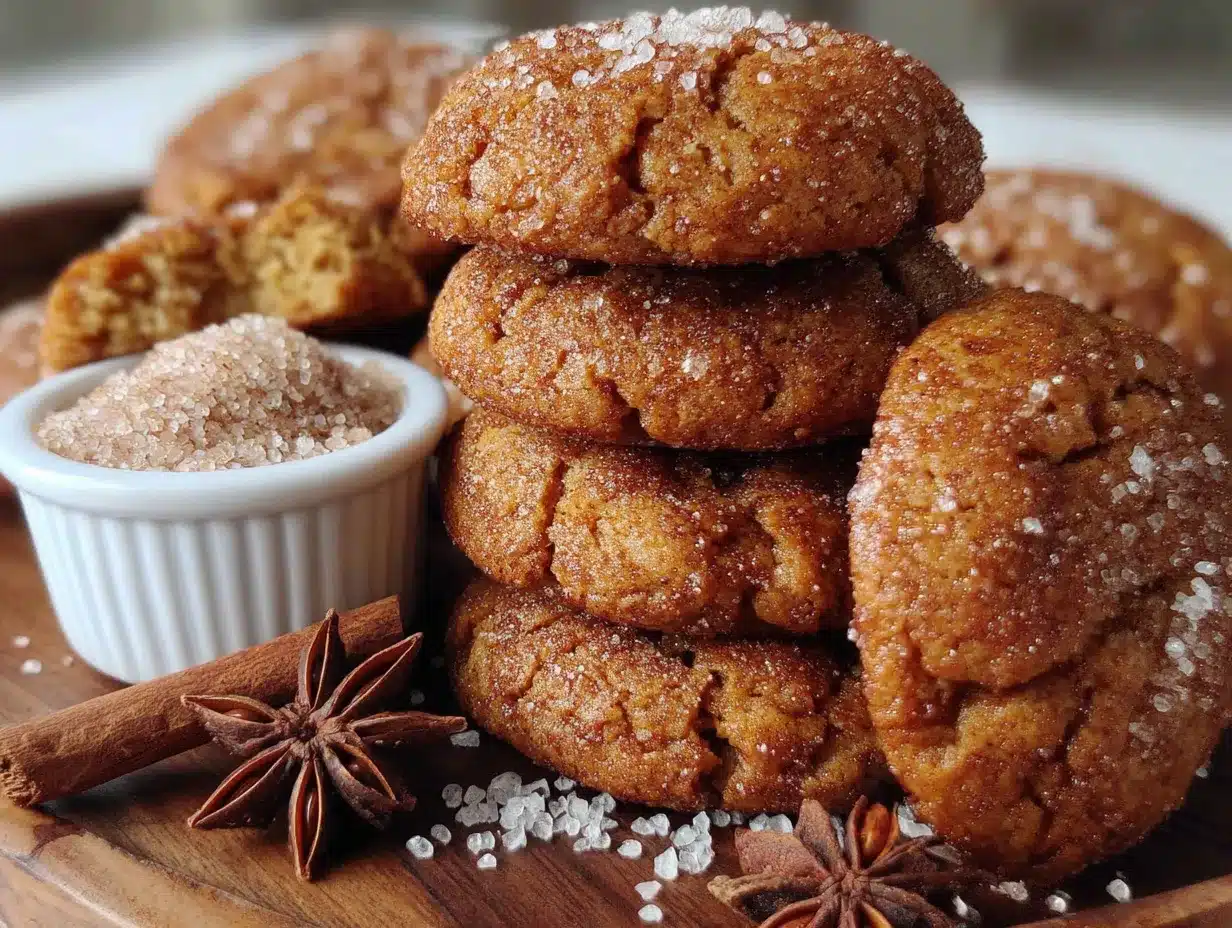
What came out of that oven was pure chaos magic. They were soft, they were spiced, they had that signature crackled top that snickerdoodles are famous for. And the taste? Honestly, I might have eaten three before they even cooled. I packed them up, dropped them off at the sale, and tried not to think about it. By pickup time, every single cookie was gone. The bake sale coordinator actually asked me for the recipe. Maybe you’ve been there—when a desperate kitchen gamble turns into your family’s most-requested cookie. These Kid-Approved Pumpkin Snickerdoodle Cookies are that gamble, and I promise you, it pays off every single time.
Why You’ll Love This Recipe
Let me be real with you—I’ve tested this recipe more times than I care to admit. The first batch was too flat. The second batch was too cakey. The third batch? That was the sweet spot, and I’ve been making them exactly that way ever since. These aren’t just another pumpkin cookie recipe floating around the internet. They’re the result of actual trial and error, burned fingertips, and one very patient family who didn’t mind being taste testers for a solid month.
- Quick & Easy: From start to finish, you’re looking at about 25 minutes. No chilling the dough, no complicated steps. Mix, roll, bake, done. Perfect for those afternoons when the kids are asking for something sweet and you need it yesterday.
- Simple Ingredients: You probably already have everything in your kitchen. Butter, sugar, pumpkin puree, flour, and spices. No weird specialty ingredients that cost a fortune and sit in your pantry for years.
- Perfect for Family Baking: This is the kind of recipe you can make with little helpers. My kids love rolling the dough balls in the cinnamon sugar—it’s messy and wonderful and exactly what cookie-making should be.
- Crowd-Pleaser: I’ve brought these to playdates, school events, and family gatherings. They disappear every single time. Kids love them because they’re soft and sweet. Adults love them because they taste like fall without being overwhelming.
- Unbelievably Delicious: The texture is what gets me every time. They’re soft in the middle with just a little chew on the edges. The cinnamon sugar crust gives them that snickerdoodle signature, while the pumpkin keeps them tender and moist.
What makes these different from every other pumpkin cookie recipe? It’s the ratio. Most pumpkin cookies turn out like little cake pucks—soft and fluffy, sure, but not quite a cookie. I adjusted the butter and sugar to get that perfect snickerdoodle texture while still packing in real pumpkin flavor. Plus, I skipped the pumpkin pie spice blend (which can taste artificial) and used individual spices instead. Trust me, it makes a difference. This is comfort food reimagined—faster, simpler, but with the same soul-soothing satisfaction that makes you close your eyes after the first bite.
What Ingredients You Will Need
This recipe uses simple, wholesome ingredients to deliver that perfect pumpkin snickerdoodle experience without any fuss. Most of these are pantry staples, which is exactly what you want when a cookie craving hits unexpectedly.
For the Cookie Dough
- 1/2 cup (113g) unsalted butter, softened — I always use unsalted so I can control the salt level. Let it sit out for about 30 minutes before you start. If you’re in a rush, cut it into small cubes and it’ll soften faster.
- 3/4 cup (150g) granulated sugar — Regular white sugar works perfectly here. It gives the cookies that light, crisp edge.
- 1/4 cup (50g) packed light brown sugar — This adds a tiny bit of moisture and a subtle molasses flavor that pairs beautifully with the pumpkin. Dark brown sugar works too if that’s what you have.
- 1/2 cup (120g) pumpkin puree — Make sure you’re using pure pumpkin puree, not pumpkin pie filling. The pie filling has added sugar and spices that will throw off the recipe. I usually grab the store brand—it works just fine.
- 1 large egg, room temperature — Room temperature egg blends into the butter mixture more smoothly. If you forgot to take it out, place it in a bowl of warm water for 5 minutes.
- 1 teaspoon vanilla extract — Pure vanilla extract adds a warmth that imitation just can’t match. I love the Simply Organic brand for its rich flavor.
For the Dry Ingredients
- 2 cups (250g) all-purpose flour — Spoon and level your flour for the most accurate measurement. Scooping directly from the bag packs in too much flour and makes the cookies dry.
- 1 teaspoon cream of tartar — This is the secret to that classic snickerdoodle tang and chewy texture. Don’t skip it! You can substitute with 2 teaspoons of lemon juice or white vinegar in a pinch, but cream of tartar gives the best results.
- 1/2 teaspoon baking soda — Helps the cookies spread just enough without puffing up too much.
- 1/2 teaspoon salt — Balances the sweetness and brings out the pumpkin flavor.
- 2 teaspoons ground cinnamon — I use McCormick cinnamon for its consistent quality, but any brand works. Fresh cinnamon makes a noticeable difference here.
- 1/2 teaspoon ground nutmeg — Freshly grated nutmeg is amazing if you have it, but pre-ground works perfectly.
- 1/4 teaspoon ground ginger — Adds a little warmth without being spicy. My kids don’t even notice it’s there.
For the Cinnamon Sugar Coating
- 1/4 cup (50g) granulated sugar
- 1 tablespoon ground cinnamon
Pro tip: Make extra cinnamon sugar and keep it in a little jar. My kids use it on toast, oatmeal, and honestly, sometimes they just eat it with a spoon when they think I’m not looking.
Equipment Needed
You don’t need anything fancy for these cookies, which is exactly how I like it. Here’s what you’ll need:
- Large mixing bowl — Any medium-to-large bowl works. I use my grandmother’s old ceramic one because it feels right for cookie-making.
- Electric hand mixer or stand mixer — A hand mixer is perfectly fine. I actually prefer it because there’s less to clean. If you’re mixing by hand, just make sure your butter is really soft and you’re ready to put in a little elbow grease.
- Measuring cups and spoons — For accuracy, especially with the flour and spices.
- Baking sheets — Standard half-sheet pans work great. No need for anything special.
- Parchment paper or silicone baking mat — Parchment paper makes cleanup so much easier and prevents sticking. Silicone mats are great too, but they can make cookies spread a tiny bit more.
- Small bowl for cinnamon sugar — Any shallow bowl works. I use a cereal bowl because it’s wide enough to roll the dough balls.
- Cookie scoop or tablespoon — A 1.5-tablespoon cookie scoop gives you perfectly uniform cookies. If you don’t have one, a regular tablespoon works—just make sure you’re consistent with the size.
- Wire cooling rack — Essential for letting the cookies cool without getting soggy bottoms.
If you don’t have a hand mixer, you can absolutely cream the butter and sugar with a wooden spoon. It takes a few extra minutes, but it’s a great arm workout and the cookies turn out just as good. I’ve done it plenty of times when my mixer was in the dishwasher.
Preparation Method
Alright, let’s make some cookies. This is straightforward, I promise. Here’s exactly how to do it:
- Preheat your oven to 350°F (175°C). Line two baking sheets with parchment paper. This gives the cookies a non-stick surface and makes cleanup a breeze. If you only have one baking sheet, that’s fine—just let it cool completely between batches.
- Cream the butter and sugars together. In your large mixing bowl, beat the softened butter, granulated sugar, and brown sugar together until light and fluffy. This takes about 2-3 minutes with a hand mixer on medium speed. You’re looking for a pale, creamy mixture that looks almost like frosting. Scrape down the sides of the bowl halfway through. Don’t rush this step—properly creamed butter and sugar is what gives cookies their structure.
- Add the wet ingredients. Beat in the pumpkin puree, egg, and vanilla extract until everything is well combined. The mixture will look a little curdled or separated at this point—don’t panic. That’s totally normal when you add pumpkin to butter. It will come back together once you add the flour. Mix until just combined, about 30 seconds.
- Whisk the dry ingredients separately. In a separate medium bowl, whisk together the flour, cream of tartar, baking soda, salt, cinnamon, nutmeg, and ginger. Whisking ensures everything is evenly distributed so you don’t end up with a pocket of baking soda in one cookie. I usually count to 15 while whisking—that’s enough time.
- Combine wet and dry ingredients. Gradually add the dry ingredients to the wet mixture, mixing on low speed or folding with a spatula. Mix until just combined—you should see a few streaks of flour remaining. Overmixing develops gluten and makes the cookies tough. We want tender, soft cookies, so stop as soon as the dough comes together. The dough will be soft and slightly sticky, but it should hold together when you press it.
- Prepare the cinnamon sugar coating. In a small bowl, stir together the 1/4 cup granulated sugar and 1 tablespoon cinnamon. Set it next to your baking sheets.
- Shape and coat the cookies. Using a cookie scoop or a tablespoon, scoop out rounded tablespoons of dough (about 1.5 tablespoons each). Roll each portion into a smooth ball between your palms. If the dough is too sticky to handle, pop it in the fridge for 10 minutes. Drop each dough ball into the cinnamon sugar mixture and roll it around until completely coated. Place the coated dough balls on the prepared baking sheets, spacing them about 2 inches apart. They spread a bit, but not too much.
- Bake the cookies. Bake for 10-12 minutes, or until the edges are set and the tops look slightly crackled. The centers will look soft and slightly underdone—that’s exactly what you want. They’ll continue to set as they cool. For softer cookies, bake for 10 minutes. For slightly crisper edges, go for 12 minutes. I’ve found that 11 minutes is the sweet spot in my oven, but every oven is a little different.
- Cool the cookies. Let the cookies cool on the baking sheet for 5 minutes. This is important—they’re too delicate to move right away. After 5 minutes, transfer them to a wire cooling rack to cool completely. If you try to move them too soon, they’ll fall apart. Trust me, I’ve learned this the hard way more times than I’d like to admit.
- Repeat with remaining dough. If you’re reusing the same baking sheet, let it cool completely before placing new dough on it. A hot baking sheet will cause the butter to melt too quickly, making the cookies spread too much.
This recipe makes about 24 cookies, depending on how generous you are with your scooping. They’ll disappear fast, so maybe make a double batch if you’re feeding a crowd.
Cooking Tips & Techniques
After making these cookies probably fifty times (I’m not exaggerating), I’ve picked up a few things that make a real difference. Here are the tips I wish someone had told me the first time:
Don’t overmix the dough. This is the number one mistake I see home bakers make. Once you add the flour, mix just until it disappears. Overmixing develops gluten, which makes cookies tough and bread-like instead of tender and soft. I learned this the hard way when I made a batch that came out more like hockey pucks than cookies. Mix until you see the last streak of flour disappear, then stop immediately.
Use room temperature ingredients. Cold butter doesn’t cream properly with sugar, and cold egg can seize up the mixture. Let your butter and egg sit out for about 30 minutes before you start. If you’re in a rush, cut the butter into small cubes and place the egg in a bowl of warm water for 5 minutes. It’s a small step that makes a big difference in the final texture.
Blot your pumpkin puree. This is a trick I picked up from a pastry chef friend. Pumpkin puree contains a lot of water, which can make cookies spread too much and turn out flat. Before adding it to the dough, spread the pumpkin puree on a paper towel-lined plate and blot it gently with another paper towel. You’ll be surprised how much liquid comes out. This step isn’t mandatory, but it gives you thicker, more perfectly shaped cookies.
Chill the dough if needed. If your kitchen is warm or the dough feels too sticky to handle, pop it in the fridge for 15-20 minutes. Chilled dough is easier to roll and holds its shape better in the oven. I do this during summer months when my kitchen feels like a sauna.
Rotate your baking sheets halfway through. Most ovens have hot spots, which means cookies on one side might brown faster than the other. About halfway through the baking time, rotate the baking sheets front to back and swap the top and bottom racks. This ensures even baking and consistent results.
Use a cookie scoop for uniform size. Uniform cookies bake evenly. A 1.5-tablespoon cookie scoop gives you perfectly sized dough balls every time. If you don’t have one, use a tablespoon measure and level it off. Your cookies will look more professional and bake more consistently.
Variations & Adaptations
One of the things I love about this recipe is how flexible it is. Here are some variations I’ve tried and loved:
Gluten-Free Version
Substitute the all-purpose flour with a 1:1 gluten-free baking flour blend. I’ve had great results with King Arthur Measure for Measure flour. The cookies come out slightly more delicate, but the flavor is spot on. Add an extra tablespoon of flour if the dough feels too wet.
Dairy-Free Version
Use vegan butter sticks instead of regular butter. I recommend Miyoko’s or Country Crock Plant Butter—they have the right fat content for baking. Avoid spreadable margarine in tubs, as they contain too much water and will make your cookies spread too much.
Extra Spiced Version
If you’re like me and love a punch of warm spices, add 1/4 teaspoon of ground cloves and 1/4 teaspoon of allspice to the dry ingredients. This gives the cookies a more complex, chai-like flavor profile. My husband calls these the “fall explosion” cookies.
Chocolate Chip Pumpkin Snickerdoodles
Fold in 1/2 cup of white chocolate chips or semi-sweet chocolate chips after mixing the dough. The chocolate adds a creamy sweetness that pairs beautifully with the pumpkin and cinnamon. My kids go absolutely crazy for these.
Pumpkin Snickerdoodle Bars
If you don’t feel like rolling individual cookies, press the dough into a greased 9×9-inch baking pan, sprinkle the cinnamon sugar on top, and bake for 18-20 minutes. Cut into squares once cooled. They’re less pretty but just as delicious, and they come together even faster.
Serving & Storage Suggestions
These cookies are best served slightly warm, when the edges are still a little soft and the cinnamon sugar coating is perfectly set. I like to let them cool on the baking sheet for 5 minutes, then transfer them to a cooling rack for another 5 minutes before serving. If you can wait that long, that is.
They’re wonderful on their own, but they also pair beautifully with a cold glass of milk (for the kids) or a warm cup of coffee or chai tea (for the adults). I’ve also been known to crumble one over a bowl of vanilla ice cream for a quick dessert that feels fancy without any extra effort.
Storage: Store the cookies in an airtight container at room temperature for up to 5 days. Place a slice of bread in the container to keep them soft—the cookies will absorb moisture from the bread and stay tender. Replace the bread slice every other day if the cookies last that long (they never do in my house).
Freezing: These cookies freeze beautifully. Place cooled cookies in a single layer in a freezer-safe container or zip-top bag, separating layers with parchment paper. They’ll keep for up to 3 months. To thaw, let them sit at room temperature for about 15 minutes. You can also freeze the unbaked dough balls—just place them on a baking sheet, freeze until solid, then transfer to a freezer bag. Bake from frozen, adding 2-3 minutes to the baking time.
Flavor development: Honestly, these cookies taste even better the next day. The spices have time to meld together, and the texture becomes even softer. If you can resist eating them all on day one, you’re in for a treat on day two.
Nutritional Information & Benefits
Here’s a rough estimate per cookie (based on 24 cookies):
| Nutrient | Amount Per Cookie |
|---|---|
| Calories | 145 |
| Total Fat | 6g |
| Saturated Fat | 3.5g |
| Cholesterol | 20mg |
| Sodium | 95mg |
| Total Carbohydrates | 21g |
| Dietary Fiber | 1g |
| Sugars | 13g |
| Protein | 2g |
| Vitamin A | 15% DV |
The pumpkin puree adds a boost of vitamin A, which is great for eye health and immune function. Cinnamon has anti-inflammatory properties and may help regulate blood sugar levels. So while these are definitely a treat, they’re not completely without redeeming qualities. Plus, they’re free of artificial colors and preservatives, which is more than you can say for most store-bought cookies.
If you’re watching your sugar intake, you can reduce the sugar to 1/2 cup total and add a tablespoon of maple syrup for sweetness. The texture will be slightly different, but they’ll still be delicious.
Conclusion
These Kid-Approved Pumpkin Snickerdoodle Cookies are the kind of recipe that becomes a family tradition. They’re simple enough for a Tuesday afternoon baking session with the kids, but impressive enough to bring to a holiday gathering or bake sale. The combination of warm spices, soft texture, and that signature cinnamon sugar coating is just irresistible.
What I love most about this recipe is how forgiving it is. You don’t need to be a professional baker to get perfect results. The dough is easy to work with, the ingredients are forgiving, and even if you make a mistake (like I did on my first few attempts), the cookies still come out delicious. That’s the beauty of a well-tested recipe—it works even when you don’t do everything perfectly.
I’d love to hear how these turn out for you! Did your kids help roll the dough balls? Did you try any of the variations? Drop a comment below and let me know. And if you loved this recipe, share it with a friend who needs a little pumpkin goodness in their life. Happy baking, friends!
Frequently Asked Questions
Can I use pumpkin pie spice instead of individual spices?
Yes, you can substitute the cinnamon, nutmeg, and ginger with 2 teaspoons of pumpkin pie spice. Just keep in mind that pumpkin pie spice blends vary by brand, so the flavor might be slightly different. I prefer using individual spices because I can control the balance, but the blend works in a pinch.
Why did my cookies turn out flat?
Flat cookies usually happen for one of three reasons: the butter was too soft or melted, the dough wasn’t chilled, or too much sugar was used. Make sure your butter is softened but not melted, and consider chilling the dough for 15-20 minutes if your kitchen is warm. Also, make sure you’re measuring your flour correctly—scooping directly from the bag packs in too much flour, which can actually make cookies spread more.
Can I make these cookies ahead of time?
Absolutely! You can prepare the dough up to 2 days in advance and keep it covered in the refrigerator. Let it sit at room temperature for about 10 minutes before rolling and baking. You can also freeze the baked cookies for up to 3 months, or freeze the unbaked dough balls for fresh cookies anytime.
Can I use fresh pumpkin instead of canned?
You can, but you’ll need to roast and puree the pumpkin first, then strain it through a cheesecloth or paper towel to remove excess moisture. Fresh pumpkin puree has a higher water content than canned, which can make the cookies spread more and turn out gummy. If you’re using fresh pumpkin, blot it well with paper towels before adding it to the dough.
How do I know when the cookies are done baking?
The cookies are done when the edges are set and lightly golden, but the centers still look soft and slightly underdone. They should have a crackled appearance on top. If you insert a toothpick into the center, it should come out with a few moist crumbs attached—not wet batter, but not completely clean either. The cookies will continue to set as they cool on the baking sheet, so don’t overbake them.
Pin This Recipe!
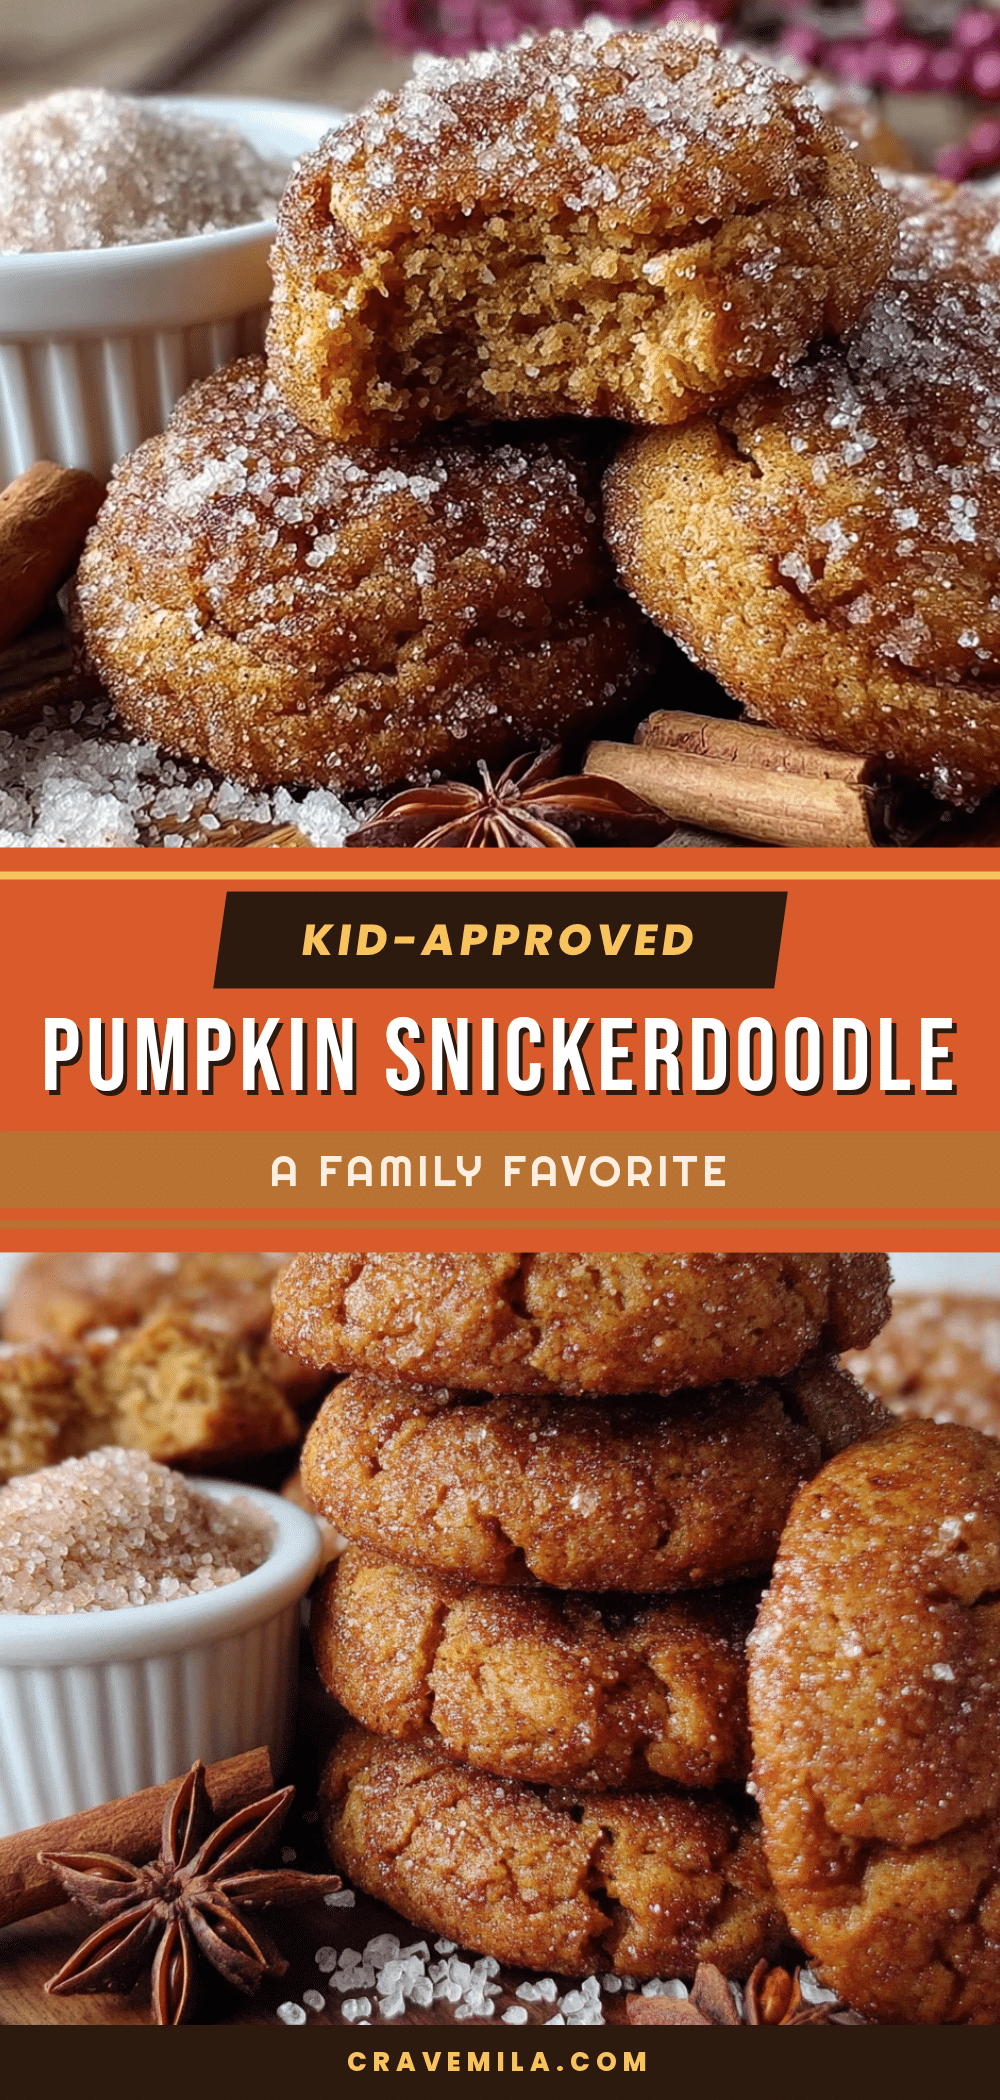
Easy Kid-Approved Pumpkin Snickerdoodle Cookies Recipe
These soft, spiced pumpkin snickerdoodle cookies are a quick and easy treat perfect for bake sales, family baking, or any fall occasion. Made with simple ingredients and ready in about 25 minutes, they feature a crackled top and a cinnamon sugar coating that kids and adults love.
- Prep Time: 15 minutes
- Cook Time: 10 minutes
- Total Time: 25 minutes
- Yield: 24 servings 1x
- Category: Dessert
- Cuisine: American
Ingredients
- 1/2 cup (113g) unsalted butter, softened
- 3/4 cup (150g) granulated sugar
- 1/4 cup (50g) packed light brown sugar
- 1/2 cup (120g) pumpkin puree
- 1 large egg, room temperature
- 1 teaspoon vanilla extract
- 2 cups (250g) all-purpose flour
- 1 teaspoon cream of tartar
- 1/2 teaspoon baking soda
- 1/2 teaspoon salt
- 2 teaspoons ground cinnamon
- 1/2 teaspoon ground nutmeg
- 1/4 teaspoon ground ginger
- 1/4 cup (50g) granulated sugar (for coating)
- 1 tablespoon ground cinnamon (for coating)
Instructions
- Preheat your oven to 350°F (175°C). Line two baking sheets with parchment paper.
- In a large mixing bowl, beat the softened butter, granulated sugar, and brown sugar together until light and fluffy, about 2-3 minutes with a hand mixer on medium speed. Scrape down the sides halfway through.
- Beat in the pumpkin puree, egg, and vanilla extract until well combined. The mixture may look curdled—this is normal.
- In a separate medium bowl, whisk together the flour, cream of tartar, baking soda, salt, cinnamon, nutmeg, and ginger.
- Gradually add the dry ingredients to the wet mixture, mixing on low speed or folding with a spatula until just combined. Do not overmix.
- In a small bowl, stir together the 1/4 cup granulated sugar and 1 tablespoon cinnamon for the coating.
- Using a cookie scoop or tablespoon, scoop rounded tablespoons of dough (about 1.5 tablespoons each). Roll each into a smooth ball, then coat in the cinnamon sugar mixture. Place on prepared baking sheets, spacing 2 inches apart.
- Bake for 10-12 minutes, until edges are set and tops look slightly crackled. Centers should still look soft.
- Let cookies cool on the baking sheet for 5 minutes, then transfer to a wire cooling rack to cool completely.
- Repeat with remaining dough, letting the baking sheet cool completely between batches.
Notes
For thicker cookies, blot the pumpkin puree with paper towels to remove excess moisture. If dough is too sticky, chill for 15-20 minutes. Rotate baking sheets halfway through for even baking. Cookies taste even better the next day.
Nutrition
- Serving Size: 1 cookie
- Calories: 145
- Sugar: 13
- Sodium: 95
- Fat: 6
- Saturated Fat: 3.5
- Carbohydrates: 21
- Fiber: 1
- Protein: 2
Keywords: pumpkin snickerdoodle cookies, easy pumpkin cookies, kid-approved cookies, fall cookies, snickerdoodle recipe



