Hand me that baking sheet, my neighbor called over the fence last September. I was staring at a half-empty jar of pizza sauce and a bag of bagels that had seen better days. She didn’t offer advice or a recipe. She just watched me for a moment, then disappeared back inside her kitchen. Ten minutes later, she appeared at my back door holding a container of what looked like perfectly browned mini pizza bagels, still warm. “For the kids,” she said. “Trust me, you’re going to want to make a double batch.”
I honestly didn’t think much of it at first. I mean, mini pizza bagels? I figured they were just a glorified snack, something to toss at the kids when they were hangry. But that first bite changed my mind. The bagel was perfectly crisp on the bottom, the cheese was bubbly and golden, and the sauce had this little kick of garlic that store-bought versions just don’t have. My daughter, who usually picks apart anything I make, ate three of them without saying a word. That’s when I knew this was different.
So I asked my neighbor about the recipe, and she laughed. “There’s no real recipe,” she said. “You just have to know when to stop adding cheese.” That stuck with me. Over the next few weeks, I played around with the idea, trying different bagels, different cheeses, different freeze-and-reheat methods. I wanted something that would actually hold up after a month in the freezer, not turn into a soggy mess. Maybe you’ve been there—pulling out something you prepped with good intentions, only to have it fall apart on the plate.
What came out of those experiments is what I’m sharing today. These freezer-friendly mini pizza bagels are the real deal. They’re the snack that keeps on giving, the one you can prep on a Sunday afternoon and forget about until the 3:00 PM hangry monster shows up. I keep making them because they solve a problem I didn’t even know I had: how to feed hungry kids something homemade without losing my mind. And honestly, they taste way better than anything from a box.
Why You’ll Love This Recipe
Let me tell you why these mini pizza bagels have become a staple in my freezer. I’ve tested this recipe more times than I can count, and every single batch has been a winner. Here’s what makes them stand out:
- Quick & Easy: From start to finish, you’re looking at about 20 minutes of active prep time. The oven does the rest. Perfect for those afternoons when you have exactly zero energy left.
- Simple Ingredients: You probably have most of this stuff in your kitchen right now. Bagels, pizza sauce, cheese, maybe some pepperoni. No fancy trips to specialty stores required.
- Perfect for After School: These are the ultimate after-school snack. They come together in minutes from frozen, and kids can even pop them in the toaster oven themselves. Total independence win.
- Crowd-Pleaser: I’ve brought these to playdates, birthday parties, and even a grown-up game night. Kids devour them. Adults sneak extras. Nobody judges.
- Unbelievably Delicious: The key is in the bagel itself. A good, chewy bagel gives you that satisfying bite that frozen pizza bagels just can’t replicate. The cheese gets perfectly crispy on the edges, and the sauce stays saucy without making everything soggy.
What makes this recipe different from every other pizza bagel tutorial out there? It’s the freeze-and-reheat method. Most recipes tell you to assemble and freeze, but they don’t account for the moisture that builds up during freezing. I’ve figured out the exact ratio of sauce to cheese to bagel that prevents sogginess. It’s not just another version—it’s the best version I’ve ever made, and I’ve made a lot.
This recipe isn’t just good. It is the kind that makes you close your eyes after the first bite, even if you’re standing over the kitchen sink. It’s comfort food reimagined—faster, freezer-friendly, but with the same soul-soothing satisfaction of a real pizza. Perfect for impressing your kids without stressing yourself out, or turning a chaotic Tuesday into something a little bit special.
What Ingredients You Will Need
This recipe uses simple, pantry-friendly ingredients to deliver big flavor and that perfect crispy-chewy texture. Here’s what you’ll need to grab:
For the Base:
- 6 plain bagels (I prefer Thomas’ or a bakery-style bagel for best texture; avoid the super soft, pre-sliced ones)
- 1 cup pizza sauce (use your favorite jarred brand—I like Rao’s for its clean flavor, but any works)
- 2 cups shredded mozzarella cheese (low-moisture part-skim is best; it melts without getting greasy)
- 1/2 cup mini pepperoni slices (optional, but highly recommended for that classic pizza feel)
For Extra Flavor (Optional but Recommended):
- 1 teaspoon dried oregano
- 1/2 teaspoon garlic powder
- 1/4 teaspoon red pepper flakes (for a little heat)
- Fresh basil leaves for garnish (if serving fresh)
A few notes on ingredient selection. First, the bagels matter more than you think. I’ve tried this with everything bagels, sesame bagels, and even gluten-free bagels. Plain bagels work best because they let the pizza flavors shine. If you use everything bagels, the seeds can burn slightly during reheating. I learned that the hard way. Second, don’t skimp on the cheese. Low-moisture mozzarella is your friend here. Fresh mozzarella has too much water and will make your bagels soggy after freezing. I recommend Sargento or Kraft for consistent melting.
For the sauce, you can use any brand you like. I’ve used homemade sauce, and it’s great, but jarred sauce saves time and works perfectly. If you’re feeling fancy, add a pinch of sugar to balance the acidity. For a dairy-free version, use vegan mozzarella shreds—they freeze surprisingly well. And if you don’t have pepperoni, try cooked Italian sausage crumbles or chopped mushrooms. The beauty of this recipe is its flexibility.
Equipment Needed
You don’t need much to pull these off, which is part of the charm. Here’s what I use:
- Baking sheet: A standard half-sheet pan works great. Line it with parchment paper for easy cleanup.
- Parchment paper or silicone baking mat: Prevents sticking and makes transfer to the freezer simple.
- Sharp knife or serrated knife: For slicing bagels in half if they aren’t pre-sliced. A serrated knife gives you clean cuts without squishing the bagel.
- Small spoon or offset spatula: For spreading sauce evenly. I use a small rubber spatula—it gets into the bagel’s nooks and crannies.
- Freezer-safe zip-top bags or airtight container: For storing your assembled pizza bagels. I prefer quart-size bags for single servings.
- Toaster oven or conventional oven: For reheating. A toaster oven is faster and more energy-efficient, but a regular oven works too.
If you don’t have a baking sheet, you can use a large cutting board or even a plate for the initial freezing step. I’ve used a cookie sheet in a pinch. For the bags, any freezer-safe bag works. I’ve reused bags before—just wash and dry them thoroughly. And if you don’t have a toaster oven, an air fryer works beautifully. Just reduce the temperature by 25 degrees and check frequently.
Preparation Method
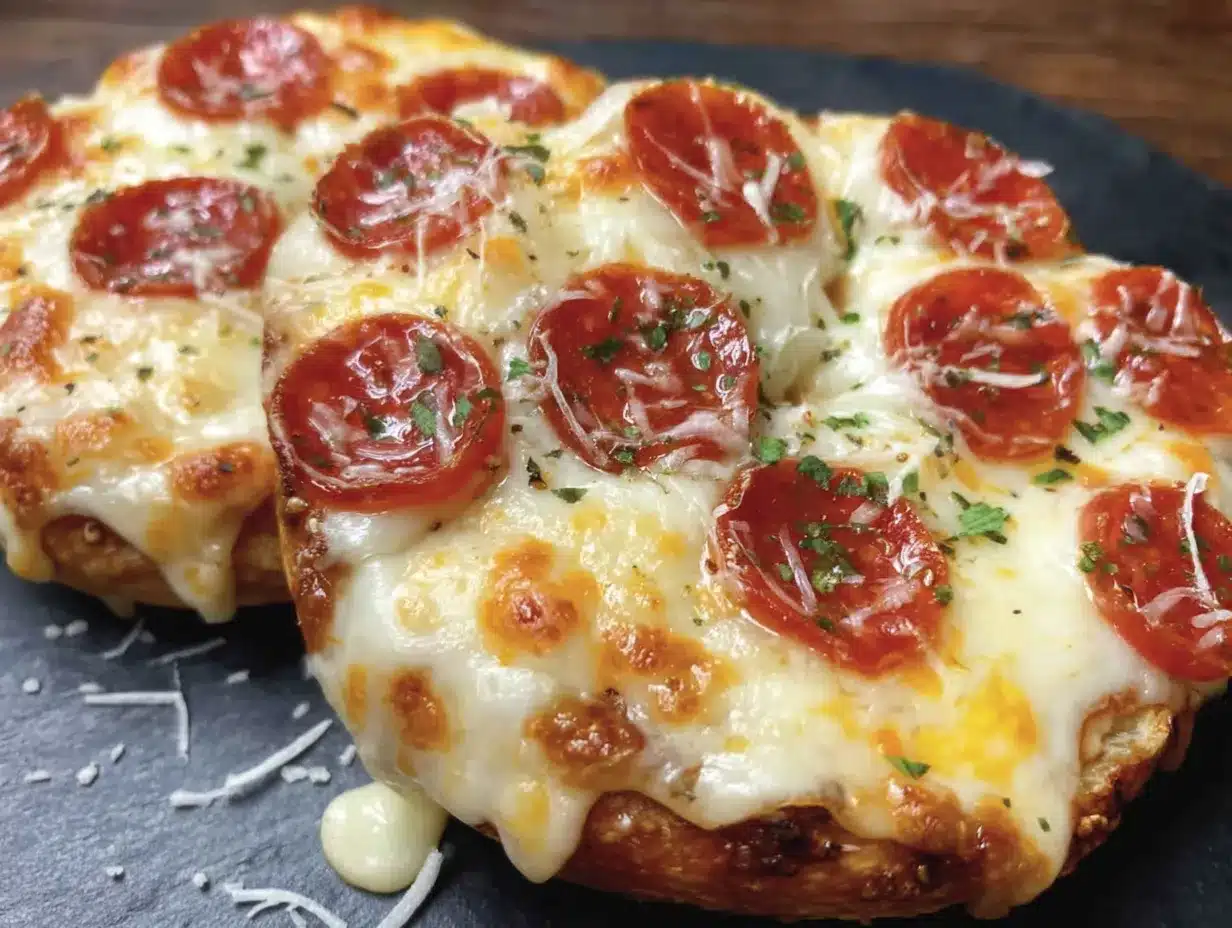
Alright, let’s get into the nitty-gritty. This method is straightforward, but each step matters. Follow these steps, and you’ll have a freezer full of perfect mini pizza bagels.
- Preheat your oven to 375°F (190°C). While it’s heating, line your baking sheet with parchment paper. This step is non-negotiable if you want easy cleanup. Trust me, melted cheese on a bare pan is a nightmare.
- Slice your bagels in half horizontally. If they’re pre-sliced, great. If not, use a serrated knife and a gentle sawing motion. You want even halves, about 1/2-inch thick. Don’t go too thin, or they’ll get crunchy. Too thick, and they won’t cook through properly. I aim for a 1-inch total thickness per half.
- Arrange the bagel halves on the prepared baking sheet, cut side up. Make sure they’re not touching. This gives them room to crisp up evenly. If they’re crowded, they’ll steam instead of toast.
- Spoon about 1 tablespoon of pizza sauce onto each bagel half. Spread it evenly, leaving a small border around the edge. Don’t drown them. Too much sauce leads to soggy bagels. I use the back of my spoon to spread it in a thin, even layer. You should see the bagel through the sauce slightly.
- Sprinkle a generous amount of shredded mozzarella over the sauce. About 2 tablespoons per half feels right. Don’t be shy, but don’t pile it too high. The cheese should cover the sauce completely. I use my fingers to distribute it evenly. If you’re using pepperoni, place 3-4 slices on top of the cheese now.
- Season with a pinch of dried oregano and garlic powder. This step is small but mighty. It adds that pizza parlor flavor that makes these taste homemade. If you like heat, add a tiny pinch of red pepper flakes.
- Place the baking sheet in the preheated oven and bake for 12-15 minutes. You’re looking for the cheese to be melted and bubbly, and the edges of the bagel to be golden brown. The bottoms should be lightly toasted. If you like extra crispy edges, give them 2 more minutes. Watch closely so the cheese doesn’t burn.
- Remove from the oven and let cool completely on the baking sheet. This is crucial. If you try to freeze them while they’re warm, they’ll stick together and get soggy. I let them sit for at least 30 minutes. Sometimes I pop them in the fridge to speed things up.
- Once completely cool, transfer the baking sheet to the freezer for 1-2 hours, or until the pizza bagels are frozen solid. This is called flash freezing. It prevents them from sticking together when you bag them. Don’t skip this step. I’ve made that mistake, and I ended up with a giant block of bagels.
- Transfer the frozen pizza bagels to a freezer-safe zip-top bag or airtight container. Squeeze out as much air as possible before sealing. Label the bag with the date and contents. They’ll keep for up to 3 months, but honestly, they never last that long in my house.
When you’re ready to eat, there’s no need to thaw. Just preheat your toaster oven or oven to 375°F (190°C). Place the frozen pizza bagels directly on the rack or a baking sheet. Bake for 8-10 minutes, or until the cheese is bubbly and the bagel is heated through. For a toaster oven, 6-8 minutes usually does it. Keep an eye on them—every oven is different. The bagel should be crisp on the outside and soft on the inside.
Cooking Tips & Techniques
I’ve made a lot of mistakes with these little guys, so let me save you some trouble. Here are my best tips:
Don’t over-sauce. This is the number one mistake I see. Too much sauce makes the bagel soggy, especially after freezing. A thin, even layer is all you need. Think of it as a flavor accent, not a soup base. I use about 1 tablespoon per half, and I spread it right to the edges.
Use low-moisture cheese. Fresh mozzarella is delicious on a fresh pizza, but it’s a disaster for freezer bagels. The extra water turns to ice crystals, and you end up with a watery mess. Low-moisture part-skim mozzarella melts beautifully and freezes well. I’ve tested this with whole milk mozzarella too, and it works, but the part-skim version is more consistent.
Flash freeze before bagging. I cannot stress this enough. If you toss warm or even room-temperature bagels into a bag, they’ll stick together in a clump. Freeze them solid on the baking sheet first. This takes about 2 hours, but it’s worth the wait. You can even leave them overnight if you’re prepping ahead.
Reheat from frozen. Don’t thaw them. Thawing introduces moisture, which makes the bagel soggy. Go straight from freezer to oven. The direct heat crisps the bagel while melting the cheese. It’s the magic of this method. I’ve reheated them in a microwave in a pinch, and they’re okay, but the texture is nowhere near as good.
Experiment with bagel types. Plain bagels are my go-to, but I’ve had great success with everything bagels (just watch the seeds for burning). Mini bagels are perfect for little hands, but they cook faster—reduce the bake time by 2-3 minutes. For a lower-carb option, try using bagel thins or even English muffins. The texture is different, but the concept works.
Variations & Adaptations
This recipe is incredibly flexible. Here are some of my favorite variations:
Veggie Lover’s Version: Skip the pepperoni and pile on sliced mushrooms, bell peppers, and black olives. Sauté the mushrooms first to remove excess moisture, or they’ll make the bagel soggy. I like to add a sprinkle of dried basil for extra flavor.
Spicy Hawaiian Twist: Use Canadian bacon or ham instead of pepperoni, and add a few chunks of pineapple. Yes, pineapple on pizza is controversial, but on a bagel, it’s amazing. The sweetness balances the salty cheese. Add a drizzle of sriracha for heat.
Breakfast Pizza Bagels: Swap the pizza sauce for a thin layer of scrambled eggs, add cooked sausage crumbles, and top with cheddar cheese. Bake as directed. These are perfect for busy mornings. You can even freeze them and reheat for a quick breakfast.
Gluten-Free Adaptation: Use gluten-free bagels. I’ve tried several brands, and Udi’s works best. The texture is a bit different, but the flavor is solid. Reduce the bake time by 2-3 minutes since gluten-free bagels tend to dry out faster.
Cheese Lover’s Dream: Use a blend of mozzarella, provolone, and parmesan. The provolone adds a sharpness, and the parmesan gives a salty crunch. I’ve also used cheddar, which melts beautifully and adds a golden color. Just don’t use pre-shredded cheese from a bag—it has anti-caking agents that prevent smooth melting.
Serving & Storage Suggestions
These mini pizza bagels are best served hot, straight from the oven. The cheese should be bubbly and the bagel crisp. I like to serve them with a side of marinara sauce for dipping, but they’re perfectly delicious on their own. For a complete after-school snack, pair them with carrot sticks or apple slices. My kids love them with a small salad, but honestly, they usually just grab a handful and run.
For storage, follow the freezing instructions above. They’ll keep in the freezer for up to 3 months. I’ve kept them for 4 months, and they were still good, but the texture starts to decline after that. The bagels can get a bit dry. If you’re planning to serve them fresh, you can assemble them and refrigerate for up to 24 hours before baking. Just add 2-3 minutes to the bake time since they’ll be cold.
Reheating is simple. From frozen, bake at 375°F (190°C) for 8-10 minutes. From the fridge, bake for 10-12 minutes. If you’re using a toaster oven, check at 6 minutes. I’ve also reheated them in an air fryer at 350°F (175°C) for 5-6 minutes, and they come out perfectly crispy. Avoid the microwave if you can—it makes the bagel chewy and the cheese rubbery.
One thing I love about these is that the flavors actually meld together after a few days in the freezer. The sauce soaks into the bagel slightly, creating a more cohesive bite. It’s subtle, but noticeable. So don’t be afraid to make a big batch. They only get better.
Nutritional Information & Benefits
Here’s a rough estimate per serving (2 mini pizza bagels, using standard ingredients):
- Calories: 320
- Protein: 16g
- Carbohydrates: 34g
- Fat: 14g
- Fiber: 2g
- Sugar: 4g
- Sodium: 680mg
These numbers will vary based on your specific ingredients. Using whole wheat bagels adds fiber. Turkey pepperoni reduces fat and calories. Low-fat cheese cuts calories but still melts well. I’ve made a lighter version using reduced-fat cheese and turkey pepperoni, and it comes in at around 250 calories per serving.
The health benefits here are about portion control and convenience. By making your own, you control the sodium and fat content. Store-bought frozen pizza bagels can have double the sodium and unhealthy preservatives. Plus, you’re using real cheese and real bagels, not processed imitations. The protein from the cheese and bagel keeps kids full longer, which is a win for after-school snacking. And honestly, knowing exactly what’s in your food is a benefit in itself.
Potential allergens: dairy (cheese), gluten (bagels), and soy (sometimes in pepperoni). For a dairy-free version, use vegan cheese. For gluten-free, use gluten-free bagels. Always check labels if you have specific allergies.
Conclusion
These easy freezer-friendly mini pizza bagels have genuinely changed how I handle after-school hunger. They’re quick, customizable, and they actually taste like something you’d want to eat, not just a desperate snack. I love that I can prep a batch on a Sunday and forget about it until the chaos hits. And when it does, I just pop a few in the oven and suddenly I’m the hero parent who made homemade pizza bagels. It’s a small win, but it feels huge.
I encourage you to make these your own. Swap the pepperoni for mushrooms. Use cheddar instead of mozzarella. Add a sprinkle of Italian seasoning. The base recipe is forgiving, and the variations are endless. That’s the beauty of cooking—you get to decide what works for your family.
I’d love to hear how yours turn out. Drop a comment below and let me know what toppings you used, or tag me in your photos. Seriously, I get so excited when I see someone else making these. And if you have a favorite variation I haven’t tried, share it. We’re all in this together, figuring out how to feed hungry people without losing our minds. Happy cooking!
Frequently Asked Questions
Can I use mini bagels instead of regular bagels?
Absolutely. Mini bagels work great, especially for little kids or smaller appetites. Just reduce the bake time by 2-3 minutes since they’re thinner. You’ll also want to use less sauce and cheese per half. I usually use about 1/2 tablespoon of sauce and 1 tablespoon of cheese for mini bagels.
Do I have to freeze them before baking?
No, you can bake them immediately after assembling. Just skip the flash freezing step and bake at 375°F (190°C) for 12-15 minutes. The freezing method is for making a big batch to have on hand. If you’re serving them right away, go ahead and bake them fresh. They’re delicious either way.
Can I use a different type of cheese?
Yes, you can experiment with other cheeses. Cheddar, provolone, and Monterey Jack all melt well. I’ve even used a Mexican blend for a different flavor. Just avoid fresh mozzarella or soft cheeses like brie, as they have too much moisture and will make the bagels soggy. Stick with low-moisture cheeses for the best results.
How do I reheat them without an oven?
If you don’t have an oven or toaster oven, you can use an air fryer at 350°F (175°C) for 5-6 minutes. A microwave works in a pinch, but the texture won’t be as good. For the microwave, heat on high for 30-45 seconds, then let them sit for a minute. The bagel will be soft rather than crispy, but they’ll still taste good.
Can I add other toppings like mushrooms or olives?
Definitely. Just make sure to cook any wet toppings first. Sauté mushrooms to remove excess moisture, and drain olives well. If you add raw vegetables, they’ll release water during freezing and baking, making the bagels soggy. Pre-cooking solves that problem. I’ve added caramelized onions and roasted red peppers with great success.
Pin This Recipe!
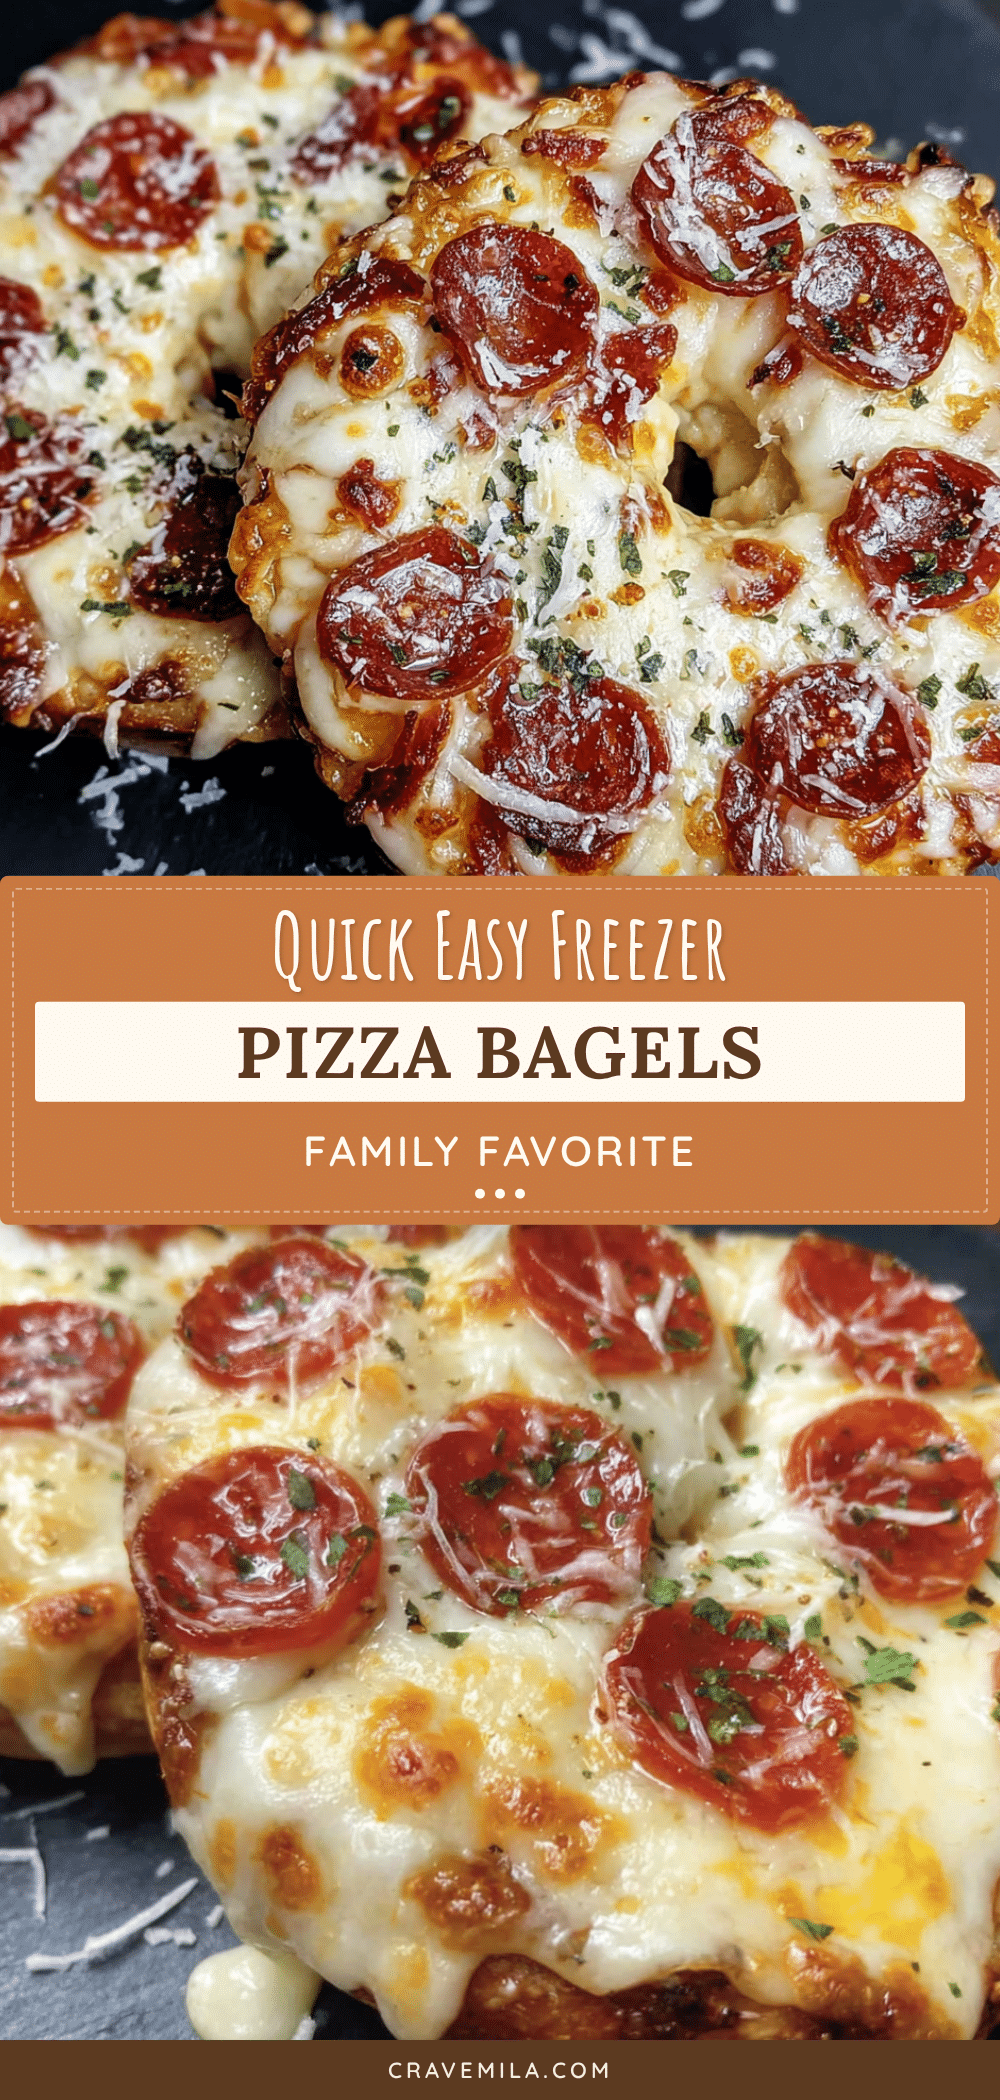
Easy Freezer-Friendly Mini Pizza Bagels for After School
These freezer-friendly mini pizza bagels are the ultimate after-school snack. They come together in minutes from frozen, and kids can even pop them in the toaster oven themselves.
- Prep Time: 20 minutes
- Cook Time: 15 minutes
- Total Time: 35 minutes (plus freezing time)
- Yield: 12 servings (2 mini pizza bagels per serving) 1x
- Category: Snack
- Cuisine: American
Ingredients
- 6 plain bagels (preferably Thomas’ or bakery-style)
- 1 cup pizza sauce (like Rao’s)
- 2 cups shredded low-moisture part-skim mozzarella cheese
- 1/2 cup mini pepperoni slices (optional)
- 1 teaspoon dried oregano
- 1/2 teaspoon garlic powder
- 1/4 teaspoon red pepper flakes (optional)
- Fresh basil leaves for garnish (optional)
Instructions
- Preheat your oven to 375°F (190°C). Line a baking sheet with parchment paper.
- Slice bagels in half horizontally if not pre-sliced, aiming for 1/2-inch thick halves.
- Arrange bagel halves cut side up on the prepared baking sheet, not touching.
- Spoon about 1 tablespoon of pizza sauce onto each bagel half and spread evenly, leaving a small border.
- Sprinkle about 2 tablespoons of shredded mozzarella over the sauce on each half.
- Place 3-4 mini pepperoni slices on top of the cheese if using.
- Season with a pinch of dried oregano and garlic powder. Add red pepper flakes if desired.
- Bake for 12-15 minutes until cheese is melted and bubbly and bagel edges are golden brown.
- Remove from oven and let cool completely on the baking sheet (at least 30 minutes).
- Once cool, transfer the baking sheet to the freezer for 1-2 hours until pizza bagels are frozen solid.
- Transfer frozen pizza bagels to a freezer-safe zip-top bag or airtight container, squeezing out excess air. Label with date and contents. Store for up to 3 months.
- To reheat: Preheat oven or toaster oven to 375°F (190°C). Place frozen pizza bagels directly on rack or baking sheet. Bake for 8-10 minutes (6-8 minutes for toaster oven) until cheese is bubbly and bagel is heated through.
Notes
Don’t over-sauce to prevent sogginess. Use low-moisture mozzarella for best freezing results. Flash freeze before bagging to prevent sticking. Reheat from frozen without thawing. Experiment with bagel types but avoid everything bagels as seeds can burn.
Nutrition
- Serving Size: 2 mini pizza bagels
- Calories: 320
- Sugar: 4
- Sodium: 680
- Fat: 14
- Carbohydrates: 34
- Fiber: 2
- Protein: 16
Keywords: pizza bagels, freezer-friendly, after school snack, mini pizza bagels, easy snack, kid-friendly



