Introduction
Jen wasn’t trying to impress anyone. I’d stopped by her place to grab a book I’d lent her months ago—one of those awkward, overdue favors you finally work up the nerve to collect—and the smell hit me before I even got through the door. It was warm, buttery, and sweet in a way that made my brain immediately skip dinner plans and go straight to dessert. She was pulling a pan out of the oven, wearing an old t-shirt with a coffee stain on the sleeve, and she just shrugged when I asked what it was. “Oh, just some blondies. I had candy corn left over from last Halloween.” Just some blondies. Like she hadn’t just created something that smelled like September in a pan.
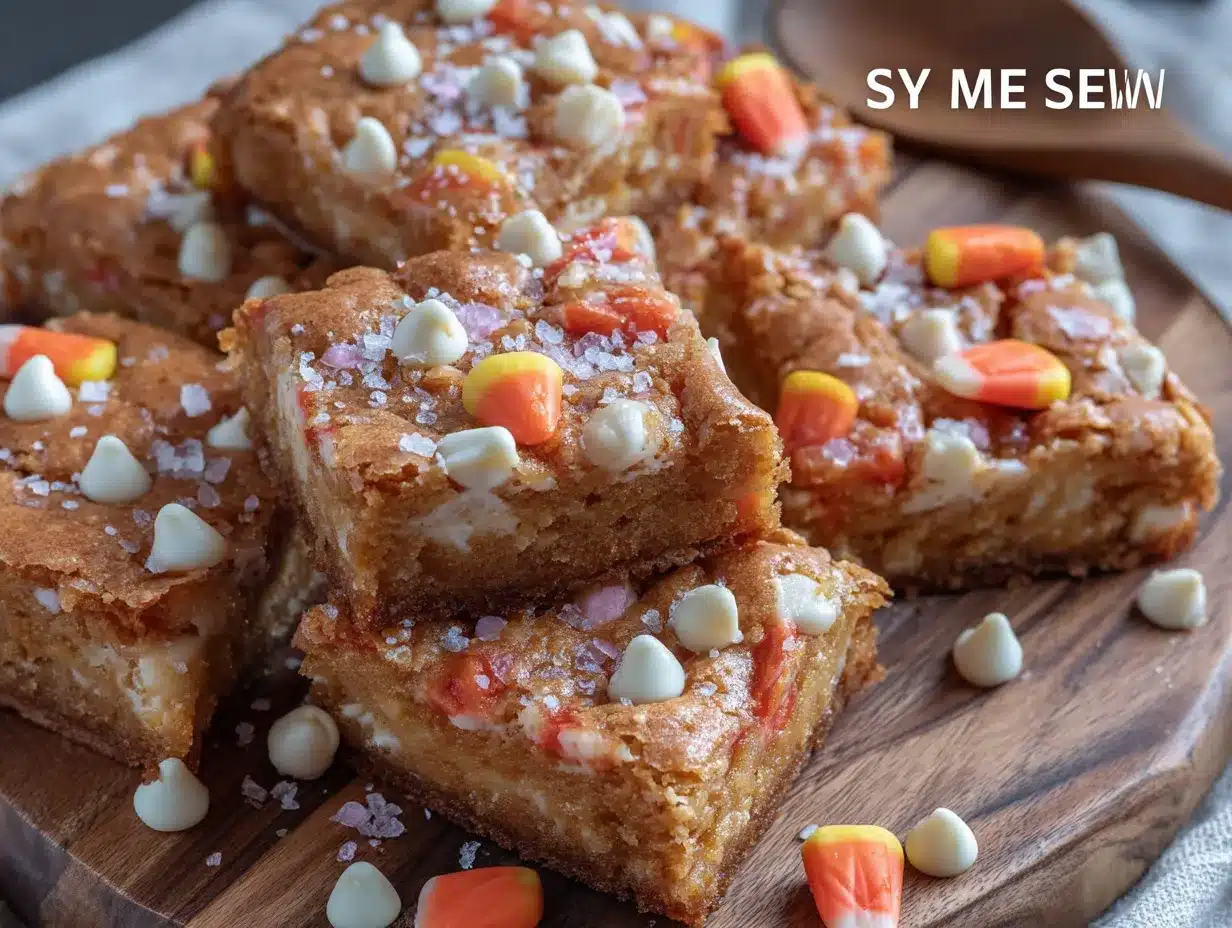
I stood there in her kitchen, probably looking a little too eager, while she cut into them. The edges were perfectly golden, and the inside was studded with those little orange, yellow, and white triangles. She tossed a warm piece onto a napkin and handed it to me like it was no big deal. One bite, and I swear I almost asked for the recipe right there with my mouth full. Honestly, maybe I did. She laughed and told me it was basically a box mix with extra stuff thrown in. But let me tell you, the woman undersold herself by a mile.
I’ve been making these easy candy corn blondies with white chocolate chips every fall since that afternoon. They’re not fancy, and they don’t pretend to be. But they’ve got this nostalgic, almost caramel-like chew from the candy corn melting into the batter, and the white chocolate chips add little pockets of creaminess that balance the sweetness just right. Maybe you’ve been there—standing in someone’s kitchen, eating something so unexpectedly good that you know you’ll be thinking about it for weeks. That’s this recipe. And the best part? You can throw it together in about ten minutes, which is exactly what I need when a craving hits and I don’t have the energy for a project.
Why You’ll Love This Recipe
Look, I’ve tested a lot of fall dessert recipes over the years. Some are gorgeous but take an hour of dirty dishes. Others are simple but taste, well, simple. These candy corn blondies hit that sweet spot where they’re almost too easy to believe, but the result is genuinely impressive. I’ve brought them to potlucks and watched people go back for thirds before they even ask what’s in them.
- Quick & Easy: From mixing bowl to oven in under 15 minutes. No stand mixer required, no chilling time, no complicated steps. This is a weeknight win if I’ve ever seen one.
- Simple Ingredients: You probably have most of this in your pantry right now. Butter, sugar, eggs, flour. The candy corn and white chocolate chips are the only specialty items, and let’s be honest—you might already have a bag of candy corn hiding in the back of a cupboard from last October.
- Perfect for Fall Gatherings: Halloween parties, Thanksgiving dessert tables, or just a random Tuesday when you need something cozy. These blondies fit in everywhere without stealing the spotlight too hard.
- Crowd-Pleaser: Kids love the candy corn pieces. Adults love the buttery blondie base. Everyone loves that they don’t taste like a box mix.
- Unbelievably Delicious: Here’s the thing—candy corn gets a bad rap sometimes. People say it’s too sweet or waxy. But when it melts into a blondie batter? It transforms. The candy corn softens into these tiny, chewy caramel-like pockets that are honestly the best part. Paired with creamy white chocolate chips, it’s a texture and flavor combo that works way better than it has any right to.
What makes these different from every other blondie recipe out there is that candy corn trick. Most people just toss it on top of cookies or leave it in the bag until Easter candy shows up. But melting it into the batter? That’s the move. It gives the blondies this subtle honey-vanilla sweetness that feels custom-made for autumn. I’m not saying it’s revolutionary cooking, but I am saying it’s the kind of recipe that makes you look like you tried harder than you actually did.
What Ingredients You Will Need
This recipe uses straightforward, pantry-friendly ingredients to create something that tastes way more complex than it is. The magic is really in how the candy corn behaves when it bakes—it softens and almost caramelizes, giving the blondies a chewy, fudgy texture that regular sugar just can’t replicate.
- Unsalted butter, melted (½ cup / 1 stick / 113g) — I always use unsalted so I can control the salt level. Let it cool slightly after melting so it doesn’t cook the eggs when you mix everything together.
- Light brown sugar, packed (1 cup / 200g) — Brown sugar gives blondies their signature chew and that warm, molasses-tinged flavor. Dark brown sugar works too if that’s what you have, but the flavor will be a bit deeper.
- Granulated sugar (¼ cup / 50g) — A little white sugar balances the brown sugar and helps with spreading. Don’t skip it—the combination is key.
- Large egg (1, room temperature) — Room temperature egg mixes more evenly into melted butter. If you forgot to take it out of the fridge, just set it in a bowl of warm water for 5 minutes.
- Vanilla extract (1 teaspoon) — Pure vanilla is best, but imitation works fine in a pinch. The candy corn adds its own vanilla-like flavor, so this just reinforces it.
- All-purpose flour (1 cup / 125g) — Spoon and level it into your measuring cup. Scooping directly can pack the flour and make your blondies dry.
- Baking powder (½ teaspoon) — Just enough to give them a little lift without making them cakey. We want dense and chewy here.
- Salt (¼ teaspoon) — Don’t skip this. Salt balances the sweetness and makes the candy corn flavor pop.
- Candy corn (¾ cup / about 150g) — The star of the show. I’ve tried this with both name-brand and store-brand candy corn, and honestly, they both work great. The store-brand pieces tend to be a little smaller, which means they distribute more evenly. Just make sure your candy corn isn’t rock hard from sitting open in the pantry for a year—fresh-ish candy corn melts better.
- White chocolate chips (½ cup / 90g) — I prefer Ghirardelli or Guittard for baking because they hold their shape and don’t get greasy. But any white chocolate chip will work. If you’re feeling fancy, chop up a white chocolate bar instead—the irregular pieces melt into bigger pools.
That’s it. Eight ingredients plus the candy corn and white chocolate chips. Nothing weird, nothing you have to mail-order. If you’re dairy-free, you can substitute the butter with a plant-based butter stick (not the spreadable kind in a tub) and use dairy-free white chocolate chips. The texture will be slightly different, but still delicious.
Equipment Needed
You don’t need a fancy bakery setup for these blondies. I’ve made them in a friend’s apartment with a fork and a Pyrex dish, and they turned out fine. But here’s what makes the process smooth and easy:
- 8×8-inch baking pan — This is the perfect size for thick, fudgy blondies. A 9×9 works too, but they’ll be thinner and bake a few minutes faster. Line it with parchment paper, leaving an overhang on two sides, so you can lift the whole slab out for easy cutting.
- Mixing bowls — One medium bowl for the wet ingredients, one small bowl for the dry. Nothing fancy needed.
- Whisk — For combining the wet ingredients without overmixing. A wooden spoon or silicone spatula works too.
- Silicone spatula — For folding in the candy corn and white chocolate chips without crushing them. Also great for scraping every last bit of batter into the pan.
- Parchment paper — Non-negotiable for easy removal. Trust me, trying to cut blondies that are stuck to the pan is a special kind of frustration.
- Cooling rack — Lets air circulate under the pan so the blondies cool evenly. If you don’t have one, just use a trivet or a folded kitchen towel.
- Sharp knife — A chef’s knife or a long serrated knife works best for clean cuts. Wipe the blade between cuts with a damp paper towel for neat edges.
If you don’t have an 8×8 pan, you can use a 9-inch round cake pan or even a small cast-iron skillet. Just keep an eye on the bake time—it might vary by a few minutes. And if you’re using a glass pan, reduce the oven temperature by 25°F to prevent the edges from overbaking.
Preparation Method
This is where the magic happens. I’ve broken this down step by step so you can follow along without second-guessing yourself. The whole process takes about 10 minutes of active work, then 25 minutes of letting your oven do the heavy lifting.
- Preheat your oven to 350°F (175°C). Line your 8×8-inch baking pan with parchment paper, leaving an overhang on two opposite sides. This is your lifeline for getting the blondies out cleanly. Spray the parchment lightly with non-stick spray if you’re feeling cautious, though it’s usually not necessary.
- Melt the butter. In a medium microwave-safe bowl, melt the ½ cup of unsalted butter in 30-second bursts, stirring between each, until fully melted. Set it aside to cool for a minute or two. You don’t want it hot—just warm enough to stay liquid. If you’re using a saucepan on the stove, melt it over low heat and then pour it into a mixing bowl.
- Mix the wet ingredients. Add the packed brown sugar and granulated sugar to the melted butter. Whisk them together until the mixture looks like wet sand—about 30 seconds. It won’t be perfectly smooth, and that’s okay. Crack in the egg and add the vanilla extract. Whisk vigorously until everything is combined and slightly thickened, about 1 minute. The mixture should look glossy and smell amazing.
- Combine the dry ingredients. In a separate small bowl, whisk together the flour, baking powder, and salt. This ensures the baking powder is evenly distributed so your blondies rise evenly. No one wants a pocket of baking powder in their first bite.
- Fold the dry into the wet. Pour the flour mixture into the butter-sugar mixture. Use your silicone spatula to fold it together gently. Stir just until you don’t see any more streaks of flour. Overmixing at this stage develops gluten and makes the blondies tough, so stop as soon as it comes together. The batter will be thick and slightly sticky—that’s perfect.
- Add the mix-ins. Gently fold in the candy corn and white chocolate chips. Try to distribute them evenly, but don’t go crazy stirring. A few uneven spots just mean some bites will be extra-loaded, which is never a complaint I’ve heard. If the batter seems too stiff to fold, let it sit for a minute—the warmth from the butter will soften the candy corn slightly and make it easier to incorporate.
- Transfer to the pan. Scrape the batter into your prepared pan. Use the spatula to spread it into an even layer. The batter will be thick, so you might need to press it gently into the corners. Wet your fingers slightly with water and pat the top smooth if it looks uneven. Don’t worry if the candy corn pieces poke through the surface—they’ll caramelize and get slightly crunchy on top, which is a nice contrast to the soft center.
- Bake. Place the pan on the middle rack of your preheated oven. Bake for 22-27 minutes. Start checking at 22 minutes—the edges should be golden brown and pulling away from the sides of the pan slightly. The center will look set but still soft. A toothpick inserted into the center should come out with a few moist crumbs, not wet batter. If it comes out clean, you’ve overbaked them a bit. They’ll still be good, just less fudgy.
- Cool completely. Set the pan on a cooling rack and let the blondies cool for at least 30 minutes in the pan. This is the hardest part, I know. But cutting them while they’re warm will result in a crumbly mess. The candy corn needs time to set back up after melting. Once they’re cool, use the parchment overhang to lift the whole slab out onto a cutting board.
- Cut and serve. Use a sharp knife to cut into 16 squares (4 rows by 4 rows). For cleaner cuts, wipe the knife blade with a damp paper towel between each slice. Serve at room temperature or slightly warm if you just can’t wait.
One thing I learned the hard way: if you press too many candy corn pieces into the top of the batter before baking, they’ll melt into flat, sticky discs that are a pain to cut through. Just let them be wherever they land when you fold them in. Trust the process.
Cooking Tips & Techniques
I’ve made these candy corn blondies probably a dozen times now, and I’ve picked up a few tricks that make the difference between good and “can I have the recipe?” good. Here’s what I’ve learned:
Don’t overbake. This is the number one mistake people make with blondies. They look underdone in the center when they’re actually perfect. Remember, they continue to bake from residual heat after you pull them out of the oven. If you wait until the center looks fully set and dry, you’ll end up with blondie-cookies instead of fudgy squares. Pull them when the edges are golden and the center still has a little jiggle.
Use room temperature eggs. I know, I know—it’s an extra step. But a cold egg seizes up the melted butter and makes the batter lumpy. If you forgot to set it out, place the egg (still in its shell) in a cup of warm tap water for 5 minutes. Problem solved.
Toast the white chocolate chips (optional). This is a little trick I picked up from a pastry chef friend. Spread the white chocolate chips on a baking sheet and toast them in a 300°F oven for 3-4 minutes until they’re just starting to turn golden. Let them cool completely before folding into the batter. It gives them a nutty, caramelized flavor that pairs beautifully with the candy corn. Fair warning: this adds time and you have to watch them carefully because white chocolate burns fast.
Line your pan properly. I cannot stress this enough. Parchment paper overhang is not optional—it’s the difference between lifting out a perfect slab of blondies and digging them out with a spatula in pieces. Cut your parchment so it’s wide enough to cover the bottom and come up two sides. You can use two sheets crisscrossed if you want overhang on all four sides.
Let them cool completely. I know I said this already, but it bears repeating. Warm blondies are soft and crumbly. Room temperature blondies are firm and chewy. If you’re in a hurry, you can pop the pan in the fridge for 15 minutes after the initial 30-minute cool-down on the counter. Just don’t skip the cooling step entirely.
Use a kitchen scale. If you have one, weigh your flour and sugar. It’s more accurate than measuring cups and ensures consistent results every time. Flour in particular is easy to over-measure if you scoop directly from the bag.
Variations & Adaptations
One of the best things about this recipe is how flexible it is. I’ve played around with it quite a bit, and here are some variations that turned out great:
Autumn Spice Blondies: Add 1 teaspoon of pumpkin pie spice or a mix of cinnamon, nutmeg, and ginger to the dry ingredients. It gives the blondies a warm, cozy flavor that screams October. I made these for a Friendsgiving dinner and they disappeared before the pie.
Chocolate Drizzle: Once the blondies are cool, melt ¼ cup of semi-sweet chocolate chips with a teaspoon of coconut oil and drizzle it over the top. The dark chocolate cuts the sweetness of the candy corn and white chocolate beautifully. Let the drizzle set at room temperature for about 20 minutes before slicing.
Gluten-Free Option: Substitute the all-purpose flour with a 1:1 gluten-free baking flour blend (I like King Arthur or Bob’s Red Mill). Add an extra tablespoon of butter to compensate for the drier texture of gluten-free flour. The blondies will be slightly more delicate, but still delicious.
Double the Batch: Use a 9×13-inch pan and double all the ingredients. Bake for 30-35 minutes instead of 25. This is my go-to for Halloween parties or bake sales. Just make sure your pan is at least 2 inches deep so the batter doesn’t overflow.
Add Nuts: Fold in ½ cup of chopped pecans or walnuts along with the candy corn and white chocolate chips. Toast the nuts first in a dry skillet over medium heat for 3-4 minutes to bring out their flavor. The crunch is a nice contrast to the chewy blondie texture.
Switch the Candy: If you’re not a candy corn fan (I know, I know, but some people aren’t), you can substitute with chopped caramel candies or butterscotch chips. The flavor profile changes, but the chewy, caramel-like texture remains. I’ve also tried it with chopped peanut butter cups, and that was a hit too.
Serving & Storage Suggestions
These blondies are incredibly versatile when it comes to serving. Here’s how I like to enjoy them and how to keep them fresh:
Serving: Serve at room temperature for the best texture. If you want to gild the lily, warm a blondie in the microwave for 10-15 seconds and top it with a scoop of vanilla ice cream. The warm blondie with cold ice cream is a next-level experience. You can also dust them with powdered sugar for a prettier presentation, or serve them alongside a hot cup of coffee or apple cider.
Storage: Store leftover blondies in an airtight container at room temperature for up to 5 days. Place a piece of parchment paper between layers if you’re stacking them to prevent sticking. Do not refrigerate them—the fridge dries out baked goods and makes them stale faster. If your kitchen is warm and you’re worried about the white chocolate chips getting greasy, store them in a cool, dark place like a pantry.
Freezing: These blondies freeze beautifully. Wrap individual squares tightly in plastic wrap, then place them in a freezer-safe bag or container. They’ll keep for up to 3 months. To thaw, just leave them at room temperature for about 30 minutes, or microwave a frozen blondie for 20-30 seconds for a warm treat. I usually keep a stash in the freezer for when a dessert craving hits unexpectedly.
Flavor Development: Here’s a little secret—these blondies actually taste better the day after they’re baked. The flavors meld together overnight, and the texture becomes even more fudgy and cohesive. So if you can stand to wait, make them a day ahead. They’ll still be delicious on day three or four, just slightly less moist.
Nutritional Information & Benefits
Let’s be real—these are a treat, not a health food. But here’s the estimated nutritional breakdown for one blondie (based on 16 servings):
| Nutrient | Amount per Serving |
|---|---|
| Calories | 215 |
| Total Fat | 10g |
| Saturated Fat | 6g |
| Carbohydrates | 30g |
| Sugar | 22g |
| Protein | 2g |
| Sodium | 85mg |
On the positive side, the butter and eggs provide some vitamin A and B12, and the white chocolate chips offer a small amount of calcium. If you want to make them slightly more nutritious, you can substitute half the all-purpose flour with whole wheat pastry flour for a touch of fiber. But honestly? Sometimes you just need a sweet, buttery blondie, and that’s perfectly okay. Balance is key, and these are meant to be enjoyed in moderation as a seasonal treat.
For those with dietary restrictions, this recipe contains gluten (from the flour), dairy (from the butter and white chocolate), and eggs. It is not suitable for vegans, though you could experiment with plant-based alternatives as mentioned in the variations section.
Conclusion
These easy candy corn blondies with white chocolate chips have become my unofficial fall signature, and I don’t see that changing anytime soon. They’re simple enough to throw together on a tired Tuesday, but special enough to bring to a party and watch people hover around the dessert table. The candy corn melts into these little pockets of chewy, caramel-like sweetness that honestly taste like autumn in a pan. And the white chocolate chips? They’re the perfect creamy counterpoint.
I love that this recipe doesn’t take itself too seriously. It’s not trying to be fancy or complicated. It’s just a really good blondie that happens to use up that bag of candy corn you bought on impulse and then forgot about. If that’s not a win, I don’t know what is.
So go ahead—preheat that oven, dig out the candy corn from the back of your pantry, and make these. And when you do, I want to hear about it. Did you add nuts? Drizzle chocolate on top? Eat three in one sitting? (No judgment here.) Leave a comment below or tag me in your photos. I love seeing how these turn out in other people’s kitchens. Happy baking, friends!
Frequently Asked Questions
Can I use salted butter instead of unsalted?
Yes, you can. Just reduce or omit the added salt in the recipe. Salted butter typically has about ¼ teaspoon of salt per stick, so you’ll want to skip the extra ¼ teaspoon called for in the ingredients list to avoid overly salty blondies.
My candy corn didn’t melt—what went wrong?
This usually happens if the candy corn is old or stale. Fresh candy corn softens and melts into the batter as it bakes. If your candy corn has been sitting open for months, it may have dried out and won’t break down properly. Try using a fresh bag for best results. You can also chop the candy corn into smaller pieces before folding it in to help it distribute better.
Can I make these ahead of time for a party?
Absolutely. In fact, I recommend it. These blondies taste even better the next day after the flavors have had time to meld. Bake them up to two days in advance, store them in an airtight container at room temperature, and cut them just before serving for the freshest look.
Why did my blondies turn out dry?
Overbaking is the most common culprit. Blondies continue to cook from residual heat after they come out of the oven, so it’s better to pull them when the center still looks slightly underdone. Measuring your flour incorrectly can also cause dryness—make sure to spoon it into your measuring cup and level it off, rather than scooping directly from the bag.
Can I use a different size pan?
Yes, but you’ll need to adjust the baking time. A 9×9-inch pan will produce thinner blondies that bake in about 18-22 minutes. A 9×13-inch pan requires doubling the recipe and bakes for 30-35 minutes. A round 9-inch cake pan works too, with a similar bake time to the 8×8. Just keep an eye on the edges and use the toothpick test to check for doneness.
Pin This Recipe!
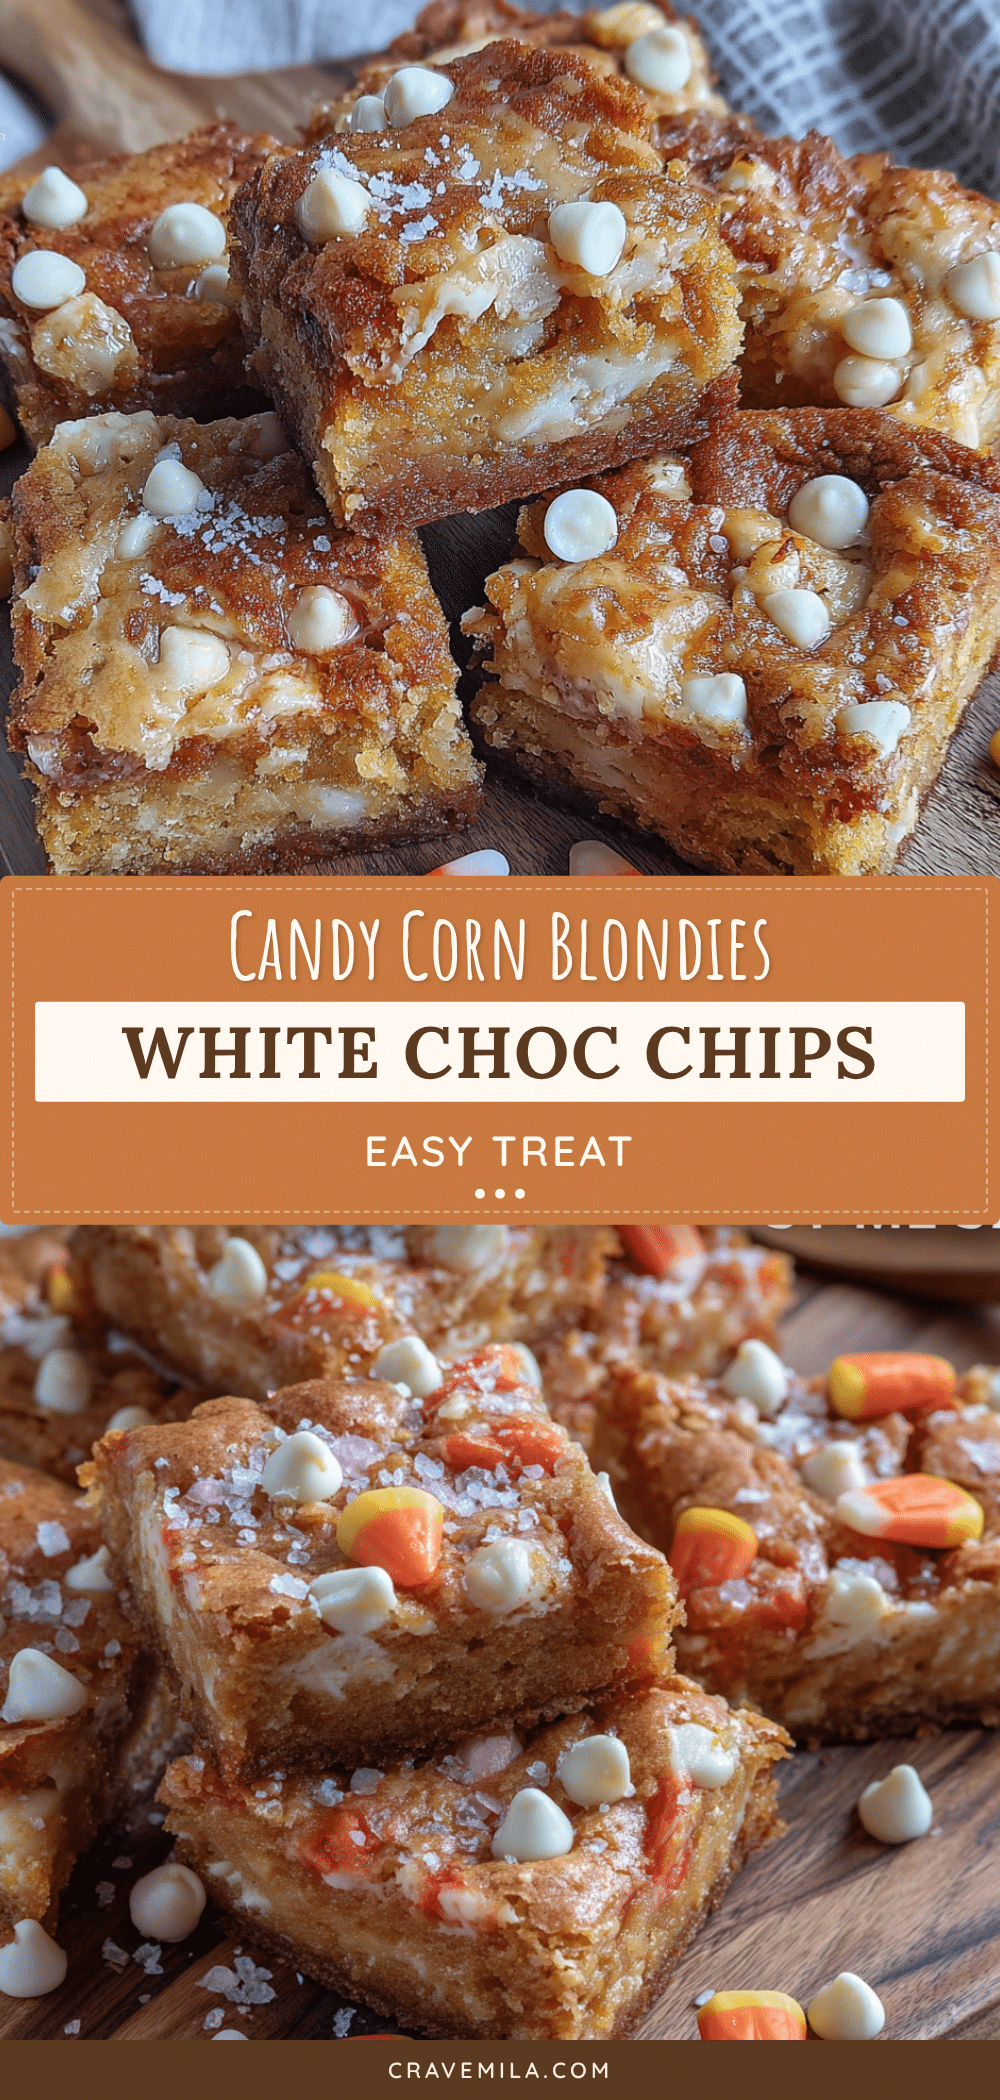
Easy Candy Corn Blondies with White Chocolate Chips
These easy candy corn blondies with white chocolate chips are a quick and delicious fall dessert. The candy corn melts into chewy, caramel-like pockets, while the white chocolate chips add creamy sweetness, all in a buttery blondie base that comes together in under 15 minutes.
- Prep Time: 10 minutes
- Cook Time: 25 minutes
- Total Time: 35 minutes
- Yield: 16 servings 1x
- Category: Dessert
- Cuisine: American
Ingredients
- ½ cup (1 stick / 113g) unsalted butter, melted
- 1 cup (200g) light brown sugar, packed
- ¼ cup (50g) granulated sugar
- 1 large egg, room temperature
- 1 teaspoon vanilla extract
- 1 cup (125g) all-purpose flour
- ½ teaspoon baking powder
- ¼ teaspoon salt
- ¾ cup (about 150g) candy corn
- ½ cup (90g) white chocolate chips
Instructions
- Preheat your oven to 350°F (175°C). Line an 8×8-inch baking pan with parchment paper, leaving an overhang on two opposite sides.
- In a medium microwave-safe bowl, melt the butter in 30-second bursts. Set aside to cool slightly.
- Add the brown sugar and granulated sugar to the melted butter. Whisk until the mixture looks like wet sand, about 30 seconds. Add the egg and vanilla extract, and whisk vigorously until combined and slightly thickened, about 1 minute.
- In a separate small bowl, whisk together the flour, baking powder, and salt.
- Pour the flour mixture into the butter-sugar mixture. Fold gently with a silicone spatula until just combined. Do not overmix.
- Gently fold in the candy corn and white chocolate chips until evenly distributed.
- Scrape the batter into the prepared pan and spread into an even layer. Wet your fingers slightly to pat the top smooth if needed.
- Bake on the middle rack for 22-27 minutes, until the edges are golden brown and the center is set but still soft. A toothpick inserted into the center should come out with a few moist crumbs.
- Cool the pan on a wire rack for at least 30 minutes. Then use the parchment overhang to lift the blondies out onto a cutting board.
- Cut into 16 squares (4×4) with a sharp knife, wiping the blade between cuts for clean edges. Serve at room temperature.
Notes
Don’t overbake; the center should still look slightly underdone when you pull them out. Use room temperature eggs for best results. For cleaner cuts, wipe the knife blade between slices. These blondies taste even better the next day.
Nutrition
- Serving Size: 1 blondie
- Calories: 215
- Sugar: 22
- Sodium: 85
- Fat: 10
- Saturated Fat: 6
- Carbohydrates: 30
- Protein: 2
Keywords: candy corn blondies, white chocolate blondies, fall dessert, easy blondie recipe, Halloween dessert, candy corn recipe