I wasn’t trying to reinvent snack time. Honestly, I was just tired of the morning scramble—you know the one. The clock is ticking, the preschooler is asking for the fifth time if it’s time to go, and you’re staring into the fridge like it might magically produce a perfectly balanced snack. That’s when this little idea hit me. I grabbed an apple, a block of cheddar, and just started slicing. No grand plan. No fancy recipe. Just pure, desperate mom logic.
My neighbor, Sarah, is the one who actually showed me this trick, though she’d never call it a recipe. I’d stopped by to borrow an egg (classic neighbor move) and she was packing her daughter’s lunchbox. She wasn’t making a big deal of it—just tossing apple slices and cheese cubes into a container like it was the most obvious thing in the world. But the way her daughter’s face lit up when she saw it? That stuck with me. It wasn’t gourmet. It wasn’t complicated. It was just good, simple food that a kid actually wanted to eat.
So I went home and tried it myself. First attempt? Total mess. The apple slices turned brown before we even got to school. The cheese got all sweaty and weird. But I kept tweaking it—because let’s face it, when you find something that makes mornings easier, you don’t give up. That’s how this easy apple and cheese snack bento was born. It’s the kind of thing you make without thinking, but your kid will ask for it again and again. And honestly, that’s the best kind of recipe, isn’t it?
Why You’ll Love This Easy Preschool-Friendly Apple and Cheese Snack Bento
This isn’t just another snack idea. It’s a game-changer for busy mornings and hungry little ones. I’ve tested this with my own kids, with neighbor kids, and even with picky eaters at playdates. It works every single time. Here’s why you’re going to love it:
- Super Quick to Assemble: We’re talking five minutes, tops. No cooking, no complicated steps. Just slice and pack.
- Simple Ingredients You Already Have: Apples and cheese are pretty much pantry staples in most homes. No special grocery trips required.
- Perfect for Preschool Lunches and Snacks: It’s portable, mess-free, and easy for little hands to manage. Great for lunchboxes, picnics, or afternoon snacks at home.
- Kid-Approved and Parent-Trusted: The combination of sweet apple and savory cheese is a classic for a reason. Kids love the flavor, and parents love that it’s wholesome.
- Naturally Nutritious: You’re getting fiber from the apple and protein and calcium from the cheese. It’s a balanced snack that actually fuels their playtime.
What makes this different from other apple and cheese snacks? It’s all in the prep. I use a simple trick to keep the apples from browning, and I cut everything into perfectly bite-sized pieces that are safe for little mouths. Plus, I’ve tested different apple and cheese combinations to find the ones that taste best together. This isn’t just throwing fruit and cheese on a plate—it’s a thoughtfully designed snack that makes your life easier. And when you see your child happily munching away, you’ll know it was worth the tiny bit of effort.
What Ingredients You Will Need
This recipe uses the simplest ingredients to create a snack that’s both delicious and nutritious. Everything is easy to find at your local grocery store, and you probably have most of it on hand already.
- Apples (1 medium apple per serving): Choose firm, crisp apples for the best texture. I personally love using Honeycrisp or Fuji apples because they’re sweet and stay crunchy. Gala apples also work great. You’ll want to wash them thoroughly and core them before slicing.
- Cheese (2-3 ounces per serving): Cheddar is my go-to because it’s firm, flavorful, and holds up well in a lunchbox. Colby Jack and Gouda are also excellent choices. I recommend buying a block of cheese and cutting it yourself—pre-shredded or pre-sliced cheese often has added starches that affect the texture. Look for a sharp or medium cheddar for the best flavor contrast with the sweet apple.
- Lemon Juice (1 tablespoon, optional): This is my secret weapon for keeping apple slices from turning brown. A quick spritz of lemon juice (or lime juice) prevents oxidation and keeps your snack looking fresh. If your child is sensitive to citrus, you can skip this or use a little apple cider vinegar instead.
- Optional Add-ins (for variety):
- Whole wheat crackers: Add a handful for extra crunch and fiber.
- Almond butter or peanut butter: A small container for dipping adds protein and healthy fats.
- Dried fruit: A few raisins or dried cranberries for a touch of sweetness.
- Seeds: Pumpkin or sunflower seeds add a nice crunch and extra nutrients.
When selecting apples, look for ones that are firm to the touch with no soft spots or bruises. For the cheese, a block of sharp cheddar from brands like Cabot or Kerrygold is my personal preference—they have excellent flavor and melt beautifully if you decide to use them in other recipes. If you’re dairy-free, try using a firm vegan cheese like Daiya or Follow Your Heart. Just note that vegan cheeses might not hold their shape as well in a lunchbox.
Equipment Needed
You don’t need any fancy tools to make this snack bento. Here’s what you’ll need:
- Cutting board: A sturdy cutting board is essential for slicing apples and cheese safely. I prefer a large wooden or plastic board that won’t slip around.
- Sharp knife: A good chef’s knife or paring knife makes slicing easy and precise. A sharp knife is actually safer than a dull one because it requires less force.
- Apple corer (optional but helpful): This tool makes coring apples a breeze. If you don’t have one, you can easily cut the apple into quarters and remove the core with your knife.
- Small bowl (for lemon juice): A small bowl to hold the lemon juice for dipping the apple slices. A shallow dish works best.
- Bento box or lunch container: A divided container helps keep the apple slices and cheese separate. I love using stainless steel bento boxes from brands like PlanetBox or Bentgo. They’re durable, easy to clean, and perfect for portion control.
- Optional: Cookie cutters (for fun shapes): If you want to make snack time extra special, use small cookie cutters to cut the cheese or apple slices into fun shapes like stars or hearts. My kids love this!
If you don’t have a bento box, any small container with a lid will work. Even a simple mason jar or reusable snack bag is fine. The key is keeping the apple slices and cheese separate so the apples don’t get soggy. I’ve used everything from silicone muffin cups to old takeout containers in a pinch—whatever works!
Preparation Method
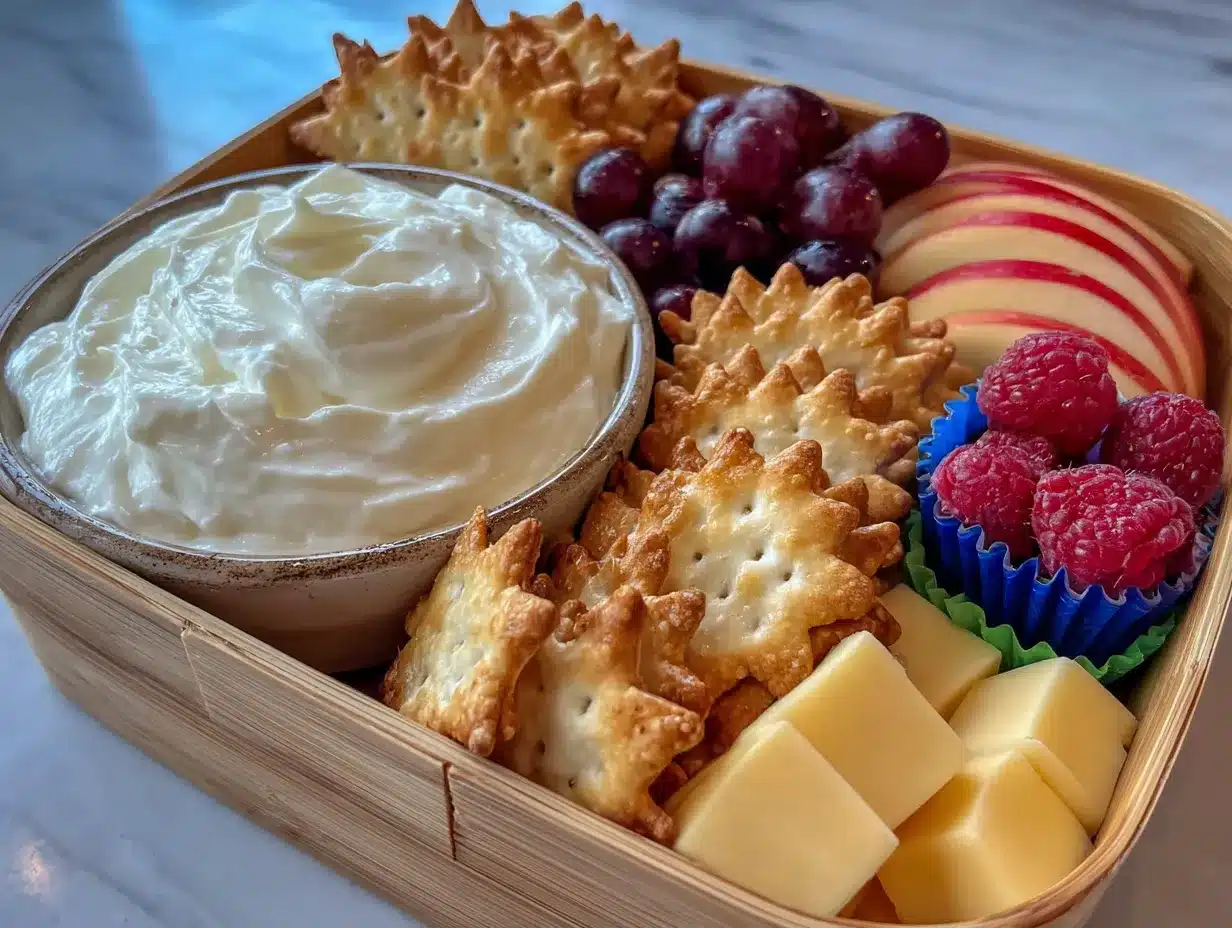
Follow these simple steps to create the perfect preschool-friendly apple and cheese snack bento. Total time: about 5 minutes.
- Wash and prep the apple: Start by washing your apple thoroughly under cool running water. Even if you’re planning to peel it (which I don’t recommend—the peel has lots of fiber and nutrients), you still want to remove any dirt or wax. Pat it dry with a clean towel.
- Core the apple: Using an apple corer or a sharp knife, remove the core. If you’re using a knife, cut the apple into quarters first, then slice out the core from each piece. This is safer than trying to core a whole apple with a knife.
- Slice the apple: Cut the apple into thin, bite-sized slices. For preschoolers, aim for slices that are about 1/4-inch thick and 2 inches long. You want them to be easy for little hands to hold and chew. If your child is very young, you can cut the slices into smaller wedges or even small cubes.
- Prevent browning: Place the apple slices in a small bowl and squeeze a little lemon juice over them. Toss gently to coat. This step is optional but highly recommended if you’re packing the snack ahead of time. The lemon juice adds a tiny bit of tartness that actually complements the sweetness of the apple.
- Cut the cheese: Take your block of cheese and cut it into small cubes, about 1/2-inch in size. You can also use a cheese slicer to make thin strips or use cookie cutters for fun shapes. The goal is to make pieces that are easy for small fingers to pick up.
- Assemble the bento: Arrange the apple slices and cheese cubes in your bento box or container. Keep them in separate compartments if possible to prevent the apples from getting soggy. If you’re using a single container, you can place a small silicone muffin cup or a piece of lettuce between them.
- Add any optional extras: If you’re including crackers, dried fruit, or other add-ins, place them in separate compartments. This is where a divided bento box really shines—you can create a balanced snack with multiple components.
- Pack and go: Close the lid and store the bento in the refrigerator until you’re ready to go. It will stay fresh for several hours. If you’re packing it for lunch, add a small ice pack to keep the cheese cool.
Here’s a tip I learned the hard way: don’t cut the apple too far in advance. The lemon juice helps, but apple slices are best when they’re freshly cut. If you’re prepping the night before, store the apple slices in a small container with a little water and a squeeze of lemon juice. Drain them before adding to the bento in the morning. Your apple slices will stay crisp and bright!
Cooking Tips & Techniques
I’ve made this snack bento dozens of times, and I’ve learned a few things along the way. Here are my best tips for getting it right every time:
- Choose the right apple: Not all apples are created equal when it comes to snacking. Granny Smith apples are too tart for most kids. Red Delicious apples can be mealy. Stick with Honeycrisp, Fuji, Gala, or Pink Lady for the best balance of sweetness and crunch.
- Keep the peel on: The apple peel contains most of the fiber and many of the nutrients. Plus, it helps the slices hold their shape. Just make sure to wash the apple thoroughly to remove any wax or pesticides.
- Use a cheese slicer: If you have one, a cheese slicer makes cutting uniform slices a breeze. If not, a sharp knife works perfectly fine. Just try to make the pieces roughly the same size so they’re easy to pack and eat.
- Don’t skip the lemon juice: I know it’s an extra step, but it really does make a difference. The ascorbic acid in lemon juice prevents the apple from oxidizing and turning brown. Your snack will look fresh and appetizing for hours.
- Pack it tight: When you close the bento box, give it a gentle shake. If things move around too much, add a little more food or use a small piece of parchment paper to fill the gap. You want everything to stay in place during transport.
One mistake I made early on was using pre-shredded cheese. It’s convenient, but it doesn’t taste as good, and it gets weird in the lunchbox. The added starches make it clump together, and the texture is just off. Trust me—buying a block of cheese and cutting it yourself is worth the extra 30 seconds. The flavor is so much better, and the texture stays nice and firm.
Another thing I learned? Don’t overthink it. This is a snack, not a gourmet meal. If you forget the lemon juice, the apples will still taste fine—they’ll just be a little brown. If you use the wrong cheese, it’ll still be delicious. The beauty of this recipe is its simplicity. It’s forgiving, flexible, and always a hit with the preschool crowd.
Variations & Adaptations
One of the best things about this snack bento is how easy it is to customize. Here are some of my favorite variations:
- Dairy-Free Version: Swap the cheese for a dairy-free alternative like vegan cheddar or a firm tofu slice. You can also use hummus or guacamole as a dip instead of cheese. My dairy-free friend swears by Follow Your Heart’s vegan cheddar slices—they hold up well in a lunchbox and have a nice flavor.
- Seasonal Twist: In the fall, use a crisp Honeycrisp apple and a sharp aged cheddar for a cozy flavor combination. In the summer, try a Gala apple with a mild Colby Jack cheese. You can also add a few fresh berries or grapes for a pop of color and extra sweetness.
- Protein-Packed Version: Add a small container of almond butter or peanut butter for dipping. The protein and healthy fats will keep your little one full and focused. Just make sure to check the school’s policy on nut products before sending it in a lunchbox.
- Fun Shapes: Use small cookie cutters to cut the cheese and apple slices into stars, hearts, or animal shapes. It takes an extra minute, but the novelty factor is huge. My kids go crazy for star-shaped cheese slices!
- Savory Option: If your child prefers savory snacks, try using a sharp cheddar or even a small piece of salami alongside the apple. The salty-sweet combination is surprisingly satisfying. You can also add a few cucumber slices or cherry tomatoes for extra veggies.
Personally, I love the classic combination of Honeycrisp apple and sharp cheddar. It’s the perfect balance of sweet and savory, and the textures are just right. But I’ve also made this with pear slices instead of apple (equally delicious!) and with different cheese varieties like Gouda or Provolone. Don’t be afraid to experiment—you might discover a new favorite combination!
Serving & Storage Suggestions
This snack bento is designed to be served cold or at room temperature. Here’s how to get the best results:
- Serving Temperature: The cheese is best when it’s slightly chilled, so I recommend serving the bento straight from the refrigerator. If you’re packing it for later, keep it cool with an ice pack. The apple slices are delicious at any temperature.
- Presentation: Arrange the apple slices and cheese cubes in separate compartments of the bento box. Add a few crackers or a small container of dip for variety. If you’re feeling fancy, use a small silicone muffin cup to separate the components. The visual appeal matters—kids are more likely to eat something that looks fun and inviting.
- Storage: If you’re making this snack ahead of time, store the apple slices and cheese separately. The apple slices can be stored in an airtight container with a little lemon water for up to 24 hours. The cheese can be stored in its own container for several days. Assemble the bento just before serving or packing.
- Reheating: This is a no-cook snack, so there’s nothing to reheat. Just take it out of the fridge and enjoy! If the cheese has softened a bit at room temperature, that’s fine—it’s still perfectly safe to eat.
- Flavor Development: Unlike some dishes that taste better the next day, this snack is best enjoyed fresh. The apple slices will start to lose their crunch after a few hours, and the cheese might become a little soft. That said, it’s still perfectly edible and delicious—just not quite as crisp as when it’s freshly made.
One thing I love about this snack bento is how easy it is to pack for on-the-go snacking. Whether you’re heading to the park, running errands, or sending it to school, it travels beautifully. Just make sure to keep it cool if you’re not eating it within a couple of hours. A small insulated lunch bag with an ice pack works perfectly.
Nutritional Information & Benefits
This snack bento is packed with nutrition that supports growing bodies and busy minds. Here’s a breakdown of what you’re getting:
- Estimated Nutritional Values (per serving):
- Calories: 180-220
- Protein: 8-10 grams
- Carbohydrates: 20-25 grams
- Fiber: 4-5 grams
- Fat: 10-12 grams
- Calcium: 200-250 mg
- Vitamin C: 8-10 mg
- Health Benefits of Apples: Apples are rich in fiber, which aids digestion and helps kids feel full longer. They also contain vitamin C, which supports the immune system, and antioxidants that help protect cells from damage. The peel contains most of the fiber and nutrients, so don’t peel it!
- Health Benefits of Cheese: Cheese is an excellent source of calcium, which is essential for strong bones and teeth. It also provides protein for muscle growth and repair, and vitamin A for healthy vision and skin. Choosing a sharp cheddar means you get more flavor with less cheese, which can help with portion control.
- Dietary Considerations: This snack is naturally gluten-free and vegetarian. For a dairy-free option, substitute the cheese with a plant-based alternative. If you’re avoiding nuts, skip the almond butter or peanut butter add-in. Always check labels to ensure your ingredients meet your dietary needs.
- Potential Allergens: Cheese contains dairy, which is a common allergen. If your child has a dairy allergy, use a dairy-free cheese alternative. Some commercial cheese products may also contain rennet, which is derived from animals, so check labels if that’s a concern.
From a personal perspective, I love that this snack gives me peace of mind. I know my kids are getting real, whole foods—not processed snacks full of additives and preservatives. It’s a small win in the middle of a busy day, and honestly, that matters. When I see my daughter happily eating her apple and cheese bento, I feel like I’ve done something right. And that’s a pretty good feeling.
Conclusion
This easy preschool-friendly apple and cheese snack bento is proof that simple really is best. With just two main ingredients and about five minutes of prep time, you can create a snack that’s nutritious, delicious, and guaranteed to make your little one smile. It’s the kind of recipe that becomes a staple—the one you turn to again and again because it just works.
I encourage you to make this your own. Try different apple varieties, experiment with different cheeses, and add your favorite extras. The beauty of this snack is its flexibility. It adapts to your family’s tastes and needs, and it never fails to deliver. Whether you’re packing it for preschool, serving it at a playdate, or enjoying it as an afternoon treat, this apple and cheese bento is a winner.
I’d love to hear how it goes for you! Drop a comment below and let me know what apple-cheese combination your family loves best. Did you try a fun variation? Did your picky eater surprise you? Share your stories and tips—I read every comment and I love hearing from you. And if you found this helpful, please share it with a friend who could use a little snack-time inspiration. Happy snacking!
Frequently Asked Questions
Can I use pre-sliced apples from the store?
You can, but they won’t be as fresh or crisp as apples you slice yourself. Pre-sliced apples are often treated with preservatives to prevent browning, which can affect the flavor. For the best results, slice your own apples right before packing the bento.
How long will this snack stay fresh in a lunchbox?
If you use the lemon juice trick and keep the bento cool with an ice pack, the snack will stay fresh for about 4-5 hours. The apple slices might start to brown slightly after that, but they’ll still be safe to eat. For best quality, eat within 3-4 hours.
Can I make this snack for a child with a dairy allergy?
Absolutely! Simply substitute the cheese with a dairy-free alternative like vegan cheddar, or use a non-dairy dip like hummus or guacamole. You can also add other protein sources like hard-boiled egg slices or turkey roll-ups to keep the snack balanced.
What’s the best way to keep apple slices from turning brown?
The most effective method is to toss the apple slices in a little lemon juice or lime juice. The citric acid prevents oxidation. You can also use a commercial product like Fruit-Fresh, or simply submerge the slices in cold water with a splash of vinegar. Pat them dry before packing.
Can I use this recipe for a child under 2 years old?
Yes, but you’ll need to modify the textures. For toddlers under 2, cut the apple into very thin, soft slices or small, soft cubes to reduce the choking risk. You can also steam the apple slices briefly to soften them. The cheese should be cut into very small, soft pieces. Always supervise young children while they eat.
Pin This Recipe!
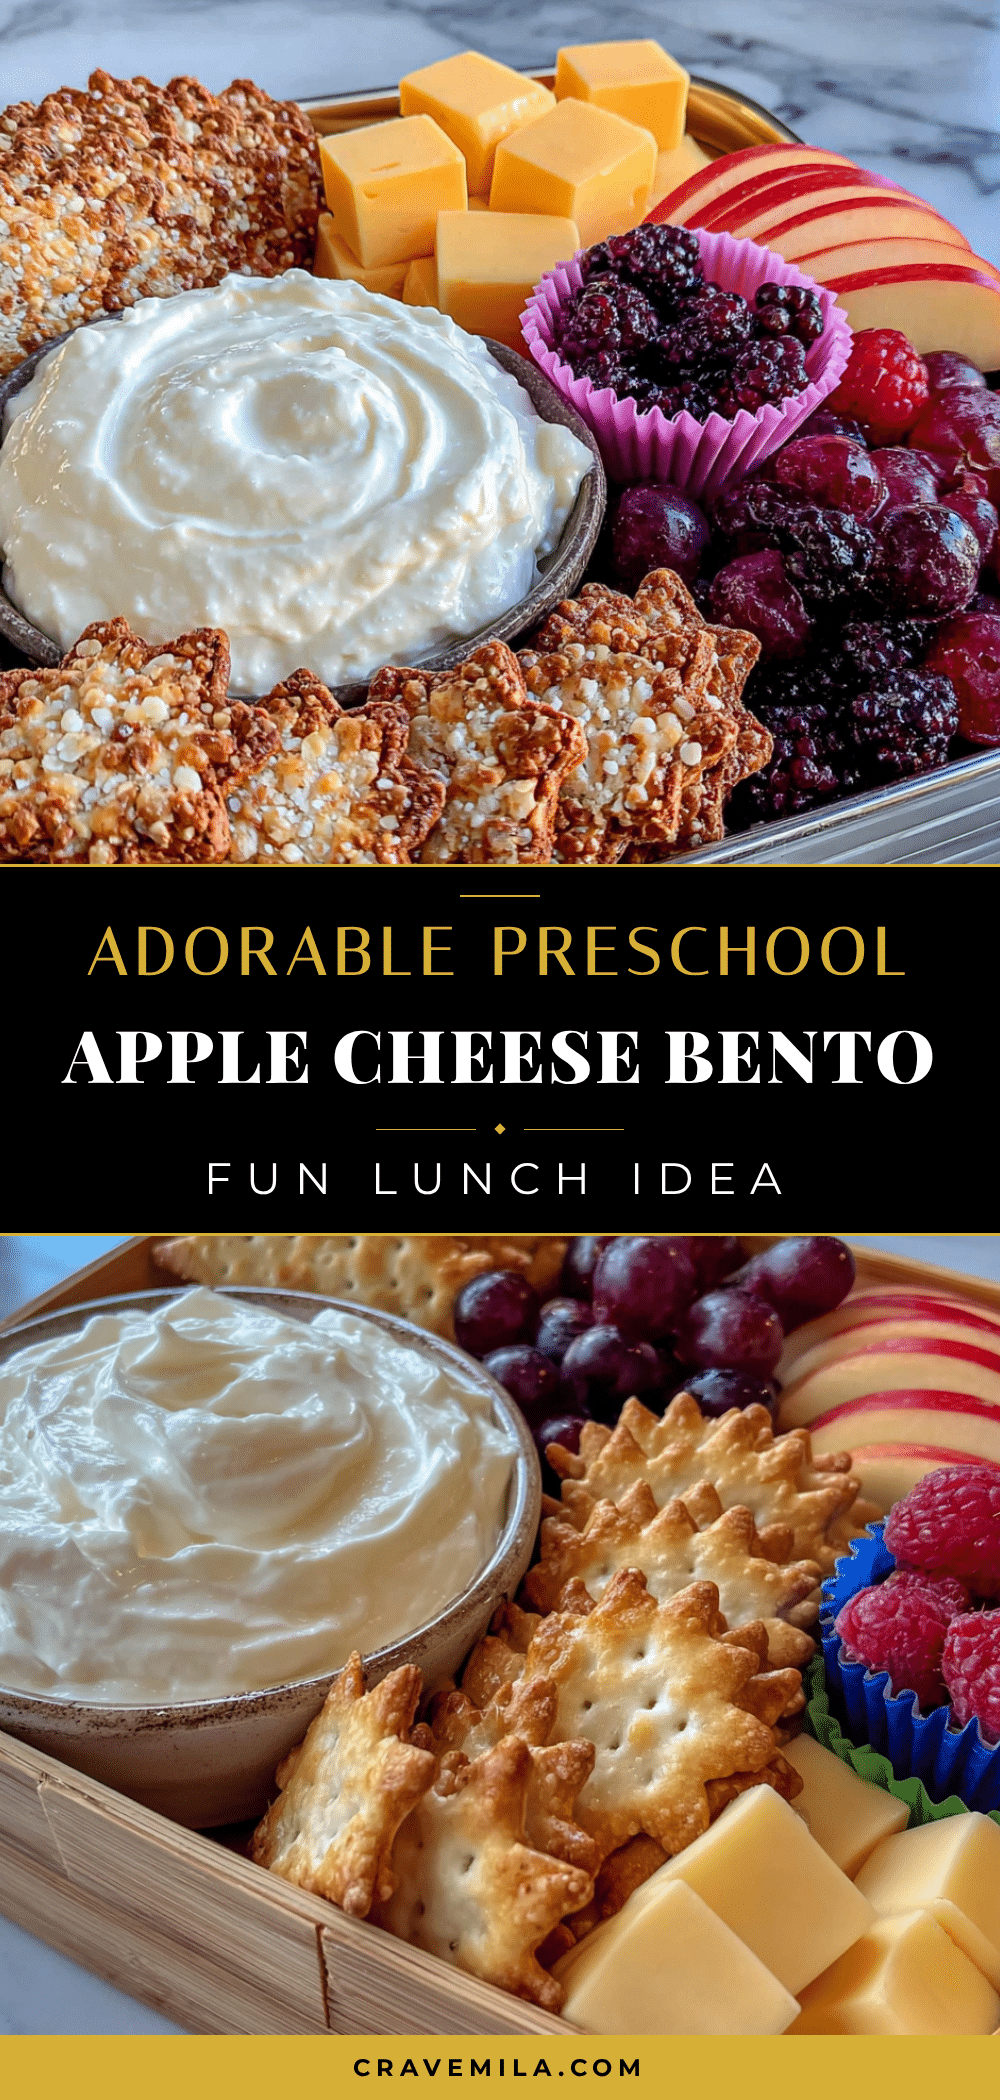
Easy Apple Cheese Bento: Best Preschool Snack Idea
A quick and easy preschool-friendly snack bento box featuring crisp apple slices and savory cheese cubes. Perfect for busy mornings, lunchboxes, or afternoon snacks, this simple recipe is nutritious, kid-approved, and ready in just 5 minutes.
- Prep Time: 5 minutes
- Cook Time: 0 minutes
- Total Time: 5 minutes
- Yield: 1 serving 1x
- Category: Snack
- Cuisine: American
Ingredients
- 1 medium apple per serving (Honeycrisp, Fuji, or Gala recommended)
- 2–3 ounces cheese per serving (sharp cheddar, Colby Jack, or Gouda)
- 1 tablespoon lemon juice (optional, to prevent browning)
- Optional add-ins: whole wheat crackers, almond butter or peanut butter, dried fruit (raisins or cranberries), pumpkin or sunflower seeds
Instructions
- Wash the apple thoroughly under cool running water and pat dry.
- Core the apple using an apple corer or by cutting into quarters and removing the core with a knife.
- Slice the apple into thin, bite-sized pieces about 1/4-inch thick and 2 inches long.
- Place apple slices in a small bowl and toss with lemon juice to prevent browning (optional).
- Cut the cheese block into small cubes, about 1/2-inch in size, or use a cheese slicer for thin strips.
- Arrange apple slices and cheese cubes in separate compartments of a bento box or container to prevent sogginess.
- Add optional extras like crackers, dried fruit, or seeds in separate compartments if desired.
- Close the lid and refrigerate until ready to serve. Pack with an ice pack for lunchboxes.
Notes
For best results, slice apples fresh and use lemon juice to prevent browning. Avoid pre-shredded cheese as it contains starches that affect texture. Store apple slices and cheese separately if prepping ahead. For toddlers under 2, cut apples into very thin, soft slices to reduce choking risk.
Nutrition
- Serving Size: 1 bento box
- Calories: 200
- Sugar: 16
- Sodium: 180
- Fat: 11
- Saturated Fat: 6
- Carbohydrates: 22
- Fiber: 4
- Protein: 9
Keywords: apple cheese bento, preschool snack, easy snack, lunchbox idea, kid-friendly snack, healthy snack, no-cook snack



