I wasn’t expecting cooking advice from my accountant, but there I was, knee-deep in tax receipts on a rainy Saturday afternoon, listening to him describe exactly how to make the most addictive pumpkin seeds I’d ever heard of. Frank—that’s his name, Frank the accountant—had this way of talking about food that made you forget you were discussing deductions and write-offs. He was explaining his wife’s method for crispy cinnamon sugar pumpkin seeds while I was trying to figure out if I could claim my stand mixer as a business expense. Honestly, I almost missed the recipe entirely because I was so focused on numbers. But something he said made me stop shuffling papers and actually listen. “You know,” he said, not looking up from his calculator, “the trick is boiling them first. Most people skip that step, and that’s why theirs turn out chewy instead of crunchy.” I made a mental note, scribbled it on the back of an envelope, and promptly forgot about it for three months.
Then came Halloween. I had just finished carving a pumpkin with my niece, and we were staring at this slimy pile of seeds wondering what to do with them. She wanted to roast them with salt, like we always did. But that envelope with Frank’s recipe popped into my head. I mean, what did an accountant know about pumpkin seeds, right? But let me tell you—I was wrong to doubt him. The seeds came out of the oven looking like little golden jewels, coated in this crackly cinnamon sugar shell that shattered when you bit into them. My niece, who usually picks at snacks, ate a handful and then asked for more. Then my brother-in-law, who claims he doesn’t like pumpkin seeds, polished off half the batch while pretending to watch football.
That’s when I knew this wasn’t just another snack. This was the kind of thing you bring to a party and suddenly become the person everyone asks for the recipe. Maybe you’ve been there—you show up with a bowl of something, and by the end of the night, people are hovering around it like it’s the main attraction. That’s these seeds. They’re sweet, they’re spicy, they’re impossibly crunchy, and they have this way of making people stop mid-conversation to grab another handful. I’ve been making them for every gathering since that Halloween, and I keep making them because they never last long. Frank probably has no idea his offhand recipe became my secret party weapon, but honestly, I think he’d be proud.
Why You’ll Love This Recipe
Let me be real with you—I’ve tested a lot of pumpkin seed recipes over the years. Some were too salty, some were too bland, and most were just… chewy. You know that sad texture when seeds come out of the oven tasting more like roasted cardboard than a snack? I’ve been there. But this recipe? It’s different. It’s the one I keep coming back to, and here’s why I think you’ll love it too.
- Perfect for Parties: These seeds are literally made for gatherings. They’re easy to eat standing up, they don’t make a mess, and they have that sweet-salty-spicy combo that keeps people coming back for more. I’ve served them at game nights, holiday parties, and casual get-togethers, and they always disappear first.
- Simple Ingredients: You probably have everything you need in your kitchen right now. Pumpkin seeds, sugar, cinnamon, butter, salt—that’s it. No fancy extracts, no specialty spices, no trips to a gourmet store. Just pantry staples that come together in a way that feels special.
- Quick & Easy: From start to finish, you’re looking at about 45 minutes. Most of that is hands-off oven time. The active prep is maybe 10 minutes. You can literally make these while your guests are walking in the door, and they’ll think you spent hours on them.
- Crowd-Pleaser: I’ve watched people who “don’t like pumpkin seeds” eat these by the handful. Kids love them, adults love them, even picky eaters get on board. The cinnamon sugar coating is familiar enough to feel comforting, but the crunch is next-level satisfying.
- Unbelievably Delicious: The texture is what sets these apart. The boiling step—yes, that thing Frank told me about—creates a crackly, shattery shell that gives way to a tender, toasty seed inside. It’s like a tiny candy-coated treasure in every bite.
What makes this recipe different from every other pumpkin seed recipe out there is that boiling trick. Most recipes just toss seeds in oil and seasonings and hope for the best. But boiling the seeds first changes everything. It plumps them up, helps the coating stick, and creates that signature crunch that makes these seeds dangerously addictive. I’ve tried skipping the boil to save time, and honestly, it’s not worth it. The seeds come out sad and chewy, and nobody wants that at their party.
This recipe isn’t just good—it’s the kind that makes people close their eyes after the first bite. It’s comfort food reimagined: healthier than chips, more interesting than nuts, and way more impressive than a bag of store-bought snacks. Perfect for impressing guests without stress, or turning a simple pumpkin carving session into something memorable.
What Ingredients You Will Need
This recipe uses simple, wholesome ingredients to deliver bold flavor and satisfying texture without the fuss. Most of these are probably already in your pantry, which makes this recipe perfect for last-minute party prep or spontaneous snack cravings.
For the Seeds:
- 1 cup fresh pumpkin seeds (about 4 ounces, scooped from a medium pumpkin) – Fresh seeds work best here because they have more moisture and plump up beautifully during boiling. If you’re using store-bought raw pumpkin seeds, also called pepitas, they’ll work too, but the texture will be slightly different. I prefer fresh seeds from a sugar pumpkin or carving pumpkin—both work great.
- 4 cups water – For boiling the seeds. You’ll also need 1 tablespoon salt for the boiling water. This helps season the seeds from the inside out, so every bite is flavorful, not just the coating.
For the Cinnamon Sugar Coating:
- 1/4 cup granulated sugar – Regular white sugar works perfectly. It melts into the butter and creates that crackly shell we’re after. I’ve tried brown sugar, and while it adds a deeper flavor, it doesn’t get as crispy. Stick with white sugar for the best crunch.
- 1 teaspoon ground cinnamon – Use a good-quality cinnamon here. I prefer Ceylon cinnamon for its milder, sweeter flavor, but Cassia cinnamon works fine too. Fresh cinnamon makes a noticeable difference—if yours has been sitting in the back of the spice cabinet for years, consider replacing it.
- 1/4 teaspoon salt – Just a pinch to balance the sweetness. I use fine sea salt because it dissolves evenly, but regular table salt is fine.
- 2 tablespoons unsalted butter, melted – Butter is the glue that holds everything together. It helps the sugar mixture stick to the seeds and adds a rich, toasty flavor. I recommend unsalted butter so you can control the salt level. If you only have salted butter, reduce the added salt to 1/8 teaspoon.
- 1/2 teaspoon vanilla extract (optional but recommended) – This adds a warm, aromatic note that complements the cinnamon beautifully. It’s not essential, but it takes the flavor from good to “what did you put in these?”
Ingredient Selection Tips: When you’re scooping seeds from a fresh pumpkin, try to remove as much of the stringy pulp as possible. Rinse them in a colander under cold water, picking out any big chunks of pumpkin flesh. Pat them dry with a clean kitchen towel—they don’t need to be bone-dry since they’re going into boiling water anyway, but removing excess pulp helps the coating stick better later.
If you’re using store-bought raw pepitas, look for ones that are pale green and uniform in size. Avoid seeds that look shriveled or have dark spots, as those might be old and won’t toast as evenly. I’ve had good luck with the bulk bins at natural food stores—they tend to be fresher than pre-packaged ones.
Substitution Guidance: For a dairy-free version, use coconut oil or a plant-based butter alternative instead of regular butter. The flavor will be slightly different—coconut oil adds a subtle tropical note—but the texture will still be great. For a lower-sugar option, you can reduce the sugar to 2 tablespoons, but the coating won’t be as crackly. I’ve also tried this with coconut sugar, and while it’s delicious, it doesn’t create the same shattery shell. Save that experiment for a more rustic, less crunchy version.
For the cinnamon, you can experiment with pumpkin pie spice if you want a more complex flavor profile. Just use 1 1/2 teaspoons of pumpkin pie spice in place of the cinnamon alone. It adds notes of nutmeg, ginger, and allspice that are absolutely lovely for fall gatherings.
Equipment Needed
You don’t need fancy equipment for this recipe, which is one of the reasons I love it. Here’s what you’ll need:
- Medium saucepan – For boiling the seeds. Any pot you’d use for pasta or soup will work. I use a 3-quart saucepan, but anything in that range is fine.
- Colander – For draining the boiled seeds. A fine-mesh strainer works even better because the seeds won’t fall through.
- Baking sheet – A standard half-sheet pan (13×18 inches) is perfect. Line it with parchment paper or a silicone baking mat for easy cleanup. Trust me on this—the sugar coating can get sticky, and parchment makes your life so much easier.
- Mixing bowl – A medium bowl for tossing the seeds with the coating mixture. Glass or stainless steel works best because they don’t absorb odors.
- Spatula or wooden spoon – For stirring the seeds during boiling and spreading them on the baking sheet. A silicone spatula is great because it doesn’t scratch your pans.
- Measuring cups and spoons – Accurate measurements matter here, especially for the sugar and cinnamon. I recommend using proper measuring spoons rather than estimating.
- Paper towels or clean kitchen towel – For drying the seeds after boiling. You want them damp but not dripping wet.
Budget-Friendly Options: If you don’t have parchment paper, you can grease the baking sheet with butter or cooking spray. It won’t be quite as non-stick, but it works in a pinch. No silicone spatula? A regular spoon or even your hands (washed, of course) will do the job. I’ve made these seeds with nothing but a pot, a bowl, and a baking sheet, and they turned out great.
Maintenance Tip: If you’re using a silicone baking mat, wash it by hand with warm soapy water after use. The sugar residue can be stubborn, but a quick soak makes cleanup easy. Parchment paper is single-use, which is why I often reach for it when making these seeds for parties—no cleanup at all.
Preparation Method
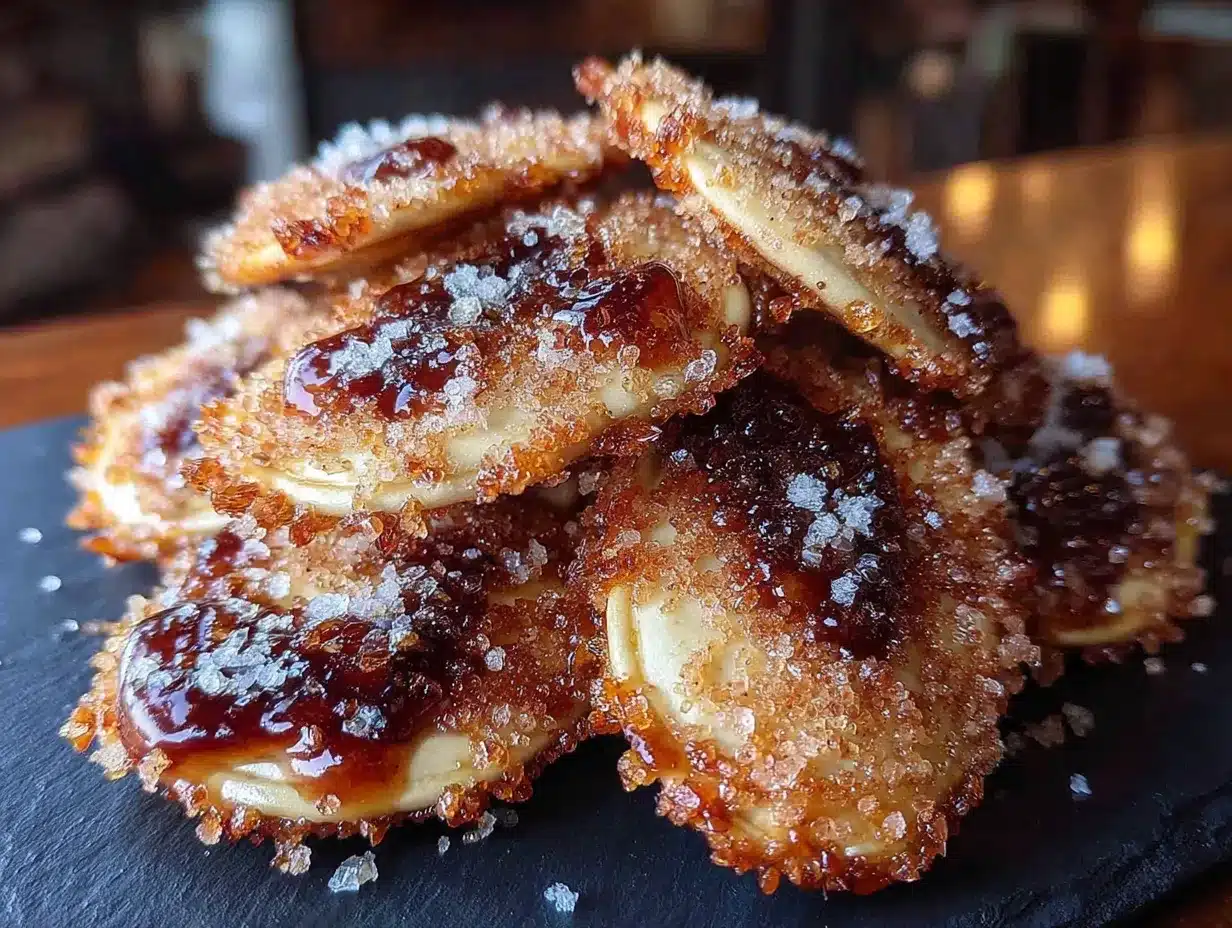
Let me walk you through this step by step. I’ve made these seeds dozens of times, and I’ve learned a few tricks along the way that make the process smoother and the results more consistent.
- Preheat your oven to 325°F (163°C). Get this going first so the oven is ready when you are. Position the rack in the center of the oven for even heat distribution.
- Clean the pumpkin seeds. If you’re using fresh seeds from a pumpkin, place them in a colander and rinse under cold running water. Pick out any large pieces of pumpkin flesh or stringy pulp. You don’t need to remove every last bit—a little pulp adds flavor—but try to get most of it. Pat the seeds dry with a paper towel or clean kitchen towel. They don’t need to be completely dry since they’re going into water anyway, but removing excess moisture helps the boiling water penetrate better.
- Boil the seeds. In a medium saucepan, bring 4 cups of water and 1 tablespoon of salt to a rolling boil. Add the cleaned pumpkin seeds and boil for exactly 10 minutes. Set a timer—this isn’t a step to eyeball. The boiling does two things: it plumps up the seeds so they become tender inside, and it helps the outer shell soften just enough that the coating can adhere properly. You’ll notice the seeds look slightly translucent and feel a bit softer after boiling.
- Drain and dry. Pour the seeds into a colander and let them drain thoroughly. Shake the colander a few times to remove excess water. Then spread the seeds out on a clean kitchen towel or paper towels and pat them dry. You want them damp but not soaking wet. If they’re too wet, the coating will slide right off. Let them sit for 2-3 minutes while you prepare the coating mixture.
- Make the coating. In a medium mixing bowl, combine 1/4 cup granulated sugar, 1 teaspoon ground cinnamon, and 1/4 teaspoon salt. Stir with a fork or small whisk to break up any clumps. Pour in 2 tablespoons of melted unsalted butter and 1/2 teaspoon vanilla extract (if using). Stir until you have a thick, grainy paste. It won’t look smooth—that’s fine. The sugar crystals are what create that crackly texture.
- Coating the seeds. Add the damp, drained seeds to the bowl with the coating mixture. Use a spatula or wooden spoon to toss everything together until every seed is evenly coated. Don’t rush this step. Take your time and make sure there are no dry patches. The mixture should cling to the seeds in a thin, even layer. If it seems too thick, you can add a tiny splash of water—like 1 teaspoon—to loosen it up. But usually, the moisture from the seeds is enough.
- Spread on baking sheet. Line your baking sheet with parchment paper or a silicone mat. Spread the coated seeds in a single, even layer. Try not to overlap them too much, or they’ll steam instead of roast and won’t get as crispy. If you have a lot of seeds, use two baking sheets or work in batches. Crowding the pan is the number one mistake people make with roasted seeds.
- Bake. Place the baking sheet in the preheated oven and bake for 20-25 minutes, stirring halfway through. At the 10-minute mark, pull the pan out and give the seeds a good stir with a spatula. This ensures even toasting and prevents the sugar from burning in spots. You’ll know they’re done when they’re golden brown and the kitchen smells like a cinnamon-scented dream. The seeds will still feel slightly soft when you take them out—they’ll crisp up as they cool.
- Cool completely. This is the hardest part: let the seeds cool on the baking sheet for at least 15-20 minutes without touching them. I know, it’s tempting to grab a handful right away, but trust me, they need this time to set. As they cool, the sugar coating hardens into that signature crackly shell. If you try to move them too soon, the coating will be sticky and might clump together.
- Break apart and serve. Once completely cool, use your hands to gently break apart any clusters that formed during baking. Some clumping is normal and actually desirable—those little clusters are like candy clusters that everyone fights over. Transfer to a serving bowl and watch them disappear.
Sensory Cues: At the boiling stage, you’ll see the seeds floating and slightly puffing up. When you stir them at the 10-minute mark during baking, you should hear a faint sizzle—that’s the sugar caramelizing. The final seeds should be deep golden brown, not dark brown or burnt. If they smell like caramel with a hint of toast, you’ve nailed it.
Cooking Tips & Techniques
I’ve made these seeds more times than I can count, and I’ve definitely had my share of failures along the way. Here are the lessons I’ve learned so you don’t have to make the same mistakes.
The boiling step is non-negotiable. I know it adds an extra 10 minutes, and I know it’s tempting to skip it. But I tried skipping it once—just once—and the seeds came out chewy and sad. The boiling water plumps the seeds and softens the outer shell, which allows the sugar coating to adhere properly. Without that step, the coating just slides off, and you end up with naked, sad seeds. Set a timer and don’t cheat.
Don’t overbake. This was my biggest mistake early on. I thought longer baking meant crunchier seeds, but that’s not how it works. Overbaked seeds taste burnt and bitter because the sugar caramelizes too far. You want them golden brown, not dark brown. They’ll continue to crisp up as they cool, so pull them out when they still look slightly soft in the center.
Stir halfway through. This is crucial for even toasting. The seeds on the edges of the pan tend to brown faster than the ones in the middle. Giving them a good stir at the 10-minute mark redistributes everything and ensures every seed gets the same treatment. I use a thin metal spatula for this—it slides underneath the seeds without disturbing the parchment paper.
Watch your oven temperature. Every oven runs a little differently. If yours runs hot, check the seeds at 15 minutes instead of 20. If it runs cool, you might need an extra 5 minutes. I learned this the hard way when I made a batch at my sister’s house and her oven was 25 degrees hotter than mine. The seeds went from golden to burnt in about 2 minutes. Keep an eye on them, especially the first time you make this recipe.
Multitasking strategy: While the seeds are boiling, prep your coating mixture and line your baking sheet. While they’re baking, clean up your dishes and set out your serving bowl. This recipe moves fast, so having everything ready before you start makes the process stress-free.
Consistency tip: If you want perfectly uniform seeds, pick through them before boiling and remove any tiny, shriveled ones. They tend to burn faster than the larger seeds. I don’t always do this—sometimes I’m in a hurry—but when I do, the results are noticeably more consistent.
Variations & Adaptations
One of the best things about this recipe is how easy it is to adapt. Here are some variations I’ve tried and loved:
Spicy Cinnamon Sugar: Add 1/4 teaspoon of cayenne pepper to the sugar mixture. The heat sneaks up on you—it starts sweet and then hits you with a warm kick at the end. I made this version for a game night once, and it was the first bowl to empty. The sweet-heat combo is addictive in a way that’s hard to explain.
Maple Cinnamon: Replace the granulated sugar with 3 tablespoons of maple syrup and reduce the butter to 1 tablespoon. The seeds won’t be as crackly—maple syrup doesn’t create the same shattery shell—but they’ll have this deep, woodsy sweetness that’s perfect for fall. I like this version for Thanksgiving because it feels more rustic and seasonal.
Chocolate-Dipped: After the seeds have cooled completely, melt 1/2 cup of dark chocolate chips and drizzle it over the seeds. Let the chocolate set at room temperature or in the fridge for 10 minutes. The combination of cinnamon sugar and dark chocolate is ridiculous. I made these for a holiday cookie exchange, and people lost their minds.
Savory-Sweet Hybrid: Add 1/2 teaspoon of smoked paprika and 1/4 teaspoon of garlic powder to the sugar mixture. It sounds weird, but trust me—the smoky, savory notes balance the sweetness in a way that’s incredibly moreish. This version is great for parties where you’re serving both sweet and savory snacks.
Dietary Adaptations: For a vegan version, use coconut oil instead of butter. The coconut flavor is subtle and actually complements the cinnamon nicely. For a lower-sugar version, reduce the sugar to 2 tablespoons and add 1 tablespoon of monk fruit sweetener. The texture won’t be quite as crackly, but the flavor is still excellent. For a nut-free version, these seeds are naturally nut-free, so no adaptations needed—just be sure to serve them in a bowl that hasn’t touched nuts if you’re serving someone with allergies.
Serving & Storage Suggestions
These seeds are at their absolute best the day they’re made, when the coating is still crackly and the seeds are perfectly toasty. But they’re still pretty fantastic for a few days after—if they last that long.
Serving Temperature: Serve at room temperature. I usually let them cool completely on the baking sheet, then transfer them to a serving bowl about 30 minutes before guests arrive. They don’t need to be warm—in fact, they’re better at room temperature because the coating stays crispier.
Presentation Ideas: For parties, I like to serve these in a wide, shallow bowl so people can easily grab handfuls. A wooden bowl adds a rustic fall vibe, while a white ceramic bowl makes the golden seeds pop. If you’re feeling fancy, sprinkle a little extra cinnamon on top for visual appeal. For a Halloween party, serve them in a mini pumpkin that’s been hollowed out—it’s a cute touch that always gets compliments.
Complementary Dishes: These seeds pair beautifully with other party snacks. I often serve them alongside a cheese board—the sweetness contrasts nicely with sharp cheddar or creamy brie. They’re also great with a bowl of fresh apple slices or pear slices for a sweet-salty combo. For drinks, they’re perfect with apple cider, hot chocolate, or even a crisp white wine like Sauvignon Blanc.
Storage Instructions: Store any leftovers in an airtight container at room temperature. A glass jar with a tight-fitting lid or a plastic container works well. They’ll stay fresh for up to 5 days, but the coating will gradually soften over time. I’ve found they’re best within the first 2-3 days. Do not refrigerate them—the moisture in the fridge will make the coating sticky and ruin the crunch.
Reheating Tips: If the seeds lose their crunch after a few days, you can revive them in the oven. Spread them on a baking sheet and warm them at 300°F (150°C) for 5-7 minutes. Let them cool completely before serving, and they’ll be almost as crispy as the day you made them. I’ve done this several times, and it works like a charm.
Flavor Development: Interestingly, the cinnamon flavor actually deepens after a day or two. The spices have time to meld with the seeds, and the sweetness becomes more rounded. Some people prefer them on day two for this reason. I like them both ways—fresh for the crackly texture, day-old for the deeper flavor.
Nutritional Information & Benefits
While these seeds are definitely a treat, they also pack some surprising nutritional benefits. Here’s a rough estimate per serving (about 1/4 cup of finished seeds):
| Nutrient | Amount |
|---|---|
| Calories | 180-200 |
| Total Fat | 12g |
| Saturated Fat | 4g |
| Carbohydrates | 16g |
| Sugar | 10g |
| Fiber | 2g |
| Protein | 6g |
| Iron | 10% DV |
| Magnesium | 15% DV |
| Zinc | 12% DV |
Pumpkin seeds are a great source of magnesium, which supports muscle function and sleep quality. They’re also rich in zinc, which is important for immune health—perfect for the cold and flu season when you’re hosting parties. The fiber content helps keep you full, so a handful of these seeds can actually curb your appetite before a big meal.
Dietary Considerations: This recipe is naturally gluten-free, nut-free, and vegetarian. For a vegan version, use coconut oil instead of butter. The sugar content is moderate—about 2.5 teaspoons per serving—so it’s not a health food, but it’s also not over-the-top sweet. If you’re watching your sugar intake, the lower-sugar variation I mentioned earlier works well.
Potential Allergens: The butter contains dairy, so this recipe isn’t suitable for those with dairy allergies unless you use a substitute. The seeds themselves are not common allergens, but as with any food, individual sensitivities vary.
From a wellness perspective, I love that these seeds offer a more nutrient-dense alternative to traditional party snacks like chips or pretzels. You’re getting protein, healthy fats, and minerals along with that satisfying crunch. It’s a snack that feels indulgent but has some real nutritional value hiding underneath that cinnamon sugar coating.
Conclusion
So there you have it—the story of how my accountant, of all people, accidentally gave me the best party snack recipe I’ve ever made. These crispy cinnamon sugar pumpkin seeds have become my go-to for every gathering, from casual game nights to holiday feasts. They’re simple enough to throw together at the last minute but impressive enough that people will think you spent hours on them.
What I love most about this recipe is how customizable it is. You can keep it classic with just cinnamon and sugar, or you can experiment with spicy, smoky, or chocolate variations. It’s the kind of recipe that rewards curiosity—every time I try a new twist, I discover something I love even more. I encourage you to do the same. Make them once as written, then start playing. Add a pinch of nutmeg. Try them with maple syrup. Drizzle them with chocolate. The possibilities are endless, and they’re all delicious.
If you make these seeds for your next party—and I really hope you do—I’d love to hear how they turn out. Drop a comment below and let me know what variations you tried, or tag me in your photos if you share them online. There’s something special about knowing a recipe that started on the back of an envelope in my kitchen is now being made in kitchens all over. So go ahead, grab a pumpkin, boil some seeds, and get ready to become the person everyone asks for the recipe. Trust me, it’s a good feeling.
Frequently Asked Questions
Can I use store-bought pumpkin seeds instead of fresh ones?
Yes, you can use raw, unsalted pepitas from the store. The texture will be slightly different—fresh seeds tend to be plumper and more tender inside—but the recipe will still work. Just skip the cleaning step and boil them as directed.
Why did my seeds turn out chewy instead of crunchy?
This usually happens for one of two reasons: either you skipped the boiling step, or you didn’t bake them long enough. The boiling step is crucial for creating that tender interior and crispy exterior. Also, make sure you’re baking at 325°F and giving them the full 20-25 minutes.
Can I make these seeds ahead of time for a party?
Absolutely. You can make them up to 3 days in advance. Store them in an airtight container at room temperature. If they lose some crunch, pop them in a 300°F oven for 5-7 minutes to revive them.
How do I prevent the sugar coating from burning?
Keep an eye on your oven temperature and stir the seeds halfway through baking. If your oven runs hot, check them at 15 minutes. The seeds should be golden brown, not dark brown. Burnt sugar tastes bitter, so it’s better to underbake slightly than overbake.
Can I freeze these pumpkin seeds?
I don’t recommend freezing them. The moisture in the freezer will make the coating sticky and soft. They’re best stored at room temperature and eaten within a few days. If you have a huge batch, share them with friends or bring them to your next gathering—they won’t last long anyway.
Pin This Recipe!
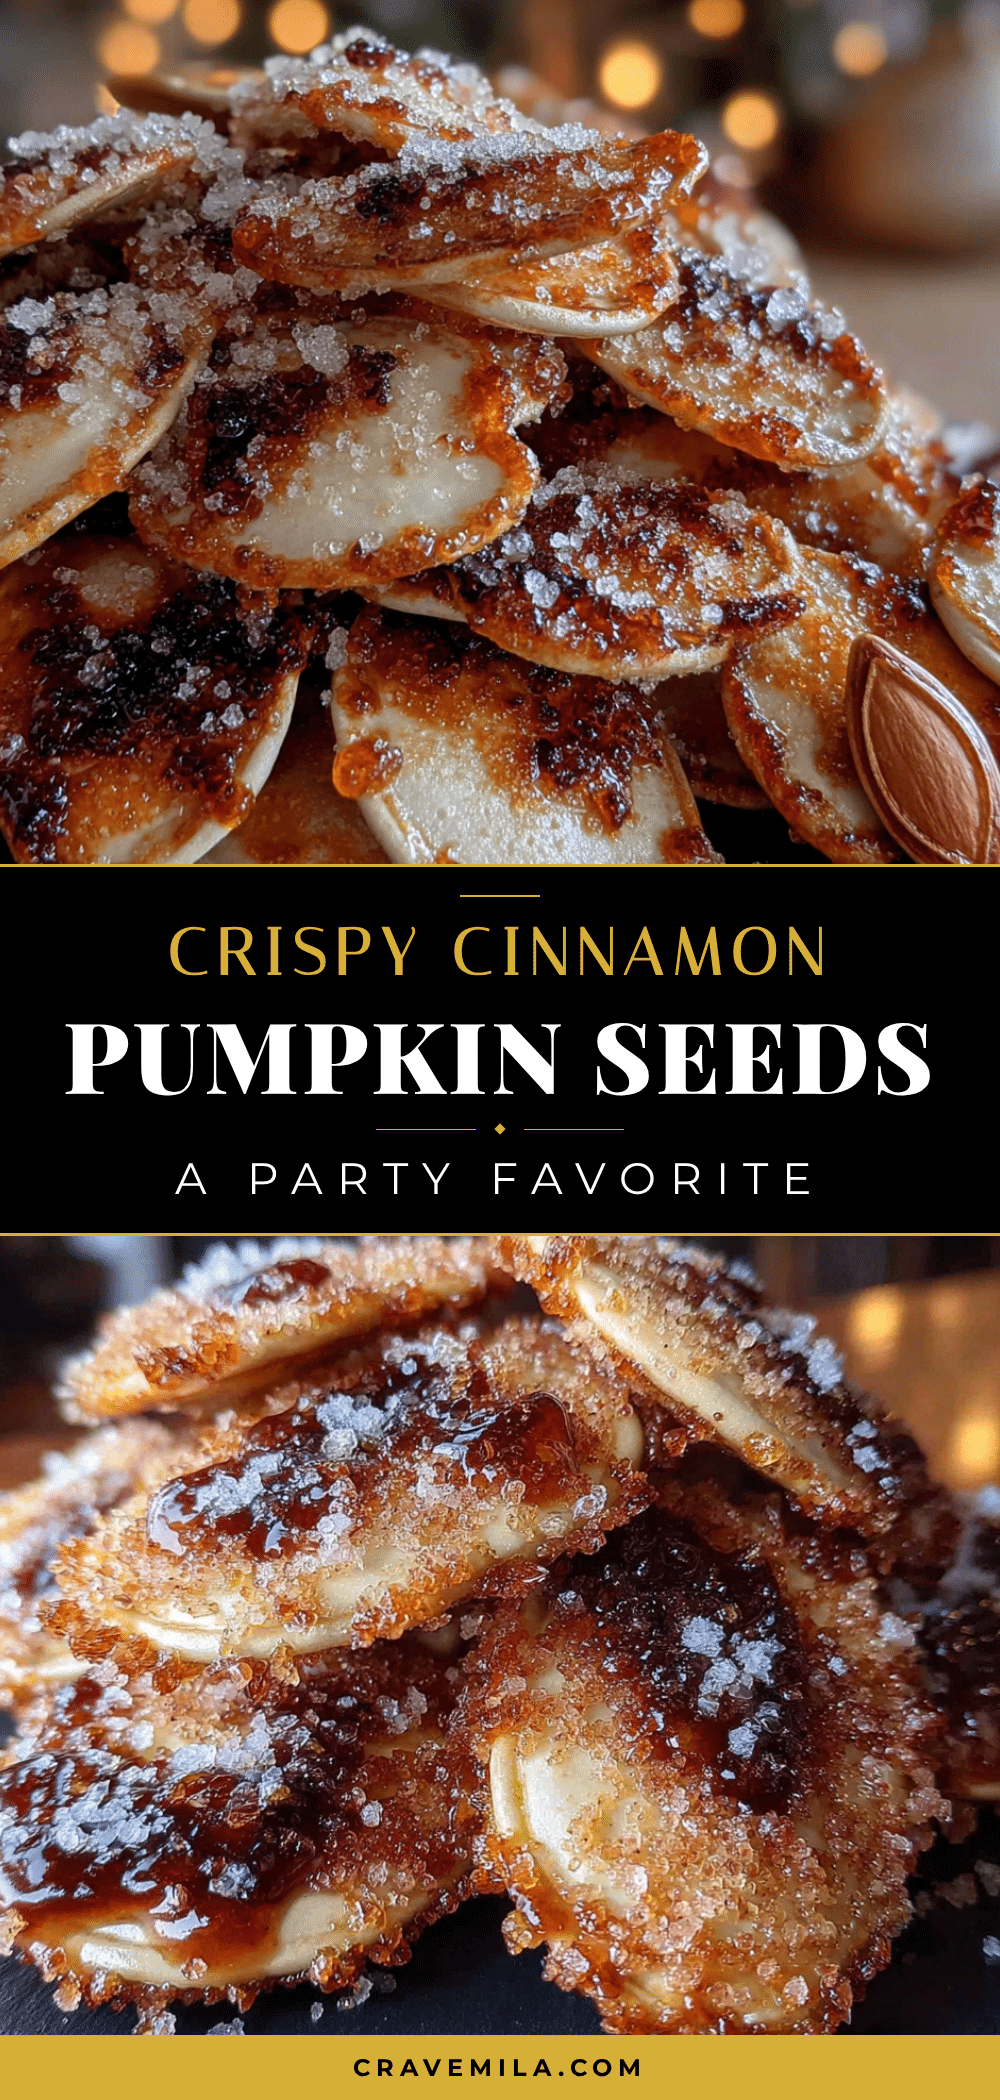
Crispy Cinnamon Sugar Pumpkin Seeds – Best Party Snack

These crispy cinnamon sugar pumpkin seeds are the ultimate party snack—sweet, spicy, and impossibly crunchy. The secret is boiling the seeds first for a crackly coating that makes them dangerously addictive.
- Prep Time: 10 minutes
- Cook Time: 25 minutes
- Total Time: 45 minutes
- Yield: 4 servings 1x
- Category: Snack
- Cuisine: American
Ingredients
- 1 cup fresh pumpkin seeds (about 4 ounces, scooped from a medium pumpkin)
- 4 cups water
- 1 tablespoon salt (for boiling water)
- 1/4 cup granulated sugar
- 1 teaspoon ground cinnamon
- 1/4 teaspoon salt
- 2 tablespoons unsalted butter, melted
- 1/2 teaspoon vanilla extract (optional but recommended)
Instructions
- Preheat your oven to 325°F (163°C). Position the rack in the center of the oven.
- Clean the pumpkin seeds: Place fresh seeds in a colander and rinse under cold water. Remove any large pieces of pumpkin flesh or stringy pulp. Pat dry with a paper towel or clean kitchen towel.
- Boil the seeds: In a medium saucepan, bring 4 cups of water and 1 tablespoon of salt to a rolling boil. Add the cleaned pumpkin seeds and boil for exactly 10 minutes. Set a timer.
- Drain and dry: Pour the seeds into a colander and drain thoroughly. Spread them out on a clean kitchen towel or paper towels and pat dry. Let them sit for 2-3 minutes.
- Make the coating: In a medium mixing bowl, combine 1/4 cup granulated sugar, 1 teaspoon ground cinnamon, and 1/4 teaspoon salt. Stir to break up clumps. Pour in 2 tablespoons melted unsalted butter and 1/2 teaspoon vanilla extract (if using). Stir until you have a thick, grainy paste.
- Coat the seeds: Add the damp, drained seeds to the bowl with the coating mixture. Toss with a spatula or wooden spoon until every seed is evenly coated.
- Spread on baking sheet: Line a baking sheet with parchment paper or a silicone mat. Spread the coated seeds in a single, even layer, avoiding overlap.
- Bake: Place the baking sheet in the preheated oven and bake for 20-25 minutes, stirring halfway through at the 10-minute mark. The seeds are done when golden brown and the kitchen smells like cinnamon.
- Cool completely: Let the seeds cool on the baking sheet for at least 15-20 minutes without touching them. The coating will harden into a crackly shell as they cool.
- Break apart and serve: Once completely cool, gently break apart any clusters with your hands. Transfer to a serving bowl and serve.
Notes
The boiling step is non-negotiable for achieving a crackly coating. Do not overbake; seeds should be golden brown, not dark brown. They will continue to crisp as they cool. Store leftovers in an airtight container at room temperature for up to 5 days. To revive crunch, reheat at 300°F for 5-7 minutes.
Nutrition
- Serving Size: 1/4 cup
- Calories: 190
- Sugar: 10
- Sodium: 180
- Fat: 12
- Saturated Fat: 4
- Carbohydrates: 16
- Fiber: 2
- Protein: 6
Keywords: pumpkin seeds, cinnamon sugar, party snack, crispy, Halloween, fall snack, roasted pumpkin seeds



