My friend Jen asked why I couldn’t just pour the cream straight into the bowl without whipping it first. I started to explain why that wouldn’t work—then stopped. Honestly? I had never tried it. I had spent years insisting that homemade ice cream required an ice cream maker, a frozen bowl, and at least twenty minutes of churning. Jen was looking at me like I was speaking a different language, and she just wanted some vanilla ice cream without the hassle. So I did it her way. I poured the cream in, stirred it around like a complete amateur, and froze it. And you know what? It was actually pretty good. Not perfect, but good enough that I started wondering what would happen if I actually did it right.
That was the moment I discovered the magic of no-churn ice cream. The trick, as it turns out, isn’t about skipping steps—it’s about knowing which steps actually matter. Whipping the cream is non-negotiable, but the machine? Totally optional. I have made this creamy no-churn vanilla bean ice cream at least a dozen times since that humbling afternoon, and I have never once regretted being wrong. It is rich, velvety, and tastes like the fancy stuff from a scoop shop—minus the price tag and the freezer burn. Maybe you have been there, standing in your kitchen, craving something cold and sweet, but dreading the equipment setup. This recipe is for those moments. It is also for the times when you just want to prove that simple can be spectacular.
Why You’ll Love This Recipe
This isn’t just another ice cream recipe. It is the one you will make again and again because it actually works. I have tested this more times than I care to admit, tweaking the ratio of cream to condensed milk, experimenting with vanilla bean paste versus extract, and even freezing it in different containers to see what gives the best texture. The result is a foolproof method that delivers a scoopable, creamy ice cream every single time.
- No Machine Needed : You don’t need an ice cream maker, a frozen bowl, or any fancy attachments. Just a mixer and a freezer.
- Simple Ingredients : Heavy cream, sweetened condensed milk, vanilla bean, and a pinch of salt. That is it. No eggs, no custard base, no tempering.
- Perfect for Hot Days : When the temperature spikes and you need something cold fast, this recipe comes together in about 15 minutes of active work.
- Crowd-Pleaser : I have served this at backyard barbecues, birthday parties, and quiet Tuesday nights. It disappears every single time.
- Unbelievably Creamy : The texture is what gets people. It is smooth, scoopable straight from the freezer, and has that rich mouthfeel you usually only get from premium brands.
What makes this recipe different is the technique. Whipping the cream to stiff peaks before folding in the condensed milk creates tiny air pockets that keep the ice cream light and creamy even after freezing. And using real vanilla bean gives it those beautiful specks and a floral, aromatic flavor that extract just can’t match. This is the kind of ice cream that makes you close your eyes after the first bite. It is comfort food reimagined—faster, simpler, but with the same soul-soothing satisfaction.
What Ingredients You Will Need
This recipe uses simple, wholesome ingredients to deliver bold flavor and satisfying texture without the fuss. Most of these are pantry staples, which makes this perfect for spontaneous dessert cravings.
- 2 cups (480 ml) heavy cream : Also called heavy whipping cream. Look for one with at least 36% milk fat for the best texture. I prefer the brand Organic Valley for its rich flavor and reliable whipping performance. Make sure it is very cold straight from the fridge.
- 1 can (14 ounces/397 grams) sweetened condensed milk : This is the secret to the no-churn method. It adds sweetness and prevents ice crystals from forming. I use Eagle Brand, but any brand works. Do not substitute with evaporated milk—they are not the same.
- 1 vanilla bean : This is where the magic happens. Look for plump, moist beans from the spice aisle or online. Madagascar vanilla beans have a classic, sweet flavor. If you cannot find a vanilla bean, use 2 teaspoons of pure vanilla extract or 1 tablespoon of vanilla bean paste. Nielsen-Massey makes an excellent vanilla bean paste.
- Pinch of sea salt : A tiny amount balances the sweetness and enhances the vanilla flavor. Use fine sea salt so it dissolves completely.
Optional add-ins: You can fold in 1 cup of crushed cookies, chocolate chips, or fresh fruit after the base is mixed. Just be gentle so you don’t deflate the cream.
Equipment Needed
You do not need much for this recipe, which is part of its charm. Here is what you will need:
- Electric mixer : A stand mixer with the whisk attachment works beautifully, but a hand mixer is perfectly fine. I have used both, and the hand mixer actually gives me more control over the whipping. If you are feeling ambitious, you can whip the cream by hand with a whisk, but be prepared for a serious arm workout—it takes about 8 to 10 minutes of steady whisking.
- Large mixing bowl : Make sure it is spotless and completely dry. Any trace of grease can prevent the cream from whipping properly. A glass or stainless steel bowl works best.
- Sharp knife : For splitting the vanilla bean and scraping out the seeds. A paring knife is perfect.
- Rubber spatula : For folding the condensed milk into the whipped cream. A flexible silicone spatula makes this step much easier.
- Freezer-safe container : A 9×5-inch loaf pan works great because it fits neatly in the freezer and gives you nice slices. A 2-quart rectangular baking dish also works. Make sure it has a tight-fitting lid or cover it tightly with plastic wrap and then foil.
One tip: Chill your container in the freezer for about 10 minutes before you pour in the ice cream base. This helps it freeze faster and reduces the formation of large ice crystals. I learned this after my first batch had a slightly icy texture around the edges.
Preparation Method
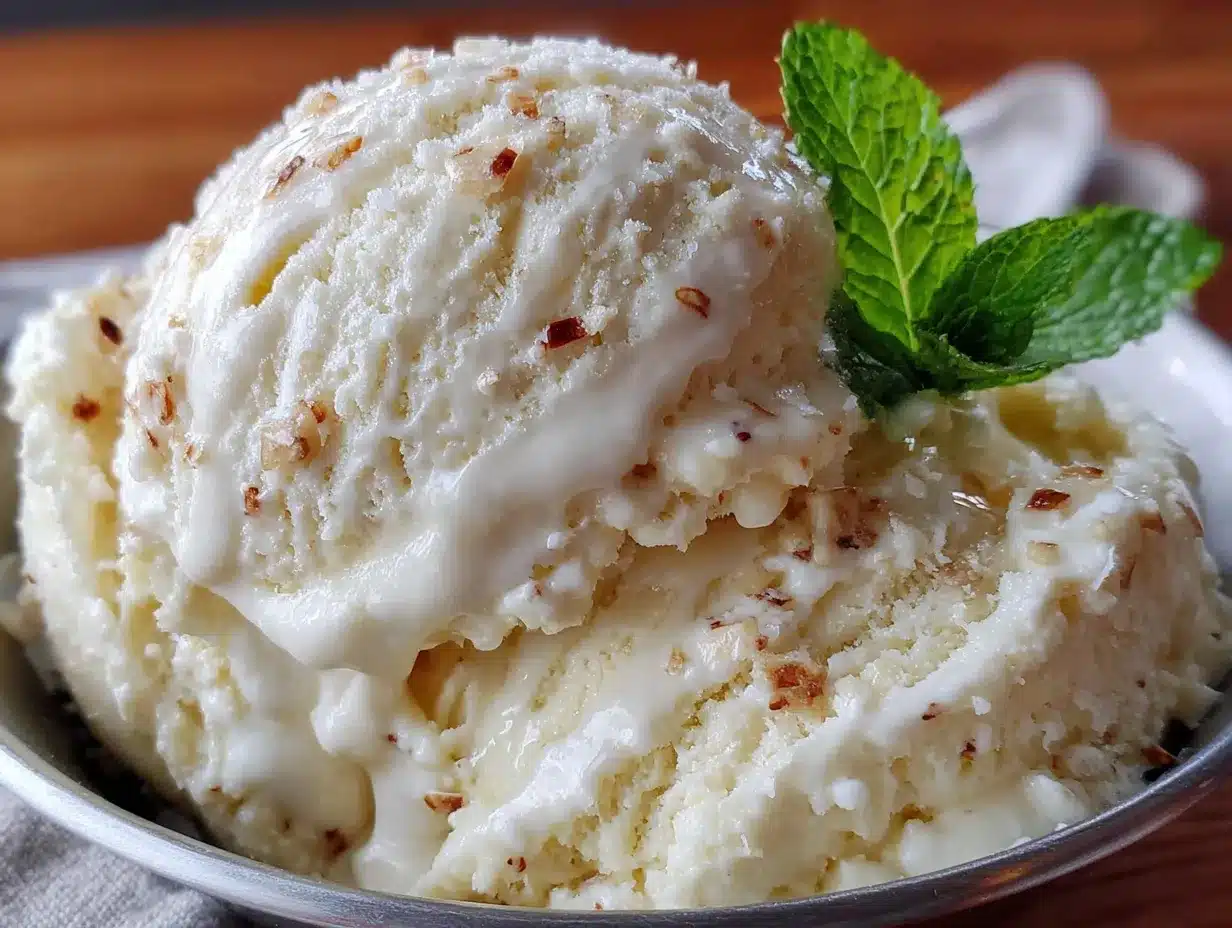
This recipe takes about 15 minutes of active work, plus at least 6 hours of freezing time. Plan ahead so you can enjoy it when the craving hits.
- Prepare the vanilla bean. Lay the vanilla bean on a cutting board. Using a sharp paring knife, slice it lengthwise down the middle, but do not cut all the way through—you want it open like a book. Use the back of the knife to scrape the tiny black seeds from inside the pod. You will see a sticky, aromatic paste. Set the seeds aside. You can save the empty pod to infuse sugar or vanilla extract later.
- Combine the condensed milk and vanilla. In a medium bowl, pour the sweetened condensed milk. Add the vanilla bean seeds and the pinch of sea salt. Stir well with a rubber spatula until the seeds are evenly distributed. The mixture will look speckled and smell amazing. If you are using vanilla extract instead, add it now and stir to combine.
- Whip the cream. Pour the cold heavy cream into a large mixing bowl. Using your electric mixer, start on low speed to avoid splashing, then gradually increase to medium-high. Whip until stiff peaks form. This usually takes about 3 to 5 minutes with a hand mixer. You will know it is ready when the cream holds its shape when you lift the beaters, and the peaks stand up straight without drooping. Be careful not to overwhip—if the cream starts to look grainy or separates, you have gone too far and it will not incorporate properly.
- Fold the mixtures together. Pour the vanilla-condensed milk mixture over the whipped cream. Using your rubber spatula, gently fold the two together. Start from the bottom of the bowl, bring the spatula up and over the top, and turn the bowl slightly as you go. Repeat until no streaks of white remain. The mixture should be uniform in color and texture. Do not stir vigorously—you want to keep as much air in the cream as possible. This is where the creamy texture comes from.
- Transfer to the container. Pour the ice cream base into your chilled container. Use the spatula to spread it evenly. Tap the container gently on the counter a few times to release any air bubbles. Smooth the top with the spatula.
- Freeze. Cover the container tightly with its lid or a double layer of plastic wrap followed by foil. Place it in the coldest part of your freezer, usually the back, not the door. Freeze for at least 6 hours, but overnight is better. The ice cream needs time to firm up completely.
- Serve. When you are ready to eat, let the ice cream sit at room temperature for about 5 to 10 minutes before scooping. This softens it just enough to make scooping easy without melting it. Use a sturdy ice cream scoop dipped in warm water for clean, smooth scoops.
Cooking Tips & Techniques
I have made this recipe at least a dozen times, and I have learned a few things the hard way. Here are my best tips for perfect no-churn ice cream every time.
Keep everything cold. Cold cream whips better and holds its structure longer. If your kitchen is warm, chill your bowl and beaters in the freezer for 10 minutes before you start. This makes a noticeable difference, especially in summer.
Do not overwhip the cream. This was my biggest mistake early on. I thought stiffer was better, but overwhiped cream starts to turn into butter. Stop as soon as you see stiff peaks. The mixture should look smooth and glossy, not grainy. If you accidentally go too far, you can try to salvage it by adding a tablespoon of cold cream and gently folding it in, but it is usually better to start over.
Use full-fat ingredients. Low-fat or light versions of cream and condensed milk will not work the same way. The fat is essential for that creamy texture and for preventing ice crystals. Trust me on this—I tried it with light cream once, and the result was icy and disappointing. Save the calories elsewhere.
Freeze in a shallow container. A wider, shallower container freezes faster than a deep one. Faster freezing means smaller ice crystals, which means smoother ice cream. If you have a metal loaf pan, use it—metal conducts cold better than glass or ceramic.
Add mix-ins carefully. If you are adding chocolate chips, cookie pieces, or fruit, fold them in gently after the base is combined. Do not stir them in aggressively, or you will deflate the air you worked so hard to incorporate. Also, chill your mix-ins beforehand so they do not warm up the base.
Variations & Adaptations
This vanilla bean base is a blank canvas for endless flavor combinations. Here are some of my favorite variations.
Chocolate No-Churn Ice Cream. Sift 1/4 cup of unsweetened cocoa powder into the condensed milk before adding the vanilla. Whisk until smooth, then proceed with the recipe. The cocoa powder adds a rich, deep chocolate flavor without making the ice cream grainy. I like to fold in 1/2 cup of dark chocolate chunks at the end for extra indulgence.
Strawberry No-Churn Ice Cream. Puree 1 cup of fresh or frozen strawberries with 2 tablespoons of sugar. Cook the puree in a small saucepan over medium heat for about 5 minutes until it thickens slightly. Let it cool completely, then swirl it into the ice cream base before freezing. Do not fully mix it in—leave ribbons of strawberry for a pretty marbled effect.
Vegan No-Churn Ice Cream. Substitute the heavy cream with full-fat coconut cream (the solid part from a can of coconut milk) and use sweetened condensed coconut milk. The coconut flavor is subtle but delicious, and the texture is surprisingly creamy. Whip the coconut cream the same way you would heavy cream, but make sure it is very cold.
Coffee No-Churn Ice Cream. Dissolve 2 tablespoons of instant espresso powder in 1 tablespoon of warm water. Let it cool, then stir it into the condensed milk along with the vanilla. The coffee flavor cuts through the sweetness beautifully. I love adding crushed chocolate-covered espresso beans on top before freezing.
One personal variation I tried last summer was adding a tablespoon of bourbon to the base. The alcohol lowers the freezing point slightly, making the ice cream softer and easier to scoop straight from the freezer. It also adds a warm, oaky note that pairs wonderfully with vanilla. Just do not add too much, or it will not freeze properly.
Serving & Storage Suggestions
This ice cream is best served slightly softened. Take it out of the freezer about 5 to 10 minutes before you plan to scoop it. For the perfect scoop, dip your ice cream scoop in warm water and wipe it dry between scoops. The warm metal glides through the ice cream without sticking.
Serve it in bowls or cones, plain or dressed up. A drizzle of warm chocolate sauce, a sprinkle of flaky sea salt, or a handful of fresh berries turns a simple scoop into something special. I also love serving it alongside a warm brownie or a slice of apple pie. The temperature contrast is heavenly.
For storage, keep the ice cream tightly covered to prevent it from absorbing freezer odors. It will stay fresh for up to 2 weeks, but honestly, it rarely lasts that long in my house. If it gets too hard, let it sit at room temperature for 10 to 15 minutes before scooping. You can also microwave the container for 10 to 15 seconds on low power to soften it, but be careful not to melt the edges.
Flavors develop over time. The vanilla flavor becomes more pronounced after a day or two in the freezer. I actually prefer the ice cream on day two—it is somehow creamier and more aromatic. Just make sure to press a piece of plastic wrap directly onto the surface before sealing the container to prevent ice crystals from forming on top.
Nutritional Information & Benefits
This is a treat, so let us be honest about that. One serving (about 1/2 cup) contains approximately 280 calories, 18 grams of fat, 28 grams of carbohydrates, and 4 grams of protein. The exact numbers will vary based on your specific ingredients and any add-ins.
On the bright side, this ice cream does contain some calcium from the dairy, and the vanilla bean provides small amounts of antioxidants called vanillin. The heavy cream also adds a touch of vitamin A. But let us be real—you are not eating this for the health benefits. You are eating it because it is delicious and makes you happy, and that counts for something.
If you are watching your sugar intake, you can use a sugar-free sweetened condensed milk, but the texture will be slightly different. For a lower-fat option, you can replace half the heavy cream with whole milk, but the ice cream will be icier and less creamy. I prefer to make the full-fat version and just enjoy a smaller portion.
This recipe is vegetarian and can be made gluten-free easily. It contains dairy and may contain traces of nuts if you add certain mix-ins, so be mindful of allergies.
Conclusion
This creamy no-churn vanilla bean ice cream is the kind of recipe that makes you feel like a kitchen genius with almost no effort. It is simple enough for a beginner but impressive enough to serve at a dinner party. The texture is silky, the flavor is pure vanilla perfection, and the method is almost laughably easy. I make this every summer, and it never gets old.
I hope you give this recipe a try and make it your own. Add your favorite mix-ins, experiment with different extracts, or keep it pure and simple. However you make it, I promise it will be the best ice cream you have ever made at home. And if you discover a variation you love, I would love to hear about it. Drop a comment below or tag me in your photos. Happy scooping!
Frequently Asked Questions
Can I make this without a mixer?
Yes, you can whip the cream by hand with a whisk, but it will take some effort. Expect about 8 to 10 minutes of steady whisking. Make sure your cream is very cold, and take breaks if your arm gets tired. The result is the same, just with a little more elbow grease.
Why did my ice cream turn out icy?
Icy ice cream usually means the cream was not whipped enough, or the mixture was not frozen quickly enough. Make sure you whip the cream to stiff peaks, and freeze the mixture in a shallow, chilled container. Also, check your freezer temperature—it should be at 0°F (-18°C) or lower.
Can I use vanilla extract instead of a vanilla bean?
Absolutely. Use 2 teaspoons of pure vanilla extract and add it to the condensed milk. You will not get the pretty black specks, but the flavor will still be delicious. Vanilla bean paste is another great option—use 1 tablespoon for the best of both worlds.
How long does this ice cream last in the freezer?
Properly stored in an airtight container, it will stay fresh for up to 2 weeks. After that, it may start to develop ice crystals or absorb other flavors from the freezer. Press plastic wrap directly onto the surface before sealing to extend its shelf life.
Can I double this recipe?
Yes, you can easily double the ingredients. Just make sure your bowl is large enough to hold the whipped cream, and freeze the mixture in a larger container or divide it between two loaf pans. The freezing time may increase slightly, so check it after 8 hours.
Pin This Recipe!
Creamy No-Churn Vanilla Bean Ice Cream: Best Easy Recipe
This creamy no-churn vanilla bean ice cream is rich, velvety, and tastes like the fancy stuff from a scoop shop—minus the price tag and the freezer burn. It requires no ice cream maker and comes together in about 15 minutes of active work.
- Prep Time: 15 minutes
- Cook Time: 0 minutes
- Total Time: 6 hours 15 minutes
- Yield: 8 servings 1x
- Category: Dessert
- Cuisine: American
Ingredients
- 2 cups (480 ml) heavy cream
- 1 can (14 ounces/397 grams) sweetened condensed milk
- 1 vanilla bean
- Pinch of sea salt
Instructions
- Prepare the vanilla bean: Lay the vanilla bean on a cutting board. Using a sharp paring knife, slice it lengthwise down the middle, but do not cut all the way through—you want it open like a book. Use the back of the knife to scrape the tiny black seeds from inside the pod. Set the seeds aside.
- Combine the condensed milk and vanilla: In a medium bowl, pour the sweetened condensed milk. Add the vanilla bean seeds and the pinch of sea salt. Stir well with a rubber spatula until the seeds are evenly distributed.
- Whip the cream: Pour the cold heavy cream into a large mixing bowl. Using your electric mixer, start on low speed to avoid splashing, then gradually increase to medium-high. Whip until stiff peaks form, about 3 to 5 minutes with a hand mixer.
- Fold the mixtures together: Pour the vanilla-condensed milk mixture over the whipped cream. Using your rubber spatula, gently fold the two together until no streaks of white remain. The mixture should be uniform in color and texture.
- Transfer to the container: Pour the ice cream base into your chilled container. Use the spatula to spread it evenly. Tap the container gently on the counter a few times to release any air bubbles. Smooth the top with the spatula.
- Freeze: Cover the container tightly with its lid or a double layer of plastic wrap followed by foil. Place it in the coldest part of your freezer. Freeze for at least 6 hours, but overnight is better.
- Serve: When you are ready to eat, let the ice cream sit at room temperature for about 5 to 10 minutes before scooping. Use a sturdy ice cream scoop dipped in warm water for clean, smooth scoops.
Notes
Keep everything cold for best results. Do not overwhip the cream. Use full-fat ingredients. Freeze in a shallow container for faster freezing. Add mix-ins gently. Chill the container before pouring in the base.
Nutrition
- Serving Size: 1/2 cup
- Calories: 280
- Sugar: 26
- Sodium: 80
- Fat: 18
- Saturated Fat: 11
- Carbohydrates: 28
- Protein: 4
Keywords: no-churn ice cream, vanilla bean ice cream, easy ice cream, homemade ice cream, no machine ice cream



