It was 11:47 PM on a random Tuesday in July, and I had a desperate need for something cold, salty, and sweet. The kind of craving that makes you open the freezer every few minutes hoping something magical has appeared since the last time you checked. I didn’t have an ice cream maker—honestly, I’ve never owned one—but I had a can of sweetened condensed milk that had been sitting in my pantry for months and a carton of heavy cream that was about to expire. The idea just sort of arrived, fully formed, like a late-night revelation: what if I just whipped the cream, folded in the caramel, and hoped for the best?
I’ll be honest, the first batch was a bit of a mess. I got impatient and added the salted caramel while the cream was still too soft, and it kind of sank to the bottom. But the flavor? Oh man, the flavor was something else. That first spoonful—cold, creamy, with that perfect hit of salt cutting through the sweet caramel—made me forget about the lumpy texture completely. I mean, I sat there on my kitchen floor at midnight, eating it straight from the container like a feral creature. Maybe you’ve been there too, you know, when a recipe just hits different at odd hours.
I spent the next week perfecting it. Three more batches, a lot of trial and error, and one very sticky countertop later, I had it dialed in. This Creamy No-Churn Salted Caramel Ice Cream is the result of those late-night experiments, and honestly, it’s become my go-to for every occasion since. It’s the kind of recipe that feels like a secret you want to share with everyone you know.
Why You’ll Love This Recipe
Let me tell you why this recipe is going to become your new best friend in the kitchen. I’ve tested this more times than I care to admit, and every single person who’s tried it has asked for the recipe. It’s that good.
- No Ice Cream Maker Needed : Seriously, you don’t need any fancy equipment. Just a mixing bowl and a whisk or hand mixer. I’ve made this in a tiny apartment kitchen with zero counter space.
- Simple Ingredients : Heavy cream, sweetened condensed milk, homemade salted caramel, and a pinch of sea salt. That’s it. No weird stabilizers or hard-to-find items.
- Perfect for Hot Days and Bad Days : Whether it’s a scorching summer afternoon or you’ve just had one of those days, this ice cream fixes everything. It’s comfort in a bowl.
- Crowd-Pleaser : I brought this to a family barbecue last month, and my cousin who “doesn’t really like sweets” had three servings. Three! It’s got that universal appeal.
- Unbelievably Creamy Texture : The secret is in how you whip the cream and fold in the caramel. It comes out so smooth and rich, you’d swear it was from a fancy gelato shop.
What makes this recipe different from all the other no-churn recipes out there? It’s the caramel, honestly. Most recipes use store-bought caramel sauce, which is fine, but it doesn’t have that deep, toasty, slightly bitter edge that makes salted caramel so addictive. I’m walking you through making a quick stovetop caramel that takes about 10 minutes and tastes like pure gold. Plus, I’ve figured out the exact technique for swirling it into the ice cream so you get ribbons of caramel in every single scoop, not just a sad puddle at the bottom.
This isn’t just another version of no-churn ice cream. It’s the version that makes you close your eyes after the first bite. It’s the version that has people asking, “Wait, you made this yourself?” It’s comfort food reimagined—faster, easier, but with the same soul-soothing satisfaction that only homemade ice cream can deliver.
What Ingredients You Will Need
This recipe uses simple, everyday ingredients to deliver that rich, creamy, perfectly salted flavor. Most of these are probably in your kitchen right now, which is exactly how I like my recipes to work. No last-minute grocery store runs required.
- 2 cups heavy cream (480 ml) – Make sure it’s cold, straight from the fridge. I prefer Organic Valley or Horizon for the best richness, but any brand works. The cold cream whips up much better and holds its structure longer.
- 1 can (14 oz) sweetened condensed milk (397 grams) – This is the backbone of no-churn ice cream. It adds sweetness and prevents ice crystals from forming. I use Eagle Brand or Borden, but store brands work fine too.
- 1 cup granulated sugar (200 grams) – For the caramel. Regular white sugar works best here. Don’t use brown sugar; it changes the flavor profile too much.
- 6 tablespoons unsalted butter (85 grams), cut into pieces – Use good quality butter here since it’s a key flavor component. I like Kerrygold or Land O’Lakes.
- 1/2 cup heavy cream (120 ml) – For the caramel sauce. Have this measured and ready before you start making the caramel because things move fast.
- 1 1/2 teaspoons flaky sea salt – Plus extra for sprinkling on top. I use Maldon sea salt flakes. They’re worth the splurge here because they dissolve nicely and give you those little salty bursts. Regular table salt will work in a pinch, but use half the amount since it’s much more concentrated.
- 1 teaspoon vanilla extract – Pure vanilla, not imitation. It rounds out the caramel flavor beautifully.
For the caramel sauce : You’ll be making this from scratch, and trust me, it’s worth the extra 10 minutes. The homemade caramel has a complexity that store-bought just can’t match. It’s got those toasty, almost burnt sugar notes that pair perfectly with the cold, creamy ice cream.
Substitution guidance : If you’re dairy-free, you can try using full-fat coconut cream and a dairy-free sweetened condensed milk alternative. I haven’t tested this exact version, but I’ve seen it work in other no-churn recipes. Just know the texture will be slightly different—still delicious, just not as rich. For a lower-sugar option, you can use a sugar-free sweetened condensed milk, but again, the texture won’t be quite the same. Sometimes you just have to go all in, you know?
Equipment Needed
You don’t need much for this recipe, which is honestly my favorite part. Here’s what you’ll need:
- Large mixing bowl – Glass or stainless steel works best. Make sure it’s clean and dry. I have this big ceramic bowl I got from a thrift store for three dollars, and it’s perfect for whipping cream.
- Hand mixer or stand mixer – You can whisk by hand if you want a workout, but a mixer makes this so much easier. I’ve done it both ways, and the mixer wins every time.
- Medium saucepan – For making the caramel. A light-colored pan is ideal so you can see the sugar changing color. I learned this the hard way after burning my first batch in a dark nonstick pan.
- Rubber spatula – For folding the caramel into the whipped cream. Get a good one that won’t scratch your bowls.
- Loaf pan or freezer-safe container – A 9×5 inch loaf pan works perfectly. I use a glass one so I can see the pretty layers of caramel.
- Parchment paper or plastic wrap – To cover the surface of the ice cream and prevent freezer burn.
- Candy thermometer (optional but helpful) – If you’re nervous about making caramel, this takes the guesswork out. I didn’t use one for years, but now I love having it for peace of mind.
If you don’t have a hand mixer, you can absolutely whip the cream by hand. It’ll take about 5-7 minutes of vigorous whisking, but it’s totally doable. Consider it arm day at the gym, but with a delicious reward at the end.
Preparation Method
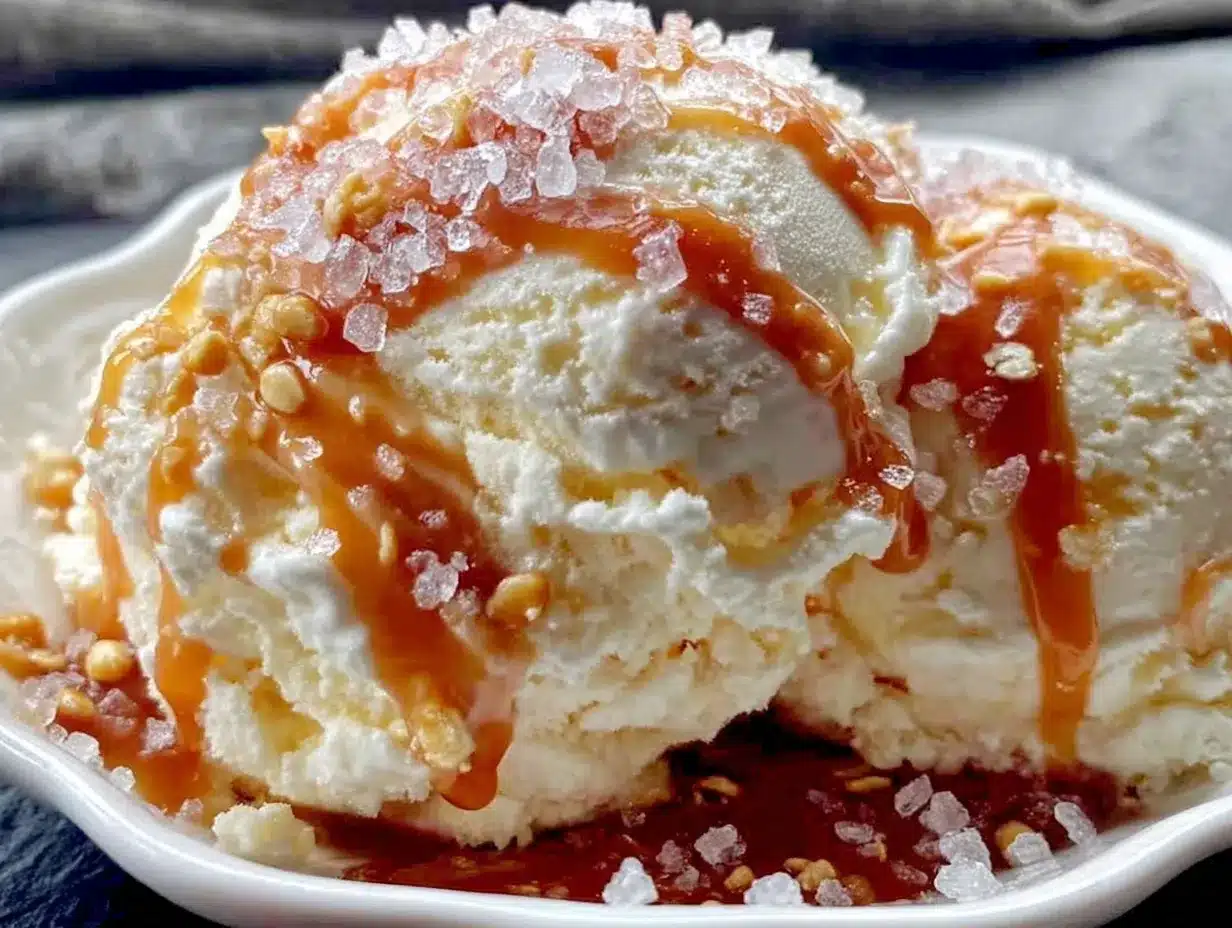
Alright, let’s make some ice cream! I’ve broken this down into clear steps so you don’t miss anything. Take your time with the caramel—it’s the star of the show.
- Make the salted caramel sauce first (about 15 minutes). Place the 1 cup of granulated sugar in a medium saucepan over medium heat. Stir it with a clean, dry spatula or wooden spoon as it starts to melt. The sugar will clump up at first—don’t panic, that’s normal. Keep stirring gently until it all melts into a deep amber liquid. This takes about 8-10 minutes. Watch it carefully; it goes from perfect to burnt very quickly. You’re looking for a color like a new penny or slightly darker.
- Add the butter once the sugar is fully melted and amber-colored. Carefully whisk in the 6 tablespoons of butter, one piece at a time. The mixture will bubble up vigorously—that’s why you need a deep saucepan. Keep whisking until the butter is fully incorporated and the mixture is smooth. It should smell nutty and rich at this point.
- Slowly pour in the 1/2 cup of heavy cream while whisking constantly. Again, it will bubble up and steam a lot. Keep whisking until everything is smooth and well combined. Remove the pan from the heat and stir in the 1 1/2 teaspoons of flaky sea salt and the 1 teaspoon of vanilla extract. Let the caramel cool completely to room temperature. I usually pour it into a glass jar and set it on the counter while I work on the ice cream base.
- Whip the heavy cream (about 3-4 minutes). Pour the 2 cups of cold heavy cream into a large mixing bowl. Using a hand mixer or stand mixer fitted with the whisk attachment, whip the cream on medium-high speed until stiff peaks form. You know it’s ready when you lift the beaters and the cream holds its shape without drooping. Be careful not to over-whip, or you’ll end up with butter. I’ve done that before, and it’s a sad, greasy mess.
- Fold in the sweetened condensed milk. Pour the entire can of sweetened condensed milk over the whipped cream. Using a rubber spatula, gently fold it in until just combined. You want to see a uniform mixture with no streaks of white or yellow. Don’t overmix, or you’ll deflate all that air you just whipped into the cream.
- Create the caramel swirl. Pour about half of the cream mixture into your loaf pan or freezer-safe container. Drizzle about a third of the cooled salted caramel sauce over the top. Use a knife or skewer to gently swirl it through the cream. Don’t overdo it—you want distinct ribbons of caramel, not a homogeneous brown mixture. Add the remaining cream mixture on top, then drizzle another third of the caramel and swirl again.
- Reserve some caramel for serving. Save the remaining caramel sauce in the fridge. You’ll use it for drizzling over the top when you serve the ice cream. Trust me, you want that extra hit of caramel.
- Cover and freeze. Press a piece of parchment paper or plastic wrap directly onto the surface of the ice cream. This prevents ice crystals from forming on top. Cover the container with its lid or another layer of plastic wrap. Freeze for at least 6 hours, but overnight is best. The longer it freezes, the firmer and more scoopable it becomes.
- Let it soften before serving. When you’re ready to eat, take the ice cream out of the freezer and let it sit at room temperature for about 5-10 minutes. This makes it much easier to scoop. Drizzle with the reserved caramel sauce and a final pinch of flaky sea salt right before serving.
Cooking Tips & Techniques
I’ve made this recipe at least a dozen times now, and I’ve learned a few things along the way. Here are my best tips for getting it right every single time.
Don’t rush the caramel. I know it’s tempting to crank up the heat and get it over with, but low and slow is the way to go. Medium heat, patient stirring, and close attention. The first time I made caramel, I walked away for “just a second” to check my phone, and came back to a blackened, smoking mess. Learn from my mistakes, friends.
Use cold cream for whipping. This seems obvious, but it makes a huge difference. Cold cream whips up faster and holds its structure much better than room temperature cream. I keep my cream in the coldest part of the fridge, right at the back.
Fold, don’t stir. When you’re combining the whipped cream with the sweetened condensed milk, use a gentle folding motion. Cut through the center of the mixture, scrape along the bottom of the bowl, and bring the spatula up and over. Rotate the bowl as you go. This keeps all that lovely air in the cream, which is what gives you that light, creamy texture.
Temperature matters for the caramel. Make sure your caramel is completely cool before you add it to the cream mixture. If it’s even slightly warm, it will melt the whipped cream and you’ll end up with a soupy mess. I usually make the caramel first, then let it sit on the counter while I do everything else. By the time I’m ready to swirl, it’s perfect.
Don’t skip the salt. The flaky sea salt on top is not optional. It’s what makes this salted caramel instead of just caramel. That little burst of salt against the sweet, creamy ice cream is pure magic. I’ve had friends try it without the salt, and they always agree it’s better with it.
Variations & Adaptations
Once you’ve mastered the basic recipe, feel free to get creative. Here are some variations I’ve tried and loved.
- Chocolate Salted Caramel : Add 1/4 cup of cocoa powder to the sweetened condensed milk before folding it into the whipped cream. It gives you a chocolate base with those same amazing caramel swirls. I made this for a chocolate-loving friend, and she said it was the best ice cream she’d ever had.
- Cookies and Cream Caramel : Crush about 10 chocolate sandwich cookies and fold them into the cream mixture along with the caramel swirl. The crunchy bits of cookie against the creamy ice cream are incredible. This is my go-to for parties because everyone loves it.
- Vegan Version : Use full-fat coconut cream instead of heavy cream and a dairy-free sweetened condensed milk alternative. The texture will be slightly icier, but the flavor is still amazing. I’ve made this for a vegan friend, and she was thrilled.
- Boozy Salted Caramel : Add 2 tablespoons of bourbon or dark rum to the caramel sauce after you take it off the heat. The alcohol keeps the ice cream slightly softer and adds a lovely warmth. Just be careful not to add too much, or it won’t freeze properly.
- Nutty Caramel Crunch : Toast 1/2 cup of chopped pecans or walnuts and fold them into the cream mixture. The nutty crunch adds another layer of texture that pairs beautifully with the caramel.
My personal favorite variation is the cookies and cream one. I made it last Christmas for a family gathering, and my uncle—who is notoriously picky about desserts—asked for the recipe. That’s when you know you’ve hit gold.
Serving & Storage Suggestions
This ice cream is best served slightly softened, straight from the freezer with a generous drizzle of the reserved caramel sauce and an extra pinch of flaky sea salt. I like to serve it in chilled bowls or cones for that authentic ice cream parlor feel.
Storage : Keep the ice cream in a tightly sealed container in the freezer for up to 2 weeks. After that, it might start to develop ice crystals, but honestly, it rarely lasts that long in my house. To prevent freezer burn, always press a piece of parchment paper directly onto the surface before sealing the container.
Reheating the caramel : If the reserved caramel sauce gets too thick in the fridge, just microwave it for 10-15 seconds or warm it in a small saucepan over low heat. Stir it well before drizzling.
Flavor development : The caramel flavor actually deepens and becomes more complex after a day or two in the freezer. So if you can resist eating it all on day one, you’ll be rewarded with an even better experience on day two or three. Not that I’ve ever managed to wait that long.
Perfect pairings : This ice cream is amazing on its own, but it also works beautifully as a topping for warm brownies, apple pie, or a simple chocolate cake. The hot-and-cold contrast is absolutely divine. I also love serving it alongside a warm cookie for an easy but impressive dessert.
Nutritional Information & Benefits
Let’s be real—this is a treat, not a health food. But here’s the nutritional breakdown so you know what you’re getting into.
Per serving (about 1/2 cup) : Approximately 350-400 calories, 22g fat, 40g carbohydrates, 4g protein. These numbers will vary slightly depending on the specific brands you use and how much caramel you add.
Health benefits of key ingredients : The heavy cream provides calcium and vitamin A, while the sweetened condensed milk adds a good dose of calcium as well. The sea salt contains essential minerals like magnesium and potassium. Okay, I’m reaching a bit here, but hey, every little bit counts, right?
Dietary considerations : This recipe is gluten-free and contains no eggs. It’s not dairy-free or vegan in its standard form, but I’ve included a vegan variation above. It’s also not low-sugar, so if you’re watching your sugar intake, this is definitely a “sometimes” treat.
My personal wellness perspective : I believe in balance. Life is too short to never eat ice cream, but it’s also important to enjoy it mindfully. A small scoop of this homemade salted caramel ice cream is far more satisfying than a giant bowl of some processed, chemical-laden alternative. Make it special, savor every bite, and don’t feel guilty about it.
Conclusion
This Creamy No-Churn Salted Caramel Ice Cream is the kind of recipe that makes you feel like a kitchen wizard. It’s surprisingly simple, uses everyday ingredients, and delivers results that taste like they came from a fancy ice cream shop. The homemade caramel with its perfect balance of sweet and salty, the incredibly creamy texture, and the fact that you don’t need any special equipment—what’s not to love?
I’ve made this recipe on lazy Sunday afternoons, for last-minute dinner parties, and during those late-night cravings that started this whole journey. Every single time, it’s been a hit. And honestly, the best part is knowing that you made it yourself, with your own two hands. There’s something deeply satisfying about that.
I’d love to hear how yours turns out! Did you try one of the variations? Did you come up with your own twist? Drop a comment below and let me know. And if you’re feeling generous, share this recipe with a friend who needs a little sweetness in their life. We could all use a bit more of that, don’t you think?
Now go make some ice cream. You deserve it.
Frequently Asked Questions
Can I use store-bought caramel sauce instead of making my own?
You can, but I really recommend making your own. Homemade caramel has a much deeper, more complex flavor that makes a huge difference in the final result. Store-bought sauces are often too thin and sweet, and they don’t have that toasty, slightly bitter edge that makes salted caramel so addictive.
Why did my ice cream turn out icy instead of creamy?
This usually happens for one of two reasons: either the cream wasn’t whipped to stiff peaks, or the caramel was too warm when you added it. Make sure your cream is very cold and whip it until it holds firm peaks. And always let your caramel cool completely to room temperature before swirling it in.
How long does this ice cream keep in the freezer?
It will stay fresh for up to 2 weeks if stored properly in an airtight container with a piece of parchment paper pressed directly onto the surface. After that, it might start to develop ice crystals, but honestly, it never lasts that long in my house!
Can I make this recipe dairy-free?
Yes! Use full-fat coconut cream instead of heavy cream and a dairy-free sweetened condensed milk alternative. The texture will be slightly different—a bit icier and less rich—but the flavor will still be delicious. I’ve made it this way for a vegan friend, and she loved it.
Do I need a candy thermometer to make the caramel?
Not at all. I made caramel for years without one. Just watch the color carefully—you’re looking for a deep amber color, like a new penny. If you’re nervous, a candy thermometer can give you peace of mind, but it’s definitely not required. Just keep your eyes on the pan and don’t walk away!
Pin This Recipe!
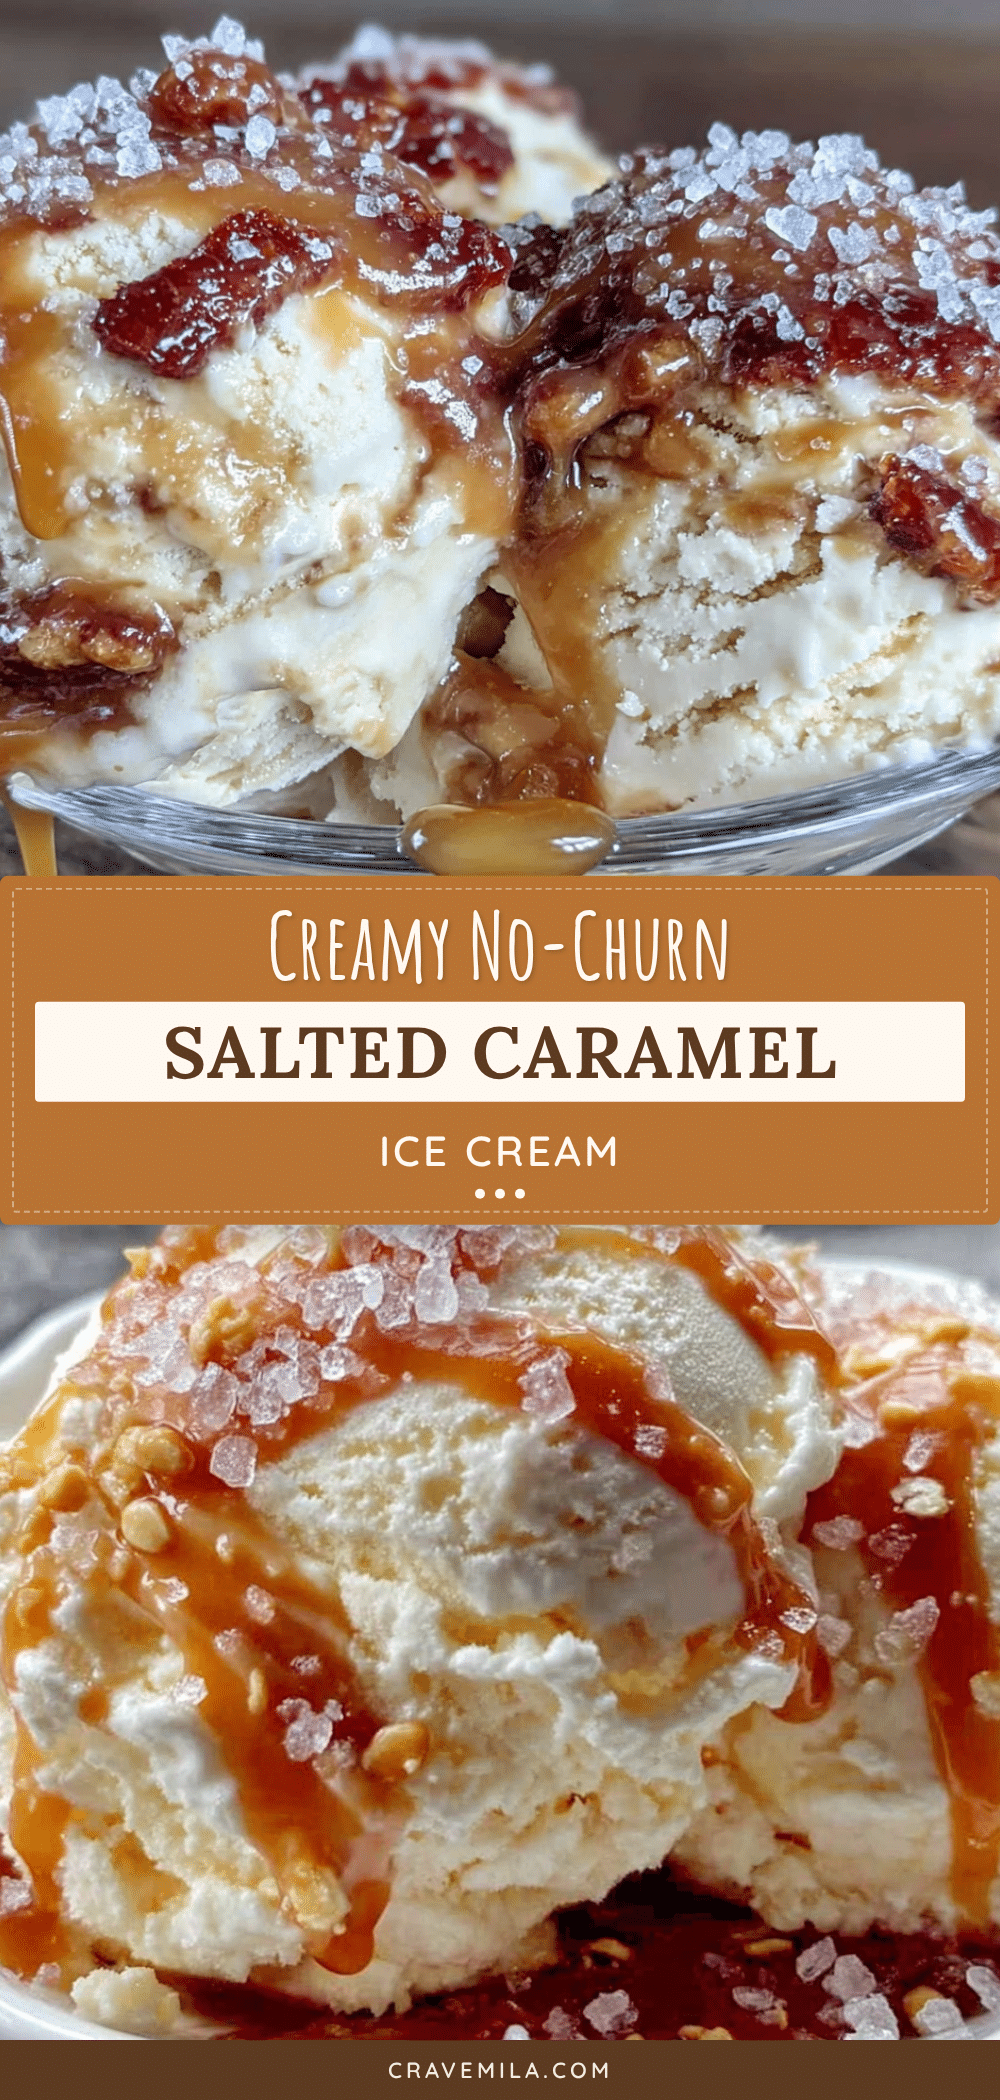
Creamy No-Churn Salted Caramel Ice Cream

This easy no-churn salted caramel ice cream is incredibly creamy and rich, made without an ice cream maker. Homemade salted caramel is swirled into a simple whipped cream and sweetened condensed milk base for a perfect balance of sweet and salty.
- Prep Time: 15 minutes
- Cook Time: 15 minutes
- Total Time: 6 hours 30 minutes (includes freezing time)
- Yield: 8 servings 1x
- Category: Dessert
- Cuisine: American
Ingredients
- 2 cups heavy cream (480 ml)
- 1 can (14 oz) sweetened condensed milk (397 grams)
- 1 cup granulated sugar (200 grams)
- 6 tablespoons unsalted butter (85 grams), cut into pieces
- 1/2 cup heavy cream (120 ml)
- 1 1/2 teaspoons flaky sea salt
- 1 teaspoon vanilla extract
Instructions
- Make the salted caramel sauce first (about 15 minutes). Place the 1 cup of granulated sugar in a medium saucepan over medium heat. Stir it with a clean, dry spatula or wooden spoon as it starts to melt. The sugar will clump up at first—don’t panic, that’s normal. Keep stirring gently until it all melts into a deep amber liquid. This takes about 8-10 minutes. Watch it carefully; it goes from perfect to burnt very quickly. You’re looking for a color like a new penny or slightly darker.
- Add the butter once the sugar is fully melted and amber-colored. Carefully whisk in the 6 tablespoons of butter, one piece at a time. The mixture will bubble up vigorously—that’s why you need a deep saucepan. Keep whisking until the butter is fully incorporated and the mixture is smooth. It should smell nutty and rich at this point.
- Slowly pour in the 1/2 cup of heavy cream while whisking constantly. Again, it will bubble up and steam a lot. Keep whisking until everything is smooth and well combined. Remove the pan from the heat and stir in the 1 1/2 teaspoons of flaky sea salt and the 1 teaspoon of vanilla extract. Let the caramel cool completely to room temperature. I usually pour it into a glass jar and set it on the counter while I work on the ice cream base.
- Whip the heavy cream (about 3-4 minutes). Pour the 2 cups of cold heavy cream into a large mixing bowl. Using a hand mixer or stand mixer fitted with the whisk attachment, whip the cream on medium-high speed until stiff peaks form. You know it’s ready when you lift the beaters and the cream holds its shape without drooping. Be careful not to over-whip, or you’ll end up with butter.
- Fold in the sweetened condensed milk. Pour the entire can of sweetened condensed milk over the whipped cream. Using a rubber spatula, gently fold it in until just combined. You want to see a uniform mixture with no streaks of white or yellow. Don’t overmix, or you’ll deflate all that air you just whipped into the cream.
- Create the caramel swirl. Pour about half of the cream mixture into your loaf pan or freezer-safe container. Drizzle about a third of the cooled salted caramel sauce over the top. Use a knife or skewer to gently swirl it through the cream. Don’t overdo it—you want distinct ribbons of caramel, not a homogeneous brown mixture. Add the remaining cream mixture on top, then drizzle another third of the caramel and swirl again.
- Reserve some caramel for serving. Save the remaining caramel sauce in the fridge. You’ll use it for drizzling over the top when you serve the ice cream.
- Cover and freeze. Press a piece of parchment paper or plastic wrap directly onto the surface of the ice cream. This prevents ice crystals from forming on top. Cover the container with its lid or another layer of plastic wrap. Freeze for at least 6 hours, but overnight is best. The longer it freezes, the firmer and more scoopable it becomes.
- Let it soften before serving. When you’re ready to eat, take the ice cream out of the freezer and let it sit at room temperature for about 5-10 minutes. This makes it much easier to scoop. Drizzle with the reserved caramel sauce and a final pinch of flaky sea salt right before serving.
Notes
Make sure the caramel is completely cool before adding to the cream mixture to avoid melting the whipped cream. For best texture, freeze overnight. The caramel flavor deepens after a day or two in the freezer.
Nutrition
- Serving Size: 1/2 cup
- Calories: 375
- Sugar: 38
- Sodium: 290
- Fat: 22
- Saturated Fat: 14
- Carbohydrates: 40
- Protein: 4
Keywords: no-churn ice cream, salted caramel, homemade ice cream, easy ice cream, no ice cream maker, summer dessert