Maggie wasn’t trying to impress anyone. I’d stopped by to borrow a pie plate—it was October, and I had grandiose plans I was frankly too tired to execute—and the scent of cinnamon and sugar hit me before I even got past her screen door. It wasn’t the fancy kind of smell you get from a bakery with a $7 cookie. It was warmer. Softer. It smelled like someone had figured out how to bottle a crisp autumn afternoon and bake it into something you could hold in your hand.
She was standing at her counter in sweatpants and an old t-shirt, a single baking sheet on the counter, and she just shrugged when I asked what she was making. “Oh, just some cookies. I had half a can of pumpkin left over.” Just some cookies. Like it was nothing. But let me tell you, the way that kitchen smelled—it was everything. I honestly forgot about the pie plate for a solid ten minutes. I just stood there, watching her scoop dough onto the sheet, not measuring anything, not checking a recipe on her phone. She was just doing it, like she’d made them a thousand times before.
That’s the thing about the best recipes, isn’t it? They don’t come from a carefully planned test kitchen. They come from someone who’s got a leftover ingredient and twenty minutes to spare. And that’s exactly how these cozy small-batch pumpkin snickerdoodle cookies were born. I begged her for the rough measurements before I left, and I’ve been tweaking them ever since. Now, I make them every time I need a little bit of that feeling back—that feeling of walking into a friend’s house and being wrapped in the smell of fall, even if the day outside is gray and cold. Maybe you’ve been there. Maybe you need that feeling today.
Why You’ll Love This Recipe
Let me be real with you for a second. There are a million pumpkin cookie recipes out there, and most of them are either too cakey, too dry, or they make enough to feed a small army. That’s not what these are. These cozy small-batch pumpkin snickerdoodle cookies are the ones I actually make on a Tuesday night when I just want something warm and sweet without committing to a three-day baking project. They are, quite simply, the best version of a fall cookie I’ve ever landed on, and here’s why they’re going to be your new go-to.
- Cozy and Small-Batch: This recipe makes exactly 8 to 10 cookies. No more, no less. Perfect for a quiet evening, a small household, or when you just want to satisfy a craving without a Tupperware full of leftovers staring at you for a week.
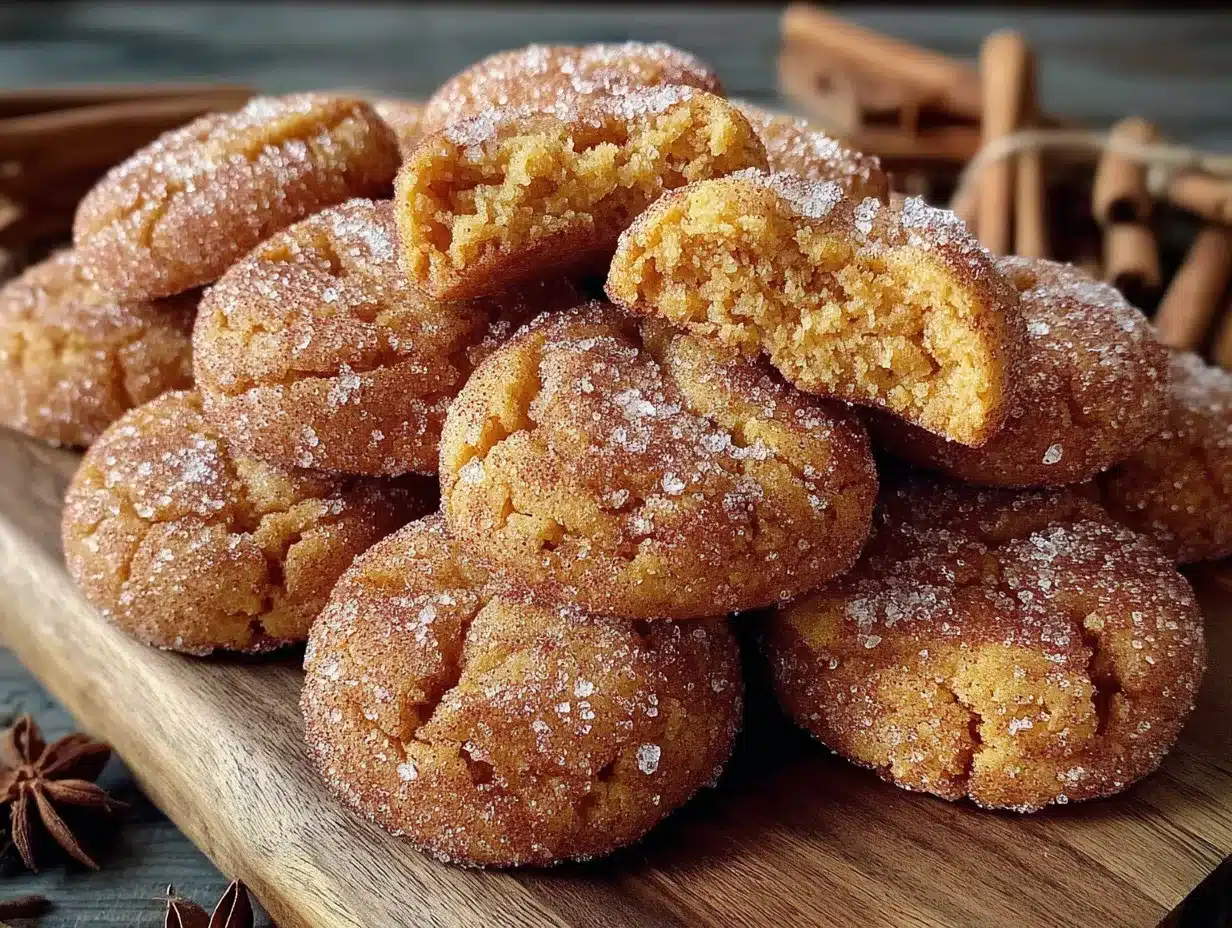
- Perfectly Soft with a Crisp Cinnamon Edge: The pumpkin keeps the centers incredibly soft and tender, while the classic snickerdoodle coating of cinnamon and sugar gives you that signature crackly, slightly crisp edge. It’s the best of both worlds.
- Simple Pantry Ingredients: You probably already have everything you need. No weird flours, no specialty extracts. Just butter, sugar, pumpkin, flour, and a mountain of cinnamon. I mean it—if you’ve got a can of pumpkin in your pantry, you’re already halfway there.
- No Chill Time Required: I don’t know about you, but when I want a cookie, I want it now. These come together in about 20 minutes from start to finish, and there’s no waiting around for the dough to firm up in the fridge. Scoop, roll, bake, done.
- That Soul-Soothing Fall Feeling: This isn’t just about the taste, though the taste is incredible. It’s about the way the kitchen smells. It’s about pulling a warm cookie off the sheet and watching the cinnamon-sugar shimmer in the light. It’s comfort, pure and simple.
I’ve tested this recipe at least eight times to get the texture just right. Too much pumpkin and they turn into little muffin tops. Too little and they’re dry. But this ratio? It’s the sweet spot. The first time I made them for my family, my husband walked into the kitchen and said, “What is that smell?” before he even saw the cookies. That’s the kind of recipe this is. It announces itself. It makes itself known.
What Ingredients You Will Need
This recipe uses simple, humble ingredients to deliver something that feels far more special than the sum of its parts. The magic is in the balance—the pumpkin adds moisture and a subtle earthiness, while the cinnamon-sugar coating gives you that iconic snickerdoodle crunch. Here’s everything you’ll need:
For the Cookies
- 1/2 cup (1 stick) unsalted butter, softened – Make sure it’s truly softened to room temperature. Cold butter won’t cream properly, and melted butter will make the cookies spread too thin. (I prefer Kerrygold for the richness, but any good unsalted butter works.)
- 1/2 cup granulated sugar – This gives the cookies their structure and sweetness. Don’t substitute brown sugar here; it changes the texture.
- 1/4 cup packed light brown sugar – Adds a touch of molasses depth and keeps the centers soft and chewy.
- 1/4 cup pumpkin puree – Not pumpkin pie filling! Make sure you’re using 100% pure pumpkin. I like Libby’s for its consistent thickness. If your pumpkin puree looks watery, pat it dry with a paper towel before adding it.
- 1 large egg yolk – Just the yolk. The white would make the cookies too puffy and cakey. Save the white for an omelet or scramble it into your morning eggs.
- 1 teaspoon vanilla extract – Pure vanilla, not imitation. It makes a difference in a small batch like this.
- 1 cup all-purpose flour – Spoon and level it. Scooping directly from the bag packs in too much flour and leads to dry cookies.
- 1/2 teaspoon cream of tartar – This is the secret to the classic snickerdoodle tang and that signature chewy texture. Don’t skip it.
- 1/2 teaspoon baking soda – Helps the cookies spread just enough and gives them a little lift.
- 1/4 teaspoon salt – Balances the sweetness and enhances the pumpkin flavor.
- 1 teaspoon ground cinnamon – For warmth and that unmistakable fall flavor.
- 1/4 teaspoon ground nutmeg – Optional, but I love the extra layer of coziness it adds.
- 1/8 teaspoon ground cloves – A tiny pinch. It’s just a whisper, but it makes the pumpkin taste more rounded.
For the Cinnamon-Sugar Coating
- 3 tablespoons granulated sugar
- 1 1/2 tablespoons ground cinnamon – Yes, this is a lot of cinnamon. That’s the point. Be generous. (I use McCormick or simply organic; the flavor is brighter.)
That’s it. Eight ingredients for the dough, two for the coating. If you want to get fancy, you can add a pinch of cardamom to the coating, but I find that the classic cinnamon-sugar pairing is already perfect. The pumpkin puree does double duty here—it adds moisture and a subtle sweetness that lets you use a little less butter than a traditional snickerdoodle. The cream of tartar is non-negotiable, though. I’ve made these without it, and they were just… flat and sad. Trust me on this one.
Equipment Needed
You don’t need a fancy stand mixer or any specialized gadgets for these cookies. That’s part of the beauty of a small-batch recipe. Here’s what you’ll want to have on hand:
- A medium mixing bowl and a small mixing bowl – One for the dry ingredients, one for the wet. I use a set of glass nesting bowls from Pyrex. They’re cheap, they’re sturdy, and they don’t hold onto smells.
- A hand mixer or a wooden spoon – A hand mixer makes creaming the butter and sugar easier, but honestly, you can do it by hand with a sturdy spoon and a little elbow grease. I’ve done it both ways. The cookies turn out the same.
- A baking sheet – A standard half-sheet pan works perfectly. No need for a specialty pan.
- Parchment paper or a silicone baking mat – Parchment paper is my go-to. It prevents sticking and makes cleanup a breeze. Silicone mats work too, but the cookies might spread slightly more.
- A cookie scoop (about 1.5 tablespoons) – This ensures all your cookies are the same size and bake evenly. If you don’t have one, use two spoons to scoop and drop the dough.
- A small, shallow bowl – For the cinnamon-sugar coating. A cereal bowl or small ramekin works great.
- A wire cooling rack – Essential for letting the cookies cool evenly without soggy bottoms. If you don’t have one, let them cool on the baking sheet for a few minutes, then transfer them carefully to a plate.
I’ve made these cookies in a friend’s tiny apartment kitchen with a warped baking sheet and a plastic spoon, and they still turned out amazing. The equipment matters less than the technique. But a good cookie scoop? That’s a game-changer. It’s one of those tools you don’t realize you need until you have it.
Preparation Method
Alright, let’s get to it. This is the part where the magic happens. Follow these steps closely, and you’ll have a tray of warm, cinnamon-scented cookies in about 20 minutes.
- Preheat your oven to 350°F (175°C). Line your baking sheet with parchment paper. This is important—don’t skip the parchment. It helps the cookies spread evenly and prevents the bottoms from burning.
- Make the cinnamon-sugar coating. In your small bowl, whisk together the 3 tablespoons of granulated sugar and 1 1/2 tablespoons of ground cinnamon. Set it aside. You’ll use this right before baking.
- Cream the butter and sugars. In your medium mixing bowl, beat the softened butter, 1/2 cup granulated sugar, and 1/4 cup brown sugar together until light and fluffy. This takes about 2 to 3 minutes with a hand mixer on medium speed, or about 4 minutes if you’re doing it by hand. You’re looking for a pale, airy mixture that looks almost like frosting. Scrape down the sides of the bowl once or twice.
- Add the wet ingredients. Beat in the pumpkin puree, the egg yolk, and the vanilla extract. Mix until just combined. The mixture might look a little curdled at this point—don’t panic. That’s normal. The pumpkin and butter aren’t the best of friends right away, but they’ll come together once the flour goes in.
- Whisk the dry ingredients. In your small bowl, whisk together the flour, cream of tartar, baking soda, salt, cinnamon, nutmeg, and cloves. Make sure there are no clumps of baking soda or cream of tartar. I once forgot to whisk and ended up with a pocket of pure cream of tartar in one cookie. It was… not pleasant. Learn from my mistake.
- Combine wet and dry. Gradually add the dry ingredients to the wet mixture, mixing on low speed or folding with a spatula until just combined. Stop as soon as you don’t see any streaks of flour. Overmixing will make the cookies tough, and nobody wants a tough snickerdoodle.
- Scoop and roll. Using your cookie scoop (or two spoons), scoop out rounded tablespoons of dough. You should get about 8 to 10 cookies. Roll each scoop of dough into a ball between your palms. The dough will be slightly sticky, but it should hold its shape. If it’s too sticky to handle, pop it in the fridge for 5 minutes.
- Roll in the coating. Drop each dough ball into the cinnamon-sugar mixture and roll it around until it’s completely coated. Be generous here. The coating is what gives these cookies their signature crackly top and that burst of cinnamon flavor with every bite. Place the coated dough balls on the prepared baking sheet, spacing them about 2 inches apart. You can fit all 8 to 10 on one standard sheet.
- Bake. Bake for 10 to 12 minutes, or until the edges are set and the tops look slightly cracked and puffed. The centers will still look soft and slightly underdone—that’s exactly what you want. They’ll continue to set as they cool. For a softer, gooier cookie, bake for 10 minutes. For a slightly crisper edge, go for 12.
- Cool. Let the cookies cool on the baking sheet for 5 minutes. This is crucial. They’re very fragile right out of the oven, and moving them too soon will cause them to fall apart. After 5 minutes, transfer them to a wire cooling rack to cool completely. Or, you know, eat one warm. I won’t tell anyone.
A quick note on timing: the entire process, from preheating to pulling the last cookie off the rack, takes about 30 minutes. That’s it. Thirty minutes from “I want a cookie” to “I am eating a cookie.” That’s the kind of math I can get behind.
Cooking Tips & Techniques
I’ve made these cozy small-batch pumpkin snickerdoodle cookies more times than I can count, and I’ve learned a few things the hard way. Here are my best tips to make sure yours turn out perfect every single time.
Don’t overmix the dough. This is the number one mistake I see with cookie recipes. Once you add the flour, mix only until it disappears. If you keep going, you’ll develop the gluten too much, and your cookies will be dense and bread-like instead of soft and tender. I’ve done it. I’ve regretted it.
Pat your pumpkin puree dry. Pumpkin puree contains a lot of water. If your puree looks watery or there’s liquid pooling on top, blot it with a paper towel before adding it to the batter. Too much moisture will make your cookies spread into flat, sad discs. I learned this after a particularly disappointing batch that looked more like pumpkin pancakes than cookies.
Use room temperature ingredients. This matters more than you think. Cold butter won’t cream properly with the sugar, and cold egg yolk won’t emulsify. Take your butter and egg out of the fridge about 30 minutes before you start baking. If you’re in a hurry, you can soften the butter in the microwave for about 10 seconds, but watch it carefully—you want it soft, not melted.
Rotate your baking sheet halfway through. Ovens have hot spots. I know, it’s annoying. But if you rotate the sheet 180 degrees at the 5-minute mark, your cookies will bake more evenly. I’ve skipped this step and ended up with cookies that were perfectly golden on one side and pale on the other. Not the end of the world, but not ideal.
Let them cool on the sheet. I know it’s tempting to move them immediately to a rack so you can free up the sheet for the next batch, but please resist. The cookies need those 5 minutes on the hot sheet to finish setting. If you move them too soon, they’ll crumble. Trust the process.
Make a double batch if you’re feeding a crowd. This recipe is designed for a small batch, but it doubles beautifully. Just use a whole egg instead of two yolks if you’re doubling, and keep an eye on the bake time—it might need an extra minute or two.
Variations & Adaptations
One of the things I love most about this recipe is how adaptable it is. You can tweak it to fit your mood, your diet, or whatever you have in your pantry. Here are a few variations I’ve tried and loved.
Gluten-Free Version: Substitute the all-purpose flour with a 1:1 gluten-free baking flour blend. I’ve used Bob’s Red Mill 1:1 Baking Flour with great results. The texture is slightly more delicate, but the flavor is spot on. Add an extra tablespoon of flour if the dough feels too sticky.
Vegan Adaptation: Use vegan butter (I like Miyoko’s or Earth Balance) and substitute the egg yolk with 1 tablespoon of aquafaba (the liquid from a can of chickpeas). The cookies won’t be quite as tender, but they’ll still be delicious. Make sure your sugar is vegan-friendly as well.
Pumpkin Spice Snickerdoodles: If you’re a fan of pumpkin spice season, swap the individual spices for 1 1/2 teaspoons of pumpkin pie spice in the dough. You can also add a pinch of pumpkin pie spice to the cinnamon-sugar coating for extra warmth.
Chocolate-Dipped Version: Once the cookies are completely cool, dip half of each cookie in melted dark chocolate and let it set on parchment paper. The combination of pumpkin, cinnamon, and dark chocolate is absolutely divine. I did this for a holiday cookie exchange, and they disappeared in minutes.
Maple Glaze Drizzle: Whisk together 1/2 cup powdered sugar, 1 tablespoon maple syrup, and 1 to 2 teaspoons of milk (or plant-based milk) until smooth. Drizzle over the cooled cookies. It adds a lovely sweetness and a beautiful finish. Perfect for when you want to dress them up for a party.
Extra Chewy Version: For cookies that are even chewier, substitute 2 tablespoons of the all-purpose flour with 2 tablespoons of bread flour. The higher protein content in bread flour creates a chewier texture. I tried this on a whim, and honestly, it might be my new favorite way to make them.
Serving & Storage Suggestions
These cookies are best enjoyed warm, straight from the oven, with a cold glass of milk or a hot cup of coffee. But let’s be real—they’re also amazing at room temperature, crumbled over vanilla ice cream, or even as a late-night snack straight from the cookie jar. No judgment here.
Serving Temperature: I love serving these slightly warm. The cinnamon-sugar coating is at its most fragrant, and the centers are impossibly soft. If you’re serving them later, pop them in a 300°F (150°C) oven for 3 to 4 minutes to warm them up. It brings them back to life.
Pairing Suggestions: These cookies pair beautifully with a chai latte, a spiced apple cider, or a simple cup of black tea. For a dessert spread, serve them alongside a pumpkin cheesecake or a warm apple crisp. They’re also fantastic with a scoop of vanilla bean ice cream and a drizzle of caramel sauce.
Storage: Store the cookies in an airtight container at room temperature for up to 4 days. Place a slice of bread in the container to keep them soft—the bread absorbs excess air and releases moisture. Replace the bread slice every other day. It sounds weird, but it works. I promise.
Freezing: These cookies freeze beautifully. You can freeze the baked cookies in a single layer on a baking sheet, then transfer them to a freezer-safe bag for up to 3 months. Thaw at room temperature for about 30 minutes, or warm them in the oven. You can also freeze the unbaked dough balls. Scoop and roll them, coat them in cinnamon-sugar, then freeze them on a baking sheet. Once frozen, transfer them to a freezer bag. Bake from frozen, adding 2 to 3 minutes to the bake time.
Flavor Development: Honestly, these cookies are at their peak on day one. The cinnamon-sugar coating stays crisp, and the centers are perfectly soft. By day two, the coating starts to absorb into the cookie, and the texture becomes more uniform. They’re still delicious, just different. So eat them quickly. That shouldn’t be a problem.
Nutritional Information & Benefits
I’m not a nutritionist, but I’ve done my best to estimate the nutritional values for these cookies. Keep in mind that these are estimates and will vary based on your specific ingredients and portion sizes.
| Nutrient | Per Cookie (based on 10 cookies) |
|---|---|
| Calories | 185 |
| Total Fat | 9g |
| Saturated Fat | 5g |
| Cholesterol | 38mg |
| Sodium | 115mg |
| Total Carbohydrates | 25g |
| Dietary Fiber | 1g |
| Sugars | 15g |
| Protein | 2g |
Health Benefits of Key Ingredients: Pumpkin is packed with vitamin A, which is great for your eyes and immune system. It’s also low in calories and high in fiber, which helps keep you full. Cinnamon has anti-inflammatory properties and can help regulate blood sugar. So, you know, these cookies are basically health food. (I’m kidding. Mostly. But they’re certainly better for you than a lot of other desserts!)
Dietary Considerations: This recipe contains gluten, dairy, and eggs. For a gluten-free version, see the variations section above. For a vegan version, see the notes above as well. These cookies are nut-free as written, making them a great option for school bake sales or parties where allergies might be a concern.
Conclusion
These cozy small-batch pumpkin snickerdoodle cookies are more than just a recipe—they’re a moment. They’re the smell that fills your kitchen on a gray October afternoon. They’re the warm bite you take when you need something to remind you that the world is still full of simple, good things. And honestly? They’re the cookie I keep coming back to, again and again, because they never let me down.
I hope you make them. I hope you eat them warm, straight off the baking sheet, with cinnamon-sugar dusting your fingers. And I hope they bring you the same quiet comfort they’ve brought me. If you try them, I’d love to hear about it. Leave a comment below and tell me how they turned out, or tag me in your photos on social media. Did you add chocolate? Drizzle them with maple glaze? Eat all eight in one sitting? (No judgment. I’ve been there.)
Until next time, happy baking. And remember—sometimes the best recipes come from a friend who wasn’t trying to impress anyone. They just wanted a cookie. And honestly? So do I.
Frequently Asked Questions
Can I use pumpkin pie filling instead of pumpkin puree?
No, please don’t. Pumpkin pie filling is pre-sweetened and spiced, and it will throw off the entire balance of the recipe. Your cookies will be too sweet, too wet, and the texture will be off. Stick with 100% pure pumpkin puree. Libby’s is my go-to brand.
Why do my cookies look flat and spread too much?
This usually happens for one of three reasons: your butter was too soft or melted, your pumpkin puree was too watery, or your baking sheet was too warm. Make sure your butter is softened but not melted, pat your pumpkin puree dry with a paper towel, and let your baking sheet cool completely between batches if you’re baking more than one.
Can I make the dough ahead of time and bake later?
Absolutely. You can scoop and roll the dough balls, coat them in the cinnamon-sugar mixture, and refrigerate them on a baking sheet for up to 24 hours. Bake them straight from the fridge, adding 1 to 2 minutes to the bake time. You can also freeze the unbaked dough balls for up to 3 months.
Can I double this recipe?
Yes! This recipe doubles beautifully. When you double it, use 1 whole egg instead of 2 egg yolks for better structure. Everything else just gets multiplied by two. You’ll need to bake in batches or use two baking sheets, rotating them halfway through the bake time.
How do I know when the cookies are done?
Look for set edges and puffed, slightly cracked tops. The centers will still look soft and a little underdone—that’s exactly what you want. They’ll continue to set as they cool on the baking sheet. If you wait until the centers look fully baked, they’ll be overdone and dry. Trust the visual cues, not the clock.
Pin This Recipe!
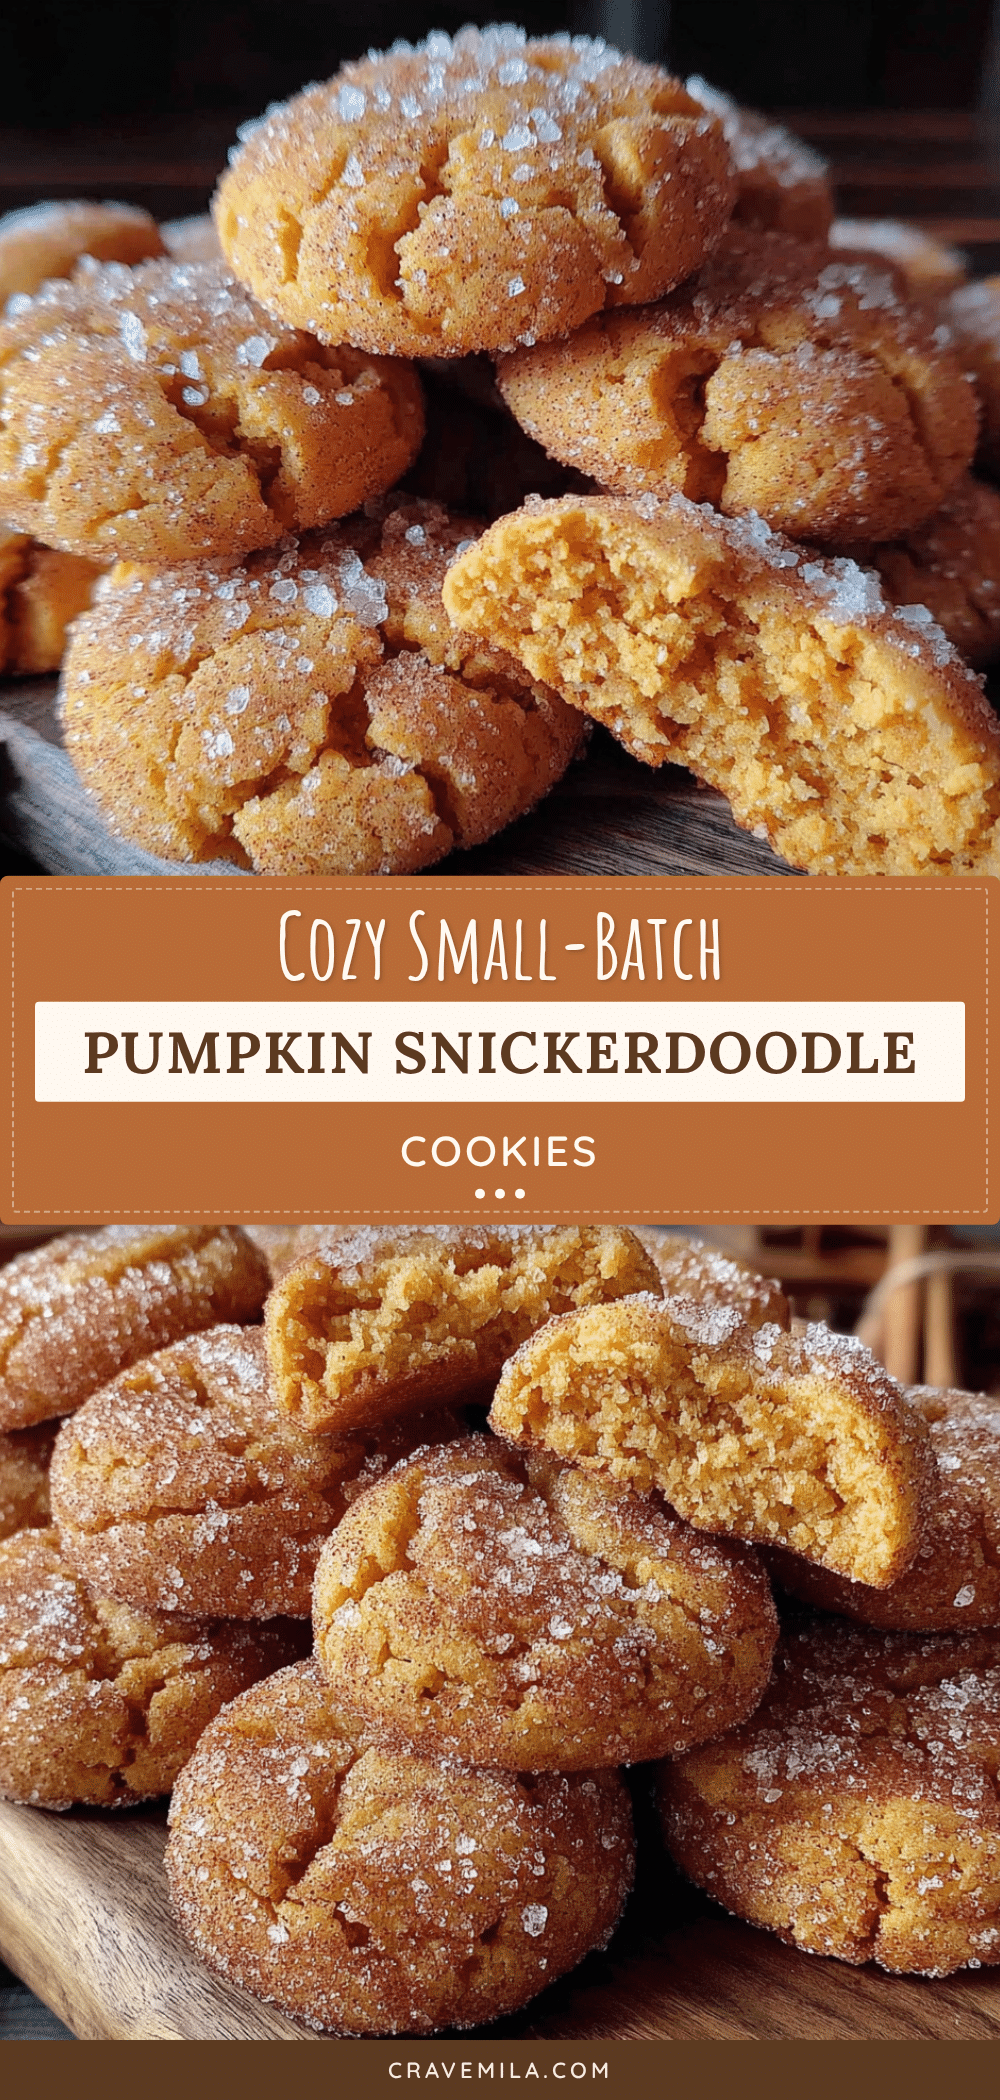
Cozy Small-Batch Pumpkin Snickerdoodle Cookies
These cozy small-batch pumpkin snickerdoodle cookies are perfectly soft with a crisp cinnamon edge, made with simple pantry ingredients and no chill time required. They yield 8 to 10 cookies and come together in about 30 minutes, making them the perfect fall treat for a quiet evening.
- Prep Time: 15 minutes
- Cook Time: 10-12 minutes
- Total Time: 30 minutes
- Yield: 8-10 cookies 1x
- Category: Dessert
- Cuisine: American
Ingredients
- 1/2 cup (1 stick) unsalted butter, softened
- 1/2 cup granulated sugar
- 1/4 cup packed light brown sugar
- 1/4 cup pumpkin puree (100% pure, not pumpkin pie filling)
- 1 large egg yolk
- 1 teaspoon vanilla extract
- 1 cup all-purpose flour, spooned and leveled
- 1/2 teaspoon cream of tartar
- 1/2 teaspoon baking soda
- 1/4 teaspoon salt
- 1 teaspoon ground cinnamon
- 1/4 teaspoon ground nutmeg (optional)
- 1/8 teaspoon ground cloves
- 3 tablespoons granulated sugar (for coating)
- 1 1/2 tablespoons ground cinnamon (for coating)
Instructions
- Preheat your oven to 350°F (175°C). Line a baking sheet with parchment paper.
- In a small bowl, whisk together 3 tablespoons granulated sugar and 1 1/2 tablespoons ground cinnamon for the coating. Set aside.
- In a medium mixing bowl, beat the softened butter, 1/2 cup granulated sugar, and 1/4 cup brown sugar together until light and fluffy, about 2-3 minutes with a hand mixer on medium speed.
- Beat in the pumpkin puree, egg yolk, and vanilla extract until just combined.
- In a separate small bowl, whisk together the flour, cream of tartar, baking soda, salt, 1 teaspoon cinnamon, nutmeg, and cloves.
- Gradually add the dry ingredients to the wet mixture, mixing on low speed or folding with a spatula until just combined. Do not overmix.
- Using a cookie scoop (about 1.5 tablespoons), scoop out rounded tablespoons of dough. Roll each scoop into a ball between your palms.
- Roll each dough ball in the cinnamon-sugar coating until completely coated. Place on the prepared baking sheet, spacing them about 2 inches apart.
- Bake for 10 to 12 minutes, until the edges are set and the tops look slightly cracked and puffed. The centers will still look soft.
- Let the cookies cool on the baking sheet for 5 minutes, then transfer to a wire cooling rack to cool completely.
Notes
Pat pumpkin puree dry with a paper towel if it looks watery to prevent cookies from spreading too much. Use room temperature ingredients for best results. Rotate the baking sheet halfway through baking for even cooking. Let cookies cool on the sheet for 5 minutes before transferring to a rack. For a gluten-free version, use a 1:1 gluten-free baking flour blend. For a vegan version, use vegan butter and substitute the egg yolk with 1 tablespoon aquafaba.
Nutrition
- Serving Size: 1 cookie
- Calories: 185
- Sugar: 15
- Sodium: 115
- Fat: 9
- Saturated Fat: 5
- Carbohydrates: 25
- Fiber: 1
- Protein: 2
Keywords: pumpkin snickerdoodle cookies, small batch cookies, fall cookies, pumpkin cookies, snickerdoodle recipe, easy cookie recipe