My neighbor Mrs. Kowalski watched me struggling with a pumpkin that was clearly more decorative than edible—I’d bought it for looks, not baking. She didn’t say anything at first. Then she just shook her head, laughed softly, and said, “Next Saturday. My kitchen. I’ll show you what to do with that thing.”
I showed up with my sad, pretty pumpkin and left with something way better than a lesson. I left with her secret for these Pumpkin Pie Cheesecake Bars. She’d been making them for forty years, ever since she moved here from Poland and couldn’t find the creamy cheesecakes she grew up with. So she did what any smart cook does—she improvised. She took the rich, tangy cheesecake she’d learned to love here and married it to the spiced pumpkin filling that reminded her of American Thanksgivings she’d seen in magazines. Honesty, it was a genius move.
I remember standing in her tiny kitchen, the counter dusted with flour, her cat weaving between my ankles. She didn’t measure anything. She just threw handfuls of this and splashes of that into a bowl, muttering about how American recipes made things too complicated. “You don’t need a scale,” she said. “You need hands that know what dough feels like.” I nodded like I understood, but I definitely took notes when she wasn’t looking.
These bars became my fall obsession. Every year when the air gets that crisp, leaf-smelling chill, I make a batch. They’re the kind of dessert that makes people close their eyes after the first bite—that sweet, spiced, creamy moment where everything feels right. Maybe you’ve been there, standing in your own kitchen, wanting something that tastes like a hug but looks like you tried really hard. That’s what these are. A cozy secret you get to share.
Why You’ll Love This Recipe
Let me tell you why these Pumpkin Pie Cheesecake Bars have become my most-requested fall dessert. I’ve tested this recipe at least a dozen times—my family has been very patient, and very well-fed—and I can promise you it works every single time. Here’s what makes it special:
- Two Desserts in One: You get the creamy tang of cheesecake and the warm, spiced comfort of pumpkin pie in every single bite. It’s like your fork can’t decide which holiday to celebrate.
- No Water Bath Needed: Traditional cheesecake can be fussy. These bars? They bake up perfectly without any of that stressful water bath business. I’ve cracked enough cheesecakes in my day to appreciate a recipe that just works.
- Make-Ahead Friendly: These actually taste better the next day. The flavors meld together overnight, and the texture gets even creamier. Perfect for holiday prep when you have a million things to do.
- Simple Ingredients: Nothing weird here. You probably have most of these in your pantry right now. No trips to specialty stores required.
- Crowd-Pleaser Guaranteed: I brought these to a Friendsgiving last year, and three different people asked for the recipe before the plates were cleared. Kids love them. Adults love them. Even my uncle who “doesn’t do dessert” had two.
- Portion Control (Sort Of): Bars are easier to cut into neat squares, which means you can pretend you’re being reasonable. I always end up cutting them smaller than I planned, and somehow that makes eating three feel acceptable.
What sets this recipe apart from the dozens of pumpkin cheesecake bars out there is the texture. I spent months perfecting the balance—not too dense, not too fluffy, with a crust that stays crunchy even after refrigeration. The secret is in how you layer the batters and the exact baking temperature. Trust me, I’ve made the mistakes so you don’t have to.
This isn’t just another fall dessert. It’s the kind that makes you slow down, pour yourself a cup of coffee, and actually sit for a minute. That’s what cozy means, right?
What Ingredients You Will Need
This recipe uses simple, honest ingredients to create something truly special. Most of these are fall baking staples, so you might already have everything you need. Let me walk you through each one and share a few little tricks I’ve picked up along the way.
For the Crust
- Graham cracker crumbs, 1 ½ cups (about 12 full sheets). I prefer the honey kind for a touch of sweetness. If you’re feeling ambitious, you can crush them yourself in a zip-top bag with a rolling pin—it’s oddly satisfying.
- Granulated sugar, ¼ cup (50g). Just enough to help the crust hold together and add a little sweetness.
- Unsalted butter, 6 tablespoons (85g), melted. I use salted butter in a pinch and just skip the added salt. Don’t use margarine here—the crust won’t set right.
- Pinch of salt, if using unsalted butter. A little salt makes the sweet crust taste even better.
For the Cheesecake Layer
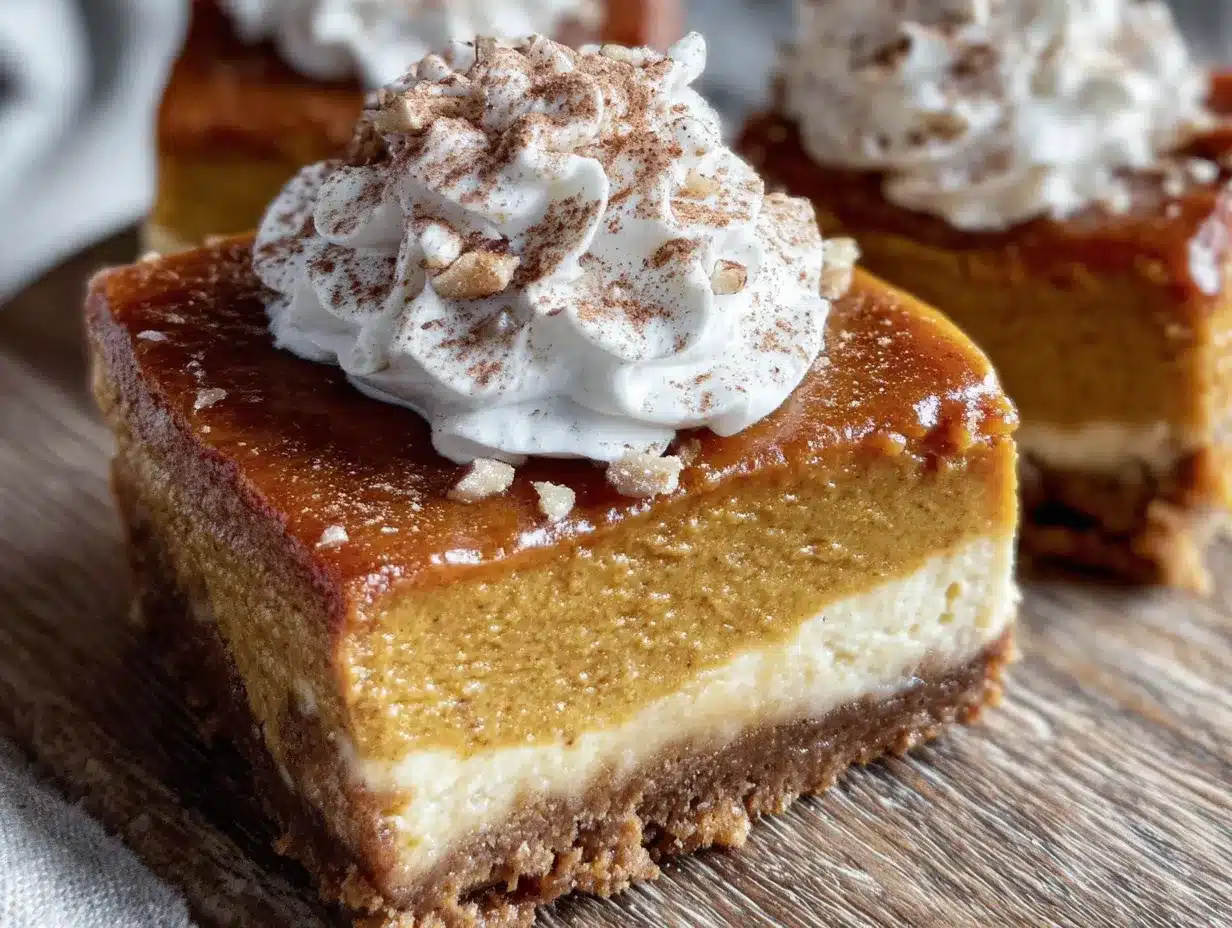
- Full-fat cream cheese, 16 ounces (two 8-ounce blocks), softened. This is non-negotiable. Low-fat cream cheese has too much water and will make your bars runny. I use Philadelphia because it’s consistently creamy, but any brand works as long as it’s full-fat.
- Granulated sugar, ½ cup (100g). Just enough sweetness to balance the tang.
- Large eggs, 2, at room temperature. Cold eggs can make the batter lumpy. If you forgot to take them out, place them in a bowl of warm water for 5 minutes.
- Vanilla extract, 1 teaspoon. Pure vanilla makes a difference here. The artificial stuff has a chemical aftertaste that doesn’t play well with pumpkin spice.
- Sour cream, ¼ cup (60g), at room temperature. This adds that signature cheesecake tang and makes the texture silky. Greek yogurt works too if that’s what you have.
For the Pumpkin Layer
- Pumpkin puree, 1 cup (245g). Make sure it’s 100% pumpkin, not pumpkin pie filling. The pre-sweetened stuff will throw off the whole recipe. Libby’s is my go-to, but store brands work fine too.
- Granulated sugar, ¼ cup (50g).
- Light brown sugar, ¼ cup (50g), packed. Brown sugar adds that molasses-y depth that makes pumpkin desserts taste like fall. Don’t skip it.
- Large egg, 1, at room temperature.
- Vanilla extract, ½ teaspoon.
- Pumpkin pie spice, 2 teaspoons. You can buy it pre-mixed, or make your own: 1 teaspoon cinnamon, ½ teaspoon ginger, ¼ teaspoon nutmeg, ¼ teaspoon cloves. I usually make my own because I always forget to buy the blend.
- Salt, ¼ teaspoon. Sounds weird in a sweet dessert, but it makes the spices pop.
Ingredient Tip: Let all your cold ingredients come to room temperature before starting. This takes about 30 minutes on the counter. I know it’s tempting to rush, but cold cream cheese makes lumpy batter, and cold eggs can break your emulsion. Trust me, I’ve learned this the hard way more times than I care to admit.
Equipment Needed
Nothing too fancy here. You probably have most of this already:
- 9×9-inch baking pan. An 8×8 works too, but your bars will be slightly thicker and need an extra 5 minutes of baking time. I love my glass Pyrex dish for this—you can see the layers setting through the sides.
- Electric hand mixer or stand mixer. You can do this by hand with some serious elbow grease, but a mixer makes the cheesecake layer silky smooth without overworking it. I’ve used my grandmother’s hand mixer for years—it’s older than me and still going strong.
- Large mixing bowls, at least two. One for the cheesecake batter, one for the pumpkin batter.
- Parchment paper. This is your best friend for easy removal. Leave overhang on two sides so you can lift the whole slab out like a little baked present.
- Measuring cups and spoons. For accuracy, especially with the spices.
- Rubber spatula. For scraping every last bit of batter into the pan. Waste not, want not.
- Toothpick or knife. For testing doneness and for that fun swirling step.
- Wire cooling rack. Helps the bars cool evenly and prevents that soggy bottom nobody wants.
Budget-Friendly Tip: Don’t have a 9×9 pan? Use a disposable aluminum pan from the grocery store. They’re like a dollar and work perfectly. Just be careful when cutting—those pans are flimsy.
Preparation Method
Alright, let’s make some magic happen. I’ll walk you through every step so you feel confident, even if this is your first time making cheesecake bars.
- Preheat and Prep: Set your oven to 325°F (163°C). Line your 9×9 pan with parchment paper, leaving a couple inches overhanging on two opposite sides. This will be your handle later. Lightly spray the parchment with non-stick spray, just to be safe.
- Make the Crust: In a medium bowl, combine the graham cracker crumbs, ¼ cup sugar, and a pinch of salt. Pour in the melted butter and stir with a fork until every crumb is moistened. It should look like wet sand and hold together when you squeeze it. Press this mixture firmly into the bottom of your prepared pan. Use the bottom of a measuring cup to really pack it down—you want a solid, even layer. Bake for 10 minutes, then set aside to cool slightly while you make the fillings.
- Make the Cheesecake Batter: In a large bowl, beat the softened cream cheese with an electric mixer on medium speed until it’s completely smooth. No lumps allowed here. Add ½ cup sugar and beat until fluffy, about 2 minutes. Scrape down the sides of the bowl with your spatula. Add the eggs one at a time, beating on low after each just until combined. Overbeating at this stage adds too much air, which can cause cracks. Stir in the vanilla and sour cream until smooth. Set this bowl aside.
- Make the Pumpkin Batter: In a separate bowl, whisk together the pumpkin puree, ¼ cup granulated sugar, and ¼ cup packed brown sugar until smooth. Add the egg, vanilla, pumpkin pie spice, and salt. Whisk until everything is beautifully combined and smells like autumn in a bowl.
- Layer the Batters: Pour the cheesecake batter over the crust and spread it into an even layer with your spatula. Then, gently spoon the pumpkin batter over the top. Don’t pour it all in one spot—dollop it around so it doesn’t sink through the cheesecake layer. Use your spatula to gently spread it to the edges.
- The Swirl (Optional but Fun): Take a butter knife or a toothpick and drag it through the two batters in a figure-eight pattern. Don’t over-swirl, or you’ll lose the distinct layers. Three or four passes is plenty. You want ribbons of pumpkin running through the cheesecake, not a muddy mess.
- Bake: Place the pan in the center of the oven and bake for 35-40 minutes. The edges should look set and slightly puffed, but the center should still have a slight jiggle when you gently shake the pan. It will continue to set as it cools. If you see cracks forming around the edges, your oven might be running hot—reduce the temperature by 10 degrees next time.
- Cool Slowly: This is the hardest part. Turn off the oven, crack the door open, and let the bars sit inside for 30 minutes. This gentle cooling helps prevent cracking. Then transfer the pan to a wire rack and cool completely at room temperature, about 1 hour.
- Chill: Once the pan is cool enough to touch, cover it with plastic wrap and refrigerate for at least 4 hours, but overnight is best. I know it’s torture to wait, but the bars need this time to set properly. The texture will be much creamier after a full chill.
- Slice and Serve: Use the parchment overhang to lift the entire slab out of the pan. Place it on a cutting board and use a sharp knife to cut into 16 squares. For clean slices, wipe the knife clean between each cut. I usually dip the knife in hot water and dry it off—it makes a big difference.
Sensory Cue: When you pull the pan out of the oven, you should smell warm spices and toasted butter. The edges will be a pale golden brown, and the center will still look a bit wobbly. That wobble is your friend—it means the cheesecake will be silky, not dry.
Cooking Tips & Techniques
I’ve made these bars more times than I can count, and I’ve definitely learned some things along the way. Let me save you from my mistakes.
Room Temperature Is Your Friend: I cannot stress this enough. Cold cream cheese creates lumps that no amount of beating will fully fix. Cold eggs can make your batter curdle. Take everything out of the fridge 30 minutes before you start. Set a timer if you’re forgetful like me.
Don’t Overmix: When you add the eggs to the cheesecake batter, mix on low speed just until the yolk disappears. Overmixing incorporates too much air, which expands during baking and then collapses, causing cracks. We want smooth, not soufflé.
The Toothpick Test Works Differently Here: For regular cakes, you want a clean toothpick. For cheesecake bars, you want a few moist crumbs clinging to the toothpick. If it comes out clean, you’ve overbaked them. The center should still jiggle slightly when you shake the pan.
My Biggest Failure: The first time I made these, I was in a hurry and skipped the gradual cooling step. I pulled the pan straight out of the oven and set it on the counter. Within 10 minutes, a giant crack ran right down the middle. It still tasted amazing, but it looked sad. The slow cool in the oven is worth the extra 30 minutes, I promise.
Multitasking Strategy: While the crust bakes, make your cheesecake batter. While the cheesecake batter rests, make your pumpkin batter. This way, everything comes together in about 15 minutes of active work.
Consistency Check: Your cheesecake batter should be smooth and pourable, like a thick milkshake. Your pumpkin batter should be slightly thicker, like pancake batter. If either seems too thin, you might have overmixed. If too thick, your cream cheese might have been too cold.
Variations & Adaptations
One of the best things about this recipe is how flexible it is. Here are some ways I’ve adapted it over the years:
Gluten-Free Version: Swap the graham crackers for gluten-free graham crackers or use crushed gluten-free shortbread cookies. I’ve also used crushed pecans mixed with a little sugar and butter for a nutty, naturally gluten-free crust. It’s honestly delicious and adds a whole new layer of flavor.
Dairy-Free Adaptation: Use dairy-free cream cheese (I like the brand Kite Hill) and coconut cream instead of sour cream. The texture will be slightly different—a bit less firm—but the flavor is still fantastic. Use a vegan butter stick for the crust. I tested this for a friend with dairy sensitivity, and she said it was the best cheesecake she’d had in years.
Spice It Up: If you like a bolder pumpkin flavor, add an extra teaspoon of pumpkin pie spice and a pinch of black pepper. The pepper sounds weird, I know, but it actually enhances the other spices and adds a tiny warmth at the end. My sister-in-law introduced me to this trick, and now I can’t go back.
Chocolate Swirl Variation: Melt ¼ cup of semi-sweet chocolate chips and drizzle it over the pumpkin layer before swirling. The chocolate and pumpkin spice combination is unexpectedly perfect. I did this on a whim one rainy Sunday, and it was a revelation.
Individual Mini Bars: Use a muffin tin lined with paper liners. Press the crust into the bottom of each cup, then divide the batters evenly. Bake for about 18-20 minutes. These are perfect for parties or portion control. Plus, they look adorable.
Bourbon Maple Twist: Add 1 tablespoon of bourbon and 1 tablespoon of maple syrup to the pumpkin layer. The bourbon adds a warm, smoky depth that pairs beautifully with the spices. Just make sure to cook off the alcohol—it bakes out during the 35 minutes in the oven.
Serving & Storage Suggestions
These bars are wonderful at room temperature, but I actually prefer them straight from the fridge. The cold, creamy texture with the crunchy crust is just perfect. Here’s how to serve and store them:
Serving Temperature: Let the bars sit at room temperature for about 10 minutes before serving. This takes the chill off without making them too soft. If you’re serving them at a party, arrange them on a platter and let them sit while people grab drinks—they’ll be perfect by the time everyone’s ready.
Presentation Ideas: Top each bar with a dollop of whipped cream and a light dusting of cinnamon or nutmeg. For a fancier look, drizzle caramel sauce over the top and add a few candied pecans. I once served these on a wooden board with fresh figs and apple slices around them, and people thought I’d hired a caterer.
What to Serve Alongside: A hot cup of coffee or spiced chai latte is the obvious choice. For something boozy, try a bourbon cider or a dark rum hot toddy. These bars also pair beautifully with vanilla ice cream—the cold creaminess against the cool cheesecake is a textural dream.
Storage Instructions: Keep the bars covered in the refrigerator for up to 5 days. They actually taste better on day two or three as the flavors meld together. I store mine in an airtight container with a piece of parchment paper between layers to prevent sticking.
Freezing Instructions: These freeze beautifully. Wrap individual bars tightly in plastic wrap, then place them in a freezer-safe bag. They’ll keep for up to 3 months. To thaw, transfer to the refrigerator overnight. I always keep a stash in my freezer for unexpected guests or late-night cravings.
Reheating: I don’t recommend reheating these—they’re meant to be served cold. But if you want a warm dessert experience, microwave a single bar for about 10 seconds. It won’t be hot, just slightly softened, which is lovely with a scoop of ice cream.
Flavor Development: The spices in the pumpkin layer become more pronounced after a day or two in the fridge. The cheesecake layer also firms up and becomes silkier. So if you can resist eating them immediately, your patience will be rewarded.
Nutritional Information & Benefits
Let’s be honest—these are a treat, not a health food. But that doesn’t mean they can’t have some redeeming qualities. Here’s the breakdown per bar (based on 16 servings):
- Calories: Approximately 280-320 per bar
- Fat: 18-20g (mostly from cream cheese and butter)
- Carbohydrates: 28-32g
- Protein: 5-6g
- Fiber: 1-2g (thanks to the pumpkin)
- Sugar: 20-24g
Health Highlights: Pumpkin is packed with vitamin A (great for eye health) and fiber. The spices—cinnamon, ginger, nutmeg—have anti-inflammatory properties. And hey, the cream cheese has some calcium. I’m not saying these are a superfood, but they’re not empty calories either.
Dietary Considerations: This recipe contains gluten, dairy, and eggs. For gluten-free and dairy-free adaptations, check the variations section above. These bars are vegetarian-friendly as written.
My Personal Perspective: I believe in balance. I eat salads most days, but when fall rolls around, I’m making these bars without apology. Food is about joy and connection, not just fuel. One of these bars with a cup of tea after a long week? That’s self-care, friends.
Conclusion
These Cozy Pumpkin Pie Cheesecake Bars have become a fall tradition in my kitchen, and I hope they become one in yours too. They’re the dessert that says “I made an effort” without actually requiring that much effort. The creamy layers, the spiced pumpkin, the buttery crust—it all comes together in a way that feels special but totally doable on a Tuesday night.
What I love most is how adaptable they are. You can make them your own—add chocolate, swap the spices, make them gluten-free. The recipe is just a starting point. Your kitchen, your rules.
I’d love to hear how yours turn out. Did you try a variation? Did your family fight over the last piece? Drop a comment below and tell me all about it. And if you share a photo on Pinterest, tag me—I want to see your beautiful bars.
Go ahead, preheat that oven. Your cozy fall moment is waiting.
Frequently Asked Questions
Can I use canned pumpkin pie filling instead of pumpkin puree?
No, I wouldn’t recommend it. Pumpkin pie filling is already sweetened and spiced, which will throw off the sugar and spice balance in this recipe. Stick with 100% pumpkin puree for the best results. If you accidentally bought pie filling, you can still use it—just reduce the sugar in the pumpkin layer to 2 tablespoons and skip the added pumpkin pie spice.
Why did my cheesecake layer crack?
Cracks usually happen from overbaking or sudden temperature changes. Make sure you pull the bars out when the center still has a slight jiggle. The gradual cooling step—leaving the bars in the turned-off oven with the door cracked—also helps prevent cracks. If they still crack, don’t worry. A dollop of whipped cream covers a multitude of sins.
Can I make these bars ahead of time for a party?
Absolutely! In fact, I recommend it. These bars need at least 4 hours to chill, but they’re even better after 24 hours. You can make them up to 3 days in advance and keep them covered in the refrigerator. They’re the perfect make-ahead dessert for Thanksgiving or any fall gathering.
How do I get clean, neat slices?
Use a sharp knife and wipe it clean between each cut with a damp paper towel. For the cleanest slices, dip the knife in hot water and dry it off before each cut. Let the bars sit at room temperature for about 10 minutes before slicing—they’ll be slightly softer and less likely to crack. And make sure they’re fully chilled first!
Can I double this recipe for a larger crowd?
Yes! Double all the ingredients and bake in a 9×13-inch pan. You’ll need to increase the baking time to about 45-50 minutes. Keep an eye on it—the edges should be set and the center should still have a slight jiggle. The crust might need an extra 2-3 minutes of pre-baking as well. I’ve done this for holiday parties, and it works beautifully.
Pin This Recipe!
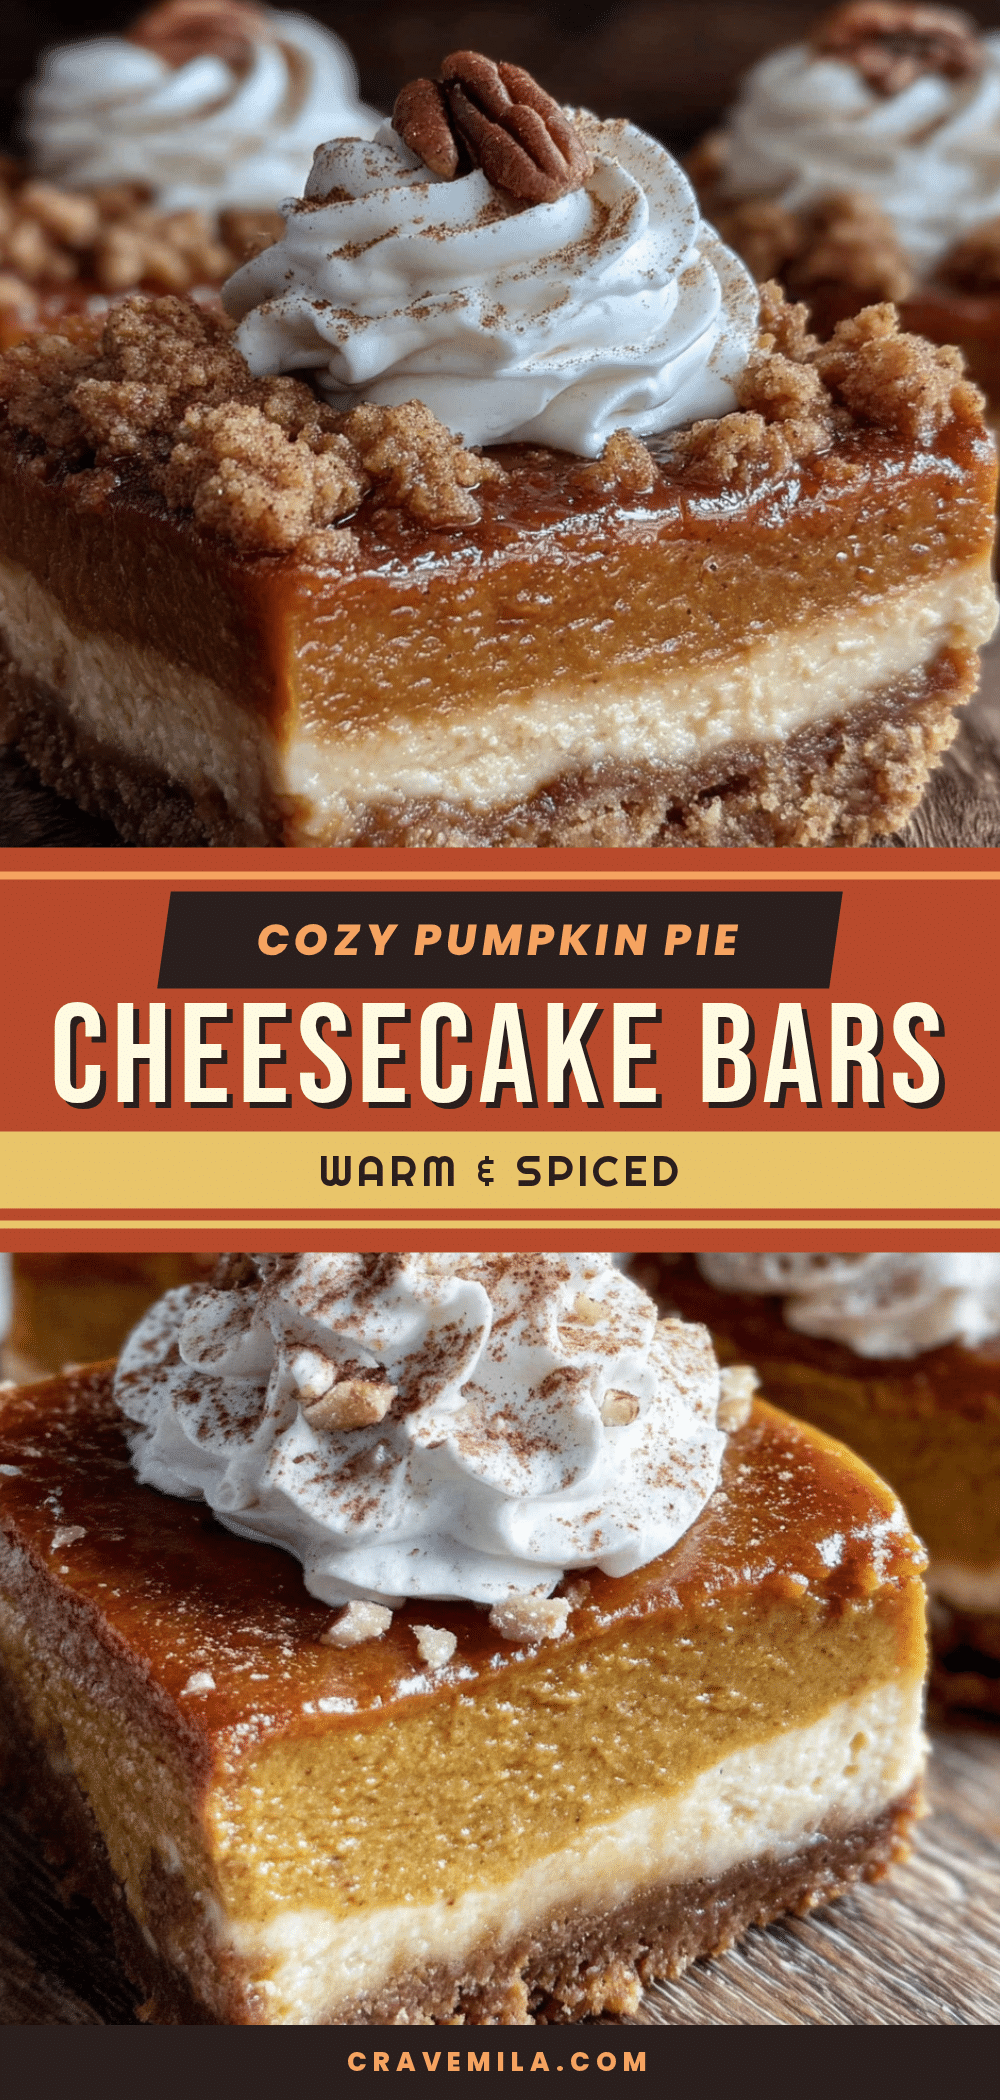
Cozy Pumpkin Pie Cheesecake Bars (Easy Fall Dessert)
These Pumpkin Pie Cheesecake Bars combine creamy cheesecake and spiced pumpkin pie in one easy, no-water-bath dessert. Perfect for fall gatherings, they feature a buttery graham cracker crust and a silky, make-ahead filling.
- Prep Time: 30 minutes
- Cook Time: 35-40 minutes
- Total Time: 5 hours (includes chilling)
- Yield: 16 bars 1x
- Category: Dessert
- Cuisine: American
Ingredients
- 1 ½ cups graham cracker crumbs (about 12 full sheets)
- ¼ cup granulated sugar (50g)
- 6 tablespoons unsalted butter, melted (85g)
- Pinch of salt (if using unsalted butter)
- 16 ounces full-fat cream cheese, softened (two 8-ounce blocks)
- ½ cup granulated sugar (100g)
- 2 large eggs, at room temperature
- 1 teaspoon vanilla extract
- ¼ cup sour cream, at room temperature (60g)
- 1 cup pumpkin puree (245g)
- ¼ cup granulated sugar (50g)
- ¼ cup light brown sugar, packed (50g)
- 1 large egg, at room temperature
- ½ teaspoon vanilla extract
- 2 teaspoons pumpkin pie spice
- ¼ teaspoon salt
Instructions
- Preheat oven to 325°F (163°C). Line a 9×9-inch baking pan with parchment paper, leaving overhang on two sides. Lightly spray with non-stick spray.
- Make the crust: In a medium bowl, combine graham cracker crumbs, ¼ cup sugar, and a pinch of salt. Pour in melted butter and stir until moistened. Press firmly into the bottom of the prepared pan. Bake for 10 minutes. Set aside to cool slightly.
- Make the cheesecake batter: In a large bowl, beat softened cream cheese with an electric mixer on medium speed until smooth. Add ½ cup sugar and beat until fluffy, about 2 minutes. Scrape down sides. Add eggs one at a time, beating on low just until combined. Stir in vanilla and sour cream until smooth. Set aside.
- Make the pumpkin batter: In a separate bowl, whisk together pumpkin puree, ¼ cup granulated sugar, and ¼ cup packed brown sugar until smooth. Add egg, vanilla, pumpkin pie spice, and salt. Whisk until combined.
- Layer the batters: Pour cheesecake batter over crust and spread evenly. Gently spoon pumpkin batter over the top, dolloping around to avoid sinking. Spread gently to edges.
- Optional swirl: Drag a butter knife or toothpick through the batters in a figure-eight pattern 3-4 times.
- Bake for 35-40 minutes. Edges should be set and slightly puffed; center should still jiggle slightly.
- Cool slowly: Turn off oven, crack door open, and let bars sit inside for 30 minutes. Then transfer to a wire rack and cool completely at room temperature, about 1 hour.
- Chill: Cover with plastic wrap and refrigerate for at least 4 hours, preferably overnight.
- Slice and serve: Use parchment overhang to lift slab out of pan. Cut into 16 squares with a sharp knife, wiping clean between cuts.
Notes
Let all cold ingredients come to room temperature before starting. Don’t overmix the cheesecake batter to avoid cracks. The slow cooling step is crucial to prevent cracking. Bars taste even better the next day.
Nutrition
- Serving Size: 1 bar
- Calories: 300
- Sugar: 22
- Sodium: 200
- Fat: 19
- Saturated Fat: 11
- Carbohydrates: 30
- Fiber: 1.5
- Protein: 5.5
Keywords: pumpkin cheesecake bars, fall dessert, pumpkin pie, cheesecake bars, easy dessert, Thanksgiving dessert