I wasn’t expecting baking advice from my accountant, but there I was, knee-deep in last year’s tax receipts, listening to Mr. Henderson describe exactly how to make the flakiest pie crust on the planet. He’d been my family’s tax guy for years — a quiet man who smelled faintly of peppermint and spoke in numbers, not flavors. I’d asked him a simple question about a deduction, and somehow he’d launched into a full-blown tutorial on the importance of ice water and frozen butter. It was the last place I’d expect a recipe to come from, honestly. But the way he talked about that crust — with this sudden, surprising warmth in his voice — made me stop worrying about my tax return and start thinking about Thanksgiving.
He scribbled the instructions on a sticky note, right there next to a stack of W-2s. “You gotta keep everything cold,” he said, handing it over like it was a secret. “And don’t overwork it. That’s where people mess up.” I nodded, half-convinced I’d never actually try it. But that night, I found myself in the kitchen, pulling butter from the fridge and a bag of flour from the pantry. I mean, what else was I going to do with a pie crust recipe from my accountant? Throw it away? No way. You don’t get handed a thing like that and not give it a shot.
The first bite of that pie — honestly, it was like a hug for my soul. The crust shattered perfectly, and the filling was this creamy, spiced dream that tasted like every cozy memory I’ve ever had. I’ve made it every year since, tweaking the filling just a bit to get that perfect balance of sweet and spice. Maybe you’ve been there — looking for that one recipe that feels like coming home. This is it. This is the one that stuck with me, the one I keep coming back to, and the one I’m so excited to share with you today.
Why You’ll Love This Recipe
This isn’t just another pumpkin pie recipe you find online. This is the one that makes people close their eyes after the first bite. I’ve tested this version more times than I can count, and it’s the kind of comfort food that fixes a rough day without even trying.
- Quick & Easy: The filling comes together in under 15 minutes. Seriously. It’s that fast. Perfect for busy weeknights or last-minute holiday cravings when you need something that feels special without the stress.
- Simple Ingredients: No fancy grocery trips needed here. You likely already have everything in your kitchen — pumpkin puree, eggs, cream, and a handful of warm spices. The crust uses just flour, butter, salt, and ice water.
- Perfect for Cozy Evenings: This pie is made for cold weather, slow nights, and the kind of days that leave you needing a little comfort. It’s great for Thanksgiving, sure, but also for a random Tuesday in November when the wind is howling outside.
- Crowd-Pleaser: Every single time I bring this to a gathering, people ask for the recipe. Kids love it. Adults love it. Even folks who say they don’t like pumpkin pie end up going back for seconds.
- Unbelievably Delicious: The texture is silky and smooth, the flavor is perfectly spiced, and that crust — oh, that crust. It’s flaky, buttery, and absolutely next-level comfort food.
What makes this recipe different from the rest is the technique. Most recipes rush the crust or rely on a store-bought version. Not this one. The secret is keeping everything ice-cold and handling the dough as little as possible. It’s a simple trick, but it makes all the difference between a crust that’s tough and one that shatters at the touch of a fork. And the filling? I’ve balanced the spices just right — not too heavy on the cinnamon, with a whisper of ginger and clove that makes it taste like autumn in a bowl.
This recipe isn’t just good — it’s the kind that makes you close your eyes after the first bite. It’s comfort food reimagined: richer, flakier, but with the same soul-soothing satisfaction you remember from childhood. Perfect for impressing guests without stress, or turning a simple evening into something memorable.
What Ingredients You Will Need
This recipe uses simple, wholesome ingredients to deliver that bold, comforting pumpkin flavor and the most satisfying flaky crust. Most of these are pantry staples, which makes this pie an easy choice whenever you need a little warmth in your life.
For the Flaky Crust
- 2 ½ cups all-purpose flour (I prefer King Arthur for consistent results)
- 1 teaspoon salt
- 1 tablespoon granulated sugar (adds a touch of sweetness and helps browning)
- 1 cup unsalted butter, very cold and cut into small cubes (European-style butter like Plugrà has a higher fat content for extra flakiness)
- ½ cup ice water (you might not need all of it — add gradually)
- 1 tablespoon apple cider vinegar (keeps the dough tender — trust me on this one)
For the Pumpkin Filling
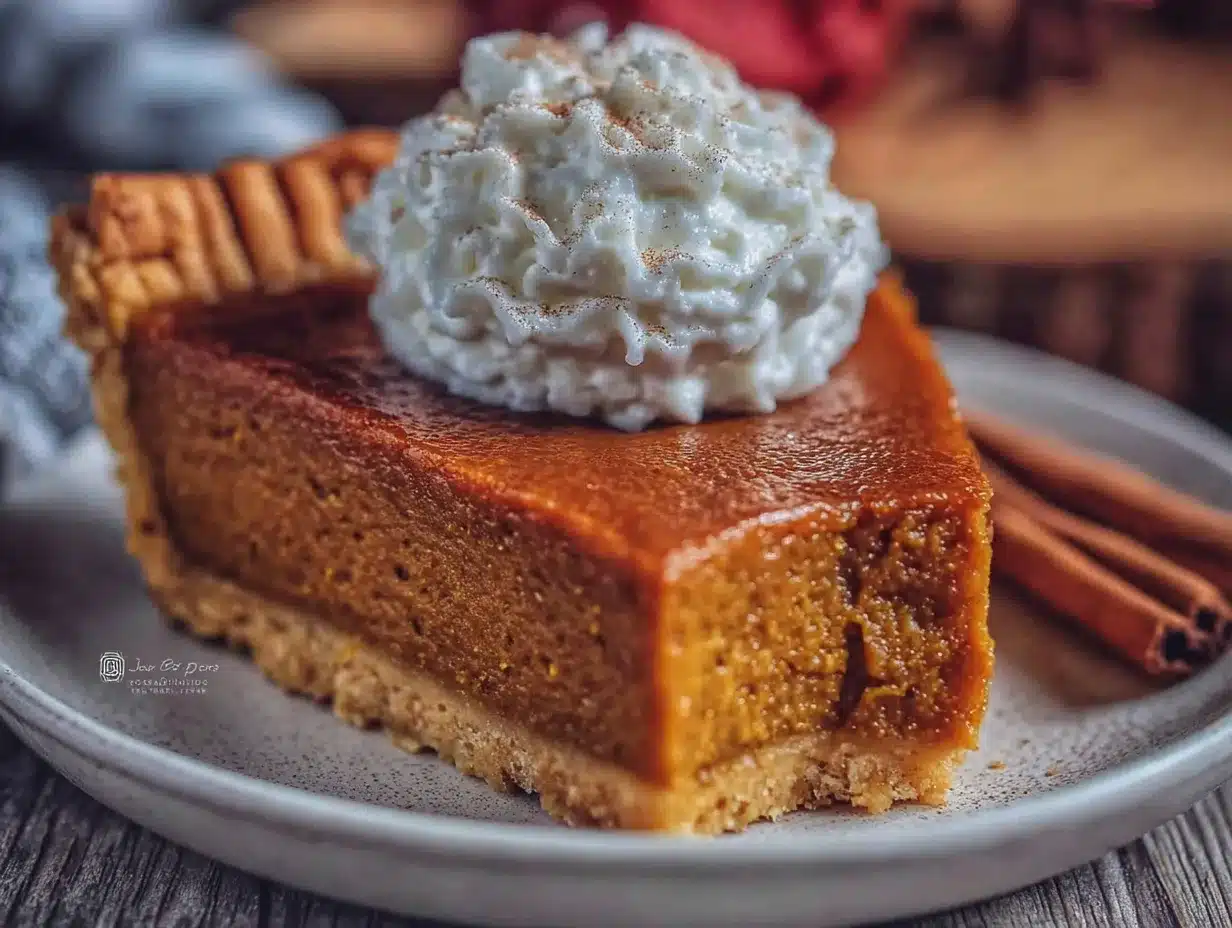
- 1 can (15 ounces) pumpkin puree (not pumpkin pie filling — look for 100% pure pumpkin)
- 1 can (12 ounces) evaporated milk (adds richness without being too heavy)
- ¾ cup packed brown sugar (light or dark both work; dark gives deeper flavor)
- 2 large eggs, room temperature
- 1 teaspoon vanilla extract
- 2 teaspoons ground cinnamon
- ½ teaspoon ground ginger
- ¼ teaspoon ground cloves
- ¼ teaspoon ground nutmeg (freshly grated is best, but pre-ground works fine)
- ½ teaspoon salt
Ingredient Tips & Substitutions: For the crust, if you don’t have European butter, regular unsalted butter works perfectly — just make sure it’s really cold. You can even pop your cubed butter in the freezer for 10 minutes before starting. For the filling, if you’re out of evaporated milk, you can substitute with heavy cream mixed with a splash of milk, or even full-fat coconut milk for a slightly different flavor. I’ve tried it with coconut milk, and honestly, it adds a lovely richness that works beautifully with the spices. Just avoid using sweetened condensed milk — it’s too sweet and will throw off the texture completely.
When picking pumpkin puree, look for brands that list only pumpkin as the ingredient. Libby’s is my go-to because it’s consistently thick and not watery. If you’re feeling ambitious, you can roast your own sugar pumpkin and puree it — just make sure to strain out the extra moisture using a cheesecloth or a clean kitchen towel. Nobody wants a soggy pie.
Equipment Needed
You don’t need a fancy kitchen to make this pie. Here’s what you’ll need to get that perfect flaky crust and silky filling.
- 9-inch pie dish: Glass or ceramic works best. I use a deep-dish glass pie plate because it conducts heat evenly and lets you see when the crust is golden. Avoid metal pans if you can — they can make the crust tough.
- Rolling pin: A standard wooden rolling pin is perfect. If you don’t have one, a clean wine bottle works in a pinch. I’ve done it — it’s not ideal, but it gets the job done.
- Large mixing bowls: You’ll need one for the crust and one for the filling. Stainless steel or glass is great because they stay cold longer, which helps with the crust.
- Pastry cutter or food processor: For cutting the butter into the flour. A pastry cutter is cheap and gives you more control. A food processor is faster but be careful not to overmix. I’ve used both, and honestly, I prefer the pastry cutter — it’s harder to overwork the dough.
- Plastic wrap: Essential for chilling the dough. You can also use reusable beeswax wraps if you’re trying to cut down on waste.
- Whisk: For mixing the filling ingredients together smoothly.
- Measuring cups and spoons: Accurate measurements matter in baking, so don’t eyeball it.
- Parchment paper and pie weights: For blind baking the crust. If you don’t have pie weights, dried beans or uncooked rice work just as well. I keep a bag of dried beans in my pantry specifically for this purpose.
Budget-Friendly Tip: You don’t need a fancy food processor for this recipe. A simple pastry cutter costs about $10 and does the job beautifully. And if you don’t have pie weights, seriously — just use dried beans. They work perfectly and you can still cook them later (though they might be a little dusty, so maybe save them for pie duty).
Preparation Method
Making this pie from scratch might feel intimidating, but I promise it’s simpler than it looks. Take it step by step, and you’ll end up with a pie that tastes like you spent all day in the kitchen — even if you didn’t.
Step 1: Make the Crust
In a large bowl, whisk together the flour, salt, and sugar. Add the cold butter cubes. Using a pastry cutter or your fingertips, work the butter into the flour until it resembles coarse meal with some pea-sized butter pieces remaining. This is important — those little bits of butter are what create the flaky layers. Don’t overdo it. You want to see visible pieces of butter.
Drizzle the apple cider vinegar and most of the ice water over the mixture. Stir gently with a fork until the dough just comes together. It should look shaggy and a little messy. If it feels too dry, add more ice water a tablespoon at a time. Turn the dough out onto a lightly floured surface and bring it together into a disk. Don’t knead it — just press it gently. Wrap tightly in plastic wrap and refrigerate for at least 1 hour. Overnight is even better.
Step 2: Blind Bake the Crust
Preheat your oven to 375°F (190°C). On a lightly floured surface, roll the chilled dough out to about 12 inches in diameter, about ⅛ inch thick. Gently transfer it to your pie dish, pressing it into the corners without stretching the dough. Trim the excess, leaving about a ½-inch overhang, and crimp the edges however you like. I do a simple fluted edge with my fingers — nothing fancy.
Line the crust with parchment paper and fill with pie weights or dried beans. Bake for 15 minutes. Remove the parchment and weights, then bake for another 8-10 minutes until the crust looks dry and just barely golden. Set aside to cool slightly while you make the filling. This step is non-negotiable — blind baking keeps the bottom crust from getting soggy.
Step 3: Make the Filling
Lower the oven temperature to 350°F (175°C). In a large bowl, whisk together the pumpkin puree, evaporated milk, brown sugar, eggs, vanilla, and all the spices until smooth. Make sure there are no lumps of brown sugar — give it a good whisk. The mixture should be smooth and slightly thick, with a beautiful warm orange color. Taste it (yes, raw eggs and all — just a tiny bit) to check the seasoning. Adjust if needed.
Step 4: Assemble and Bake
Pour the filling into the pre-baked crust. It should fill the crust almost to the top. Bake for 50-60 minutes, until the edges are set but the center still jiggles slightly when you gently shake the pan. That slight jiggle is your friend — it means the center will set to a silky texture as it cools. If the edges of the crust start browning too quickly, tent them with foil or a pie shield around the 30-minute mark.
Step 5: Cool Completely
Let the pie cool on a wire rack for at least 2 hours at room temperature. Then refrigerate for at least 4 hours, preferably overnight. I know it’s hard to wait, but this step is crucial. The filling needs time to fully set, and the flavors deepen as it rests. I’ve learned this the hard way — cutting into a warm pie gives you a runny mess and muted flavor.
Cooking Tips & Techniques
After making this pie more times than I can count, I’ve picked up a few tricks that make a real difference. Here are the ones I wish someone had told me when I started.
Keep everything cold for the crust. This is the number one rule. If your butter starts to soften, pop the whole bowl in the fridge for 10 minutes. I once made the mistake of working the dough in a warm kitchen, and the crust turned out tough and greasy. Never again. Cold butter creates steam pockets as it melts in the oven, which gives you those beautiful flaky layers.
Don’t overmix the filling. Whisk just until everything is combined. Overmixing incorporates too much air, which can cause the filling to puff up and then crack as it cools. A few tiny bubbles on the surface are fine — they’ll settle as it bakes.
Use a kitchen scale for the flour. This is the most accurate way to measure, and it makes a huge difference in the crust. If you don’t have a scale, spoon the flour into your measuring cup and level it off with a knife. Scooping directly from the bag packs the flour down and gives you too much, which leads to a dry, crumbly crust.
Let the pie cool gradually. Don’t put a hot pie directly in the fridge. Let it come to room temperature on the counter first, then refrigerate. Rapid temperature changes can cause the filling to crack. And honestly, that’s the last thing you want after all that effort.
Check for doneness with a knife. If you’re unsure whether the pie is done, insert a knife about an inch from the center. If it comes out clean, it’s ready. But honestly, the jiggle test is more reliable — the center should wobble slightly when you shake the pan.
Variations & Adaptations
One of the best things about this recipe is how easily it adapts. Here are a few variations I’ve tried and loved.
Gluten-Free Version: Substitute the all-purpose flour with a 1:1 gluten-free baking blend that contains xanthan gum. I’ve used Bob’s Red Mill with great results. The dough will be a bit more fragile, so handle it gently. Everything else stays the same.
Dairy-Free Option: Use cold coconut oil or vegan butter in place of regular butter for the crust. For the filling, swap the evaporated milk with full-fat coconut milk. The coconut flavor is subtle and actually pairs beautifully with the pumpkin and spices. I’ve made this for a friend with dairy allergies, and she said it was the best pumpkin pie she’d ever had.
Spice It Up: If you like a bolder flavor, add a pinch of black pepper or cayenne to the filling. It sounds strange, but it really brings out the warmth of the other spices. I started doing this after a friend suggested it, and now I can’t go back. Just a tiny pinch — you want a hint of warmth, not heat.
Maple Pumpkin Pie: Replace the brown sugar with an equal amount of pure maple syrup. The filling will be slightly softer, so you might need to bake it an extra 5-10 minutes. The maple flavor is incredible — it adds a cozy, almost caramel-like depth that’s perfect for fall.
Mini Pies: Use a muffin tin to make individual pies. Roll the crust, cut circles, and press them into the muffin cups. Fill and bake for about 20-25 minutes. These are perfect for parties or when you want to share without cutting a whole pie.
Serving & Storage Suggestions
This pie is best served chilled or at room temperature. I actually prefer it straight from the fridge — the filling is firmer and the flavors are more pronounced. But if you like a softer texture, let it sit on the counter for about 20 minutes before serving.
Topping Ideas: A generous dollop of lightly sweetened whipped cream is the classic choice, and for good reason — it balances the spiced filling perfectly. For something a little different, try a drizzle of caramel sauce, a sprinkle of candied pecans, or a scoop of vanilla ice cream. I’ve also served it with a dollop of Greek yogurt mixed with a little honey, which adds a tangy contrast that’s surprisingly delicious.
Storage: Cover the pie loosely with plastic wrap or foil and store in the refrigerator for up to 4 days. The crust will stay flaky for the first 2 days, then soften slightly after that. It’s still delicious — just different.
Freezing: You can freeze the fully baked and cooled pie for up to 3 months. Wrap it tightly in plastic wrap, then a layer of foil. Thaw in the refrigerator overnight before serving. I’ve also frozen the unbaked crust successfully — just wrap it well and bake straight from frozen, adding a few extra minutes to the blind baking time.
Reheating: If you prefer warm pie, reheat individual slices in the microwave for about 20 seconds. For the whole pie, place it in a 300°F (150°C) oven for 10-15 minutes. Just be careful not to overheat it, or the filling can become runny.
Flavor Development: Honestly, this pie tastes even better on day two. The spices have time to meld, and the texture of the filling becomes perfectly smooth. So if you can, make it a day ahead. Your future self will thank you.
Nutritional Information & Benefits
Here’s the thing about this pie — it’s a treat, and it should be enjoyed as such. But it does have some redeeming qualities. Pumpkin is packed with vitamin A, fiber, and antioxidants. The spices — cinnamon, ginger, cloves, nutmeg — are all anti-inflammatory and rich in beneficial compounds. And making it from scratch means you control exactly what goes into it.
Estimated Nutritional Values (per slice, based on 8 servings):
- Calories: 380
- Total Fat: 22g
- Saturated Fat: 13g
- Carbohydrates: 42g
- Fiber: 3g
- Sugar: 22g
- Protein: 6g
- Vitamin A: 170% of the Daily Value
Dietary Considerations: This recipe contains gluten, dairy, and eggs. For gluten-free and dairy-free adaptations, see the variations section above. It is not suitable for a vegan diet as written, but the filling can be made with silken tofu and coconut milk for a plant-based version.
I’m not here to tell you that pie is health food. It’s not. But it’s made with real ingredients, and there’s something to be said for that. A slice of this on a cold evening, shared with people you love — that’s nourishment of a different kind.
Conclusion
This cozy homemade pumpkin pie with flaky crust is more than just a dessert. It’s a little piece of comfort you can create in your own kitchen, no matter what’s happening outside your window. The flaky, buttery crust. The smooth, spiced filling. The way it makes your house smell like autumn and warmth and everything good in the world.
I love this recipe because it’s forgiving. It doesn’t demand perfection. The first time I made it, my crust was a little lopsided and the filling had a small crack. It didn’t matter. It tasted incredible, and everyone at the table went back for seconds. That’s the thing about homemade pie — it doesn’t have to be perfect to be perfect.
So go ahead and make it your own. Add a little extra cinnamon. Swap the spices. Top it with whatever makes you happy. This recipe is a starting point, not a rulebook. And when you take that first bite — the one that makes you close your eyes — I hope it feels like coming home.
I’d love to hear how yours turns out! Leave a comment below and let me know if you tried any variations, or tag me in your photos if you share them. Happy baking, friend.
Frequently Asked Questions
Can I use a store-bought crust instead?
Absolutely. If you’re short on time, a high-quality refrigerated pie crust works fine. Just make sure to blind bake it first to avoid a soggy bottom. The filling is forgiving enough that it will still taste great. But honestly, once you try this homemade crust, you might never go back to store-bought.
Why did my crust shrink during baking?
This usually happens when the dough is overworked or not chilled enough. The gluten tightens up in the oven and pulls the crust down. To prevent this, handle the dough as little as possible and make sure it’s thoroughly chilled before rolling and baking. Also, let the crust rest in the fridge for 15 minutes after you place it in the pie dish.
Can I make this pie ahead of time?
Yes, and I actually recommend it. This pie tastes even better the next day. You can make it up to 2 days in advance and keep it covered in the refrigerator. You can also prepare the crust dough up to 3 days ahead and keep it wrapped in the fridge, or freeze it for up to 3 months.
How do I prevent cracks in the filling?
Cracks happen when the filling is overbaked or cools too quickly. Bake just until the edges are set and the center jiggles slightly. Let the pie cool gradually on a wire rack at room temperature before refrigerating. If you do get a crack, don’t worry — a layer of whipped cream covers it beautifully.
Can I use fresh pumpkin instead of canned?
Yes, but it requires extra work. Roast a sugar pumpkin until tender, scoop out the flesh, and puree it in a food processor. The biggest difference is moisture content — fresh pumpkin puree is much more watery than canned. You’ll need to strain it through a cheesecloth or clean kitchen towel to remove excess liquid. Otherwise, your pie filling might be too loose.
Pin This Recipe!
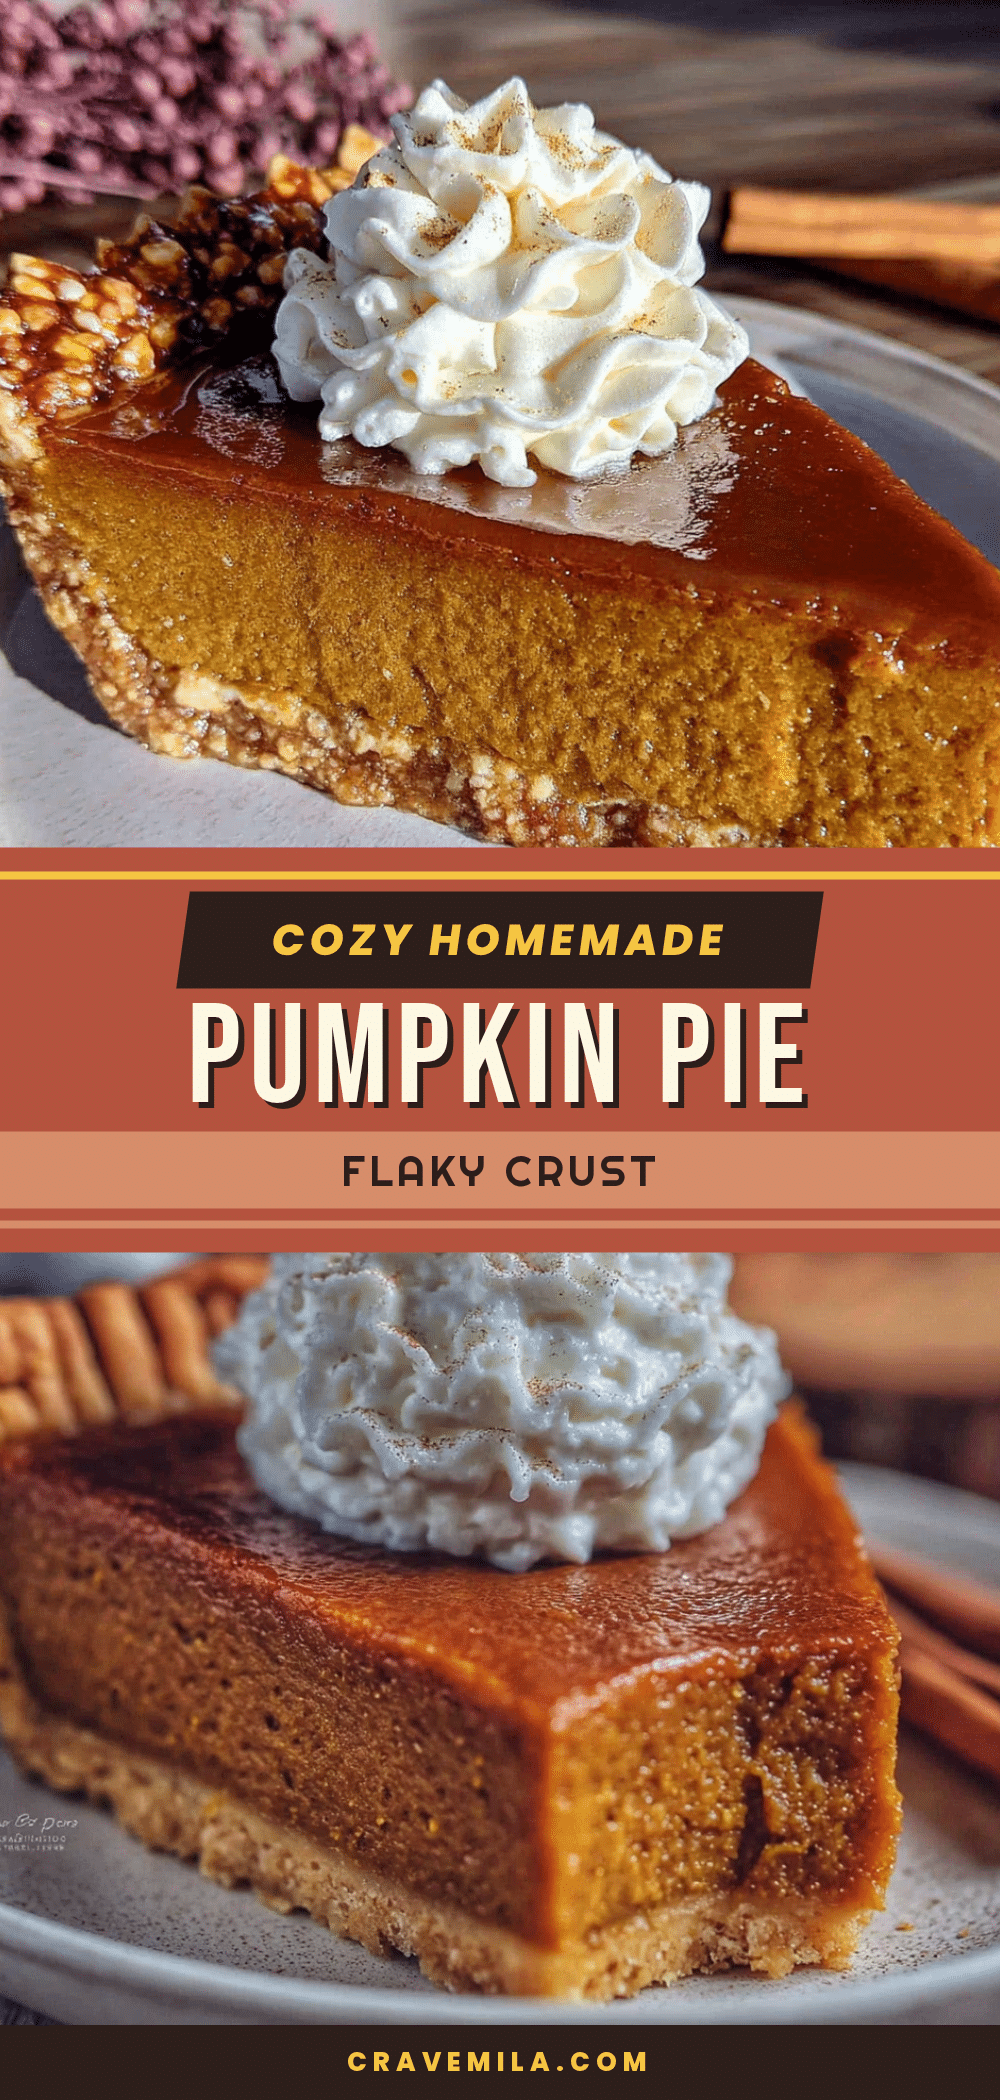
Cozy Homemade Pumpkin Pie with Perfect Flaky Crust

This pumpkin pie features a perfectly flaky, buttery crust and a creamy, spiced filling that tastes like autumn in every bite. It’s the ultimate comfort dessert, perfect for Thanksgiving or any cozy evening.
- Prep Time: 15 minutes
- Cook Time: 1 hour 10 minutes
- Total Time: 1 hour 25 minutes (plus chilling time)
- Yield: 8 servings 1x
- Category: Dessert
- Cuisine: American
Ingredients
- 2 ½ cups all-purpose flour (King Arthur preferred)
- 1 teaspoon salt
- 1 tablespoon granulated sugar
- 1 cup unsalted butter, very cold and cut into small cubes (European-style like Plugrà preferred)
- ½ cup ice water (add gradually)
- 1 tablespoon apple cider vinegar
- 1 can (15 ounces) pumpkin puree (100% pure pumpkin, not pie filling)
- 1 can (12 ounces) evaporated milk
- ¾ cup packed brown sugar (light or dark)
- 2 large eggs, room temperature
- 1 teaspoon vanilla extract
- 2 teaspoons ground cinnamon
- ½ teaspoon ground ginger
- ¼ teaspoon ground cloves
- ¼ teaspoon ground nutmeg (freshly grated preferred)
- ½ teaspoon salt
Instructions
- Make the crust: In a large bowl, whisk together flour, salt, and sugar. Add cold butter cubes. Using a pastry cutter or fingertips, work butter into flour until mixture resembles coarse meal with some pea-sized butter pieces remaining. Drizzle apple cider vinegar and most of ice water over mixture; stir gently with a fork until dough just comes together (shaggy and messy). Turn out onto lightly floured surface, bring together into a disk (do not knead). Wrap tightly in plastic wrap and refrigera…
- Blind bake the crust: Preheat oven to 375°F (190°C). On a lightly floured surface, roll chilled dough to about 12 inches in diameter, about ⅛ inch thick. Transfer to 9-inch pie dish, pressing into corners without stretching. Trim excess, leaving ½-inch overhang, and crimp edges. Line with parchment paper and fill with pie weights or dried beans. Bake 15 minutes. Remove parchment and weights; bake another 8-10 minutes until crust looks dry and just barely golden. Set aside to cool slightly.
- Make the filling: Lower oven temperature to 350°F (175°C). In a large bowl, whisk together pumpkin puree, evaporated milk, brown sugar, eggs, vanilla, cinnamon, ginger, cloves, nutmeg, and salt until smooth (no lumps of brown sugar).
- Assemble and bake: Pour filling into pre-baked crust. Bake 50-60 minutes, until edges are set but center still jiggles slightly when shaken. If crust edges brown too quickly, tent with foil or pie shield around 30-minute mark.
- Cool completely: Let pie cool on wire rack at least 2 hours at room temperature. Then refrigerate at least 4 hours, preferably overnight, before serving.
Notes
Keep everything cold for the crust. Do not overmix the filling. Use a kitchen scale for flour for best results. Let pie cool gradually to prevent cracks. Pie tastes even better on day two.
Nutrition
- Serving Size: 1 slice (1/8 of pie)
- Calories: 380
- Sugar: 22
- Fat: 22
- Saturated Fat: 13
- Carbohydrates: 42
- Fiber: 3
- Protein: 6
Keywords: pumpkin pie, homemade pie, flaky crust, Thanksgiving dessert, fall dessert, comfort food, pumpkin dessert



