The power went out halfway through my first attempt at making meringue cookies. I was standing in my tiny apartment kitchen, a borrowed hand mixer in one hand, and a bag of powdered sugar I’d just dropped on the floor in the other. It was the kind of Tuesday night that felt like a Monday, and honestly, I was this close to just ordering pizza. But then I remembered a conversation I had the week before with my landlord, Mr. Gable, a quiet man in his seventies who mostly just fixed leaky faucets and complained about the squirrels. I wasn’t expecting baking advice from him, but there I was, in the dark, listening to him describe exactly how to make these ghost meringue pops he used to make for his daughter every Halloween. He told me about using a wooden spoon and a candle flame to get the right shape, a trick he learned from his own grandmother. It sounded so unlikely, so wonderfully weird, that when the power came back an hour later, I had to try it. That first batch was lopsided and a little scorched around the edges, but they were the most charming things I’d ever pulled out of my oven. Let me tell you, there’s something about creating a treat that feels both a little bit magical and a little bit clumsy that just sticks with you. Maybe you’ve been there, staring at a failed recipe and finding a better one in the most unexpected place. These Cozy Ghost Meringue Cookie Pops are that story for me—a happy accident born from a power outage and a landlord with a sweet tooth.
Why You’ll Love This Recipe
These aren’t your average Halloween cookies. They are light, airy, and melt-in-your-mouth good, with a subtle vanilla sweetness that isn’t overwhelming. I’ve tested this recipe about six times to get the texture just right—crisp on the outside, slightly chewy in the center, and sturdy enough to stay on a lollipop stick without crumbling. It’s a recipe that feels special but is surprisingly simple to pull off.
- Quick & Easy: From start to finish, you’re looking at about 45 minutes of active time. The oven does most of the work for you!
- Simple Ingredients: You only need four basic ingredients: egg whites, sugar, vanilla, and cream of tartar. No fancy grocery trips required.
- Perfect for Halloween: These are the star of any Halloween party, spooky movie night, or cozy autumn gathering. They are kid-friendly and adult-approved.
- Crowd-Pleaser: I’ve brought these to two different potlucks, and they disappear faster than the candy bowl. People love the whimsical shape and the satisfying crunch.
- Unbelievably Delicious: The texture is what gets everyone. It’s like a marshmallow and a cloud had a baby, and that baby is dipped in vanilla.
What makes this recipe different from the rest is the technique. Instead of just piping a blob, we are using a simple piping tip and a gentle twisting motion to create a ghost shape that actually looks like a ghost—not a sad, deflated blob. It’s a small trick that makes a huge difference in presentation. This isn’t just another cookie; it’s the kind of treat that makes you close your eyes after the first bite, thinking about crisp autumn air and cozy blankets. It’s comfort food reimagined—lighter, airier, but with the same soul-soothing satisfaction. Perfect for impressing guests without stress, or turning a simple Tuesday into something a little bit magical.
What Ingredients You Will Need
This recipe uses simple, pantry-friendly ingredients to deliver a surprisingly elegant treat. The magic is all in the technique, not the grocery list. You likely have everything you need right now.
- 3 large egg whites (room temperature is key – cold egg whites don’t whip up as well. Separate them when they are cold, then let them sit on the counter for 30 minutes.)
- ¾ cup (150g) granulated sugar (I prefer fine, organic cane sugar for the smoothest texture. Regular white sugar works perfectly too.)
- ½ teaspoon cream of tartar (This is your secret weapon for stable meringue. It helps the egg whites hold their shape and prevents them from deflating. Don’t skip it!)
- 1 teaspoon pure vanilla extract (I recommend Nielsen-Massey for the best flavor, but any good quality vanilla works. Avoid imitation vanilla, as it can give a slightly artificial taste.)
- Pinch of salt (Just a tiny pinch to balance the sweetness. I use fine sea salt.)
- Black gel food coloring (For the ghost faces. A small toothpick is all you need. You can also use a black edible marker if you prefer.)
- Lollipop sticks (I use the 6-inch sticks. You can find them at craft stores or online. Popsicle sticks work in a pinch, but they are wider.)
Ingredient Selection Tips: Look for eggs that are fresh, but not too fresh. Eggs that are a week or two old actually whip up better than farm-fresh eggs because the whites are thinner. For the sugar, if you have a superfine sugar (often called “baker’s sugar”), it dissolves much faster into the egg whites, creating a silkier meringue. If you only have regular granulated sugar, just pulse it in a food processor for 10 seconds to make it finer.
Substitution Guidance: For a dairy-free option, this recipe is already dairy-free! For a gluten-free option, it is naturally gluten-free. If you are avoiding eggs, unfortunately, meringue is impossible to make without them. You could try aquafaba (chickpea water) as a vegan alternative, but the texture will be different and less stable. For a different flavor, swap the vanilla extract for almond extract or peppermint extract for a fun twist.
Equipment Needed
You don’t need a lot of fancy gear for this recipe, which is part of its charm. Here is what you will need:
- Electric hand mixer or stand mixer: A stand mixer with a whisk attachment is the easiest, but a hand mixer works great too. I’ve made these with a $20 hand mixer from the grocery store, and they turned out perfectly. Whisking by hand is possible, but your arm will get very tired. Trust me, I tried it once for a blog post. It took 20 minutes and my arm was sore for two days.
- Large mixing bowl: Glass or metal is best. Plastic bowls can sometimes retain a little grease, which can prevent egg whites from whipping up properly.
- Piping bag and tip: I use a large piping bag (or a sturdy zip-top bag) fitted with a large round tip (like a Wilton 1A or 2A). If you don’t have a piping tip, you can just snip the corner of the bag. The shapes won’t be as defined, but they will still be ghosts!
- Baking sheet: A standard half-sheet pan works perfectly. Line it with parchment paper. Do not use wax paper, as it will stick.
- Small offset spatula or toothpick: For drawing the ghost faces. A toothpick is my go-to because it gives you more control.
Budget-Friendly Options: If you don’t own a piping bag, a sturdy zip-top freezer bag is a perfect substitute. Just fill it with the meringue, snip off a tiny corner, and you are good to go. It won’t be as precise, but it will still be delicious. For the lollipop sticks, you can often find them at dollar stores or craft stores for a couple of dollars for a pack of 50.
Preparation Method
Making these ghosts is a little like a science experiment and a little like an art project. It’s fun, and it’s surprisingly forgiving once you get the hang of it. Here is the step-by-step method.
- Preheat and Prep: Preheat your oven to 200°F (93°C). Yes, that low! Line a large baking sheet with parchment paper. Have your lollipop sticks ready nearby.
- Whip the Egg Whites: In your clean, dry mixing bowl, combine the 3 room-temperature egg whites and the ½ teaspoon of cream of tartar. Beat on medium speed until frothy and bubbly, about 1-2 minutes. You should see lots of tiny bubbles forming.
- Add the Sugar Slowly: With the mixer running on medium speed, start adding the ¾ cup of sugar, one tablespoon at a time. This is the most important step. If you dump all the sugar in at once, the meringue can collapse. Take your time—about 2-3 minutes to add all the sugar. Once all the sugar is in, increase the speed to high.
- Whip to Stiff Peaks: Continue beating on high for 5-7 minutes. The mixture will become thick, glossy, and white. To check if it’s ready, stop the mixer and lift the whisk. The meringue should form a stiff peak that holds its shape without drooping. If it droops, keep beating for another minute. You should also rub a tiny bit of the meringue between your fingers. If it feels gritty, the sugar hasn’t fully dissolved. Keep beating until it feels smooth.
- Add Flavor: Add the 1 teaspoon of vanilla extract and a tiny pinch of salt. Beat on low for just 10 seconds to combine. Don’t overmix here, or you can deflate the meringue.
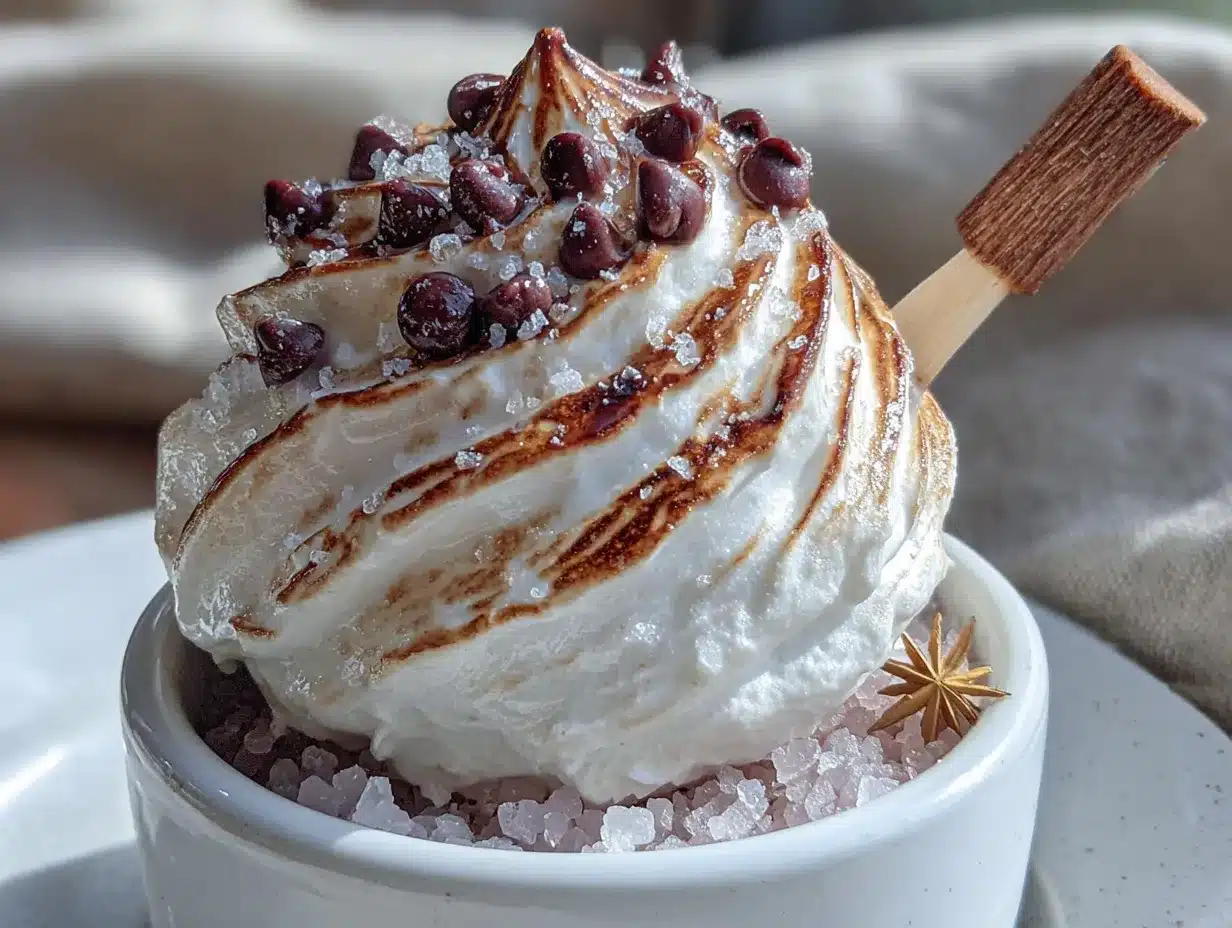
- Pipe the Ghosts: Transfer the meringue to your piping bag fitted with the large round tip. Hold the bag straight up and down, about ½ inch above the parchment paper. Squeeze gently to create a round base (about 1.5 inches wide). Without releasing pressure, slowly lift the bag straight up about 1.5 inches, then stop squeezing and pull away. You should have a nice little ghost shape—a round body with a pointy top. It’s okay if it’s not perfect! The charm is in the imperfection.
- Insert the Sticks: Gently push a lollipop stick into the bottom of each ghost, about ¾ of the way up. The meringue will naturally seal around the stick. If it cracks a little, just use a wet finger to smooth it over.
- Bake Low and Slow: Place the baking sheet in the preheated oven and bake for 60-75 minutes. The ghosts are done when they are firm to the touch and can be easily lifted off the parchment paper. They should not be brown at all—just a pale, creamy white. If they start to brown, your oven is too hot. Crack the oven door open for a few minutes.
- Cool Completely: Turn off the oven and leave the ghosts inside for at least 1 hour, or even overnight, to dry out completely. This makes them perfectly crisp. Do not open the oven door during this time.
- Draw the Faces: Once the ghosts are completely cool, use a toothpick dipped in black gel food coloring to draw two little eyes and a mouth. You can make them happy, spooky, or surprised. I like to make a few different expressions. It makes the tray look more lively.
Troubleshooting Tip: If your meringue is weeping (little droplets of liquid forming on the surface), it means the sugar wasn’t fully dissolved or the humidity is too high. Try baking on a dry day. If your ghosts are chewy instead of crisp, they might need more time in the oven to dry out. Just pop them back in at 200°F for another 20 minutes.
Cooking Tips & Techniques
I have made a lot of mistakes with meringue. I’ve had batches that were flat, sticky, and even a little bit brown. Here are the lessons I learned the hard way so you don’t have to.
The Humidity Factor: Meringue is the enemy of humidity. It absorbs moisture from the air and becomes sticky and soft. If you live in a humid climate (like I do in the summer), try to make these on a dry, cool day. You can also add an extra 2 tablespoons of sugar to the recipe to help stabilize the meringue. Another trick is to bake them for a little longer at a slightly lower temperature (190°F for 80 minutes) to ensure they are bone-dry.
Don’t Overwhip: It is possible to over whip meringue. If you beat it too long, the egg whites will become grainy and dry, and they will start to separate. You’ll see a watery liquid pooling at the bottom of the bowl. If this happens, unfortunately, you have to start over. The key is to stop as soon as you have stiff, glossy peaks. It’s better to stop a little early than to go too far.
The Egg White Temperature Trick: I mentioned this before, but it’s worth repeating. Cold egg whites are easier to separate from the yolks, but they don’t whip as well. Separate your eggs when they are cold, then let the whites sit on the counter for 30 minutes. This little step makes a huge difference in volume and stability.
Timing and Multitasking: The active time for this recipe is only about 15 minutes. The rest is just baking and drying. I like to make the meringue while I’m waiting for my dinner to cook. Then, I pipe the ghosts, pop them in the oven, and forget about them. I usually make these the night before I need them, so they have all night to dry out in the turned-off oven. It makes the morning of the party so much easier.
Consistency is Key: For the most consistent results, use a kitchen scale to measure your egg whites. A large egg white typically weighs about 30-35 grams. Using a scale ensures you have the exact same amount every time, which is crucial for a recipe that relies on a precise ratio of egg white to sugar.
Variations & Adaptations
Once you master the basic ghost, the possibilities are endless. Here are a few of my favorite variations.
- Spooky Spider Webs: After piping the ghosts, use a toothpick to gently swirl a little bit of black or purple gel food coloring into the meringue before baking. It creates a marbled, web-like effect that looks super cool.
- Chocolate Dipped Ghosts: Once the ghosts are baked and cooled, dip the bottom half into melted dark chocolate or white chocolate. Sprinkle with some orange or black sprinkles before the chocolate sets. It adds a whole new layer of flavor and texture.
- Pumpkin Spice Ghosts: Add 1 teaspoon of pumpkin pie spice to the meringue along with the vanilla extract. It gives the ghosts a warm, autumn flavor that is perfect for a cozy Halloween party. The color will be a little bit off-white, but the flavor is incredible.
- Vegan Aquafaba Ghosts: I tried this once for a friend with an egg allergy. Replace the 3 egg whites with ¾ cup of aquafaba (the liquid from a can of chickpeas). Whip it with the cream of tartar and sugar just like you would with egg whites. It takes a little longer to whip, but it works! The texture is slightly less crisp, but still very good.
- Mini Ghost Pops: Instead of making one large ghost per stick, you can pipe tiny little ghosts (about 1 inch tall) and skip the sticks. They make perfect little bite-sized treats for a party platter. Just reduce the baking time to 45-55 minutes.
Serving & Storage Suggestions
These ghosts are best served at room temperature. They are perfect for a Halloween party, a spooky movie night, or even as a fun after-school snack for the kids. I like to arrange them standing up in a small glass jar or a Styrofoam block covered with decorative paper. It makes a fantastic centerpiece.
Storage: Store the ghosts in an airtight container at room temperature. Do not refrigerate them, as the moisture in the fridge will make them sticky. They will stay crisp for up to 2 weeks if stored properly. I have kept a batch in a sealed tin for a full month, and they were still perfectly crunchy.
Reheating: You don’t need to reheat them. If they have softened a little bit from humidity, you can pop them back into a 200°F oven for 15-20 minutes to re-crisp them. Just make sure they are completely cool before you store them again.
Flavor Development: The flavor of these cookies actually improves after a day or two. The vanilla mellows out and becomes more pronounced. I actually prefer them on day two. The texture is perfectly crisp, and the flavor is more rounded.
Nutritional Information & Benefits
While these are a treat, they are a lighter option compared to many other Halloween cookies. Each ghost pop (without chocolate coating) contains approximately:
- Calories: 45
- Fat: 0g
- Carbohydrates: 11g
- Protein: 1g
- Sugar: 11g
Health Benefits: The main ingredient is egg whites, which are a great source of high-quality protein. They are low in calories and contain no fat or cholesterol. The cream of tartar is a source of potassium. Of course, the sugar content is high, so these are best enjoyed in moderation as a special occasion treat.
Dietary Considerations: This recipe is naturally gluten-free, dairy-free, and nut-free. It is also low in fat. The main allergen is eggs. For those watching their sugar intake, you can try using a sugar substitute like Swerve or monk fruit sweetener, but I have not tested this myself. The texture might be slightly different.
From a wellness perspective, I love that this recipe allows you to enjoy a festive Halloween treat without the heavy feeling you get from a lot of butter and flour. It feels light and playful, which is exactly what a holiday like Halloween should be about.
Conclusion
These Cozy Ghost Meringue Cookie Pops are more than just a recipe—they are a little piece of joy. They are the result of a power outage, a kind landlord, and a willingness to try something unexpected. They remind me that the best things in life often come from the most unlikely places. I really hope you give them a try. Don’t worry if your first ghost looks a little wonky. Honestly, the wonky ones are always the most charming. That’s the beauty of homemade treats—they have personality.
I would love to see your ghost creations! Please share a photo in the comments below or tag me on Pinterest. Tell me what expressions you gave your ghosts, or if you tried any of the variations. Your feedback and adaptations always inspire me to try new things. Until next time, happy baking, and may your kitchen be filled with cozy, spooky vibes.
Frequently Asked Questions
Why did my meringue collapse?
This usually happens for two reasons: the egg whites were over-whipped, or there was a tiny bit of grease or yolk in the bowl. Make sure your bowl and whisk are perfectly clean and dry. Also, don’t overbeat the meringue—stop as soon as you have stiff, glossy peaks.
Can I make these on a rainy day?
You can, but they might not be as crisp. The humidity in the air can make the meringue sticky. If you must make them on a humid day, try baking them for an extra 10-15 minutes at the low temperature to ensure they are completely dried out.
How do I get the ghost shape perfect?
Practice makes perfect! The key is to use a large round tip and to squeeze with steady, even pressure. Start with a round base, then lift straight up while still squeezing, then stop and pull away. If the top is too pointy, you can gently pat it down with a wet finger before baking.
Can I freeze these cookie pops?
I do not recommend freezing them. The moisture in the freezer will make them sticky and soft. They are best stored in an airtight container at room temperature, where they will stay fresh for up to two weeks.
What can I use instead of black gel food coloring?
You can use a black edible marker to draw the faces, which is even easier! You can find them at craft stores or online. If you don’t have either, you can melt a little bit of dark chocolate and use a toothpick to pipe the faces on. It adds a nice chocolatey touch.
Pin This Recipe!
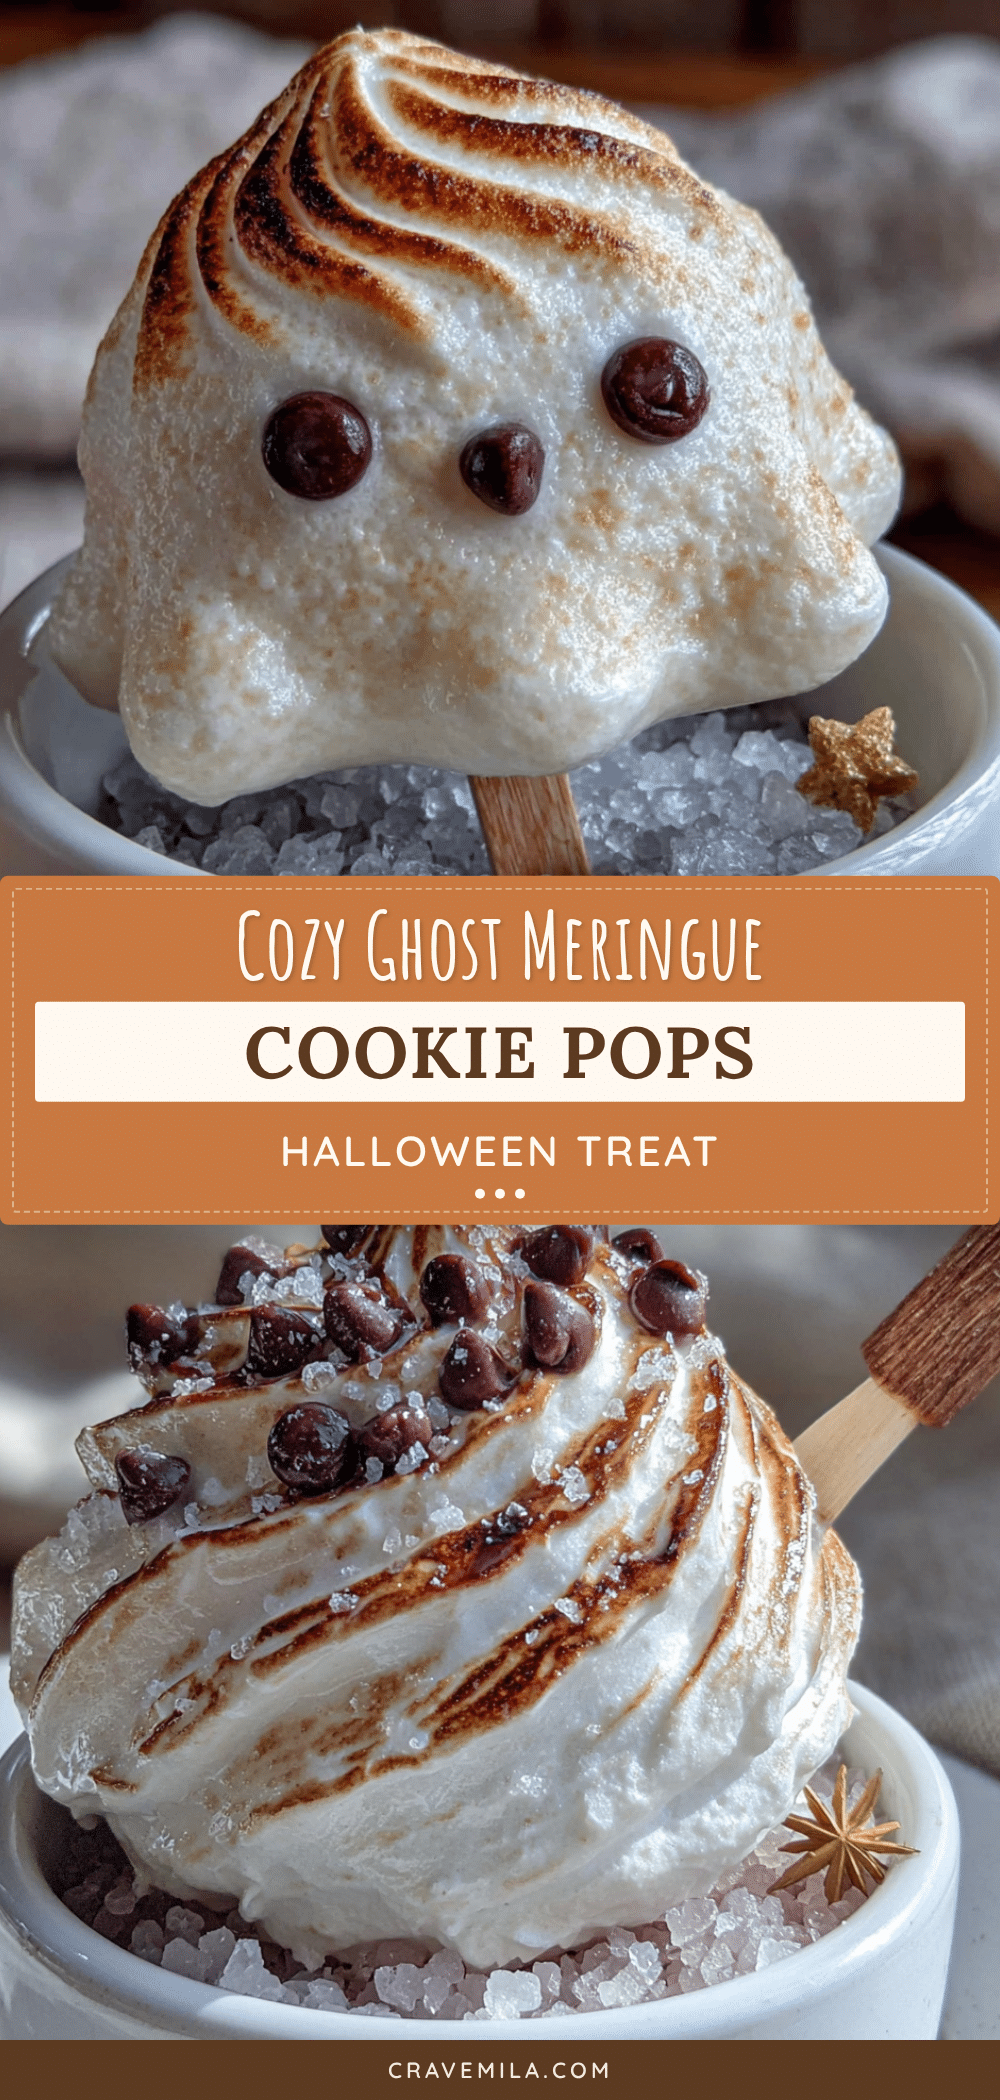
Cozy Ghost Meringue Cookie Pops: Easy Halloween Treat
Light, airy, and melt-in-your-mouth ghost-shaped meringue pops on lollipop sticks, perfect for Halloween parties or cozy autumn gatherings. A simple four-ingredient recipe with a whimsical shape that’s both kid-friendly and adult-approved.
- Prep Time: 15 minutes
- Cook Time: 60-75 minutes
- Total Time: 1 hour 15 minutes (plus 1 hour drying time)
- Yield: 12-15 pops 1x
- Category: Dessert
- Cuisine: American
Ingredients
- 3 large egg whites (room temperature)
- ¾ cup (150g) granulated sugar
- ½ teaspoon cream of tartar
- 1 teaspoon pure vanilla extract
- Pinch of salt
- Black gel food coloring (for faces)
- Lollipop sticks
Instructions
- Preheat oven to 200°F (93°C). Line a large baking sheet with parchment paper. Have lollipop sticks ready.
- In a clean, dry mixing bowl, combine egg whites and cream of tartar. Beat on medium speed until frothy and bubbly, about 1-2 minutes.
- With mixer running on medium speed, add sugar one tablespoon at a time, taking 2-3 minutes. Increase speed to high and beat until stiff, glossy peaks form, about 5-7 minutes. The meringue should feel smooth between your fingers.
- Add vanilla extract and salt; beat on low for 10 seconds to combine.
- Transfer meringue to a piping bag fitted with a large round tip (e.g., Wilton 1A or 2A). Pipe ghosts by squeezing a round base (about 1.5 inches wide), then slowly lifting straight up about 1.5 inches while squeezing, then stop and pull away.
- Gently push a lollipop stick into the bottom of each ghost, about ¾ of the way up. Smooth any cracks with a wet finger.
- Bake for 60-75 minutes, until firm to the touch and easily lifted off the parchment. They should remain pale white.
- Turn off oven and leave ghosts inside for at least 1 hour (or overnight) to dry completely.
- Once cool, use a toothpick dipped in black gel food coloring to draw eyes and a mouth on each ghost.
Notes
For best results, use room-temperature egg whites and add sugar slowly. Avoid making on humid days; if necessary, bake an extra 10-15 minutes. Store in an airtight container at room temperature for up to 2 weeks. Do not refrigerate. For vegan option, replace egg whites with ¾ cup aquafaba.
Nutrition
- Serving Size: 1 pop
- Calories: 45
- Sugar: 11
- Sodium: 20
- Carbohydrates: 11
- Protein: 1
Keywords: Halloween, meringue cookies, ghost pops, easy Halloween treats, meringue pops, gluten-free, dairy-free