The power went out halfway through preheating the oven. Let me tell you, that was not part of the plan. I had a dozen russet potatoes sitting on the counter, a fridge full of cheese and bacon, and a living room full of people expecting snacks for the big game. This was supposed to be my moment—the first time I hosted the championship watch party. I wanted everything perfect. Instead, the oven clicked, the lights flickered, and nothing happened.
I stood there staring at the dark display panel, holding a potato in one hand and a brush of melted butter in the other. Honestly, I almost cried. You know that feeling when you’ve prepped everything in your head, and then reality just laughs at you? That was me. I grabbed my phone, ready to order pizza and admit defeat. But then I looked at those potatoes again. They were already scrubbed clean, poked with fork holes, and sitting there like little golden soldiers waiting for their mission. I couldn’t let them down.
So I did what any desperate cook would do—I improvised. I microwaved those potatoes until they were tender, scooped out the insides, and pan-fried the skins in a cast iron skillet until they were shatteringly crisp. I loaded them up with sharp cheddar, crispy bacon, and a dollop of sour cream, then finished them under the broiler for that melty, bubbly finish. They came out better than anything I had planned. The oven failure turned into the best thing that ever happened to my loaded potato skins. I mean, I still use the oven sometimes, but that pan-fried method? It’s the secret to the crunchiest skins you’ll ever bite into. These crispy loaded potato skins for game day saved my reputation, and now they’re the only version I make.
Why You’ll Love This Recipe
Let me be honest with you—I’ve tested a lot of potato skin recipes over the years. Some come out soggy. Some are too greasy. Some just don’t have that satisfying crunch that makes you close your eyes after the first bite. This one is different. It’s the result of that accidental discovery in the dark kitchen, plus years of tweaking and perfecting. Here’s why this recipe stands out:
- Quick & Easy: You can have these on the table in about 45 minutes, even without a fully functional oven. The microwave and stovetop method cuts the time in half compared to traditional baked potato skins.
- Simple Ingredients: No fancy grocery trips needed. Potatoes, cheese, bacon, sour cream, and a few pantry staples—that’s it. You probably already have everything in your kitchen right now.
- Perfect for Game Day: These hold up beautifully on a buffet table. They stay crispy longer than you’d expect, and they’re easy to grab and eat without a plate or fork.
- Crowd-Pleaser: I’ve brought these to parties, potlucks, and family gatherings. They disappear every single time. Kids love them. Adults love them. Even my picky uncle who “doesn’t eat appetizers” ate six of them.
- Unbelievably Delicious: The texture is what gets everyone. That first bite has this shattering crunch, followed by the creamy melted cheese, the salty bacon, and the cool tang of sour cream. It’s next-level comfort food.
What makes this recipe different from the rest is the pan-frying technique. Most recipes rely solely on oven baking, which can leave the skins chewy instead of crispy. By par-cooking the potatoes in the microwave and then crisping them in a hot skillet with butter and oil, you get that golden, crunchy texture that stays crisp even after you add the toppings. It’s not just another version—it’s the best version.
What Ingredients You Will Need
This recipe uses simple, wholesome ingredients to deliver bold flavor and satisfying crunch without the fuss. Most of these are pantry staples you probably already have on hand. Here’s what you’ll need:
For the Potato Skins
- 6 medium russet potatoes (about 2 pounds total) — Russets are the best choice here. Their high starch content and thick skin create that perfect crispy exterior. Look for firm potatoes without green spots or sprouts.
- 2 tablespoons unsalted butter (melted) — I use Land O’Lakes for consistent flavor. The butter adds richness and helps with browning.
- 2 tablespoons olive oil — This raises the smoke point so the butter doesn’t burn. Use a good quality extra virgin olive oil or avocado oil for a neutral flavor.
- 1 teaspoon kosher salt — Diamond Crystal is my go-to. It dissolves evenly and doesn’t overpower the other flavors.
- ½ teaspoon black pepper (freshly ground) — Pre-ground pepper works in a pinch, but fresh cracked pepper adds a subtle warmth that makes a difference.
- ½ teaspoon garlic powder — Not garlic salt. We want the flavor without extra sodium.
For the Loaded Topping
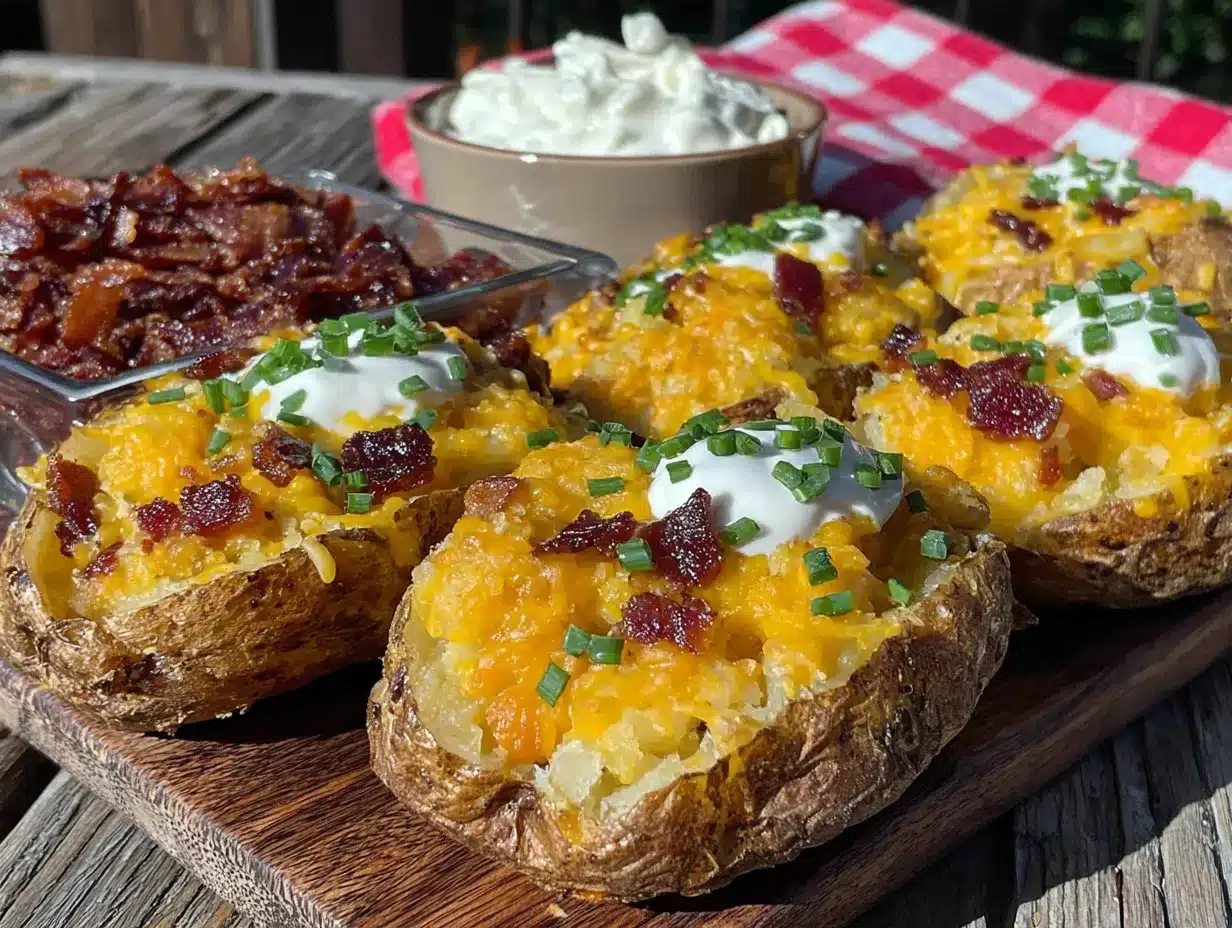
- 1 cup sharp cheddar cheese (shredded) — I recommend Tillamook or Cabot for that bold, tangy flavor. Shred it yourself from a block—pre-shredded cheese has anti-caking agents that prevent smooth melting.
- ½ cup cooked bacon (crumbled) — About 6 slices. I prefer thick-cut bacon for more texture. You can cook it in the oven or microwave until crispy.
- ½ cup sour cream — Full-fat sour cream gives the best creamy contrast. Greek yogurt works as a lighter substitute if needed.
- 2 green onions (sliced thin) — For a fresh, mild onion bite on top. Chives are a great alternative if you prefer a milder flavor.
Optional Garnishes
- Pickled jalapeños — Adds heat and acidity that cuts through the richness.
- Hot sauce — A few dashes of Frank’s RedHot or Cholula for extra kick.
- Extra shredded cheese — Because more cheese is never a bad thing.
Equipment Needed
You don’t need a professional kitchen to make these crispy loaded potato skins for game day. Here’s what you’ll need:
- Large pot or microwave-safe dish — For cooking the potatoes. If you’re using the microwave method (which I recommend), a large glass bowl or microwave-safe plate works perfectly.
- Sharp chef’s knife — A good knife makes cutting the potatoes in half clean and easy. Dull knives can crush the potato edges.
- Melon baller or small spoon — For scooping out the potato flesh. A melon baller gives you nice, clean cavities. A teaspoon works just as well if that’s what you have.
- Cast iron skillet or large non-stick pan — Cast iron gives the best heat distribution and crispiest results. A 12-inch skillet is ideal. If you don’t have cast iron, a heavy-bottomed non-stick pan works well too.
- Baking sheet — For broiling the loaded skins. Line it with foil for easy cleanup.
- Pastry brush — For brushing the butter-oil mixture onto the potato skins. A silicone brush is easy to clean and doesn’t shed bristles.
- Tongs — For flipping the skins in the hot skillet. Metal tongs give you the best control.
Budget-friendly tip: If you don’t have a cast iron skillet, a regular non-stick pan will work. Just be careful not to overheat it, and use a bit more oil to prevent sticking. I’ve used a $15 non-stick pan from the grocery store and got great results.
Preparation Method
Let’s get these crispy loaded potato skins for game day on the table. Follow these steps carefully, and you’ll have the crunchiest, cheesiest skins your friends have ever tasted.
- Scrub and pierce the potatoes (5 minutes). Wash the russet potatoes thoroughly under cold running water. Scrub off any dirt or debris with a vegetable brush. Pat them dry with a clean towel. Use a fork to pierce each potato 6-8 times all over. This allows steam to escape during cooking and prevents explosions. I learned this the hard way—cleaning potato off the microwave ceiling is not fun.
- Cook the potatoes (10-12 minutes). Place the potatoes on a microwave-safe plate, leaving space between each one. Microwave on high for 5 minutes, then flip them over and microwave for another 5-7 minutes. They’re done when a knife slides through the center with little resistance. If you prefer the oven method, bake at 400°F for 45-50 minutes, but honestly, the microwave saves so much time and the final texture is identical.
- Let them cool (5 minutes). The potatoes will be extremely hot straight out of the microwave. Let them rest on the counter until they’re cool enough to handle. This also allows the steam to finish cooking the insides evenly.
- Cut and scoop (10 minutes). Use a sharp knife to cut each potato in half lengthwise. Using a melon baller or small spoon, carefully scoop out the flesh, leaving about ¼ inch of potato attached to the skin. You want enough potato left to hold its shape, but not so much that it becomes stodgy. Save the scooped-out potato flesh for another use—mashed potatoes, potato soup, or even added to bread dough.
- Prepare the butter mixture (2 minutes). In a small bowl, combine the melted butter, olive oil, kosher salt, black pepper, and garlic powder. Whisk until well combined. The oil prevents the butter from burning during pan-frying.
- Pan-fry the skins (8-10 minutes). Place your cast iron skillet over medium-high heat. Once hot, add a tablespoon of the butter-oil mixture and swirl to coat the bottom. Place the potato skins in the skillet, cut-side down, in a single layer. You may need to work in batches. Cook for 4-5 minutes until the bottoms are golden brown and crispy. Flip each skin using tongs and cook for another 3-4 minutes on the skin side. The skins should look deeply golden and feel firm to the touch.
- Brush and season (2 minutes). Remove the skins from the skillet and place them on a foil-lined baking sheet, cut-side up. Use a pastry brush to coat the inside and edges of each skin with the remaining butter-oil mixture. This extra layer of fat ensures they stay crispy during broiling.
- Load with toppings (3 minutes). Sprinkle a generous amount of shredded cheddar cheese into each potato skin. Don’t be shy—fill them up. Top with crumbled bacon pieces. The cheese will melt and hold everything together.
- Broil until bubbly (3-4 minutes). Preheat your broiler to high. Place the baking sheet on the top rack, about 4-6 inches from the heating element. Broil for 3-4 minutes, watching closely. The cheese should be melted and bubbly, with some golden brown spots. Remove immediately—broilers can go from perfect to burnt in seconds.
- Garnish and serve (2 minutes). Remove from the oven and let rest for 1 minute. Top each skin with a small dollop of sour cream, a sprinkle of sliced green onions, and any additional garnishes you like. Serve hot while the skins are still crispy.
Cooking Tips & Techniques
After making these crispy loaded potato skins for game day more times than I can count, I’ve picked up a few tricks that make a real difference. Let me share what I’ve learned—including a few failures along the way.
Don’t skip the microwave step. I know some purists insist on oven-baked potatoes only, but hear me out. The microwave cooks the potatoes from the inside out, creating steam that separates the flesh from the skin just enough to make scooping easy. Plus, it cuts the total cooking time in half. The pan-frying step is where the crispiness happens anyway, so the microwave is just a time-saving shortcut that works.
Watch your heat level. Medium-high heat is perfect for pan-frying the skins. If the heat is too low, the skins will absorb oil and become greasy instead of crispy. Too high, and the butter will burn before the skins have a chance to brown. You want a steady sizzle when the skins hit the pan. If you see smoke, turn the heat down immediately.
Work in batches if needed. Crowding the skillet is the number one mistake people make. The skins need space to make contact with the hot surface. If you pile them in, they’ll steam instead of fry. I usually do two batches of six halves each. It takes a few extra minutes, but the texture is worth it.
Use room temperature sour cream. Cold sour cream straight from the fridge can make the hot skins soggy. Let the sour cream sit out for 10-15 minutes before serving. Or, if you’re in a rush, microwave it for 10 seconds on low power. You just want to take the chill off.
One mistake I still make sometimes: Over-scooping the potatoes. I get carried away and take out too much flesh, leaving the skins too thin. They end up flimsy and can’t hold the toppings. Aim for that ¼ inch thickness—it’s the sweet spot between crispy and sturdy.
Variations & Adaptations
One of the best things about crispy loaded potato skins for game day is how adaptable they are. Here are some variations I’ve tried and loved:
Buffalo Chicken Potato Skins
Mix 1 cup of shredded cooked chicken with ¼ cup of buffalo sauce. Spoon the mixture into the skins before adding the cheese. Top with blue cheese crumbles instead of cheddar, and drizzle with ranch dressing. This is my go-to for football parties—it’s like a buffalo wing in potato form.
Vegetarian Loaded Skins
Skip the bacon and add sautéed mushrooms, bell peppers, and onions. Use a smoked gouda or pepper jack cheese for extra flavor. Black beans also work well—just drain and rinse them first, then sprinkle them in before the cheese. My vegetarian friends always request this version.
Loaded Breakfast Potato Skins
Use the same base, but top with scrambled eggs, crumbled breakfast sausage, and shredded cheddar. Finish with a drizzle of maple syrup for that sweet-savory combo. I made these for a brunch party once, and they were gone in ten minutes.
Spicy Southwest Skins
Add a layer of refried beans at the bottom of each skin. Top with pepper jack cheese, crumbled chorizo, diced tomatoes, and pickled jalapeños. Serve with a side of salsa and guacamole. The heat from the chorizo and jalapeños pairs perfectly with the cool sour cream.
Low-Carb Option
Use small sweet potatoes instead of russets. They have a slightly lower glycemic index and add a natural sweetness that complements the savory toppings. The cooking method is exactly the same—just keep an eye on them during pan-frying since sweet potatoes can brown faster.
Serving & Storage Suggestions
These crispy loaded potato skins for game day are best served hot, right after broiling. The contrast between the crispy skin, melted cheese, and cool sour cream is at its peak within the first 10 minutes. Arrange them on a large platter lined with parchment paper or a wire rack—the rack helps keep the bottoms from getting soggy if they sit out for a while.
For a game day spread, pair these with classic dips like ranch dressing, blue cheese dressing, or extra sour cream. They also go great with other finger foods like chicken wings, sliders, or a veggie platter. If you’re serving a crowd, I recommend making a double batch—trust me, they’ll disappear fast.
Storage: If you have leftovers (unlikely, but possible), store them in an airtight container in the refrigerator for up to 3 days. The texture won’t be as crispy as fresh, but they’ll still be delicious. To reheat, place them on a baking sheet in a 375°F oven for 8-10 minutes. Avoid the microwave—it will make the skins chewy and the sour cream watery.
Freezer instructions: You can freeze the potato skins before adding the toppings. After pan-frying and brushing with butter, let them cool completely. Place them on a baking sheet and freeze until solid, then transfer to a freezer-safe bag. They’ll keep for up to 3 months. When you’re ready to serve, thaw in the refrigerator, add toppings, and broil as directed. The texture holds up surprisingly well.
Make-ahead tip: Cook and scoop the potatoes up to 24 hours in advance. Store the empty skins in a covered container in the fridge. When you’re ready to serve, pan-fry, load, and broil. This makes game day prep so much less stressful.
Nutritional Information & Benefits
Let’s be real—crispy loaded potato skins for game day aren’t health food. But they do have some redeeming qualities if you look closely. Here’s the estimated nutritional breakdown per serving (2 potato skin halves):
| Nutrient | Amount |
|---|---|
| Calories | 320 |
| Total Fat | 18g |
| Saturated Fat | 9g |
| Cholesterol | 45mg |
| Sodium | 520mg |
| Total Carbohydrates | 28g |
| Dietary Fiber | 3g |
| Total Sugars | 2g |
| Protein | 12g |
| Vitamin C | 15% DV |
| Potassium | 620mg |
The potatoes themselves are a good source of vitamin C and potassium—more than a banana, actually. The skin contains most of the fiber, so eating the whole skin is actually a smart move. The cheese and sour cream add calcium and protein. And the bacon? Well, it adds flavor and a little protein too. I’m not saying this is a health food, but it’s not empty calories either. It’s comfort food that also gives you some nutritional value.
If you’re watching your sodium, use low-sodium bacon and reduce the added salt. For a lighter version, swap the sour cream for Greek yogurt and use reduced-fat cheese. The texture will be slightly different, but the flavor is still fantastic.
Conclusion
These crispy loaded potato skins for game day started as a happy accident in a dark kitchen, but they’ve become my most-requested party recipe. The combination of shatteringly crispy skins, gooey melted cheese, salty bacon, and cool sour cream is just unbeatable. And the best part? They’re surprisingly easy to make once you know the trick.
I hope you give these a try for your next game day gathering. Don’t be afraid to customize them with your favorite toppings—that’s the beauty of this recipe. Whether you stick with the classic loaded version or try one of the variations, I promise you’ll end up with a plate of empty potato skins and a bunch of happy people.
Have you made these? I’d love to hear how they turned out. Drop a comment below and let me know what toppings you used, or share a photo of your creation. And if you’re looking for more game day recipes, don’t forget to check out my best homemade chicken wings and three-cheese spinach artichoke dip—they’re perfect for pairing with these skins. Happy cooking, and enjoy the game!
Frequently Asked Questions
Can I make these potato skins ahead of time?
Absolutely! You can cook and scoop the potatoes up to 24 hours in advance. Store the empty skins in a covered container in the refrigerator. When you’re ready to serve, pan-fry, load with toppings, and broil as directed. This is a huge time-saver for game day prep.
Why are my potato skins soggy instead of crispy?
Soggy skins usually happen for one of three reasons: the potatoes were overcooked and too soft, the pan wasn’t hot enough when you added the skins, or you crowded the skillet. Make sure your pan is preheated to medium-high heat, and cook the skins in a single layer with space between each piece.
Can I use sweet potatoes instead of russet potatoes?
Yes, you can! Sweet potatoes work well, though they have a slightly different texture and flavor. They cook faster, so keep an eye on them during the pan-frying step. The natural sweetness pairs beautifully with the savory toppings.
What can I do with the scooped-out potato flesh?
Don’t throw it away! The leftover potato flesh is perfect for making mashed potatoes, potato soup, or even adding to bread dough for extra moisture. You can also mix it with a little butter and cheese to make a quick potato casserole. Store it in an airtight container in the fridge for up to 3 days.
How do I reheat leftover loaded potato skins?
The best way to reheat them is in the oven. Place the skins on a baking sheet and warm them at 375°F for 8-10 minutes. This helps restore some of the crispiness. Avoid the microwave—it will make the skins chewy and the sour cream watery.
Pin This Recipe!

Best Crispy Loaded Potato Skins for Game Day

These crispy loaded potato skins are the ultimate game day snack, featuring shatteringly crunchy skins loaded with sharp cheddar, crispy bacon, and cool sour cream. A pan-frying technique ensures the perfect texture every time.
- Prep Time: 15 minutes
- Cook Time: 30 minutes
- Total Time: 45 minutes
- Yield: 6 servings (12 potato skin halves) 1x
- Category: Appetizer
- Cuisine: American
Ingredients
- 6 medium russet potatoes (about 2 pounds)
- 2 tablespoons unsalted butter, melted
- 2 tablespoons olive oil
- 1 teaspoon kosher salt
- ½ teaspoon black pepper, freshly ground
- ½ teaspoon garlic powder
- 1 cup sharp cheddar cheese, shredded
- ½ cup cooked bacon, crumbled (about 6 slices)
- ½ cup sour cream
- 2 green onions, sliced thin
- Pickled jalapeños (optional)
- Hot sauce (optional)
- Extra shredded cheese (optional)
Instructions
- Scrub and pierce the potatoes: Wash the russet potatoes thoroughly under cold running water. Scrub off any dirt with a vegetable brush. Pat dry. Use a fork to pierce each potato 6-8 times all over.
- Cook the potatoes: Place the potatoes on a microwave-safe plate, leaving space between each one. Microwave on high for 5 minutes, then flip and microwave for another 5-7 minutes until a knife slides through the center with little resistance.
- Let them cool: Let the potatoes rest on the counter until cool enough to handle, about 5 minutes.
- Cut and scoop: Cut each potato in half lengthwise. Using a melon baller or small spoon, scoop out the flesh, leaving about ¼ inch of potato attached to the skin. Save the scooped-out flesh for another use.
- Prepare the butter mixture: In a small bowl, combine the melted butter, olive oil, kosher salt, black pepper, and garlic powder. Whisk until well combined.
- Pan-fry the skins: Place a cast iron skillet over medium-high heat. Once hot, add a tablespoon of the butter-oil mixture and swirl to coat. Place the potato skins in the skillet, cut-side down, in a single layer (work in batches if needed). Cook for 4-5 minutes until golden brown and crispy. Flip and cook for another 3-4 minutes on the skin side.
- Brush and season: Remove the skins from the skillet and place them on a foil-lined baking sheet, cut-side up. Brush the inside and edges of each skin with the remaining butter-oil mixture.
- Load with toppings: Sprinkle shredded cheddar cheese into each potato skin, then top with crumbled bacon.
- Broil until bubbly: Preheat the broiler to high. Place the baking sheet on the top rack, about 4-6 inches from the heating element. Broil for 3-4 minutes until the cheese is melted and bubbly with some golden brown spots.
- Garnish and serve: Remove from the oven and let rest for 1 minute. Top each skin with a dollop of sour cream, a sprinkle of sliced green onions, and any additional garnishes. Serve hot.
Notes
For best results, use room temperature sour cream to prevent sogginess. Work in batches when pan-frying to avoid crowding the skillet. The microwave step is a time-saving shortcut that doesn’t compromise texture. Leftover potato flesh can be used for mashed potatoes or soup.
Nutrition
- Serving Size: 2 potato skin halves
- Calories: 320
- Sugar: 2
- Sodium: 520
- Fat: 18
- Saturated Fat: 9
- Carbohydrates: 28
- Fiber: 3
- Protein: 12
Keywords: crispy loaded potato skins, game day appetizer, potato skins, loaded potato skins, crispy potato skins, game day snack, party appetizer



