I was cleaning out my aunt’s garage last fall—a dusty, thankless job involving old Christmas ornaments and mouse droppings—when a greasy, spiral-bound cookbook slid off a shelf and hit the floor. It opened to a page stained with what looked like melted butter and cinnamon, and the title read, “Mabel’s Snickerdoodles.” I didn’t know Mabel. My aunt shrugged and said Mabel was the church organist who never spoke but always brought cookies. That was it. No recipe for pumpkin, no brown butter. Just a basic cookie that apparently kept a whole congregation quiet during sermons.
But honestly? I couldn’t stop thinking about Mabel’s cookies. There was something about that stained page—like a secret message from a woman who let her baking do the talking. I took the cookbook home (my aunt didn’t want it), and over the next few weeks, I started messing with the recipe. I added pumpkin puree because it was October and I had a can staring at me from the pantry. Then I browned the butter on a whim, and let me tell you, the smell alone made me feel like I’d discovered a new religion. The first batch came out flat and sad—I forgot to adjust the flour. But the second batch? That was the one. The edges were crisp, the centers were soft, and that brown butter-pumpkin-cinnamon combo tasted like fall had been distilled into a single bite.
Maybe you’ve been there—standing in your kitchen, covered in flour, wondering if you’ve just wasted good butter on a science experiment. I get it. That’s exactly how I felt. But this recipe, these Brown Butter Pumpkin Snickerdoodles, they’re the kind of cookie that makes you close your eyes after the first bite. I keep making them because they taste like that garage discovery—unexpected, a little messy, and absolutely worth sharing.
Why You’ll Love This Recipe
Let me be straight with you—I’ve tested this recipe seven times. Seven. My coworkers have been willing taste-testers, and my neighbor, Dave, has started knocking on my door when he smells brown butter. So I can say with authority that these cookies are special. They’re not just another pumpkin cookie that disappears into the holiday shuffle. These are the ones people remember.
- Quick & Easy: From start to finish, you’re looking at about 30 minutes of active time. The dough needs a quick chill—30 minutes in the fridge—but that’s mostly hands-off. Perfect for a Tuesday night craving or a last-minute potluck.
- Simple Ingredients: No trips to a specialty store. You probably have flour, sugar, butter, and cinnamon in your kitchen right now. The pumpkin puree and cream of tartar are the only “extras,” and both are easy to find.
- Perfect for Fall Gatherings: These cookies scream autumn. They’re ideal for Thanksgiving dessert tables, Halloween parties, or that cozy friend dinner where everyone brings something warm.
- Crowd-Pleaser: Kids love the soft, chewy texture. Adults love the sophisticated brown butter depth. My picky-eating nephew ate four in one sitting. Four.
- Unbelievably Delicious: The brown butter adds a nutty, almost caramel flavor that pairs perfectly with the pumpkin and warm spices. The cinnamon-sugar coating gives that classic snickerdoodle crackle. It’s next-level comfort food.
What makes this recipe different from every other pumpkin cookie out there? It’s the technique. Browning the butter first changes everything. It deepens the flavor without adding extra sugar or fat. Plus, I’ve nailed the flour-to-pumpkin ratio so the cookies stay soft and puffy instead of turning into flat, soggy discs. I learned that lesson the hard way, and now you don’t have to.
This isn’t just good. It’s the kind of cookie that makes you text your friends the recipe before you’ve even finished eating one. It’s comfort food reimagined—richer, warmer, and with the same soul-soothing satisfaction that Mabel’s original snickerdoodles probably gave that congregation every Sunday.
What Ingredients You Will Need
This recipe uses straightforward ingredients to create something genuinely special. Most of these are pantry staples, but I’ll note a few key details that make a difference.
For the Cookies
- 1 cup (226g) unsalted butter – Use good-quality butter here. I prefer Kerrygold or Plugrà for browning because they have a lower water content, which means richer flavor. You’ll brown this first, so don’t skip that step.
- 1 cup (200g) granulated sugar – Standard white sugar. It helps create that crisp edge.
- 1/2 cup (100g) packed light brown sugar – Adds moisture and a hint of molasses that complements the brown butter. Dark brown sugar works too, but the flavor will be slightly more intense.
- 1/2 cup (120g) pumpkin puree – Not pumpkin pie filling. Make sure it’s 100% pure pumpkin. Libby’s is my go-to brand. Pat the puree with a paper towel to remove excess moisture—this prevents soggy cookies.
- 1 large egg – Room temperature. If you forgot to take it out of the fridge, place it in a bowl of warm water for 5 minutes.
- 2 teaspoons vanilla extract – Pure vanilla, not imitation. The brown butter deserves the real stuff.
- 2 1/2 cups (312g) all-purpose flour – Spoon and level your flour. Scooping directly from the bag packs it down and gives you too much, which makes dry cookies.
- 1 teaspoon cream of tartar – This is the secret to the snickerdoodle tang. Don’t skip it. If you don’t have it, you can substitute 2 teaspoons of lemon juice or white vinegar, but the texture won’t be quite the same.
- 1/2 teaspoon baking soda – Fresh baking soda matters. If yours has been open for more than six months, replace it.
- 1/2 teaspoon salt – Fine sea salt or table salt. I like Morton’s.
- 2 teaspoons ground cinnamon – Fresh cinnamon makes a difference. I buy mine from a local spice shop, but grocery store brands work fine.
- 1 teaspoon pumpkin pie spice – Store-bought is fine, or make your own with 1/2 teaspoon cinnamon, 1/4 teaspoon ginger, 1/4 teaspoon nutmeg, and a pinch of cloves.
For the Cinnamon-Sugar Coating
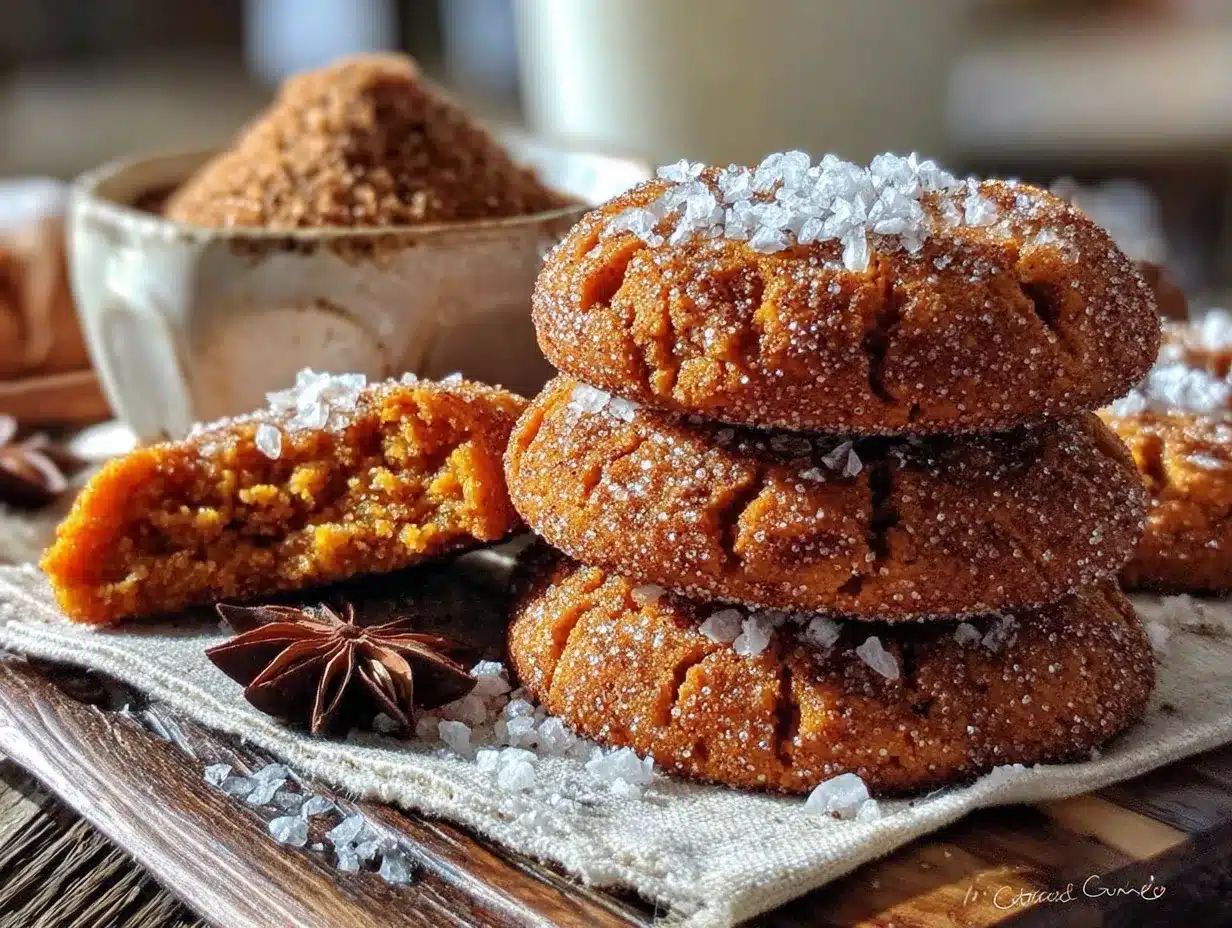
- 1/4 cup (50g) granulated sugar
- 1 tablespoon ground cinnamon
That’s it. Simple, right? The magic happens when these humble ingredients meet brown butter and pumpkin. If you’re out of pumpkin pie spice, don’t panic. Just use extra cinnamon and a pinch of nutmeg. I’ve done it before, and the cookies still disappeared in a day.
Equipment Needed
You don’t need a fancy kitchen for these cookies. Here’s what you’ll want to have on hand:
- Large skillet or saucepan – A light-colored pan is best for browning butter because you can see the color change. I use a stainless steel skillet. Dark nonstick pans make it harder to judge the browning.
- Mixing bowls – One large, one medium. Glass or stainless steel work well.
- Whisk – For combining dry ingredients. A fork works in a pinch.
- Electric hand mixer or stand mixer – You can mix by hand, but a mixer makes creaming the butter and sugars easier. I’ve done both. Your arm will thank you for the mixer.
- Rubber spatula – For scraping down the bowl and folding in dry ingredients.
- Baking sheets – Two standard half-sheet pans. Line them with parchment paper or silicone baking mats.
- Cooling rack – Wire racks help the cookies cool evenly and stay crisp on the edges.
- Cookie scoop – A 1.5-tablespoon scoop makes uniform cookies. I use a #40 scoop. If you don’t have one, use two spoons.
- Small bowl – For the cinnamon-sugar coating.
If you don’t have cream of tartar, you can still make these cookies—just add 1/2 teaspoon of lemon juice to the wet ingredients. The texture will be slightly different (less tangy, a bit softer), but they’ll still be delicious. And if you don’t have a cooling rack, just let the cookies rest on the baking sheet for 5 minutes before transferring them to a plate. Works fine.
Preparation Method
Alright, let’s make some cookies. I’ll walk you through every step so you don’t end up with flat, sad discs like my first batch.
Step 1: Brown the Butter
Place the 1 cup of unsalted butter in a light-colored skillet or saucepan over medium heat. Stir occasionally with a rubber spatula or wooden spoon. The butter will melt, then foam, then start to sizzle. After about 5-7 minutes, you’ll see golden-brown specks forming at the bottom of the pan. The butter will smell nutty and amazing. Once it reaches a deep amber color and the specks are plentiful, remove it from the heat immediately. Pour it into a heatproof bowl—glass or ceramic works well—and let it cool for 10-15 minutes. Don’t walk away during this process. Burnt butter happens fast and tastes bitter.
Step 2: Mix the Wet Ingredients
In a large mixing bowl, combine the cooled brown butter (it should still be liquid but not hot), 1 cup granulated sugar, and 1/2 cup packed brown sugar. Beat with an electric mixer on medium speed for 2 minutes until the mixture looks light and fluffy. Add the 1/2 cup pumpkin puree, 1 large egg, and 2 teaspoons vanilla extract. Mix on low until combined. The mixture might look slightly separated—that’s normal because of the pumpkin. Scrape down the sides of the bowl with a rubber spatula.
Step 3: Combine the Dry Ingredients
In a separate medium bowl, whisk together 2 1/2 cups all-purpose flour, 1 teaspoon cream of tartar, 1/2 teaspoon baking soda, 1/2 teaspoon salt, 2 teaspoons cinnamon, and 1 teaspoon pumpkin pie spice. Make sure there are no lumps. I like to whisk for a full 20 seconds to aerate the flour.
Step 4: Combine Wet and Dry
Gradually add the dry ingredients to the wet mixture, mixing on low speed. Add about one-third at a time, mixing just until combined after each addition. Stop when you no longer see streaks of flour. Overmixing develops gluten and makes tough cookies. Use your spatula to fold the last bit of flour in by hand if needed.
Step 5: Chill the Dough
Cover the bowl with plastic wrap and refrigerate for at least 30 minutes. This step is non-negotiable. Chilling solidifies the brown butter and prevents the cookies from spreading too much. If you’re in a hurry, you can pop the dough in the freezer for 15 minutes, but don’t skip the chill entirely. I learned this after my first batch turned into pumpkin-flavored pancakes.
Step 6: Preheat and Prepare
While the dough chills, preheat your oven to 350°F (175°C). Line two baking sheets with parchment paper or silicone mats. In a small bowl, mix the 1/4 cup granulated sugar and 1 tablespoon cinnamon for the coating.
Step 7: Shape and Coat
Using a cookie scoop or two spoons, portion out rounded tablespoons of dough (about 1.5 tablespoons each). Roll each portion into a ball between your palms. The dough will be slightly sticky—that’s okay. Drop each ball into the cinnamon-sugar mixture and roll to coat thoroughly. Place them on the prepared baking sheets about 2 inches apart. You should get about 24-26 cookies.
Step 8: Bake
Bake one sheet at a time for 10-12 minutes. The cookies should look puffy and slightly cracked on top. The edges will be set but the centers will still look soft. Don’t overbake—they continue cooking on the hot sheet after you pull them out. I usually bake for 11 minutes for soft, chewy centers.
Step 9: Cool
Let the cookies rest on the baking sheet for 5 minutes. This allows them to set up. Then transfer them to a wire cooling rack to cool completely. If you try to move them too soon, they’ll fall apart. Trust me, I’ve been there.
Cooking Tips & Techniques
I’ve made a lot of mistakes with these cookies so you don’t have to. Here’s what I’ve learned:
Watch the butter like a hawk. Browning butter is a 5-7 minute process that can go wrong in seconds. The moment you see amber specks and smell that nutty aroma, pull it off the heat. Burnt butter tastes acrid and ruins the whole batch. I once got distracted by a phone call and ended up with black butter. Not my finest moment.
Pat your pumpkin puree dry. Pumpkin has a lot of water. Too much moisture makes cookies spread and turn gummy. Before adding the puree, spread it on a paper towel-lined plate and press another paper towel on top. Let it sit for 5 minutes. You’ll be shocked at how much liquid comes out. This single tip transformed my cookies from flat to puffy.
Don’t skip the chill. I know you’re impatient. I am too. But warm dough = flat cookies. The brown butter needs to firm up so the cookies hold their shape. If you’re really pressed for time, scoop the dough into balls before chilling, then pop them in the freezer for 15 minutes. Works like a charm.
Use a cookie scoop for uniform sizes. This ensures even baking. Some cookies won’t be done at the same time if they’re different sizes. A #40 scoop (1.5 tablespoons) is perfect for this recipe.
Bake one sheet at a time. I know it’s tempting to cram both sheets in the oven, but the heat circulates unevenly. Your cookies will bake better if you give them space. While one sheet bakes, keep the other dough balls in the fridge.
Check for doneness at 10 minutes. Every oven runs differently. My friend’s oven runs hot, and her cookies are done at 9 minutes. Mine takes 11. Start checking early. The edges should be set and lightly golden, but the centers should still look soft and underdone.
Variations & Adaptations
These cookies are forgiving. Here are a few ways to make them your own:
Gluten-Free Version: Substitute the all-purpose flour with a 1:1 gluten-free baking flour blend. I’ve used Bob’s Red Mill with great results. Add 1/4 teaspoon xanthan gum if your blend doesn’t already include it. The texture will be slightly more tender, but still delicious.
Vegan Adaptation: Use vegan butter (I like Miyoko’s) for browning, and replace the egg with a flax egg (1 tablespoon ground flaxseed mixed with 3 tablespoons water, let sit for 5 minutes). The cookies will be slightly less puffy but still chewy and flavorful. Make sure your sugar is vegan-friendly too.
Spice It Up: Add 1/4 teaspoon ground cardamom or 1/8 teaspoon ground cloves to the dry ingredients. Cardamom pairs beautifully with pumpkin and brown butter. I tried this last Thanksgiving and got rave reviews.
Add Mix-Ins: Fold in 1/2 cup white chocolate chips or chopped pecans after the dry ingredients are incorporated. White chocolate and pumpkin are a dream team. Just be gentle so you don’t overmix.
Make Them Sandwich Cookies: Once cooled, spread a dollop of cream cheese frosting between two cookies. The tangy frosting cuts through the sweetness perfectly. I did this for a cookie exchange and people lost their minds.
Freeze the Dough: Scoop the dough into balls, roll in the cinnamon-sugar, and freeze on a baking sheet. Once solid, transfer to a freezer bag. You can bake them straight from frozen—just add 2-3 minutes to the baking time. Perfect for unexpected guests or late-night cravings.
Serving & Storage Suggestions
These cookies are best served slightly warm, when the edges are still crisp and the centers are soft. Let them cool on the baking sheet for 5 minutes, then transfer to a plate. If you want that fresh-from-the-oven experience later, pop a cookie in the microwave for 10 seconds. Trust me on this.
For a full fall spread, serve these alongside a hot cup of apple cider or a spiced chai latte. They also pair beautifully with vanilla ice cream—just crumble a cookie on top for an impromptu dessert. I’ve even used them as a crust for a no-bake pumpkin cheesecake. Yes, it’s as good as it sounds.
Storage: Keep the cookies in an airtight container at room temperature for up to 5 days. Place a slice of bread in the container to keep them soft—the bread absorbs excess air and releases moisture. Replace the bread slice every other day. I learned this trick from my grandmother, and it works like magic.
Freezer: Baked cookies freeze well for up to 3 months. Place them in a single layer in a freezer-safe bag or container. Thaw at room temperature for 30 minutes, or microwave for 10-15 seconds. The texture stays remarkably close to fresh.
Flavor Development: Honestly, these cookies taste even better the next day. The brown butter flavor deepens overnight, and the spices meld together. If you can resist eating them all on day one, you’re in for a treat on day two.
Nutritional Information & Benefits
Let’s be real—these are cookies. They’re a treat, not a health food. But here’s the approximate nutritional breakdown per cookie (based on 24 cookies):
- Calories: 175
- Fat: 9g
- Carbohydrates: 23g
- Protein: 2g
- Fiber: 1g
- Sugar: 14g
That said, there are a few bright spots. Pumpkin puree is packed with vitamin A and fiber, which supports eye health and digestion. Cinnamon has anti-inflammatory properties and may help regulate blood sugar. And brown butter, while indulgent, contains butyrate, a fatty acid that supports gut health. So you’re not just eating empty calories—you’re getting a few small benefits with every bite.
If you’re watching your sugar intake, you can reduce the granulated sugar to 3/4 cup and the brown sugar to 1/3 cup. The cookies will be less sweet but still flavorful. For a lower-fat option, substitute half the butter with unsweetened applesauce. The texture will be cakier, but the taste is still lovely.
Potential allergens: This recipe contains dairy (butter) and gluten (flour). For dairy-free, use vegan butter. For gluten-free, use a 1:1 gluten-free flour blend. The egg can be replaced with a flax egg for those with egg allergies.
Frequently Asked Questions
Can I use pumpkin pie filling instead of pumpkin puree?
No, please don’t. Pumpkin pie filling is pre-sweetened and spiced, which will throw off the sugar and spice balance in this recipe. Stick with 100% pure pumpkin puree. Your cookies will thank you.
Why did my cookies turn out flat?
This usually happens for one of three reasons: the dough wasn’t chilled long enough, the butter was too warm when you mixed it, or the pumpkin puree wasn’t patted dry. Next time, chill the dough for a full 30 minutes and pat the pumpkin dry with paper towels. You’ll see a big difference.
Can I make the dough ahead of time?
Absolutely. You can refrigerate the dough for up to 3 days before baking. Just wrap it tightly in plastic wrap. If it gets too firm to scoop, let it sit at room temperature for 10-15 minutes. You can also freeze the dough balls for up to 3 months—bake directly from frozen, adding 2-3 minutes to the baking time.
What’s the best way to brown butter without burning it?
Use a light-colored pan so you can see the color change. Keep the heat at medium, not high. Stir constantly with a rubber spatula. Once you see golden-brown specks forming and smell a nutty aroma, remove it from the heat immediately. Pour it into a cool bowl to stop the cooking process. Practice makes perfect—don’t get discouraged if your first attempt isn’t perfect.
Can I double this recipe?
Yes, this recipe doubles beautifully. Just make sure you have a large enough mixing bowl. When browning the butter, use a larger pan so it doesn’t overflow. The chilling time stays the same. You’ll get about 48 cookies, which is perfect for holiday gift-giving or a big party.
Conclusion
These Brown Butter Pumpkin Snickerdoodles are more than just a cookie—they’re a little piece of fall that you can hold in your hand. The nutty brown butter, the warm pumpkin, the crackly cinnamon-sugar coating—every bite tastes like a crisp October afternoon. I’ve made these for Thanksgiving, for casual hangouts, and for those days when I just need something cozy. They never disappoint.
I hope you give them a try. Don’t stress about perfection—my first batch was a disaster, and I still ended up with a recipe I love. Make them your own. Add extra cinnamon if that’s your thing. Throw in some chocolate chips. Share them with someone who needs a little sweetness in their day.
And if you do make them, I’d love to hear about it. Leave a comment below and tell me how they turned out. Did you try a variation? Did your family fight over the last cookie? Drop your stories in the comments—I read every single one. Happy baking, friends!
Pin This Recipe!
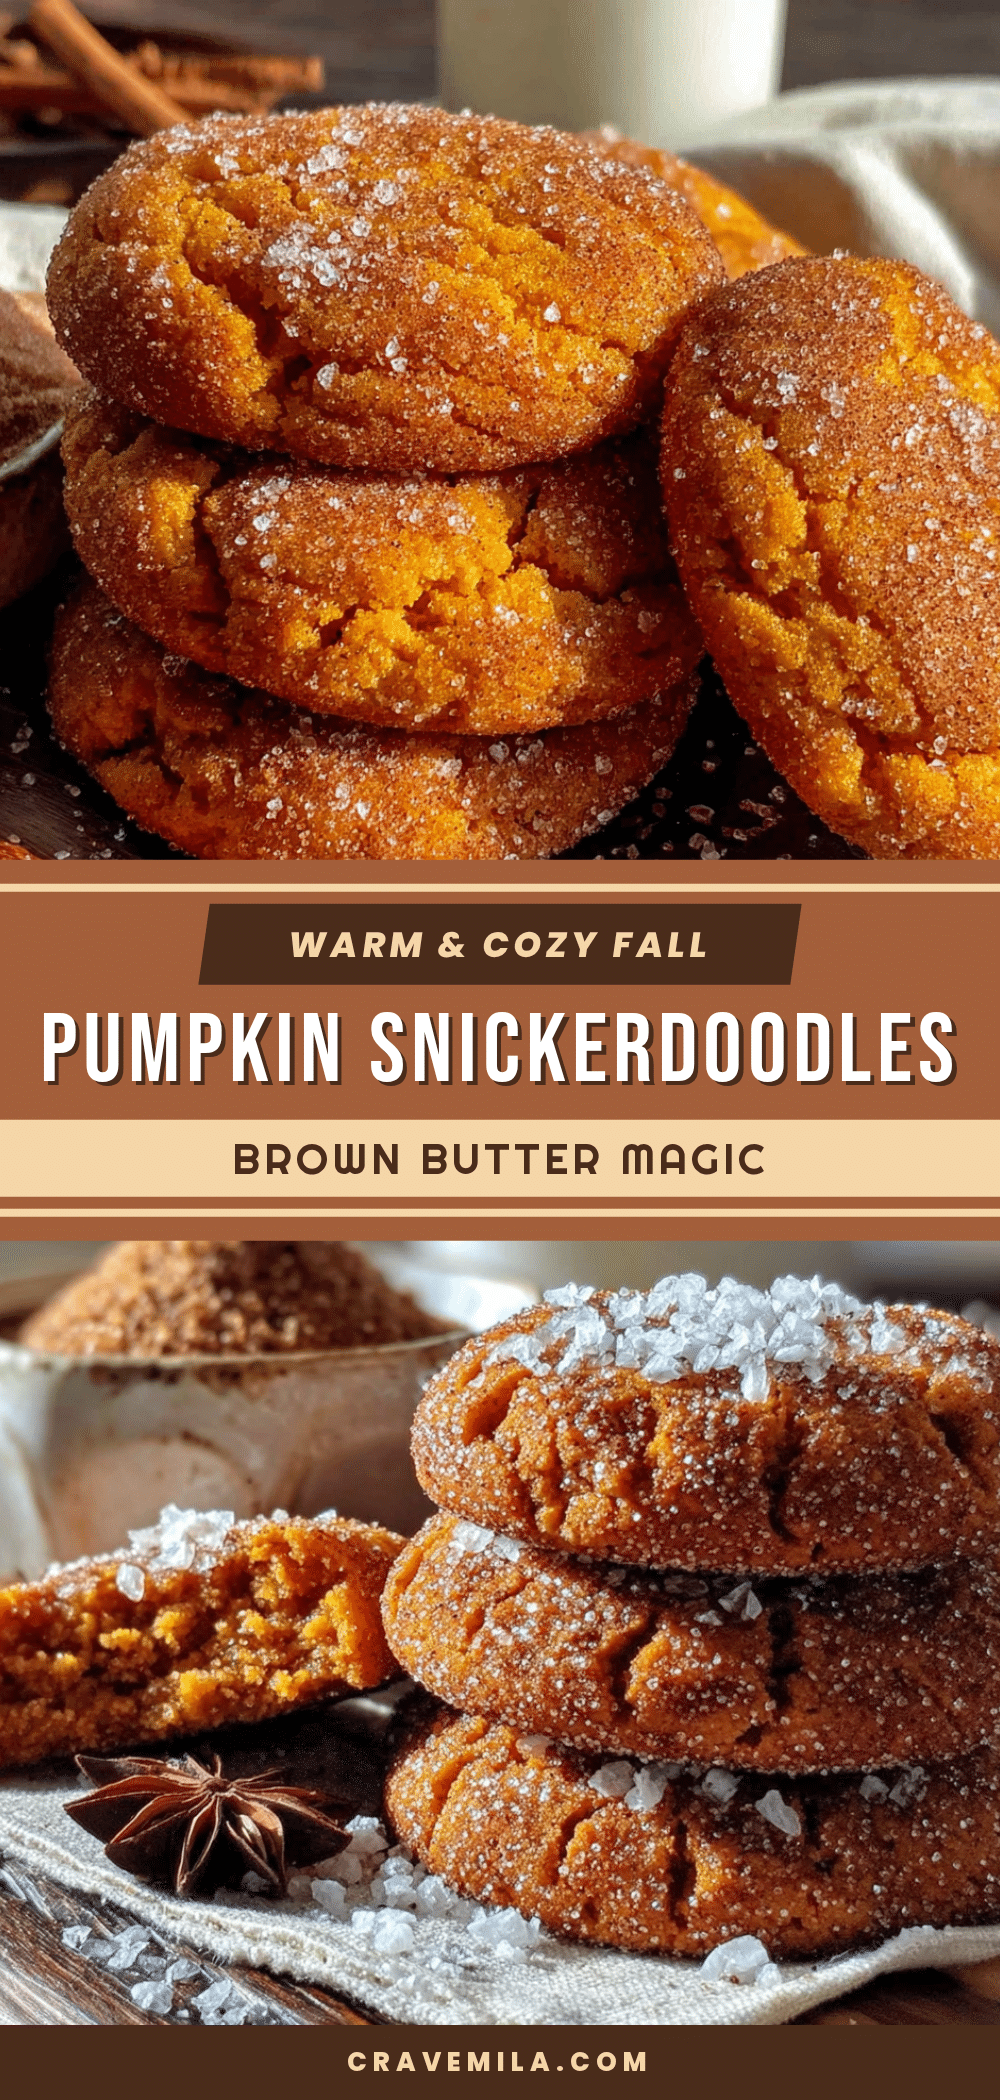
Best Brown Butter Pumpkin Snickerdoodles Recipe
These Brown Butter Pumpkin Snickerdoodles are soft, chewy cookies with a nutty brown butter flavor, warm pumpkin, and a crackly cinnamon-sugar coating. Perfect for fall gatherings, they’re quick to make with simple ingredients and guaranteed to be a crowd-pleaser.
- Prep Time: 30 minutes
- Cook Time: 11 minutes
- Total Time: 1 hour 11 minutes (including 30 minutes chilling)
- Yield: 24-26 cookies 1x
- Category: Dessert
- Cuisine: American
Ingredients
- 1 cup (226g) unsalted butter
- 1 cup (200g) granulated sugar
- 1/2 cup (100g) packed light brown sugar
- 1/2 cup (120g) pumpkin puree (not pumpkin pie filling)
- 1 large egg, room temperature
- 2 teaspoons vanilla extract
- 2 1/2 cups (312g) all-purpose flour
- 1 teaspoon cream of tartar
- 1/2 teaspoon baking soda
- 1/2 teaspoon salt
- 2 teaspoons ground cinnamon
- 1 teaspoon pumpkin pie spice
- 1/4 cup (50g) granulated sugar (for coating)
- 1 tablespoon ground cinnamon (for coating)
Instructions
- Brown the butter: Place 1 cup unsalted butter in a light-colored skillet or saucepan over medium heat. Stir occasionally until melted, foamy, and golden-brown specks form (about 5-7 minutes). Remove from heat immediately and pour into a heatproof bowl. Let cool for 10-15 minutes.
- Mix wet ingredients: In a large mixing bowl, combine cooled brown butter, 1 cup granulated sugar, and 1/2 cup packed brown sugar. Beat with an electric mixer on medium speed for 2 minutes until light and fluffy. Add 1/2 cup pumpkin puree, 1 large egg, and 2 teaspoons vanilla extract. Mix on low until combined. Scrape down sides of bowl.
- Combine dry ingredients: In a separate medium bowl, whisk together 2 1/2 cups all-purpose flour, 1 teaspoon cream of tartar, 1/2 teaspoon baking soda, 1/2 teaspoon salt, 2 teaspoons cinnamon, and 1 teaspoon pumpkin pie spice until no lumps remain.
- Combine wet and dry: Gradually add dry ingredients to wet mixture, mixing on low speed. Add about one-third at a time, mixing just until combined after each addition. Stop when no streaks of flour remain. Fold in last bit by hand if needed.
- Chill dough: Cover bowl with plastic wrap and refrigerate for at least 30 minutes (or freeze for 15 minutes if in a hurry).
- Preheat and prepare: Preheat oven to 350°F (175°C). Line two baking sheets with parchment paper or silicone mats. In a small bowl, mix 1/4 cup granulated sugar and 1 tablespoon cinnamon for coating.
- Shape and coat: Using a cookie scoop or two spoons, portion out rounded tablespoons of dough (about 1.5 tablespoons each). Roll into balls between palms. Drop each ball into cinnamon-sugar mixture and roll to coat thoroughly. Place on prepared baking sheets about 2 inches apart. Makes about 24-26 cookies.
- Bake: Bake one sheet at a time for 10-12 minutes. Cookies should look puffy and slightly cracked on top, with edges set but centers still soft. Do not overbake.
- Cool: Let cookies rest on baking sheet for 5 minutes, then transfer to a wire cooling rack to cool completely.
Notes
Pat pumpkin puree dry with paper towels to remove excess moisture and prevent soggy cookies. Watch butter closely when browning to avoid burning. Chilling dough is essential to prevent flat cookies. For best results, bake one sheet at a time. Cookies taste even better the next day as flavors meld.
Nutrition
- Serving Size: 1 cookie
- Calories: 175
- Sugar: 14
- Sodium: 95
- Fat: 9
- Saturated Fat: 5
- Carbohydrates: 23
- Fiber: 1
- Protein: 2
Keywords: brown butter, pumpkin, snickerdoodles, fall cookies, pumpkin cookies, cinnamon sugar, easy cookie recipe



