My neighbor, a retired butcher named Frank, watched me wrestling with a skillet of sputtering chicken thighs one Tuesday evening and didn’t say anything at first. Then he leaned over the fence and said, “You know, you’re making that harder than it has to be.” He wasn’t being rude—just stating a fact, the way people who’ve spent forty years around meat do. He told me about his air fryer, this gadget his daughter bought him that he’d been skeptical about. “Best thing that’s happened to chicken since someone figured out frying,” he said, and walked back to his garden.
I’ll be honest—I didn’t rush out to buy one that night. But the image stuck with me. A few weeks later, I found a decent air fryer on sale and thought, why not? The first batch of chicken thighs I made came out okay, but not great. The second batch? Better. By the third try, I had it down. Frank was right. The skin turned out shatteringly crisp, the meat stayed juicy, and the whole thing took less than thirty minutes. And here’s the thing—chicken thighs are cheap. You can feed a family of four for under ten bucks, easy.
This recipe started with Frank’s casual advice and turned into a weekly staple at my house. My kids, who usually pick at dinner, actually ask for seconds. My husband, who believes every meal needs some kind of sauce, eats these plain. That’s how I knew I’d stumbled onto something good. Maybe you’ve been there—trying to get dinner on the table without spending a fortune or standing over a hot stove forever. If that sounds familiar, this recipe is for you. It’s simple, it works, and honestly, it might just change the way you cook chicken.
Why You’ll Love This Recipe
I’ve tested this recipe more times than I care to count. I’ve tried different temperatures, different seasonings, different ways of patting the chicken dry. What I’m sharing with you is the version that worked every single time, no matter what air fryer I used. This isn’t just another recipe—it’s the one I’d make for a friend who said they couldn’t cook chicken without drying it out. And you know what? It worked for them too.
- Quick & Easy: From prep to plate in under 30 minutes. No marinating overnight, no complicated steps. Just simple cooking that fits into a busy weeknight.
- Simple Ingredients: You probably have everything in your kitchen right now. Chicken thighs, oil, salt, pepper, garlic powder, paprika. That’s it. No fancy grocery trips required.
- Perfect for Family Dinners: This is the kind of meal that pleases everyone. The kids love the crispy skin, the adults appreciate the flavor, and your budget will thank you.
- Crowd-Pleaser: I’ve served these at potlucks and family gatherings. They disappear fast. People always ask for the recipe, and they’re surprised when I say it’s this simple.
- Unbelievably Delicious: The texture is what gets you. The skin turns golden and crackly, while the meat stays tender and juicy. It’s comfort food that feels indulgent but isn’t.
What makes this recipe different? It’s the technique. Most recipes tell you to just toss the chicken in the air fryer and hope for the best. I’ll show you how to get that perfect crisp every time—no flipping halfway through, no messy cleanup. This is the version I landed on after burning through a few batches (and a few temper tantrums). It’s tested, it’s true, and it’s designed for real families on real budgets.
What Ingredients You Will Need
This recipe uses simple, everyday ingredients to deliver big flavor without breaking the bank. Most of these are pantry staples, so you can make this anytime without a special shopping trip.
- Bone-in, skin-on chicken thighs (4 to 6 thighs, about 2 pounds total) – The bone keeps the meat moist, and the skin gets beautifully crisp. I prefer thighs from a trusted brand like Bell & Evans or just whatever’s on sale at my local grocery store. Look for thighs with even fat distribution and skin that’s intact.
- Olive oil (1 to 2 tablespoons) – Helps the seasoning stick and promotes browning. You can use avocado oil if you prefer a higher smoke point, but olive oil works perfectly here.
- Garlic powder (1 teaspoon) – Adds savory depth without burning like fresh garlic can in the air fryer. I’ve tried both, and garlic powder wins every time for even flavor.
- Paprika (1 teaspoon) – Gives the chicken a beautiful color and a subtle sweetness. Smoked paprika works too if you want a deeper, smokier flavor.
- Onion powder (½ teaspoon) – Rounds out the savory notes. Don’t skip this—it makes a difference.
- Salt (1 teaspoon) – Essential for flavor. I use kosher salt, but table salt works too—just use a little less.
- Black pepper (½ teaspoon) – Freshly ground is best, but pre-ground works in a pinch.
- Optional: dried herbs (½ teaspoon dried thyme or rosemary) – Adds an extra layer of flavor. I sometimes toss in a pinch of dried oregano when I’m feeling Italian-ish.
Substitution Guidance: If you’re feeding picky eaters who don’t like dark meat, you can use boneless, skinless chicken thighs—just reduce the cooking time by about 5 minutes. For a dairy-free option, skip the butter (there’s none in this recipe anyway, so you’re good). For a gluten-free meal, this is naturally gluten-free as written. If you want to switch up the seasoning, try a pre-made blend like Cajun seasoning for a spicy kick or lemon pepper for a brighter flavor.
Equipment Needed
You don’t need much for this recipe, which is part of why I love it. Here’s what you’ll need:
- Air fryer (any size that fits 4 to 6 thighs in a single layer) – I use a 5.8-quart basket-style air fryer, but a larger oven-style model works too. If you’re new to air fryers, start with a mid-range model—you don’t need the most expensive one. I’ve used a $40 model that worked just as well as a $150 one.
- Paper towels – For patting the chicken dry. This step is crucial, so don’t skip it.
- Mixing bowl – Any medium bowl works for tossing the chicken with oil and seasonings.
- Tongs – For placing the chicken in the air fryer and removing it safely. Silicone-tipped ones won’t scratch the basket.
- Meat thermometer – Optional but recommended. It takes the guesswork out of knowing when the chicken is done. A simple instant-read thermometer costs about $10 and is worth every penny.
- Cutting board and knife – For trimming any excess fat or skin if needed.
Budget-friendly tip: If you don’t have an air fryer, you can make a version of this in a convection oven or even a regular oven at 425°F. The cooking time will be longer (about 35 to 40 minutes), and the skin won’t be quite as crispy, but it’ll still be delicious.
Preparation Method
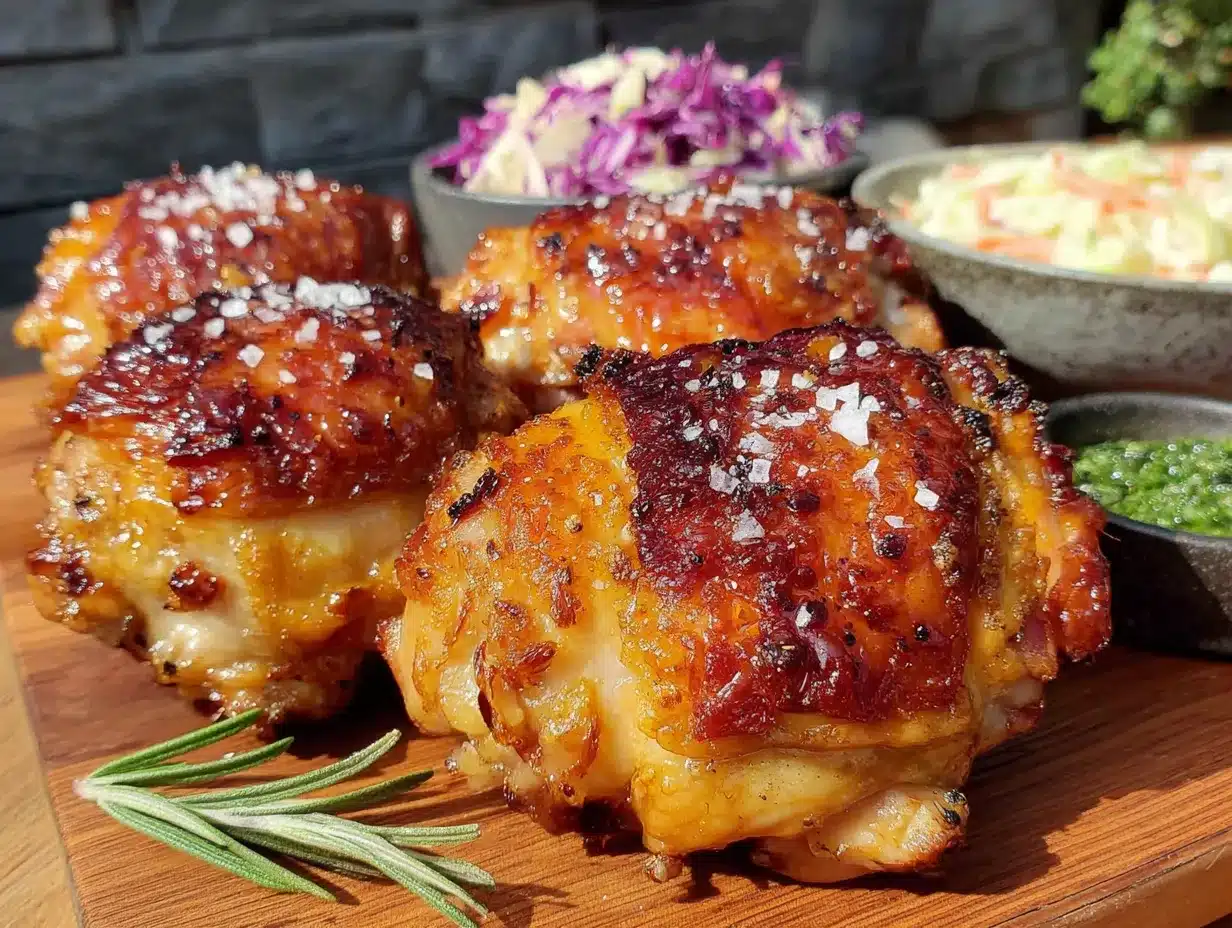
- Pat the chicken dry. This is the most important step. Take your chicken thighs out of the package and pat them dry with paper towels. Get every bit of moisture you can. Wet skin won’t crisp up—it’ll steam instead. I usually use 3 or 4 paper towels per batch. Don’t be shy about it.
- Season the chicken. In a mixing bowl, combine the olive oil, garlic powder, paprika, onion powder, salt, pepper, and any dried herbs you’re using. Add the chicken thighs and toss until each piece is evenly coated. Make sure the seasoning gets under the skin too—gently lift the skin with your fingers and rub a little seasoning underneath. This adds flavor directly to the meat.
- Preheat the air fryer. Set your air fryer to 380°F (193°C) and let it preheat for 3 to 5 minutes. Preheating ensures the chicken starts cooking immediately, which helps the skin crisp up faster.
- Arrange the chicken. Place the seasoned chicken thighs in the air fryer basket in a single layer. Make sure they’re not touching each other—if they’re crowded, they’ll steam instead of crisp. If you have more than 4 thighs, cook them in batches. I know it’s tempting to cram them all in, but trust me, the extra few minutes are worth it for that perfect crunch.
- Cook for 20 to 22 minutes. Place the basket in the air fryer and cook at 380°F for 10 minutes. Then flip each thigh using tongs and cook for another 10 to 12 minutes. The chicken is done when the internal temperature reaches 165°F (74°C) at the thickest part of the thigh, near the bone. The skin should be golden brown and crispy.
- Let it rest. Once the chicken is cooked, remove it from the air fryer and let it rest on a cutting board or plate for 5 minutes. This allows the juices to redistribute, keeping the meat moist. I know it’s hard to wait, but this step really matters.
- Serve and enjoy. Serve the chicken thighs hot, with your favorite sides. The skin will stay crispy for about 10 to 15 minutes, so eat up while they’re at their best.
Troubleshooting tip: If your chicken skin isn’t getting as crispy as you’d like, try increasing the temperature to 400°F for the last 3 minutes of cooking. Keep an eye on it so it doesn’t burn. Also, make sure you’re not overcrowding the basket—that’s the most common mistake.
Cooking Tips & Techniques
I’ve made this recipe more times than I can count, and I’ve learned a few things along the way. Here are the tips that made the biggest difference for me:
- Dry the chicken thoroughly. I can’t say this enough. Moisture is the enemy of crispiness. If you have time, let the seasoned chicken sit uncovered in the fridge for 30 minutes before cooking. This dries out the skin even more, resulting in an extra-crispy finish.
- Don’t skip the flip. Flipping the chicken halfway through ensures even cooking and browning. I’ve tried cooking them without flipping, and the bottom side always ends up pale and soggy. It’s worth the extra minute.
- Use a meat thermometer. Chicken thighs can handle a little extra cooking time without drying out, but you still want to hit that 165°F mark. An instant-read thermometer takes the guesswork out of it. I’ve had too many batches where I cut into the chicken only to find pink near the bone—never again.
- Season generously. Chicken thighs can handle more seasoning than you think. Don’t be shy with the salt and spices. I learned this the hard way after a few bland batches. The seasoning should be visible on the skin, not just a light dusting.
- Let the air fryer preheat. This is a small step that makes a big difference. A preheated air fryer starts cooking the chicken immediately, which helps the skin crisp up faster. I set a timer for 3 minutes before I start seasoning the chicken.
- Clean your air fryer basket. A greasy basket can cause smoking and uneven cooking. I wash mine after every use with warm soapy water. It takes two minutes and saves a lot of hassle later.
A lesson from my own kitchen: The first time I made these, I forgot to pat the chicken dry. I was in a hurry, and I figured it wouldn’t matter. The skin came out soft and flabby, and the seasoning slid right off. My family ate it, but nobody was impressed. That mistake taught me more than any successful batch ever did. Now I always take that extra 30 seconds to dry the chicken properly. It’s the difference between good chicken and great chicken.
Variations & Adaptations
This recipe is a great starting point, but don’t be afraid to make it your own. Here are some variations I’ve tried and loved:
- Spicy version: Add ½ teaspoon of cayenne pepper or red pepper flakes to the seasoning mix. My husband loves this version—he says it wakes up the chicken. Just be careful not to overdo it if you’re serving kids.
- Lemon herb version: Add the zest of one lemon and 1 teaspoon of dried thyme or rosemary to the seasoning. Squeeze a little fresh lemon juice over the cooked chicken before serving. This version is bright and fresh, perfect for spring or summer dinners.
- BBQ version: After cooking, brush the chicken with your favorite barbecue sauce and return to the air fryer for 2 to 3 minutes. The sauce caramelizes and creates a sticky, sweet glaze. My kids go crazy for this version.
- Garlic parmesan version: After cooking, sprinkle the chicken with grated parmesan cheese and a pinch of garlic powder. Return to the air fryer for 1 to 2 minutes until the cheese melts. This is rich and indulgent—save it for a special treat.
- Dietary adaptation: For a lower-fat option, remove the skin before seasoning and cooking. The meat will still be juicy, and you’ll save on calories. For a keto-friendly meal, serve with roasted vegetables instead of carbs.
My personal favorite variation: I love adding a tablespoon of honey to the seasoning mix. It creates a sweet and savory crust that’s absolutely addictive. Just be careful not to burn the honey—keep an eye on the chicken during the last few minutes of cooking. I learned this the hard way when I walked away and came back to slightly charred chicken. It was still edible, but not my finest moment.
Serving & Storage Suggestions
These crispy air fryer chicken thighs are best served hot, right out of the air fryer. The skin stays crispy for about 10 to 15 minutes, so I like to serve them as soon as they’re done. Here are my favorite ways to enjoy them:
- Serving temperature: Serve hot, straight from the air fryer. If you’re making a larger batch, keep the cooked chicken warm in a 200°F oven while you finish the rest. Place them on a wire rack set over a baking sheet so the air circulates and the skin stays crisp.
- Side dish ideas: These chicken thighs pair beautifully with simple sides. I love serving them with garlic mashed potatoes and a green salad, or with roasted vegetables like broccoli, carrots, or asparagus. For a budget-friendly meal, serve with rice and steamed green beans. The chicken is flavorful enough to carry the whole plate.
- Beverage pairing: A crisp white wine like Sauvignon Blanc or a light beer like a pilsner complements the savory flavors. For a non-alcoholic option, try iced tea with a squeeze of lemon.
- Storage: Store leftover chicken in an airtight container in the refrigerator for up to 4 days. The skin will lose its crispiness, but the meat will stay moist. I usually remove the skin before storing and crisp it up separately later.
- Reheating: To reheat, place the chicken in the air fryer at 350°F for 3 to 4 minutes. This brings back some of the crispiness. You can also reheat in a 375°F oven for about 10 minutes. Avoid the microwave—it will make the skin soggy.
- Freezing: Cooked chicken thighs freeze well for up to 3 months. Let them cool completely, then wrap each piece individually in plastic wrap and place in a freezer-safe bag. To reheat, thaw in the refrigerator overnight and then warm in the air fryer or oven.
Flavor development note: These chicken thighs are delicious fresh, but the flavors actually deepen after a day in the fridge. If you’re meal-prepping, cook them a day ahead and reheat them—they’ll taste even better. I’ve done this for busy weeks, and my family never complains.
Nutritional Information & Benefits
Here’s an estimated nutritional breakdown for one serving (one chicken thigh with skin):
- Calories: 250-300
- Protein: 22-25 grams
- Fat: 18-20 grams
- Carbohydrates: 1-2 grams
- Fiber: 0 grams
- Sugar: 0 grams
- Sodium: 400-500 mg (varies based on salt used)
Health benefits: Chicken thighs are an excellent source of high-quality protein, which supports muscle growth and repair. They also provide essential B vitamins, particularly B6 and B12, which help with energy metabolism. The dark meat contains more iron and zinc than chicken breast, making it a great choice for maintaining healthy blood and immune function. And because you’re using an air fryer instead of deep-frying, you’re cutting down on added fat and calories without sacrificing flavor.
Dietary considerations: This recipe is naturally gluten-free, low-carb, and keto-friendly. It contains no dairy, making it suitable for lactose-intolerant diets. If you need to reduce sodium, use a salt-free seasoning blend or cut the salt in half. The only potential allergen is the chicken itself, so this is a safe option for most people.
My personal take: I love that this recipe lets me serve a satisfying, flavorful meal without feeling guilty. The air fryer gives me that crispy texture I crave without the mess and extra oil of traditional frying. It’s a win for my family’s taste buds and my peace of mind.
Conclusion
This crispy air fryer chicken thighs recipe has become a staple in my kitchen, and I hope it becomes one in yours too. It’s simple, affordable, and delivers results that taste like you spent hours in the kitchen—when really, it’s just 30 minutes and a handful of ingredients. The best part? You can customize it to fit your family’s tastes, whether that means adding heat, herbs, or a sweet glaze.
I love this recipe because it reminds me that good food doesn’t have to be complicated or expensive. It’s about using what you have, trusting the process, and sharing a meal with the people you care about. That’s what cooking is all about, isn’t it?
I’d love to hear how this recipe turns out for you. Did you try a variation? Did your kids ask for seconds? Drop a comment below and let me know—I read every single one. And if you loved this recipe, share it with a friend who needs an easy weeknight dinner win. Happy cooking!
Frequently Asked Questions
Can I use boneless, skinless chicken thighs?
Yes, you can. Boneless, skinless thighs will cook faster—about 12 to 15 minutes at 380°F. The texture will be different (less crispy), but the meat will still be juicy and flavorful. Just make sure to pat them dry and season well.
Do I need to flip the chicken halfway through?
Yes, flipping is important for even cooking and browning. The bottom of the chicken won’t get as crispy if you don’t flip it. I use tongs to flip each piece carefully after 10 minutes of cooking.
How do I keep the skin crispy if I’m cooking in batches?
Place the cooked chicken on a wire rack set over a baking sheet in a 200°F oven. The air circulation helps keep the skin crispy while you finish the remaining batches. Don’t stack the pieces on top of each other.
Can I marinate the chicken overnight?
Absolutely. If you want deeper flavor, marinate the chicken in the seasoning mixture (add a tablespoon of lemon juice or vinegar) for 2 to 8 hours in the refrigerator. Just pat it dry again before cooking to ensure crispiness.
What if my air fryer is smaller than 5 quarts?
No problem. Just cook the chicken in smaller batches to avoid overcrowding. A smaller air fryer might need an extra minute or two of cooking time. Use a meat thermometer to check for doneness—it’s the most reliable method.
Pin This Recipe!

Crispy Air Fryer Chicken Thighs: Best Easy Budget Dinner

Shatteringly crispy skin, juicy meat, and ready in under 30 minutes. This simple, affordable recipe uses basic pantry ingredients and an air fryer to deliver perfect chicken thighs every time—no fuss, no mess, just delicious results the whole family will love.
- Prep Time: 10 minutes
- Cook Time: 20 to 22 minutes
- Total Time: 30 to 32 minutes
- Yield: 4 servings 1x
- Category: Main Course
- Cuisine: American
Ingredients
- 4 to 6 bone-in, skin-on chicken thighs (about 2 pounds total)
- 1 to 2 tablespoons olive oil
- 1 teaspoon garlic powder
- 1 teaspoon paprika
- ½ teaspoon onion powder
- 1 teaspoon kosher salt
- ½ teaspoon black pepper, freshly ground
- ½ teaspoon dried thyme or rosemary (optional)
Instructions
- Pat the chicken thighs dry thoroughly with paper towels, removing as much moisture as possible.
- In a mixing bowl, combine olive oil, garlic powder, paprika, onion powder, salt, pepper, and any dried herbs. Add chicken thighs and toss until evenly coated. Gently lift the skin and rub some seasoning underneath.
- Preheat the air fryer to 380°F (193°C) for 3 to 5 minutes.
- Arrange the seasoned chicken thighs in the air fryer basket in a single layer, ensuring they are not touching. Cook in batches if necessary.
- Cook at 380°F for 10 minutes. Flip each thigh using tongs, then cook for another 10 to 12 minutes, until the internal temperature reaches 165°F (74°C) at the thickest part near the bone and the skin is golden brown and crispy.
- Remove chicken from the air fryer and let rest on a cutting board or plate for 5 minutes before serving.
- Serve hot. The skin stays crispy for about 10 to 15 minutes.
Notes
Patting the chicken dry is crucial for crispy skin. For extra crispiness, let seasoned chicken sit uncovered in the fridge for 30 minutes before cooking. If skin isn’t crispy enough, increase temperature to 400°F for the last 3 minutes. Do not overcrowd the basket. Leftovers can be stored in an airtight container in the refrigerator for up to 4 days; reheat in the air fryer at 350°F for 3 to 4 minutes to restore crispiness.
Nutrition
- Serving Size: 1 chicken thigh with
- Calories: 250300
- Sodium: 400500
- Fat: 1820
- Saturated Fat: 56
- Carbohydrates: 12
- Protein: 2225
Keywords: air fryer chicken thighs, crispy chicken thighs, easy chicken dinner, budget chicken recipe, quick chicken recipe, air fryer recipe, family dinner



