This was supposed to be a layered peppermint cheesecake. I had the springform pan out, the cream cheese softening on the counter, and a whole plan mapped out in my head. But somewhere between digging through the pantry for graham crackers and realizing I only had dark chocolate—not the semi-sweet I needed for the ganache layer—things went sideways. The oven was preheating, I was already running late for a holiday cookie swap, and honestly, I just stood there staring at the mess I’d created. You know that feeling when you’re one ingredient short and thirty minutes behind? That was me, holding a block of cream cheese and wondering if I should just give up on the whole idea.
Then I looked at the bag of candy canes sitting next to the dark chocolate bars, and something clicked. Forget the cheesecake. What if I just melted this chocolate, crushed those candy canes, and made something simple? I mean, really simple. No baking, no fuss, no layers of filling. Just chocolate and peppermint, pressed thin and broken into pieces. It felt like cheating, honestly. Like I was taking the easy way out. But I grabbed the wrong chocolate anyway—dark instead of semi-sweet—and started melting.
The first batch came out looking like a toddler had decorated it. The white chocolate seized up because I got distracted answering a text, and the peppermint pieces were so uneven they looked like gravel. I almost threw it all in the trash. But I broke off a piece to taste, and let me tell you—that first bite stopped me cold. The dark chocolate was rich and deep, the white chocolate was sweet and creamy, and the peppermint cut through everything with this bright, cool crunch. It was nothing like the cheesecake I’d planned. It was better. I ended up bringing a whole tray to that cookie swap, and people asked for the recipe before they even asked what was in the punch bowl. That was three holidays ago, and I haven’t made the cheesecake since.
Why You’ll Love This Recipe
Listen, I’ve tested this holiday peppermint bark more times than I care to admit. The first few batches were disasters—seized chocolate, greasy streaks, peppermint pieces that sank to the bottom. But after about six attempts, I landed on a method that works every single time. No double boiler required, no fancy equipment, and definitely no stress. Here’s why this recipe is worth your time:
- Incredibly Easy: We’re talking five minutes of active prep and zero baking. If you can melt chocolate in the microwave, you can make this bark.
- Simple Ingredients: Dark chocolate, white chocolate, coconut oil (the secret weapon), and candy canes. That’s it. No weird extracts or specialty items.
- Perfect for the Holidays: This bark is made for cookie exchanges, hostess gifts, holiday parties, and those last-minute “oh no, I need something to bring” moments.
- Always a Crowd-Pleaser: I’ve watched people who “don’t like peppermint” go back for thirds. The combination of dark and white chocolate balances the mint perfectly.
- Unbelievably Beautiful: That crackled top with the white chocolate swirl and red peppermint pieces? It looks like you spent hours on it. You didn’t.
What makes this version different from all the other peppermint bark recipes out there? Two things. First, the coconut oil. A tiny amount keeps the chocolate from seizing and gives it that satisfying snap when you break it. Second, the method—layering the white chocolate on top while the dark is still warm creates this beautiful marbled effect without any extra work. It’s not just another bark recipe. It’s the one that makes people close their eyes after the first bite and say, “Okay, this is really good.”
This is comfort food for the holiday season. It’s simple enough to make with kids, elegant enough to gift in a pretty tin, and satisfying enough to keep a stash hidden in your own freezer. Trust me on this one.
What Ingredients You Will Need
This recipe uses a short list of simple ingredients, but each one plays a specific role. Don’t skip the coconut oil—it’s the trick that keeps everything smooth and snappy.
For the Dark Chocolate Layer
- 12 ounces dark chocolate (60-70% cacao), finely chopped (I prefer Ghirardelli or Lindt for consistent melting)
- 1 teaspoon coconut oil (unrefined or refined—both work; this prevents seizing)
For the White Chocolate Layer
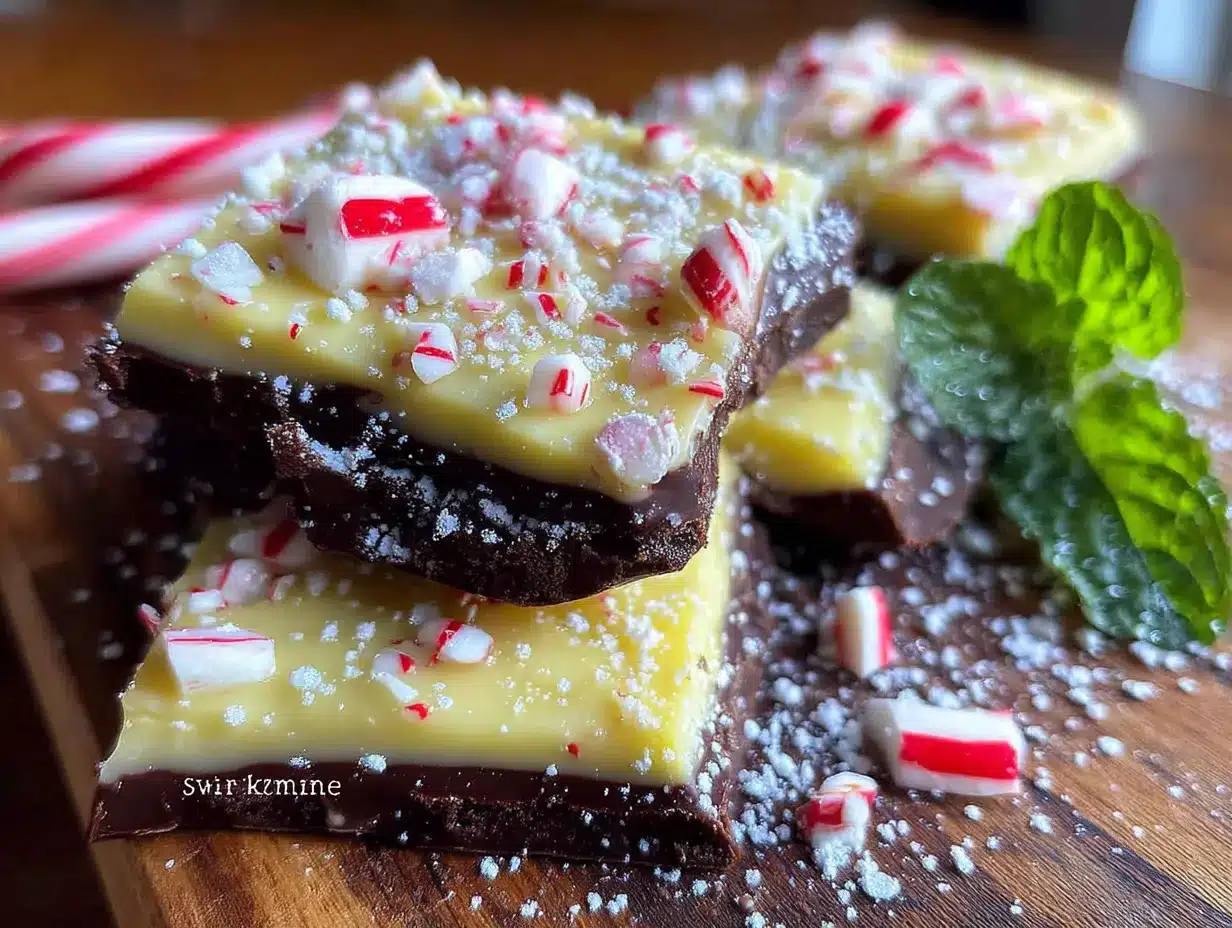
- 12 ounces white chocolate, finely chopped (use a good brand like Ghirardelli or Callebaut—cheap white chocolate can be grainy)
- 1 teaspoon coconut oil
For the Topping
- 1 cup crushed candy canes (about 6-8 large candy canes; crush them yourself for the best texture)
- Optional: ¼ teaspoon peppermint extract (add to the white chocolate if you want a stronger mint kick)
A few notes on ingredients. For the dark chocolate, I recommend staying in the 60-70% range. Anything darker can taste bitter against the sweet white chocolate, and anything lighter won’t give you that nice contrast. For the white chocolate, look for one that lists cocoa butter as an ingredient—not just palm oil or vegetable fats. The texture will be creamier and the flavor will be richer.
The candy canes are worth crushing yourself. The pre-crushed stuff in the baking aisle is often too fine and can turn into dust. I put my candy canes in a zip-top bag, wrap it in a kitchen towel, and go at it with a rolling pin. You want a mix of small pieces and a little bit of powder—the powder creates that pretty pink tint on the white chocolate.
If you’re dairy-free, look for dark chocolate that’s labeled dairy-free (many are) and a vegan white chocolate alternative. The coconut oil works perfectly with both.
Equipment Needed
You don’t need much for this recipe, which is part of the beauty. Here’s what you’ll need:
- Baking sheet (standard half-sheet size, about 13×18 inches)
- Parchment paper (don’t skip this—it’s essential for easy removal)
- Medium microwave-safe bowls (two of them, one for each chocolate)
- Rubber spatula (for spreading the chocolate evenly)
- Rolling pin or meat mallet (for crushing candy canes)
- Zip-top bag and kitchen towel (for the candy cane crushing setup)
- Sharp knife (for cutting the bark into pieces after it sets)
If you don’t have a microwave, you can melt the chocolate using a double boiler. Just put a heatproof bowl over a pot of simmering water (make sure the bowl doesn’t touch the water) and stir until smooth. I’ve done it both ways, and honestly, the microwave is faster and less messy. Just use short bursts and stir often.
For the baking sheet, any size works as long as it has a rim. You’ll spread the chocolate to about ¼-inch thickness, so a larger sheet gives you thinner bark and more pieces. A smaller sheet makes thicker, chunkier bark. Both are delicious.
Preparation Method
Let’s make some bark. This is straightforward, but there are a few moments where paying attention makes the difference between perfect bark and a seized mess. I’ve made both, so trust me on the details.
Step 1: Prepare Your Workspace
Line your baking sheet with parchment paper, making sure the paper comes up the sides a bit. Crush your candy canes and set them aside. Have everything ready before you start melting chocolate—once you start, you won’t want to stop.
Step 2: Melt the Dark Chocolate
Place the chopped dark chocolate and ½ teaspoon of coconut oil in a microwave-safe bowl. Microwave in 30-second bursts at 50% power, stirring well after each burst. It usually takes about 1½ to 2 minutes total. The chocolate should be mostly melted with just a few small pieces remaining—stir until those last pieces melt from the residual heat. Do not overheat, or the chocolate will seize and turn grainy. (I learned this the hard way. Twice.)
Step 3: Spread the Dark Chocolate Layer
Pour the melted dark chocolate onto the center of your parchment-lined baking sheet. Use a rubber spatula to spread it into an even rectangle, about ¼-inch thick. Don’t worry about making it perfect—the rustic edges are part of the charm. Set the sheet aside for 5 minutes to let the chocolate cool slightly.
Step 4: Melt the White Chocolate
While the dark chocolate is cooling, melt the white chocolate with the remaining ½ teaspoon of coconut oil in a separate microwave-safe bowl. Use the same method: 30-second bursts at 50% power, stirring well each time. White chocolate is more delicate than dark, so be extra careful not to overheat it. If it starts to look thick and pasty, you’ve gone too far—add another ½ teaspoon of coconut oil and stir vigorously to bring it back.
Step 5: Layer the White Chocolate
Here’s where the magic happens. Pour the melted white chocolate over the slightly cooled dark chocolate layer. Don’t spread it perfectly—let it pool and swirl naturally. Use the spatula to gently spread it to the edges, but leave some areas where the dark chocolate peeks through. This creates that beautiful marbled look without any extra effort.
Step 6: Add the Peppermint
Immediately sprinkle the crushed candy canes evenly over the white chocolate layer. Press them in gently with your fingers or the spatula so they stick. Work quickly—the white chocolate will start to set, and you want the candy canes to embed themselves.
Step 7: Let It Set
Place the baking sheet in the refrigerator for at least 1 hour, or until the bark is completely firm and snaps when you press it. If you’re in a hurry, 30 minutes in the freezer works too. Just don’t leave it in the freezer for more than 2 hours, or the chocolate can develop condensation when you bring it out.
Step 8: Break or Cut
Once the bark is fully set, lift the parchment paper out of the baking sheet and place it on a cutting board. You can break the bark into irregular pieces with your hands for a rustic look, or use a sharp knife to cut it into clean squares. I prefer breaking it—the uneven edges look more homemade and inviting.
Cooking Tips & Techniques
After making this bark more times than I can count, I’ve picked up a few tricks that make a real difference. Here’s what I wish someone had told me before my first attempt.
Don’t skip the coconut oil. I know it seems like a small detail, but that tiny amount of fat stabilizes the chocolate and prevents it from seizing. It also gives the bark that satisfying snap when you break it. I’ve made batches without it, and they were dull and crumbly. Never again.
Temper your chocolate if you want it shiny. For most home cooks, the microwave method works fine. But if you’re making this bark for gifts and want that glossy, professional look, learn to temper your chocolate. It’s not hard—you just melt two-thirds of the chocolate, then stir in the remaining third until it melts and cools the mixture. The result is a shiny, snappy bark that stays firm at room temperature.
Watch your timing on the layers. The dark chocolate layer needs to cool for about 5 minutes before you add the white chocolate. If it’s too hot, the white chocolate will melt into it and you’ll lose the distinct layers. If it’s too cold, the white chocolate won’t stick and will peel off later. Five minutes is the sweet spot.
Crush candy canes strategically. Put them in a zip-top bag, wrap the bag in a kitchen towel (this is crucial—it muffles the sound and keeps the bag from tearing), and whack them with a rolling pin. You want a mix of fine dust and small chunks. The dust creates that pretty pink tint, and the chunks give you something to bite into.
One mistake I made early on: I used pre-crushed peppermint from the baking aisle. It was too fine and basically dissolved into the white chocolate, leaving no texture. Crush your own. It takes two minutes and makes a huge difference.
Variations & Adaptations
This recipe is incredibly flexible. Here are a few ways I’ve adapted it over the years:
Milk Chocolate Version
If dark chocolate isn’t your thing, swap it for milk chocolate. The result is sweeter and creamier, with a more subtle peppermint flavor. I make this version for my niece, who finds dark chocolate too bitter. Just use the same quantities and melting method.
Vegan & Dairy-Free
Use dairy-free dark chocolate (many brands are naturally dairy-free) and a vegan white chocolate alternative. The coconut oil works perfectly with both. I’ve tested this with Enjoy Life brand white chocolate chips, and the texture was spot-on. Just be extra careful not to overheat the vegan white chocolate—it’s more sensitive than regular white chocolate.
Extra Peppermint Kick
Add ¼ teaspoon of peppermint extract to the white chocolate before spreading. This gives the bark a stronger mint flavor that cuts through the sweetness. I do this when I’m making the bark for adults who want a more intense peppermint experience. Just don’t add too much—peppermint extract is potent, and a little goes a long way.
Topping Variations
Swap the candy canes for crushed peppermint candies, or add a sprinkle of flaky sea salt on top for a sweet-salty contrast. I’ve also tried it with crushed gingerbread cookies mixed into the white chocolate, and it was surprisingly good. Get creative with what you have on hand.
Gift-Worthy Presentation
For holiday gifts, I cut the bark into clean squares and layer them in a tin with parchment paper between each layer. Add a ribbon and a tag with the recipe, and you’ve got a homemade gift that looks like it came from a fancy bakery.
Serving & Storage Suggestions
This bark is best served cold or at cool room temperature. If your kitchen is warm, keep it in the refrigerator until just before serving. The chocolate softens quickly, and you want that satisfying snap when someone bites into it.
For serving, I like to arrange the pieces on a white platter or in a festive tin. The contrast between the dark chocolate, white chocolate, and red peppermint pieces is stunning. Add a few whole candy canes around the platter for a decorative touch.
Storage is simple. Keep the bark in an airtight container in the refrigerator for up to 2 weeks. It also freezes beautifully—layer it between sheets of parchment paper in a freezer-safe container, and it’ll keep for up to 3 months. Just let it come to room temperature for about 10 minutes before serving.
One thing I’ve noticed: the flavors actually improve after a day or two. The peppermint mellows out and melds with the chocolate, creating a more balanced taste. So don’t worry if you make it a few days ahead—it might be even better.
Nutritional Information & Benefits
Let’s be real—this is a treat, not a health food. But here’s the nutritional breakdown for a 2-ounce serving (about one large piece):
- Calories: 280
- Fat: 18g
- Carbohydrates: 30g
- Sugar: 24g
- Protein: 3g
- Fiber: 2g
The dark chocolate does offer some health benefits—it’s rich in antioxidants called flavonoids, which can support heart health. And the peppermint can aid digestion, so at least there’s that. But honestly, this bark is about joy, not nutrition. It’s a holiday treat meant to be shared and enjoyed in moderation.
If you’re watching your sugar intake, you can use a sugar-free dark chocolate and a sugar-free white chocolate alternative. The texture will be slightly different, but the flavor will still be great. I’ve made it this way for my dad, who has diabetes, and he loved it.
Conclusion
This holiday peppermint bark started as a kitchen accident—a moment of frustration that turned into something I genuinely look forward to making every year. It’s simple enough for a weekday afternoon, elegant enough for holiday parties, and forgiving enough for even the most distracted cook. I love that about it.
I hope you’ll try this recipe and make it your own. Maybe you’ll add a sprinkle of sea salt, or swap the dark chocolate for milk, or double the peppermint for an extra kick. Whatever you do, I’d love to hear about it. Drop a comment below and tell me how your bark turned out—or share a photo on Pinterest and tag me. There’s nothing better than seeing someone else fall in love with a recipe that started as a happy accident.
Happy holidays, and happy breaking!
Frequently Asked Questions
Can I use chocolate chips instead of chopped chocolate?
Yes, but chocolate chips contain stabilizers that help them hold their shape, so they don’t melt as smoothly. If you use chips, add an extra teaspoon of coconut oil to help them melt evenly. I’ve done it, and it works fine—the texture is just slightly less smooth.
Why did my white chocolate seize up?
White chocolate is more delicate than dark chocolate and seizes easily if overheated or if it comes into contact with even a drop of water. Always use a clean, dry bowl, and microwave in short bursts at 50% power. If it does seize, stir in a teaspoon of coconut oil or heavy cream to bring it back.
How do I crush candy canes without making a mess?
Put the candy canes in a sturdy zip-top bag, wrap the bag in a kitchen towel (this muffles the sound and prevents punctures), and go at it with a rolling pin or meat mallet. The towel catches any sharp pieces and keeps everything contained.
Can I make this bark ahead of time?
Absolutely. The bark keeps in the refrigerator for up to 2 weeks in an airtight container, and it freezes beautifully for up to 3 months. The flavors actually meld and improve after a day or two, so making it ahead is a great idea.
How do I get clean cuts instead of breaking the bark?
Use a sharp chef’s knife and score the bark while it’s still slightly cool but not fully set. Then refrigerate until firm and cut along the scored lines. For the cleanest cuts, warm the knife under hot water, dry it, and make one smooth cut at a time. Wipe the blade clean between cuts.
Pin This Recipe!
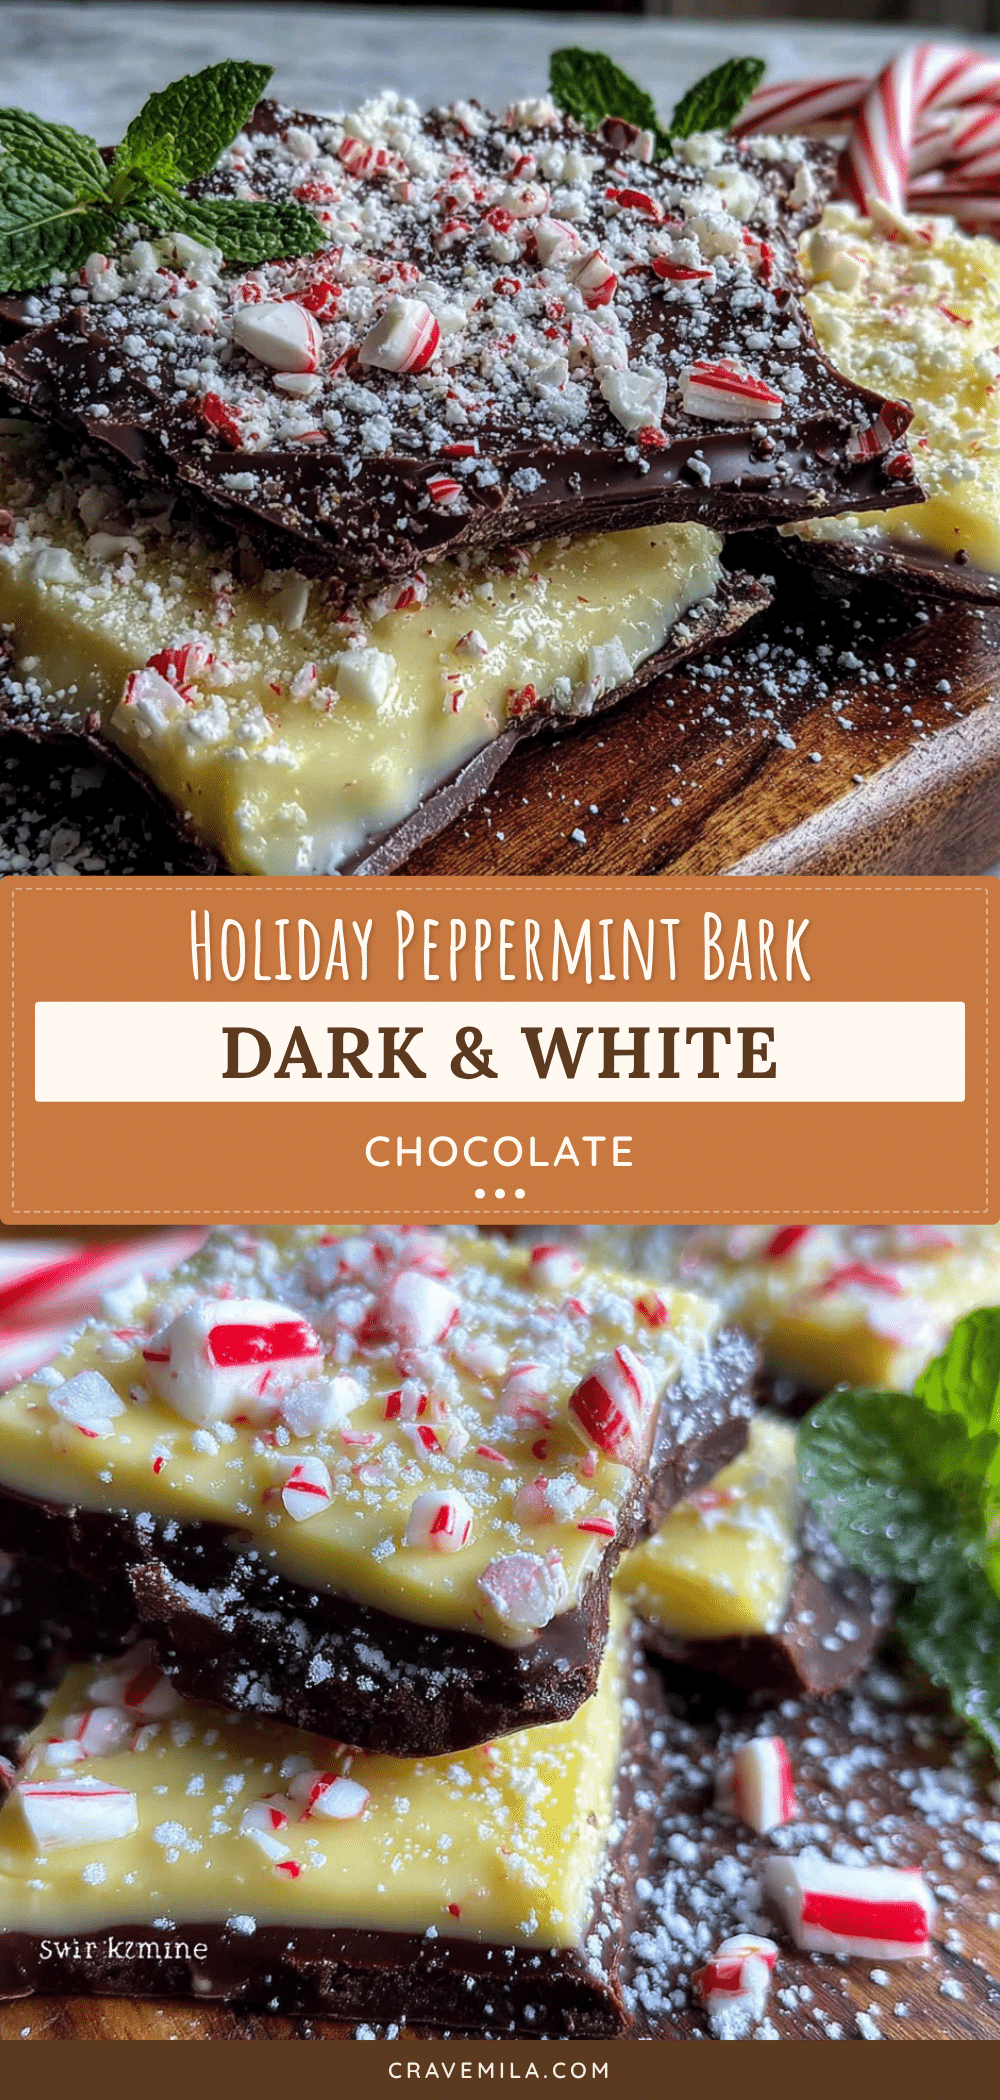
Holiday Peppermint Bark: Easy Dark & White Chocolate Recipe
This easy peppermint bark recipe combines dark and white chocolate with crushed candy canes for a simple, no-bake holiday treat that’s perfect for gift-giving or cookie swaps.
- Prep Time: 15 minutes
- Cook Time: 5 minutes
- Total Time: 1 hour 20 minutes (including chilling)
- Yield: 12 servings 1x
- Category: Dessert
- Cuisine: American
Ingredients
- 12 ounces dark chocolate (60-70% cacao), finely chopped
- 1 teaspoon coconut oil, divided
- 12 ounces white chocolate, finely chopped
- 1 cup crushed candy canes (about 6–8 large candy canes)
- Optional: ¼ teaspoon peppermint extract
Instructions
- Line a baking sheet with parchment paper. Crush candy canes and set aside.
- Place chopped dark chocolate and ½ teaspoon coconut oil in a microwave-safe bowl. Microwave in 30-second bursts at 50% power, stirring after each, until mostly melted (about 1½-2 minutes). Stir until smooth.
- Pour melted dark chocolate onto prepared baking sheet and spread into an even ¼-inch thick rectangle. Let cool for 5 minutes.
- In a separate microwave-safe bowl, melt white chocolate with remaining ½ teaspoon coconut oil using the same method (30-second bursts at 50% power). Stir until smooth.
- Pour melted white chocolate over the slightly cooled dark chocolate layer. Spread gently to edges, leaving some dark chocolate exposed for a marbled effect.
- Immediately sprinkle crushed candy canes evenly over the white chocolate layer. Gently press them in.
- Refrigerate for at least 1 hour (or freeze for 30 minutes) until completely firm.
- Lift parchment paper from baking sheet. Break bark into irregular pieces or cut into squares with a sharp knife.
Notes
Don’t skip the coconut oil—it prevents seizing and gives the bark a satisfying snap. Crush candy canes yourself for the best texture. The dark chocolate layer should cool for about 5 minutes before adding white chocolate to ensure distinct layers. Store in an airtight container in the refrigerator for up to 2 weeks or freeze for up to 3 months.
Nutrition
- Serving Size: 1 large piece (about
- Calories: 280
- Sugar: 24
- Sodium: 35
- Fat: 18
- Saturated Fat: 10
- Carbohydrates: 30
- Fiber: 2
- Protein: 3
Keywords: peppermint bark, holiday dessert, chocolate bark, easy candy, no-bake dessert, Christmas treat