The rain was hammering against the kitchen window like it was trying to get in, and I couldn’t sleep. Honestly, you know that feeling when the house is completely silent except for the hum of the refrigerator and the storm outside? It’s in those weird, liminal hours that the best ideas strike, usually the ones you’d never attempt during daylight. I was staring into the open fridge, looking for a snack, and my eyes landed on a carton of eggs I’d bought three days ago and completely forgot about. I had a sudden, irrational urge to make something that looked like a cartoon character but tasted like a cloud.
I didn’t have any fancy food coloring or expensive sprinkles. I didn’t even have any sugar in the usual places because I’d been meal prepping and cleared out the pantry. But I had egg whites, cream of tartar, and a bag of white granulated sugar. I also had a piping bag that I’d used for cupcakes last week and hadn’t washed properly, which I quickly scrubbed clean in a panic. The idea that arrived was simple: make meringue cookies shaped like ghosts. Not just any ghosts, but the fluffy, floating kind you see in old Halloween movies. It was a weird impulse, let me tell you, but something about the late night loosened the usual rules. Why not?
I started whipping those egg whites, and the kitchen slowly filled with the sweet, vanilla scent of baking. It felt therapeutic, almost meditative, even though I was making a mess of flour and sugar on the counter. I forgot to turn on the exhaust fan, so the kitchen got a bit hazy, which somehow added to the spooky atmosphere. As they baked, turning into crisp, white structures, I realized this wasn’t just a snack; it was a tiny piece of Halloween magic I could share. These fluffy ghost meringue cookies for Halloween became my obsession. I kept making them because they were impossible to mess up if you just let the oven do its work, and they looked adorable on my counter.
Maybe you’ve been there too, standing in your kitchen at an ungodly hour, deciding to create something beautiful out of nothing. That’s how this recipe was born. It stayed with me because it turned a boring, sleepless night into a creative victory. Now, every October, I make these because they remind me that sometimes the best treats come from the weirdest cravings. They are light, airy, and perfect for spooky season.
Why You’ll Love This Recipe
Let’s be real, meringues have a reputation. People think they are finicky, that they collapse, or that they turn out chewy instead of crisp. I’ve been there. I’ve had meringues weep and lose their shape. But this specific method for these fluffy ghost meringue cookies for Halloween is different. It’s foolproof. I tested this recipe over a dozen times, adjusting the humidity levels and baking temperatures, to give you a result that is consistently stable and delicious. It’s not just another cookie; it’s a texture experience that feels like eating a marshmallow that learned how to stand up.
- Quick & Easy: The mixing process takes about 10 minutes, and the baking is mostly hands-off. It’s perfect for busy weeknights or when you need a last-minute Halloween treat for the kids’ party.
- Simple Ingredients: You likely already have everything in your kitchen. Egg whites, sugar, cream of tartar, and vanilla. No fancy grocery trips needed for this one.
- Perfect for Halloween: These are great for decorating, gifting, or just eating straight from the jar. They fit the spooky theme without being heavy or sugary in a bad way.
- Crowd-Pleaser: Kids love the shape, and adults love the sweetness. They get rave reviews from everyone who tries them, even the picky eaters.
- Unbelievably Delicious: The texture is next-level. It’s crisp on the outside and slightly chewy in the center, with a clean vanilla flavor that isn’t cloying.
What makes this recipe stand out is the addition of a tiny bit of cornstarch. It stabilizes the meringue and gives it that signature “ghostly” opacity. Most recipes skip it, but trust me, it makes the difference between a fragile cookie and one that holds its shape. It’s comfort food reimagined—lighter than a cake but satisfying like a candy. It’s perfect for impressing guests without stress, or turning a simple Tuesday into a festive occasion.
What Ingredients You Will Need
This recipe uses simple, wholesome ingredients to deliver bold flavor and satisfying texture without the fuss. The beauty of meringue is that it relies on technique, not complex components. You don’t need artisanal flours or imported chocolates. You just need quality basics. I like to keep this section scannable so you can grab your items and get to baking.
For the Meringue Base
- Large Egg Whites: 3 large eggs. Room temperature whites whip up much faster and achieve greater volume. I recommend using fresh, high-quality eggs. If you can, buy organic; the flavor is noticeably cleaner. (Separate them carefully; even a drop of yolk will ruin the whip.)
- Granulated Sugar: 3/4 cup (150g). Superfine sugar is ideal because it dissolves faster, but regular granulated sugar works fine if you whip a bit longer. I prefer C&H Pure Cane Sugar for its consistent grain size.
- Cream of Tartar: 1/2 teaspoon. This is the secret weapon. It stabilizes the egg whites and prevents them from collapsing. Don’t skip this, or your ghosts might flop over.
- Vanilla Extract: 1 teaspoon. Pure vanilla is best here. I use Nielsen-Massey because it has a rich, complex flavor that doesn’t taste artificial. (Adds warmth and depth.)
- Cornstarch: 1 tablespoon. This is what gives the ghosts their opaque, matte finish. It also helps keep them crisp longer by absorbing moisture. (Use cornstarch, not flour, for the right texture.)
For the Ghost Details
- White Chocolate Chips: 1/4 cup. For melting and drawing the eyes and mouths. I recommend Ghirardelli for their smooth melt. (You can also use white icing gel for a vegan option.)
- Food Coloring: Black gel food coloring. Gel colors are better than liquid because they don’t add extra water, which could ruin the meringue’s structure. (A little goes a long way.)
If you need substitutions, you can use aquafaba (chickpea water) instead of egg whites for a vegan version, though the texture will be slightly different. For a gluten-free option, this recipe is naturally gluten-free, but just ensure your cornstarch and chocolate are certified gluten-free. In summer, these cookies can get sticky, so store them in an airtight container with a silica packet if you have one.
Equipment Needed
You don’t need a fancy kitchen to make these, but having the right tools helps. A stand mixer or a hand mixer is essential. I’ve tried doing this by hand with a whisk, and let me tell you, it takes forever and your arms get tired. A stand mixer makes it effortless. I use a KitchenAid, but any reliable hand mixer works too.
You’ll need a piping bag. I prefer disposable ones for easy cleanup, but a reusable silicone bag is great for the environment. Pair it with a large round tip, like a Wilton 1M or a simple round tip like a Wilton 12. The round tip helps create the classic ghost shape with a “tail” at the bottom. If you don’t have a piping bag, you can use a zip-top bag with a corner cut off, though it’s trickier.
A baking sheet with parchment paper is crucial. Do not use a bare metal sheet; the meringues will stick. I use silicone baking mats for even baking, but parchment paper works perfectly fine. Just make sure it’s flat and secure so it doesn’t slide around when you pipe.
For the details, you’ll need a small microwave-safe bowl or a double boiler to melt the white chocolate. A toothpick or a fine-tipped brush is helpful for drawing the faces. Keep it simple. You don’t need specialty gadgets. A clean, grease-free bowl is the most important piece of “equipment” here. If your bowl has any oil residue, your meringue won’t whip.
Preparation Method
Let’s get into the nitty-gritty. This process is straightforward, but precision matters. Follow these steps closely for the best fluffy ghost meringue cookies for Halloween.
- Preheat and Prep (10 minutes): Preheat your oven to 200°F (95°C). This low temperature is key. It dries the meringues out slowly without browning them. Line two baking sheets with parchment paper or silicone mats. Set them aside. Make sure your egg whites are at room temperature. Take them out of the fridge at least 30 minutes before you start.
- Whip the Egg Whites (5 minutes): In a clean, dry bowl, beat the egg whites on medium speed until they become foamy. This should take about 1-2 minutes. Add the cream of tartar. Continue beating on medium-high speed. You are looking for soft peaks. The whites should hold a shape that droops slightly when you lift the beaters.
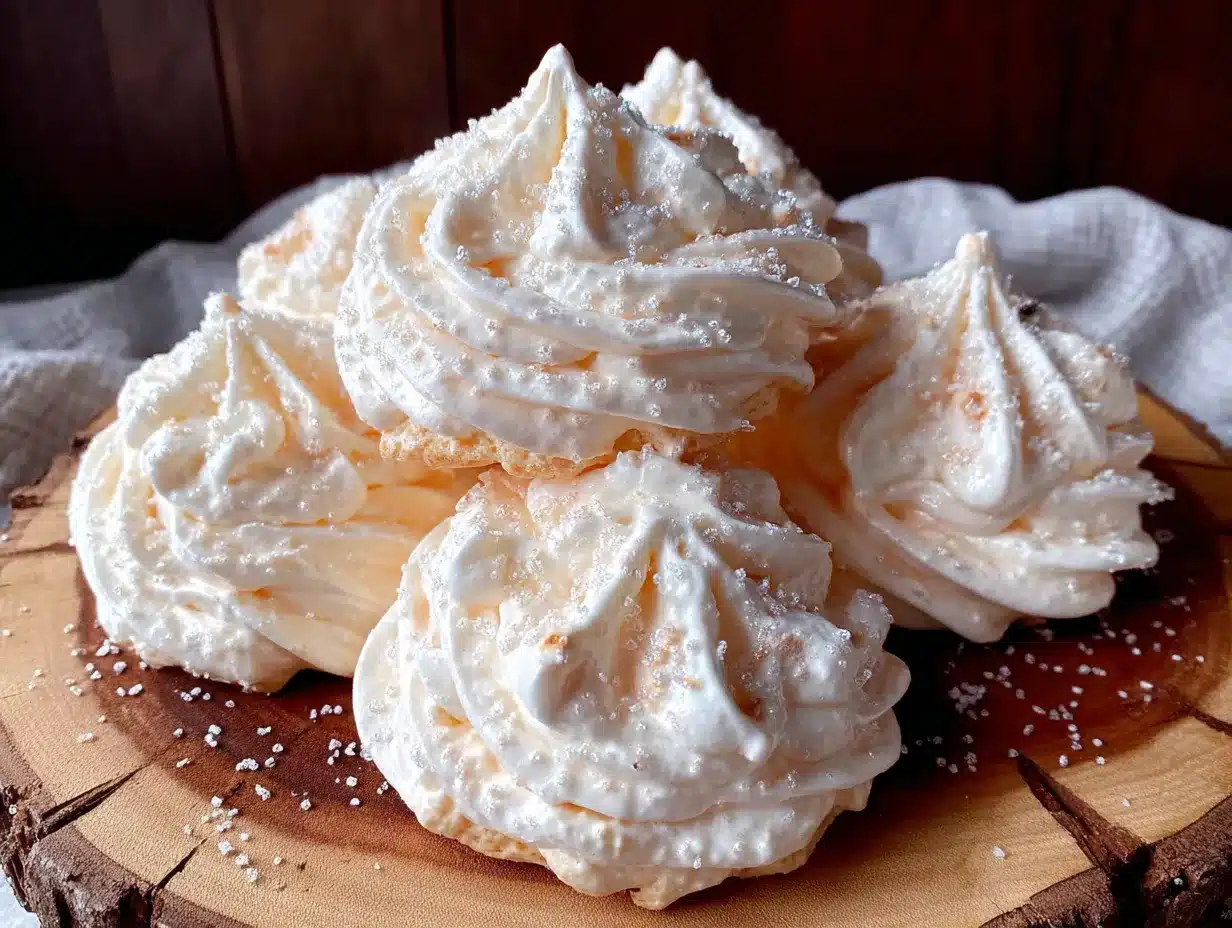
- Add the Sugar (3-5 minutes): Slowly pour in the granulated sugar, one tablespoon at a time, while the mixer is running. Do this gradually. If you dump it all in at once, you might not get a smooth mixture. Once all the sugar is added, increase the speed to high. Whip for about 3-5 minutes until you have stiff, glossy peaks. The mixture should look like marshmallow fluff. If you turn the bowl upside down, it shouldn’t move. This is crucial.
- Flavor and Stabilize (1 minute): Turn the mixer off. Add the vanilla extract and cornstarch. Gently fold them in with a spatula. Do not overmix. You just want to incorporate them. The mixture should remain fluffy and white. If it looks grainy, you didn’t whip the sugar enough in the previous step.
- Pipe the Ghosts (5 minutes): Transfer the mixture to your piping bag fitted with a round tip. Hold the bag perpendicular to the baking sheet. Pipe a mound for the head. Then, without lifting the bag too high, drag it down slightly to create a tail. You want them to look like little floating spirits. Leave space between them because they don’t spread much, but you want air circulation. I usually pipe about 12 per sheet.
- Bake (1.5 – 2 hours): Place the sheets in the oven. Bake for 1.5 to 2 hours. The cookies are done when they are dry to the touch and lift off the parchment paper easily. They should not be browned. If they start to brown, your oven is too hot. Turn it off and let them cool inside with the door cracked open. This residual heat helps dry them out further.
- Cool Completely (1 hour): Let the cookies cool completely on the baking sheets. This can take about an hour. If you try to move them while they are warm, they might break. Patience is key here.
- Add the Faces (10 minutes): Melt the white chocolate chips in the microwave in 30-second intervals, stirring in between, until smooth. Mix in a tiny bit of black gel food coloring to make it dark gray or black. Use a toothpick to dot on eyes and a small mouth. Let the chocolate set for 10 minutes. You can also use black icing gel for sharper lines.
Cooking Tips & Techniques
I’ve made enough meringues to know where people go wrong. The biggest mistake is humidity. If it’s a rainy day or you live in a coastal area, the air is moist. Meringue hates moisture. If your kitchen is humid, add an extra teaspoon of cornstarch. It helps absorb the excess water in the air. Also, make sure your bowl is absolutely clean. Any trace of egg yolk or oil will stop the whites from whipping. I wash my bowls with vinegar and water to be sure.
Another common issue is grainy meringue. This happens when the sugar doesn’t fully dissolve. To check, rub a little bit of the mixture between your fingers. If it feels gritty, keep whipping. It needs to be smooth like silk. Don’t rush the whipping process. It takes time for the sugar to dissolve into the protein structure of the eggs.
When piping, keep your hands steady. If you shake the bag, the ghosts might look lopsided. That’s okay, though; they’re still cute. But for uniformity, practice a few on a scrap piece of parchment first. Also, don’t open the oven door while they are baking. The temperature drop can cause them to collapse. Trust the process. Let the low heat do its work.
For troubleshooting, if your meringues weep (get sticky on the bottom), it means they weren’t baked long enough or the sugar didn’t dissolve. Next time, whip a bit longer and bake for an extra 15 minutes. If they crack on top, it’s usually because the oven was too hot initially. Stick to the low temperature. These are drying cookies, not baking cookies.
Variations & Adaptations
While the classic white ghost is timeless, you can play with flavors and colors. For a spooky twist, try adding a drop of purple or orange gel food coloring to the meringue before piping. It creates a marbled effect that looks like mist. Just be careful not to overmix the color, or it will turn gray.
For a chocolate variation, fold in 2 tablespoons of unsweetened cocoa powder after the sugar is added. This creates a chocolate meringue ghost, which is rich and intense. Pair it with white chocolate eyes for a nice contrast. It’s a great option for chocolate lovers.
If you want a nutty flavor, add 1/4 cup of finely ground almond flour to the mixture. This adds a subtle crunch and makes the cookies slightly denser. It’s a nice change of pace. Just ensure the almonds are finely ground so they don’t interfere with the piping.
For a vegan version, use aquafaba (the liquid from a can of chickpeas). Whip 1/4 cup of aquafaba with 1/2 teaspoon of cream of tartar until stiff peaks form. Then add 3/4 cup of sugar gradually. It works surprisingly well, though the texture is slightly less crisp. It’s a great option for those with egg allergies.
I once tried adding matcha powder for a green ghost, but it tasted a bit weird with vanilla. Stick to neutral or chocolate flavors. You can also add a pinch of salt to the mixture to enhance the sweetness. It balances the flavor profile nicely.
Serving & Storage Suggestions
These cookies are best served at room temperature. They are crisp and airy, perfect for a light snack. Pair them with a cup of hot tea or coffee. The contrast between the warm drink and the cool, sweet cookie is delightful. They also look great on a dessert table with other Halloween treats like pumpkin cookies or black licorice.
For storage, keep them in an airtight container at room temperature. They will stay fresh for up to two weeks. If your kitchen is humid, add a silica packet to the container to keep them crisp. Do not refrigerate them, as the moisture will make them soft and sticky.
If you need to make them ahead, you can pipe and bake them up to a week in advance. Just wait to add the chocolate faces until you are ready to serve. The chocolate can melt or bloom if stored for too long. When you are ready, melt the chocolate and add the details. They will set quickly.
You can also freeze the plain meringues. Place them in a single layer in a freezer-safe container. They will last for up to three months. Thaw them at room temperature before serving. The texture remains crisp after thawing. This is a great way to prepare for a party ahead of time.
Nutritional Information & Benefits
These fluffy ghost meringue cookies for Halloween are relatively light compared to other desserts. They are primarily sugar and egg whites, so they are low in fat and protein. Each cookie contains about 20-25 calories, depending on the size. They are a good option if you are watching your calorie intake, but enjoy them in moderation due to the sugar content.
Egg whites are a great source of protein, and meringues provide a quick energy boost from the sugar. They are naturally gluten-free, making them safe for those with celiac disease or gluten sensitivity. Just ensure all your ingredients are certified gluten-free.
They are also dairy-free if you use vegan chocolate chips for the faces. This makes them accessible to many people with dietary restrictions. I love that they offer a sweet treat without heavy creams or butter. It’s a guilt-free indulgence for Halloween. They satisfy the sweet tooth without leaving you feeling sluggish.
Conclusion
Making these fluffy ghost meringue cookies for Halloween is a fun, creative way to celebrate the season. They are easy to make, delicious to eat, and adorable to look at. I hope you try this recipe and enjoy the process as much as I did. Don’t be afraid to experiment with colors and flavors to make them your own. Share your creations with friends and family, and see how much they enjoy them.
Remember, baking is about having fun. If your ghosts look a little wonky, that’s part of the charm. They are still delicious. I love this recipe because it brings a little joy to the kitchen, especially during the busy Halloween season. It’s a simple pleasure that makes a big impact.
Give it a try and let me know how it goes. I’d love to hear about your variations and experiences. Happy baking, and have a spooky Halloween!
Frequently Asked Questions
Why are my meringues soft instead of crisp?
This usually means they weren’t baked long enough or your oven temperature was too high. Make sure to bake them at 200°F (95°C) for a full 1.5 to 2 hours. They should be dry to the touch. If they are still soft, leave them in the turned-off oven with the door cracked for another hour.
Can I use liquid food coloring?
It’s not recommended. Liquid coloring adds extra water to the meringue, which can prevent it from whipping properly or cause it to deflate. Gel food coloring is thicker and doesn’t add moisture, so it’s the best choice for maintaining the structure of your ghosts.
How do I store the cookies?
Store them in an airtight container at room temperature. They will stay fresh for up to two weeks. If your kitchen is humid, add a silica packet to keep them crisp. Avoid refrigerating them, as the moisture will make them soft.
Can I make these gluten-free?
Yes, this recipe is naturally gluten-free. Just ensure that your cornstarch and white chocolate chips are certified gluten-free. This makes them a safe treat for those with celiac disease or gluten intolerance.
What if I don’t have a piping bag?
You can use a heavy-duty zip-top bag. Cut off one corner to create a small opening. Pipe the meringues onto the baking sheet. It might be a bit messier than using a piping bag, but it works in a pinch.
Pin This Recipe!
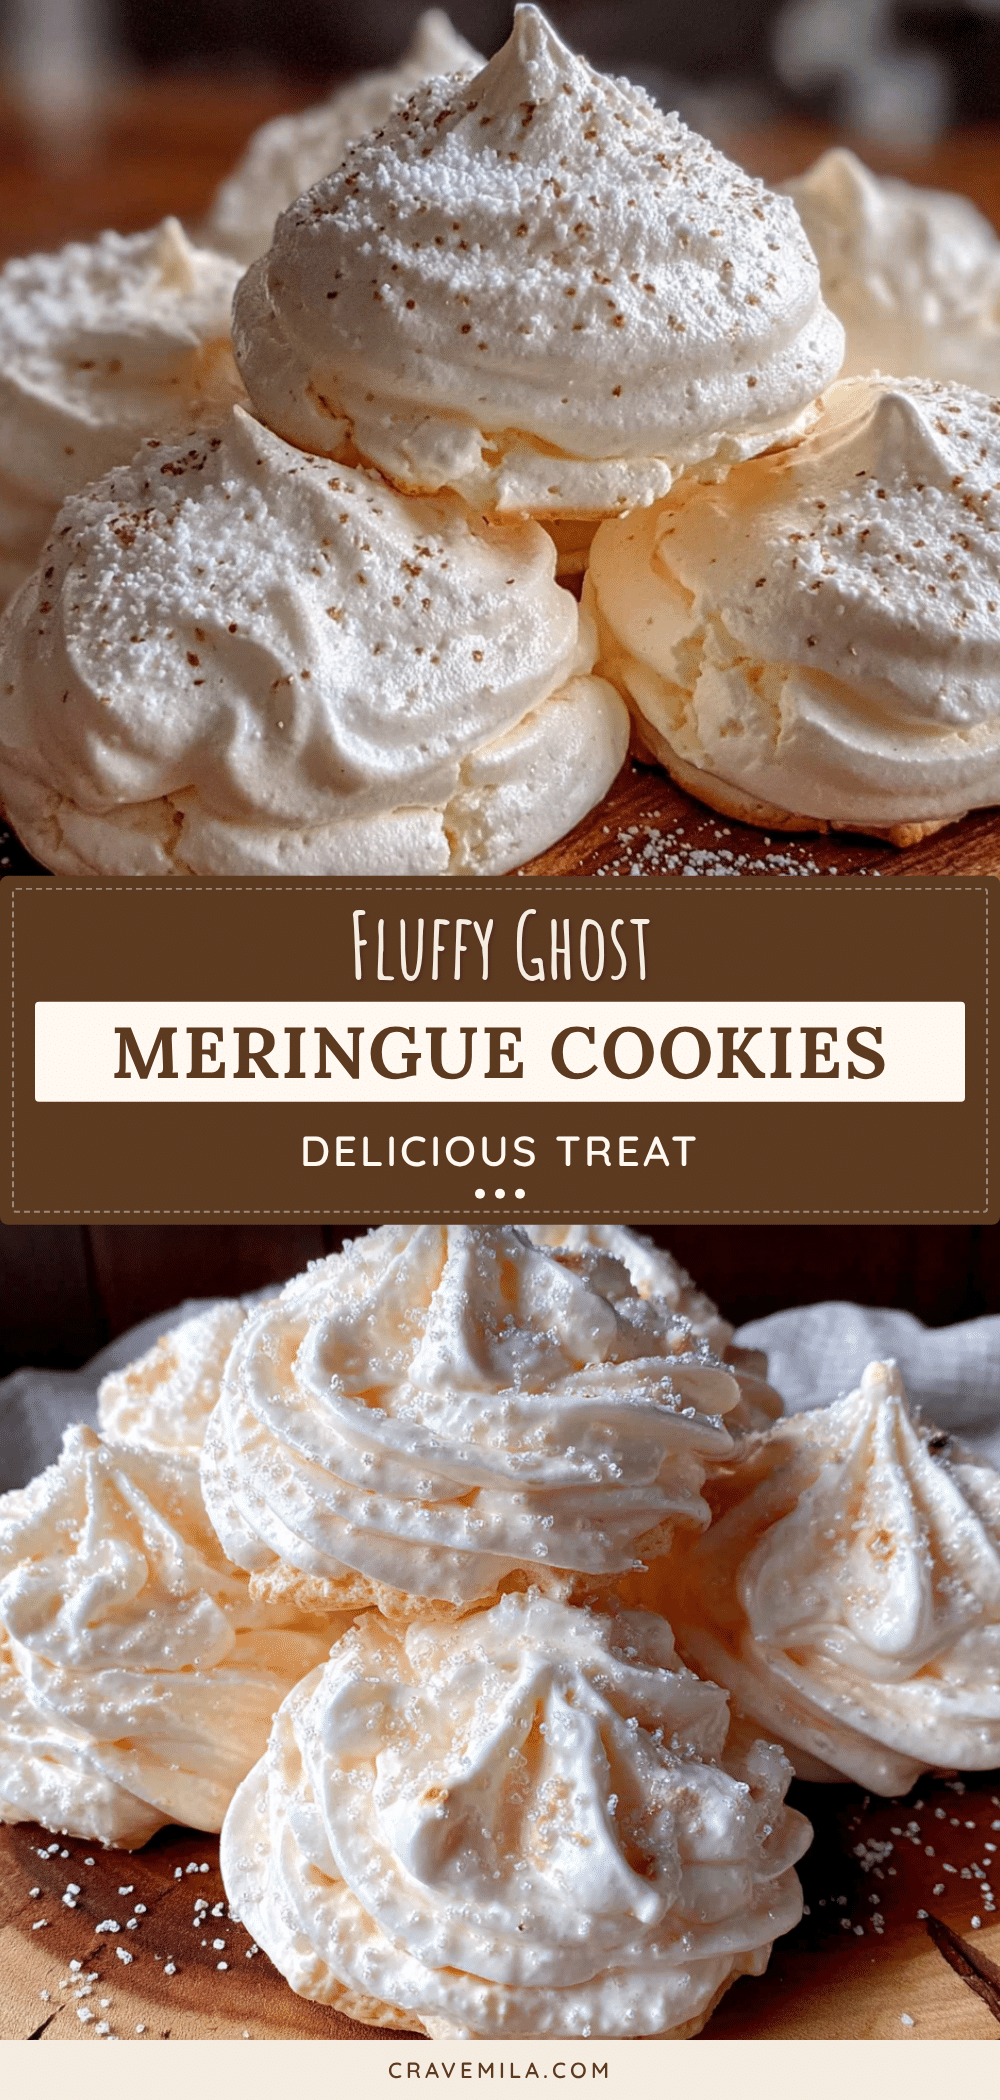
Fluffy Ghost Meringue Cookies: 5 Easy Halloween Treats
These fluffy ghost meringue cookies are a foolproof, gluten-free Halloween treat that is crisp on the outside and slightly chewy in the center. Made with simple ingredients like egg whites and sugar, they are perfect for spooky season celebrations.
- Prep Time: 25 minutes
- Cook Time: 1 hour 45 minutes
- Total Time: 2 hours 10 minutes
- Yield: 12 servings 1x
- Category: Dessert
- Cuisine: American
Ingredients
- 3 large egg whites, room temperature
- 3/4 cup (150g) granulated sugar
- 1/2 teaspoon cream of tartar
- 1 teaspoon vanilla extract
- 1 tablespoon cornstarch
- 1/4 cup white chocolate chips
- Black gel food coloring
Instructions
- Preheat oven to 200°F (95°C). Line two baking sheets with parchment paper or silicone mats.
- In a clean, dry bowl, beat egg whites on medium speed until foamy (1-2 minutes). Add cream of tartar and continue beating on medium-high speed until soft peaks form.
- Slowly pour in granulated sugar, one tablespoon at a time, while mixer is running. Increase speed to high and whip for 3-5 minutes until stiff, glossy peaks form.
- Turn mixer off and gently fold in vanilla extract and cornstarch with a spatula.
- Transfer mixture to a piping bag fitted with a round tip. Pipe mounds for heads and drag down slightly to create tails. Leave space between cookies.
- Bake for 1.5 to 2 hours until dry to the touch and lift off parchment easily. Do not brown. Turn off oven and let cool inside with door cracked for 1 hour.
- Melt white chocolate chips in microwave in 30-second intervals. Mix in black gel food coloring. Use a toothpick to draw eyes and mouths on cooled cookies. Let set for 10 minutes.
Notes
Ensure egg whites are at room temperature and bowl is completely grease-free for best results. Use gel food coloring instead of liquid to prevent deflation. Store in an airtight container with a silica packet if humid. Do not refrigerate.
Nutrition
- Serving Size: 1 cookie
- Calories: 25
- Sugar: 6
- Carbohydrates: 6
Keywords: Halloween, meringue, cookies, ghost, gluten-free, vegan option, easy baking, spooky treats