I had sworn off stuffing for years. Honestly, it was the dry, crumbly, flavorless filler that showed up at every holiday table—the kind that sat there, taking up space, while everyone reached for the mashed potatoes instead. I just didn’t get the hype. Then last November, my friend Maria texted me a photo from her own kitchen: a roasting pan piled high with golden squash, caramelized sausage, and herbs that looked like they’d been sprinkled by someone who actually cared. “I made this just for myself,” she said, “because no one else in my house likes stuffing.” I laughed and told her she was on her own.
But here’s the thing about Maria—she doesn’t let things go. She showed up at my doorstep two days later with a foil-covered dish, still warm, and said, “Just try it. If you hate it, I’ll never mention stuffing again.” I rolled my eyes, grabbed a fork, and took a bite standing right there in the doorway. And let me tell you, that first mouthful was a total betrayal of everything I thought I knew. The squash was sweet and tender, the sausage had these crispy little edges, and the bread—it was actually moist, not soggy, with a texture that held its own against everything else. I ate three servings. Standing up. In the doorway. I didn’t even sit down.
So yeah, I was wrong. This Crowd-Pleasing Roasted Butternut Squash and Sausage Stuffing completely flipped my opinion on its head. It’s the kind of dish that makes you question every other stuffing you’ve ever had, and honestly, that’s exactly what it did to me. Maybe you’ve been there too—stuck in a rut with a side dish you thought you knew, only to discover there’s a version out there that changes everything. This is that version.
Why You’ll Love This Recipe
Let me tell you why this stuffing has earned a permanent spot on my holiday menu, and why it will on yours too. I’ve tested this recipe at least a dozen times—tweaking the herb ratios, playing with different sausages, even trying it with gluten-free bread for a friend—and every single time, it delivers. It’s not just good; it’s the kind of dish that makes people close their eyes after the first bite, and I don’t say that lightly.
- Perfect for Hosting: This stuffing is a showstopper at any gathering. It scales beautifully for a crowd—double it for a potluck or a big family dinner—and it looks stunning on the table with those vibrant orange cubes of squash and flecks of green herbs. Your guests will think you spent all day on it, but honestly, it’s surprisingly hands-off.
- Simple Ingredients: You don’t need to hunt down obscure items at a specialty store. Everything here is straightforward: butternut squash, Italian sausage, good-quality bread, and fresh herbs. You probably already have most of it in your pantry.
- Crowd-Pleaser: I’ve served this to picky eaters, vegetarians (with a sausage swap), and even my uncle who claims he “doesn’t do sides.” Every single person went back for seconds. It’s one of those rare dishes that appeals to everyone—kids, adults, and everyone in between.
- Make-Ahead Friendly: Hosting is stressful enough without worrying about last-minute prep. This stuffing can be assembled a day in advance and baked just before serving. That’s a game-changer when you’re juggling a turkey, mashed potatoes, and a dozen other things.
- Unbelievably Delicious: The combination of roasted squash, savory sausage, and herby bread cubes is next-level comfort food. The squash gets all caramelized and sweet, the sausage adds a salty, spicy kick, and the bread soaks up all those juices without turning into mush. It’s texture heaven.
What sets this apart from other stuffing recipes is the roasting step. Instead of just mixing everything together and baking it, you roast the squash and sausage first. That extra step concentrates the flavors and gives everything a deeper, more complex taste. It’s a small thing, but it makes a huge difference. Trust me, once you try it this way, you’ll never go back to the old method.
What Ingredients You Will Need
This recipe uses simple, wholesome ingredients that work together to create something truly special. Most of these are pantry staples or easy to find at any grocery store, so you won’t be running around looking for obscure items. Here’s what you’ll need:
- Butternut squash – 1 medium (about 2 pounds), peeled, seeded, and cut into 1/2-inch cubes. Look for one that feels heavy for its size and has a firm, unblemished skin. The sweetness of the squash is the backbone of this dish, so don’t skimp here. I prefer using a whole squash rather than pre-cut cubes because they tend to be fresher and more flavorful.
- Italian sausage – 1 pound, casings removed. I like using mild Italian sausage for a gentle flavor that doesn’t overpower the squash, but hot Italian sausage works great if you want a little kick. You can also use chicken or turkey sausage for a lighter option. My go-to brand is Johnsonville, but any good-quality sausage will do.
- Bread – 1 loaf (about 12 ounces) of day-old French bread or sourdough, cut into 1-inch cubes. Stale bread is key here—it holds its shape better and absorbs the liquid without turning into paste. If your bread is fresh, just spread the cubes on a baking sheet and toast them in a 300°F oven for 10-15 minutes until dry.
- Onion – 1 large yellow onion, diced. Yellow onions have a nice balance of sweetness and sharpness that mellows out as it cooks. You could use a white onion in a pinch, but red onion might be too strong.
- Celery – 3 ribs, diced. Celery adds that classic stuffing crunch and a subtle herbal flavor. Don’t skip it—it’s more important than you think.
- Garlic – 4 cloves, minced. Fresh garlic is non-negotiable here. The jarred stuff just doesn’t have the same punch.
- Fresh sage – 2 tablespoons, chopped. Sage and squash are a match made in heaven. If you can’t find fresh, use 2 teaspoons of dried sage, but honestly, fresh makes a world of difference.
- Fresh thyme – 1 tablespoon, leaves removed from stems. Thyme adds an earthy, slightly lemony note that brightens up the whole dish.
- Fresh rosemary – 1 tablespoon, finely chopped. Rosemary is potent, so a little goes a long way. It adds a piney, aromatic quality that pairs beautifully with the sausage.
- Chicken broth – 2 cups, low-sodium. You want to control the salt level, so low-sodium is best. Vegetable broth works fine if you’re making this vegetarian.
- Butter – 4 tablespoons, unsalted, plus more for greasing the dish. Unsalted butter lets you control the saltiness of the final dish.
- Olive oil – 2 tablespoons, for roasting the squash and sausage. A good extra-virgin olive oil adds a nice fruity note.
- Eggs – 2 large, lightly beaten. Eggs help bind the stuffing together so it holds its shape when you serve it.
- Salt and pepper – To taste. I recommend kosher salt for its clean flavor and easy pinching.
- Optional add-ins – 1/2 cup dried cranberries for a touch of sweetness, or 1/2 cup chopped pecans for crunch. Both are fantastic additions that I’ve tried and loved.
When it comes to the bread, I’ve found that a crusty artisan loaf works best. Avoid soft sandwich bread—it’ll turn into a gluey mess. Sourdough is my personal favorite because its tanginess cuts through the richness of the sausage and butter. And if you’re gluten-free, use a good-quality gluten-free bread that’s sturdy enough to hold up to the liquid.
Equipment Needed
You don’t need a fancy kitchen to pull this off, but having the right tools makes the process smoother. Here’s what you’ll need:
- Large baking sheet – For roasting the squash and sausage. A rimmed baking sheet is ideal to catch any juices. I use a half-sheet pan, which is 18×13 inches, and it fits everything perfectly.
- 9×13-inch baking dish – This is the standard size for the stuffing. You can also use a 3-quart casserole dish. If you’re doubling the recipe, use a larger dish or two separate ones.
- Large skillet – For cooking the onion, celery, and garlic. A 12-inch skillet gives you plenty of room to stir everything without overcrowding.
- Large mixing bowl – For combining all the ingredients. You want a bowl big enough to toss everything without spilling.
- Chef’s knife – A sharp 8-inch chef’s knife makes quick work of dicing the squash and chopping the herbs. A dull knife is not only frustrating but dangerous—trust me, I’ve learned that the hard way.
- Cutting board – A sturdy wooden or plastic board. I prefer a large board so I have room to work.
- Vegetable peeler – For peeling the butternut squash. A Y-shaped peeler is my favorite because it’s ergonomic and fast.
- Measuring cups and spoons – For accurate measurements. I like having both dry and liquid measuring cups on hand.
- Whisk – For beating the eggs and mixing them into the broth.
- Aluminum foil – For covering the dish during the first part of baking. This keeps the stuffing moist while it heats through.
If you don’t have a 9×13-inch dish, you can use a 10-inch cast-iron skillet or a 2-quart baking dish—just adjust the baking time slightly. And if you’re short on time, you can buy pre-cut butternut squash from the store, though I find it’s often less flavorful and more expensive. A good vegetable peeler is a worthwhile investment; I’ve had my Kuhn Rikon peeler for years, and it’s still going strong.
Preparation Method
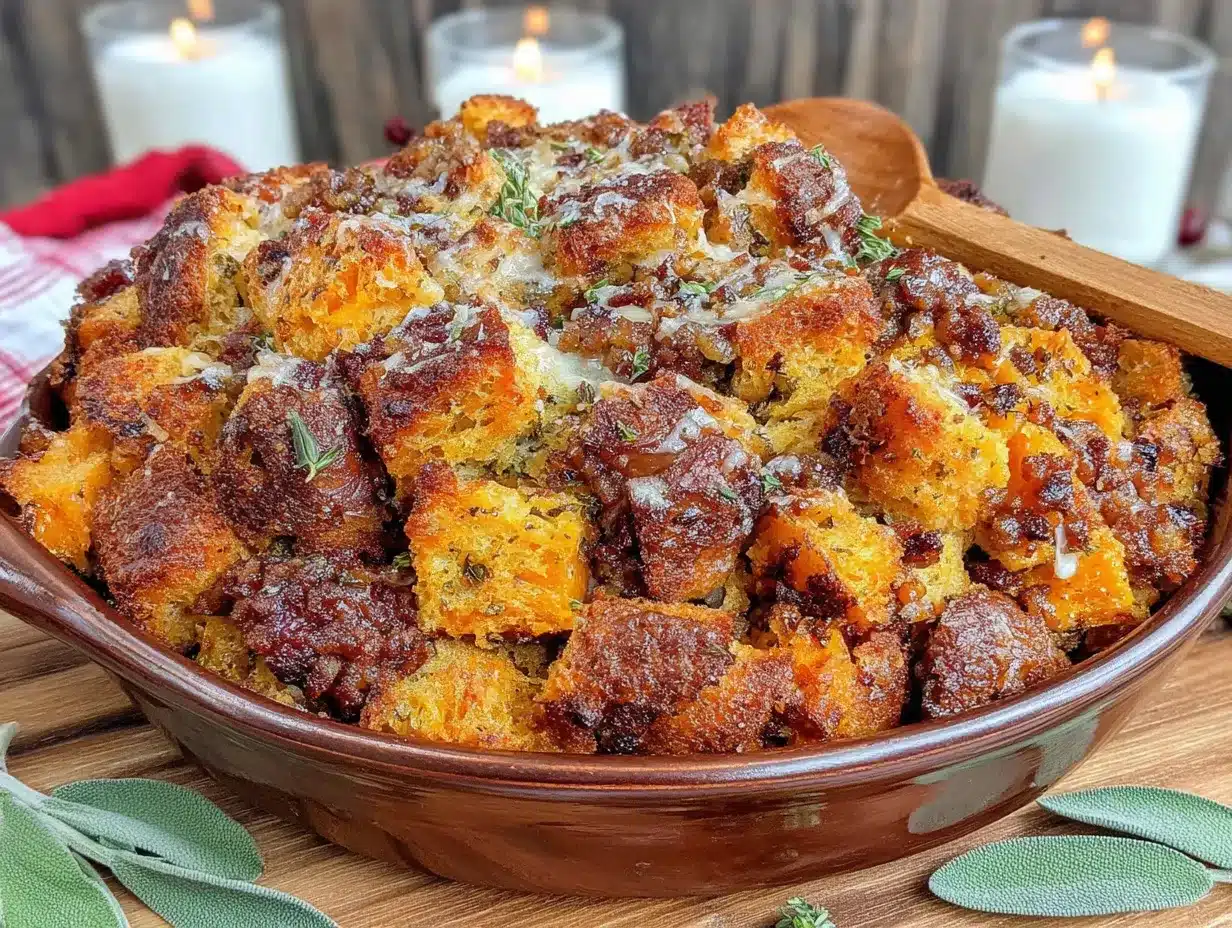
Alright, let’s get cooking. This method breaks down into a few manageable steps, and I’ve included some tips I’ve picked up along the way. Take your time, and don’t rush—the results are worth it.
- Preheat your oven to 400°F (200°C). While it’s heating up, line a large baking sheet with parchment paper or lightly grease it with olive oil. This makes cleanup a breeze.
- Prepare the squash. Peel the butternut squash using a vegetable peeler, then cut it in half lengthwise. Scoop out the seeds with a spoon—you can save them to roast later if you like, but I usually just toss them. Cut the squash into 1/2-inch cubes. Try to keep them uniform in size so they cook evenly. This takes about 10 minutes, but it’s meditative work. I like to put on a podcast while I do it.
- Roast the squash. Spread the cubed squash on the prepared baking sheet in a single layer. Drizzle with 1 tablespoon of olive oil, season with a pinch of salt and pepper, and toss to coat. Roast for 20-25 minutes, flipping halfway through, until the squash is tender and lightly caramelized around the edges. You’ll know it’s done when a fork slides in easily. Remove from the oven and set aside. Don’t turn the oven off—you’ll need it later.
- Cook the sausage. While the squash is roasting, heat 1 tablespoon of olive oil in a large skillet over medium-high heat. Add the Italian sausage, breaking it up with a wooden spoon as it cooks. Cook for 6-8 minutes, until the sausage is browned and cooked through. Use a slotted spoon to transfer the sausage to a plate, leaving the rendered fat in the skillet. That fat is liquid gold—it adds so much flavor to the vegetables.
- Sauté the aromatics. Reduce the heat to medium. Add the butter to the skillet with the sausage drippings. Once it melts, add the diced onion and celery. Cook for 5-6 minutes, stirring occasionally, until the onion is translucent and the celery is softened. Add the minced garlic and cook for another minute until fragrant. Be careful not to burn the garlic—it turns bitter quickly. I’ve done that more times than I’d like to admit.
- Toast the bread cubes. If your bread isn’t already stale, spread the cubes on a baking sheet and toast them in the oven for 10 minutes at 350°F (175°C). You want them dry but not browned. If your bread is day-old, you can skip this step.
- Combine the ingredients. In a large mixing bowl, combine the roasted squash, cooked sausage, sautéed onion and celery mixture, and toasted bread cubes. Add the chopped sage, thyme, and rosemary. Toss everything gently to distribute the herbs evenly. I use my hands for this—it’s the best way to make sure everything is mixed without crushing the bread.
- Prepare the liquid mixture. In a separate bowl, whisk together the chicken broth and beaten eggs. Pour this mixture over the bread mixture and stir gently until everything is evenly moistened. Don’t overmix—you want some texture, not a paste. Let it sit for 5-10 minutes so the bread can absorb the liquid. This is a good time to taste and adjust the seasoning. Remember, the sausage is already salty, so go easy on the salt.
- Bake the stuffing. Transfer the mixture to a greased 9×13-inch baking dish and spread it into an even layer. Cover with aluminum foil and bake at 375°F (190°C) for 30 minutes. Then remove the foil and bake for another 15-20 minutes, until the top is golden brown and crispy. The edges should be slightly caramelized—that’s the best part. Let it rest for 5 minutes before serving.
A few notes from my own trials: If the stuffing looks too dry before baking, add a splash more broth. If it looks too wet, don’t worry—the bread will absorb it as it bakes. And if you’re making this ahead, stop after step 8, cover the dish, and refrigerate it. When you’re ready to bake, add an extra 10 minutes to the covered baking time to account for the cold start.
Cooking Tips & Techniques
Over the years, I’ve made this stuffing more times than I can count, and I’ve definitely had my share of mishaps. Here are some tips to help you avoid the mistakes I’ve made:
Don’t skip the roasting step. I know it adds an extra dish to wash, but roasting the squash and sausage separately before mixing everything together is non-negotiable. Roasting concentrates the flavors and gives the squash a caramelized sweetness that you just can’t get from boiling or steaming. Plus, it helps the squash hold its shape during baking instead of turning into mush.
Use stale bread. Fresh bread will absorb too much liquid and turn into a gluey, dense mess. Day-old bread that’s slightly dried out is ideal because it soaks up the broth without falling apart. If you only have fresh bread, cube it and spread it on a baking sheet in a 300°F (150°C) oven for 10-15 minutes. This dries it out perfectly.
Watch your salt. Italian sausage is already seasoned, and chicken broth usually has some sodium too. I learned this the hard way when I made a batch that was so salty it was almost inedible. Use low-sodium broth and taste the mixture before adding any extra salt. You can always add more, but you can’t take it out.
Don’t overmix. When you combine the ingredients, be gentle. You want the bread cubes to stay intact so you get those nice, distinct pieces in every bite. Overmixing will crush the bread and turn the stuffing into a uniform, pasty texture. I use my hands and a light touch—it’s the best way to control the mixing.
Let it rest. After the stuffing comes out of the oven, let it sit for at least 5 minutes before serving. This allows the steam to settle and the structure to firm up, making it easier to scoop and serve. Plus, it gives you a moment to catch your breath before the chaos of serving a crowd.
Multitask like a pro. While the squash is roasting, cook the sausage and sauté the aromatics. While the stuffing is baking, you can prep your other dishes. This recipe is forgiving, so you can work at your own pace without feeling rushed. I often make the entire dish the day before and just pop it in the oven when guests arrive.
Variations & Adaptations
One of the things I love about this recipe is how adaptable it is. Over the years, I’ve tried several variations, and they’ve all been hits. Here are some ideas to make it your own:
Vegetarian version: Swap the Italian sausage for a plant-based sausage or double the amount of mushrooms. I’ve used cremini mushrooms, diced and sautéed until golden, and they add a wonderful umami flavor that mimics the meatiness of sausage. You can also add a can of drained and rinsed cannellini beans for extra protein and creaminess.
Gluten-free option: Use a good-quality gluten-free bread. I’ve tested this with several brands, and the key is to find one that’s sturdy and not too crumbly. Udi’s and Canyon Bakehouse both work well. Toast the cubes thoroughly to help them hold their shape. Also, make sure your broth is gluten-free—some brands sneak in wheat-based ingredients.
Add some sweetness: Toss in 1/2 cup of dried cranberries or chopped dried apricots when you mix the ingredients. The tartness of the cranberries cuts through the richness of the sausage and butter, and it adds a lovely pop of color. I did this for a Thanksgiving potluck last year, and it was the first dish to disappear.
Spice it up: Use hot Italian sausage instead of mild, or add a pinch of red pepper flakes when you sauté the aromatics. If you really want to turn up the heat, drizzle some hot honey over the finished dish. I tried this on a whim one night, and it was unexpectedly amazing—the sweet heat worked perfectly with the squash.
Make it ahead: This is a lifesaver for hosting. Assemble the stuffing completely (through step 8), cover the dish, and refrigerate for up to 24 hours. When you’re ready to bake, add 10 minutes to the covered baking time. The flavors actually meld together more overnight, so it tastes even better the next day.
Seasonal swap: In the fall, use butternut squash. In the winter, try it with delicata squash (you don’t even need to peel it) or sweet potatoes. In the spring, swap in asparagus and leeks for a lighter version. The basic formula—roasted vegetable + sausage + bread + herbs—works with whatever you have on hand.
Serving & Storage Suggestions
This stuffing is incredibly versatile when it comes to serving. Here’s how I like to present it and store any leftovers (if there are any, which is rare).
Serving temperature: Serve this stuffing warm, straight from the oven. The contrast between the crispy top and the moist, tender interior is part of what makes it so good. I like to garnish it with a sprinkle of fresh parsley or a few extra sage leaves for a pop of green. If you’re feeling fancy, drizzle a little balsamic glaze over the top before serving—it adds a touch of acidity that brightens everything up.
What to serve alongside: This stuffing is a natural partner for roasted turkey or chicken, but it’s also fantastic with a simple roast pork loin or even a grilled steak. For a vegetarian meal, serve it with a big green salad and some crusty bread. I’ve also served it as a main dish with a fried egg on top for a hearty breakfast—trust me, it’s incredible.
Presentation tips for hosting: Transfer the stuffing to a beautiful serving dish and bring it to the table family-style. The vibrant orange of the squash against the golden bread and green herbs is visually stunning. I like to use a white ceramic dish to make the colors pop. If you’re serving a crowd, keep the stuffing warm in a slow cooker set to “warm” for up to 2 hours—just stir it occasionally to prevent the edges from drying out.
Storage instructions: Store any leftovers in an airtight container in the refrigerator for up to 4 days. The flavors actually deepen as it sits, so it’s even better the next day. To reheat, place the stuffing in a baking dish, cover with foil, and warm in a 350°F (175°C) oven for 15-20 minutes. You can also microwave individual portions, but the top won’t be as crispy. I prefer the oven method for that reason.
Freezing: This stuffing freezes beautifully. Let it cool completely, then transfer it to a freezer-safe container or zip-top bag. It will keep for up to 3 months. To reheat, thaw it overnight in the refrigerator, then bake as directed, adding 10 minutes to the covered baking time. I’ve done this for holiday prep, and it’s a huge time-saver.
How flavors develop: Honestly, this stuffing tastes even better the day after it’s made. The herbs have time to meld with the squash and sausage, and the bread absorbs all those delicious juices. If you can resist eating it all in one sitting, you’re in for a treat. I’ve been known to make a double batch just so I have leftovers for the next few days.
Nutritional Information & Benefits
Let’s talk about what’s actually in this dish, beyond the deliciousness. While this is definitely a comfort food, it also has some surprising nutritional perks. Here’s a rough breakdown per serving (based on 8 servings):
| Nutrient | Amount per Serving |
|---|---|
| Calories | 380 |
| Total Fat | 18g |
| Saturated Fat | 7g |
| Cholesterol | 75mg |
| Sodium | 680mg |
| Total Carbohydrates | 38g |
| Dietary Fiber | 5g |
| Sugars | 8g |
| Protein | 16g |
| Vitamin A | 180% DV |
| Vitamin C | 30% DV |
| Calcium | 8% DV |
| Iron | 15% DV |
The butternut squash is the real star here nutritionally. It’s packed with vitamin A (in the form of beta-carotene), which is great for eye health and immune function. It also provides a good amount of vitamin C and fiber. The sausage adds protein and iron, while the herbs contribute antioxidants. If you use turkey sausage, you can cut the fat and calories significantly. And if you swap in whole wheat bread, you’ll get more fiber and B vitamins.
This recipe is relatively high in sodium due to the sausage and broth, so if you’re watching your salt intake, use low-sodium broth and consider using a lower-sodium sausage. It also contains gluten and dairy, but as I mentioned earlier, both can be substituted. Overall, it’s a balanced dish that fits into a varied diet—especially when you pair it with a big green salad or roasted vegetables.
Conclusion
So there you have it—my total conversion story, from stuffing skeptic to full-on believer. This Crowd-Pleasing Roasted Butternut Squash and Sausage Stuffing has become my go-to for every gathering, from Thanksgiving to casual potlucks and everything in between. It’s the dish that people ask for by name, the one that gets texted around the family group chat, and honestly, the one that makes me feel like a kitchen rockstar with minimal effort.
I hope you give it a try, whether you’re a long-time stuffing lover or a skeptic like I was. Play around with the variations—add cranberries, swap the sausage, make it your own. That’s the beauty of cooking, right? You take a recipe and tweak it until it feels like yours. And when you do make it, I’d love to hear how it turned out. Drop a comment below, tag me in your photos, or tell me about your own stuffing conversion story. There’s something special about sharing a dish that changes someone’s mind, and I think this one has that power.
Happy cooking, and remember—sometimes the best things come from being proven wrong. Now go make some stuffing and watch it disappear.
Frequently Asked Questions
Can I make this stuffing completely ahead of time?
Absolutely! You can assemble the entire stuffing (through step 8) up to 24 hours in advance. Cover the dish tightly with foil and refrigerate. When you’re ready to bake, add about 10 minutes to the covered baking time to account for the cold start. The flavors actually meld together beautifully overnight, so it’s a great make-ahead option for hosting.
Can I use pre-cut butternut squash from the store?
Yes, you can, but I find that pre-cut squash is often less flavorful and can be a bit dry. If you’re short on time, it’s a fine shortcut—just make sure the cubes are uniform in size so they roast evenly. Fresh, whole squash tends to be sweeter and more moist, so I recommend it if you have the time to peel and cube it yourself.
What’s the best bread to use for this stuffing?
I strongly recommend a day-old crusty artisan bread like sourdough or French bread. The tanginess of sourdough pairs beautifully with the sweet squash and savory sausage. Avoid soft sandwich bread, as it will turn into a gluey mess. If your bread is fresh, cube it and toast it in a 300°F oven for 10-15 minutes to dry it out before using.
Can I freeze this stuffing?
Yes, it freezes wonderfully. Let the baked stuffing cool completely, then transfer it to a freezer-safe container or zip-top bag. It will keep for up to 3 months. To reheat, thaw it overnight in the refrigerator, then warm it in a 350°F oven, covered with foil, for 20-25 minutes. The texture holds up really well, which is great for holiday prep.
How do I make this stuffing vegetarian?
Simply swap the Italian sausage for a plant-based sausage or use a combination of sautéed mushrooms and cannellini beans. Cremini mushrooms work great—dice them and sauté until golden for a meaty texture. You can also add extra roasted vegetables like carrots or parsnips for more depth. Use vegetable broth instead of chicken broth, and you’re all set.
Pin This Recipe!
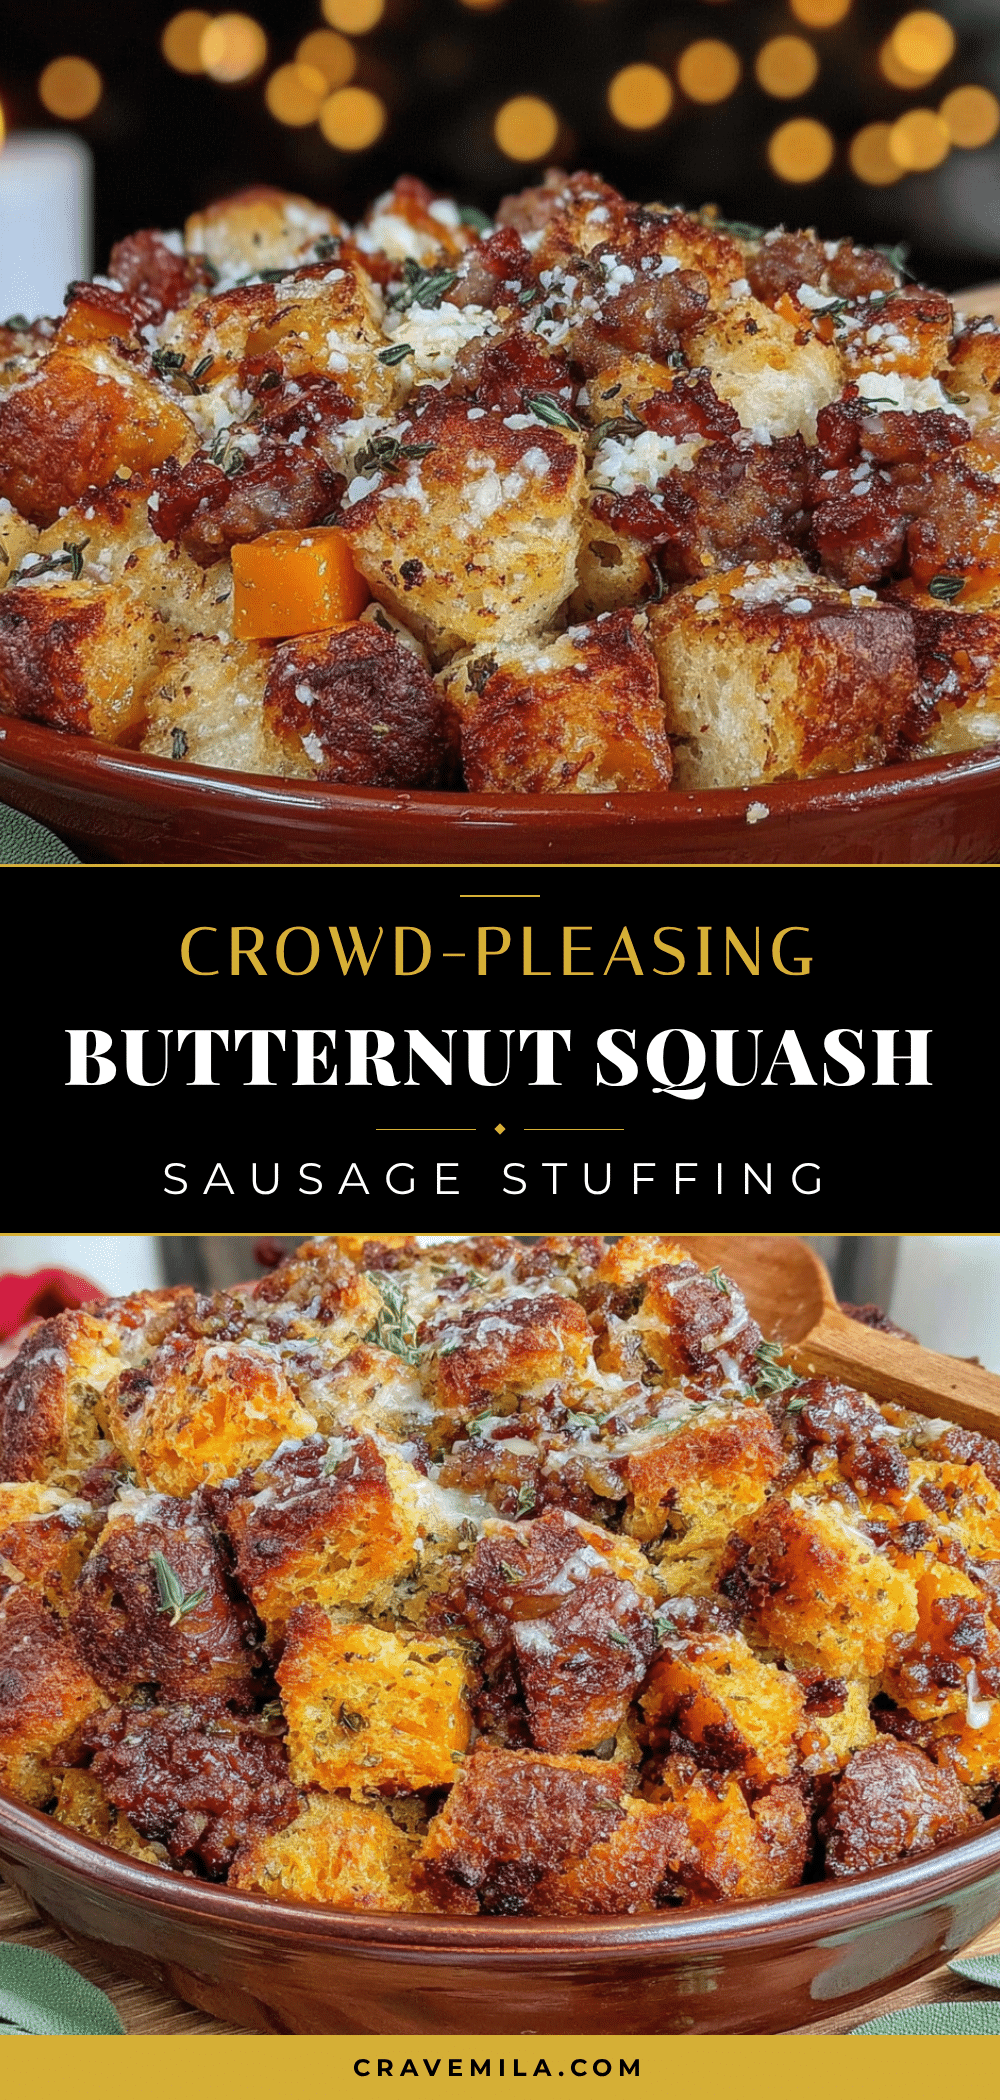
Crowd-Pleasing Roasted Butternut Squash and Sausage Stuffing

This roasted butternut squash and sausage stuffing is a total game-changer. Sweet, caramelized squash, savory sausage, and herby bread cubes come together for a moist, flavorful side dish that will convert even the biggest stuffing skeptics.
- Prep Time: 30 minutes
- Cook Time: 1 hour 10 minutes
- Total Time: 1 hour 40 minutes
- Yield: 8 servings 1x
- Category: Side Dish
- Cuisine: American
Ingredients
- 1 medium butternut squash (about 2 pounds), peeled, seeded, and cut into 1/2-inch cubes
- 1 pound Italian sausage, casings removed
- 1 loaf (about 12 ounces) day-old French bread or sourdough, cut into 1-inch cubes
- 1 large yellow onion, diced
- 3 ribs celery, diced
- 4 cloves garlic, minced
- 2 tablespoons fresh sage, chopped
- 1 tablespoon fresh thyme leaves
- 1 tablespoon fresh rosemary, finely chopped
- 2 cups low-sodium chicken broth
- 4 tablespoons unsalted butter, plus more for greasing the dish
- 2 tablespoons olive oil
- 2 large eggs, lightly beaten
- Salt and pepper to taste
- 1/2 cup dried cranberries (optional)
- 1/2 cup chopped pecans (optional)
Instructions
- Preheat your oven to 400°F (200°C). Line a large baking sheet with parchment paper or lightly grease it with olive oil.
- Prepare the squash: Peel the butternut squash, cut it in half lengthwise, and scoop out the seeds. Cut into 1/2-inch cubes.
- Roast the squash: Spread the cubed squash on the prepared baking sheet in a single layer. Drizzle with 1 tablespoon of olive oil, season with a pinch of salt and pepper, and toss to coat. Roast for 20-25 minutes, flipping halfway through, until tender and lightly caramelized. Set aside.
- Cook the sausage: While the squash roasts, heat 1 tablespoon of olive oil in a large skillet over medium-high heat. Add the Italian sausage, breaking it up with a wooden spoon. Cook for 6-8 minutes until browned and cooked through. Transfer to a plate with a slotted spoon, leaving the rendered fat in the skillet.
- Sauté the aromatics: Reduce heat to medium. Add the butter to the skillet with the sausage drippings. Once melted, add the diced onion and celery. Cook for 5-6 minutes until the onion is translucent and the celery is softened. Add the minced garlic and cook for 1 minute until fragrant.
- Toast the bread cubes (if needed): If your bread isn’t stale, spread the cubes on a baking sheet and toast at 350°F (175°C) for 10 minutes until dry but not browned.
- Combine the ingredients: In a large mixing bowl, combine the roasted squash, cooked sausage, sautéed onion and celery mixture, and toasted bread cubes. Add the chopped sage, thyme, and rosemary. Toss gently to distribute the herbs evenly.
- Prepare the liquid mixture: In a separate bowl, whisk together the chicken broth and beaten eggs. Pour over the bread mixture and stir gently until evenly moistened. Let sit for 5-10 minutes so the bread can absorb the liquid. Taste and adjust seasoning.
- Bake the stuffing: Transfer the mixture to a greased 9×13-inch baking dish and spread into an even layer. Cover with aluminum foil and bake at 375°F (190°C) for 30 minutes. Remove the foil and bake for another 15-20 minutes until the top is golden brown and crispy. Let rest for 5 minutes before serving.
Notes
Don’t skip roasting the squash and sausage separately—it concentrates flavors and prevents mush. Use day-old bread for best texture; if using fresh, toast cubes at 300°F for 10-15 minutes. Watch salt levels as sausage and broth are already seasoned. For make-ahead: assemble through step 8, cover, and refrigerate up to 24 hours; add 10 minutes to covered baking time. Let stuffing rest 5 minutes before serving for easier scooping.
Nutrition
- Serving Size: 1 serving (about 1 c
- Calories: 380
- Sugar: 8
- Sodium: 680
- Fat: 18
- Saturated Fat: 7
- Carbohydrates: 38
- Fiber: 5
- Protein: 16
Keywords: stuffing, butternut squash, sausage, Thanksgiving, holiday, side dish, roasted, comfort food



