I was standing in the frozen food aisle of our local grocery store last November when the smell hit me — that unmistakable, savory-sweet aroma of fried onions and cream of mushroom soup. And suddenly I was seven years old, sitting at my Aunt Maggie’s formica kitchen table, watching her pull a bubbling casserole dish from the oven. She’d let me sprinkle the last of the crispy onions on top, my small fingers carefully placing them in a pattern that I thought was art. Aunt Maggie passed away five years ago, and honestly, I haven’t had her green bean casserole since. But standing there in that chilly aisle, surrounded by strangers and shopping carts, I missed it so badly my chest ached.
Here’s the thing though — I can’t eat gluten anymore. And those cans of soup and pre-packaged fried onions? Loaded with it. So I stood there for a solid minute, maybe two, feeling sorry for myself. Then I grabbed a bag of fresh green beans, some mushrooms, and decided right then and there that I was going to figure out how to make this work. I mean, how hard could it be to recreate a dish that’s basically a hug in a baking dish?
Let me tell you — it took three tries. The first batch was watery. The second had a weird gummy texture from the wrong flour blend. But the third? That third batch made me close my eyes and smile. It was creamy, rich, topped with gloriously crunchy onions, and not a speck of gluten in sight. Maybe you’ve been there — missing a dish from your past that you thought you couldn’t have anymore. This one’s for you.
Why You’ll Love This Recipe
This isn’t just another green bean casserole recipe. After testing this dish for friends, family, and even my picky neighbor Carol (who swore she could tell the difference — she couldn’t), I can honestly say this version holds its own against any traditional recipe out there. Here’s why it works:
- Quick & Easy: From start to table in about 45 minutes. Perfect for those busy holiday mornings or a random Tuesday when you need comfort food fast.
- Simple Ingredients: No weird specialty flours or hard-to-find items. Everything is available at your regular grocery store.
- Perfect for Holidays: Thanksgiving, Christmas, Easter — this dish fits right in on any holiday table without anyone guessing it’s gluten-free.
- Crowd-Pleaser: I’ve served this to gluten-free folks and gluten-loving folks side by side. Empty dish every single time.
- Unbelievably Delicious: The creamy mushroom sauce, the tender green beans, those crispy onions on top — it’s comfort food at its finest.
What makes this recipe different from the rest is the technique. Instead of using a gluten-free flour blend that can turn gummy, I use a simple cornstarch slurry to thicken the sauce. It creates this silky, velvety texture that coats every bean perfectly. Plus, I make my own crispy onions using a light rice flour coating — they stay crunchy even after baking, which is the real magic trick here.
This is the kind of dish that makes you close your eyes after the first bite. It’s comfort food reimagined — healthier, gluten-free, but with the same soul-soothing satisfaction that Aunt Maggie’s casserole always had. Perfect for impressing guests without stress, or turning a simple weeknight dinner into something memorable.
What Ingredients You Will Need
This recipe uses simple, wholesome ingredients to deliver bold flavor and satisfying texture without the fuss. Most of these are likely already in your pantry, which makes this dish even more appealing when a craving strikes.
For the Green Bean Casserole
- Fresh green beans – 1.5 pounds, trimmed and cut into 2-inch pieces (frozen works too, but fresh gives better texture)
- Mushrooms – 8 ounces cremini or white button mushrooms, sliced (I prefer cremini for deeper flavor)
- Unsalted butter – 3 tablespoons (use dairy-free butter if needed)
- Yellow onion – 1 medium, finely diced
- Garlic – 3 cloves, minced
- Cornstarch – 2 tablespoons (this is our gluten-free thickener)
- Chicken or vegetable broth – 1 cup, low-sodium (I like Pacific Foods brand)
- Heavy cream – 1 cup (or full-fat coconut milk for dairy-free)
- Tamari or gluten-free soy sauce – 1 tablespoon (adds that umami depth)
- Salt – ½ teaspoon, plus more for blanching water
- Black pepper – ¼ teaspoon, freshly ground
- Dried thyme – ½ teaspoon
- Nutritional yeast – 1 tablespoon (optional, but adds a lovely savory note)
For the Homemade Crispy Onions

- Large yellow onion – 1, thinly sliced into rings
- Rice flour – ½ cup (creates that light, crunchy coating)
- Cornstarch – ¼ cup
- Salt – ½ teaspoon
- Paprika – ¼ teaspoon (for color)
- Garlic powder – ¼ teaspoon
- Oil for frying – about 2 cups avocado or vegetable oil (enough for 1-inch depth in pan)
I recommend using fresh green beans for this recipe — they stay firmer and more vibrant than canned. Look for beans that snap when you bend them. For the mushrooms, cremini have a slightly earthier taste that stands up well to the creamy sauce. And if you can find it, the Kikkoman gluten-free tamari really makes a difference in the depth of flavor.
Equipment Needed
You don’t need a fancy kitchen to pull this off. Here’s what you’ll need:
- Large pot – for blanching the green beans
- Large skillet or sauté pan – a 12-inch pan works best for the mushroom sauce
- Medium saucepan – for making the crispy onions (or use the same skillet)
- 9×13-inch baking dish – or any 2.5-quart casserole dish
- Mixing bowls – one medium, one small
- Sharp knife and cutting board
- Slotted spoon or spider strainer – for removing fried onions
- Paper towels – for draining
- Whisk – for the sauce
If you don’t have a spider strainer, a slotted spoon works just fine — I used one for years before upgrading. And honestly, my favorite baking dish for this is a vintage Pyrex one I found at a thrift store for three dollars. You don’t need expensive equipment, just things that work.
Preparation Method
Let me walk you through this step by step. I’ve included all the little details I wish someone had told me when I was first figuring this out.
Step 1: Prep the Green Beans
Fill a large pot with water and bring it to a boil. Add a generous tablespoon of salt — the water should taste like the sea. While it’s heating, trim the ends off your green beans and cut them into 2-inch pieces. Once the water is boiling, drop the beans in and cook for exactly 3 minutes. You want them tender-crisp, not mushy. Drain them and immediately transfer to a bowl of ice water to stop the cooking. This is called blanching, and it keeps your beans bright green and perfectly textured. Drain again and set aside.
Step 2: Make the Crispy Onions
While the beans are cooling, slice your onion into thin rings — about ⅛-inch thick. In a medium bowl, whisk together the rice flour, cornstarch, salt, paprika, and garlic powder. Toss the onion rings in the flour mixture until they’re all separated and coated. Heat about an inch of oil in a medium saucepan to 350°F. If you don’t have a thermometer, drop a piece of onion in — it should sizzle immediately. Fry the onions in batches, don’t crowd the pan. Cook for 2-3 minutes, stirring occasionally, until golden brown. Use your slotted spoon to transfer them to a paper towel-lined plate and sprinkle with a little salt while they’re hot. They’ll crisp up as they cool. Set aside about half for the topping.
Step 3: Build the Creamy Mushroom Sauce
In your large skillet, melt the butter over medium heat. Add the diced onion and cook for 4-5 minutes until soft and translucent. Add the sliced mushrooms and cook for another 5-7 minutes, stirring occasionally, until they release their liquid and start to brown. Add the minced garlic and cook for 30 seconds until fragrant — your kitchen should smell amazing right about now. Sprinkle the cornstarch over the mushroom mixture and stir constantly for 1 minute. This cooks out the raw flour taste. Slowly pour in the broth while whisking, then add the heavy cream, tamari, salt, pepper, thyme, and nutritional yeast if using. Bring to a gentle simmer and cook for 3-4 minutes until the sauce thickens enough to coat the back of a spoon. Taste it and adjust seasoning — this is your moment to get it right.
Step 4: Assemble the Casserole
Preheat your oven to 375°F. In a large bowl, combine the blanched green beans with the mushroom sauce. Fold everything together gently until the beans are well coated. Transfer the mixture to your greased 9×13 baking dish and spread it into an even layer. Sprinkle half of your crispy onions over the top — don’t press them in, just let them rest on the surface.
Step 5: Bake to Perfection
Bake for 20-25 minutes until the casserole is bubbly around the edges and the sauce is thickened. Remove from the oven and top with the remaining crispy onions. Return to the oven for another 5 minutes. This two-step topping method ensures your onions stay crunchy instead of getting soggy. Let the casserole rest for 5 minutes before serving — it needs that time to set up properly.
Cooking Tips & Techniques
I learned most of these the hard way, so you don’t have to. First batch I made was a soupy disaster because I didn’t let the sauce simmer long enough. Trust me, that extra few minutes of simmering makes all the difference.
Don’t skip the blanching step. I know it’s tempting to just throw raw beans in the casserole, but they’ll end up unevenly cooked — some crunchy, some mushy. Blanching gives you control over the texture.
Watch your heat when making the crispy onions. If the oil is too hot, they’ll burn on the outside and stay raw inside. Too cool, and they’ll absorb oil and turn greasy. Medium heat, patience, and small batches are your friends here.
Make the crispy onions ahead of time. They’ll stay crunchy in an airtight container for up to 3 days. This is a huge time-saver if you’re making this for a holiday meal.
If your sauce seems too thin after baking, don’t panic. Let it rest for 5-10 minutes and the cornstarch will continue to thicken as it cools. If it’s still thin, you can mix 1 teaspoon cornstarch with 2 tablespoons cold water and stir it in, then bake for another 5 minutes.
One thing I wish I’d known earlier — use full-fat cream. Low-fat or half-and-half will make the sauce watery. You can substitute with full-fat coconut milk for a dairy-free version, but don’t go lighter than that.
Variations & Adaptations
This recipe is wonderfully flexible. Here are some ways I’ve adapted it over the years:
Dairy-Free Version: Swap the butter for vegan butter or olive oil, and use full-fat coconut milk instead of heavy cream. The coconut flavor is subtle and actually complements the mushrooms beautifully. I’ve made this for my lactose-intolerant sister-in-law and she couldn’t tell the difference.
Protein-Packed Twist: Add 1 cup of cooked, shredded chicken or 8 ounces of sautéed tempeh to the casserole before baking. It turns a side dish into a complete meal. I did this one busy weeknight and it was a game-changer.
Roasted Mushroom Upgrade: Instead of sautéing the mushrooms, roast them at 400°F for 15 minutes before adding to the sauce. Roasting concentrates their flavor and gives them a meatier texture. This is my preferred method when I have the extra time.
Seasonal Variations: In spring, add a handful of fresh asparagus tips along with the green beans. In fall, toss in some sautéed butternut squash cubes. The base recipe is forgiving enough to handle these additions without breaking.
Air Fryer Crispy Onions: If you want to skip the deep frying, toss the coated onion rings with a tablespoon of oil and air fry at 350°F for 8-10 minutes, shaking halfway through. They won’t be quite as crunchy, but they’re still delicious and much lighter.
Serving & Storage Suggestions
This casserole is best served hot, straight from the oven. Let it rest for those 5 minutes — I know it’s hard to wait, but it really does make a difference in how it holds together on the plate.
What to serve with it: This dish is the ultimate comfort food side. It pairs beautifully with roasted turkey or chicken, and honestly, it’s amazing alongside a simple roast chicken. For a vegetarian meal, serve it with mashed potatoes and a crisp green salad. I’ve also been known to eat leftovers straight from the fridge with a fork — no judgment.
Storage: Leftovers keep in an airtight container in the refrigerator for up to 4 days. The texture will soften over time, but the flavor actually gets better as it sits. I think it’s even better the next day — the flavors meld together in a way that’s just lovely.
Reheating: The best way to reheat is in the oven at 350°F for 10-15 minutes. This helps restore some of the crispiness to the onions. The microwave works in a pinch, but the onions will be soft. If you’re reheating just a single portion, try the toaster oven for better results.
Freezing: You can freeze the assembled but unbaked casserole for up to 3 months. Thaw overnight in the refrigerator, then bake as directed, adding 10-15 minutes to the cooking time. Don’t add the crispy onions until after baking — add them fresh when you’re ready to serve.
Nutritional Information & Benefits
While this is definitely a comfort food, it does have some redeeming nutritional qualities. Here’s the approximate breakdown per serving (based on 8 servings):
- Calories: 285
- Protein: 6g
- Carbohydrates: 22g
- Fiber: 4g
- Fat: 19g
- Saturated Fat: 9g
- Sodium: 480mg
Green beans are a good source of vitamin C, vitamin K, and fiber. Mushrooms provide B vitamins and selenium, which supports immune function. By making this gluten-free, we’ve eliminated the inflammatory properties that wheat can cause for some people, making this dish more accessible for those with celiac disease or gluten sensitivity.
If you’re watching your sodium, use low-sodium broth and reduce the added salt — the tamari and nutritional yeast provide plenty of savory flavor on their own. This recipe is also naturally nut-free and can easily be made dairy-free as mentioned above.
Conclusion
This cozy gluten-free green bean casserole with crispy onions isn’t just a recipe — it’s a way to hold onto the flavors we love while honoring the bodies we have now. Every time I make it, I think of Aunt Maggie and her formica table, and I smile. That frozen food aisle moment led me to something I never expected: a dish that feels just as comforting as the original, maybe even more so because I made it work.
I’d love for you to try this and make it your own. Maybe add a little extra garlic, or swap in your favorite mushrooms. The beauty of cooking is that every batch tells a slightly different story. Leave a comment below and tell me about your green bean casserole memories — or how this version turned out for you. Did you make any changes? Did it hit that comfort spot you were looking for? I genuinely want to know.
Here’s to cozy nights, full bellies, and recipes that feel like coming home. You’ve got this.
Frequently Asked Questions
Can I use frozen green beans instead of fresh?
Absolutely! If using frozen green beans, thaw them first and pat them dry with paper towels to remove excess moisture. You can skip the blanching step since frozen beans are already partially cooked. Just add them directly to the sauce mixture.
How do I make this recipe completely dairy-free?
Replace the butter with vegan butter or olive oil, and use full-fat canned coconut milk instead of heavy cream. The coconut milk adds a subtle sweetness that works beautifully with the mushrooms. Just make sure to use a good quality coconut milk without added guar gum for the smoothest sauce.
Can I prepare this casserole ahead of time?
Yes! You can assemble the casserole completely (without the crispy onions) up to 24 hours in advance. Cover and refrigerate. When ready to bake, add 10-15 minutes to the cooking time since you’re starting from cold. Add the crispy onions during the last 10 minutes of baking.
Why did my sauce turn out watery?
This usually happens for one of three reasons: the sauce wasn’t simmered long enough to thicken, the green beans weren’t drained well after blanching, or low-fat dairy was used instead of full-fat. Make sure to simmer your sauce for a full 3-4 minutes until it coats the back of a spoon, and always pat your blanched beans dry before adding them.
Can I make this without deep frying the onions?
Definitely! For a lighter version, toss the coated onion rings with 1-2 tablespoons of oil and bake at 400°F for 12-15 minutes, flipping halfway through. They won’t be as crispy as the fried version, but they’ll still add wonderful flavor and texture. Alternatively, you can find gluten-free crispy fried onions at some specialty stores — just check the label to make sure they’re certified gluten-free.
Pin This Recipe!
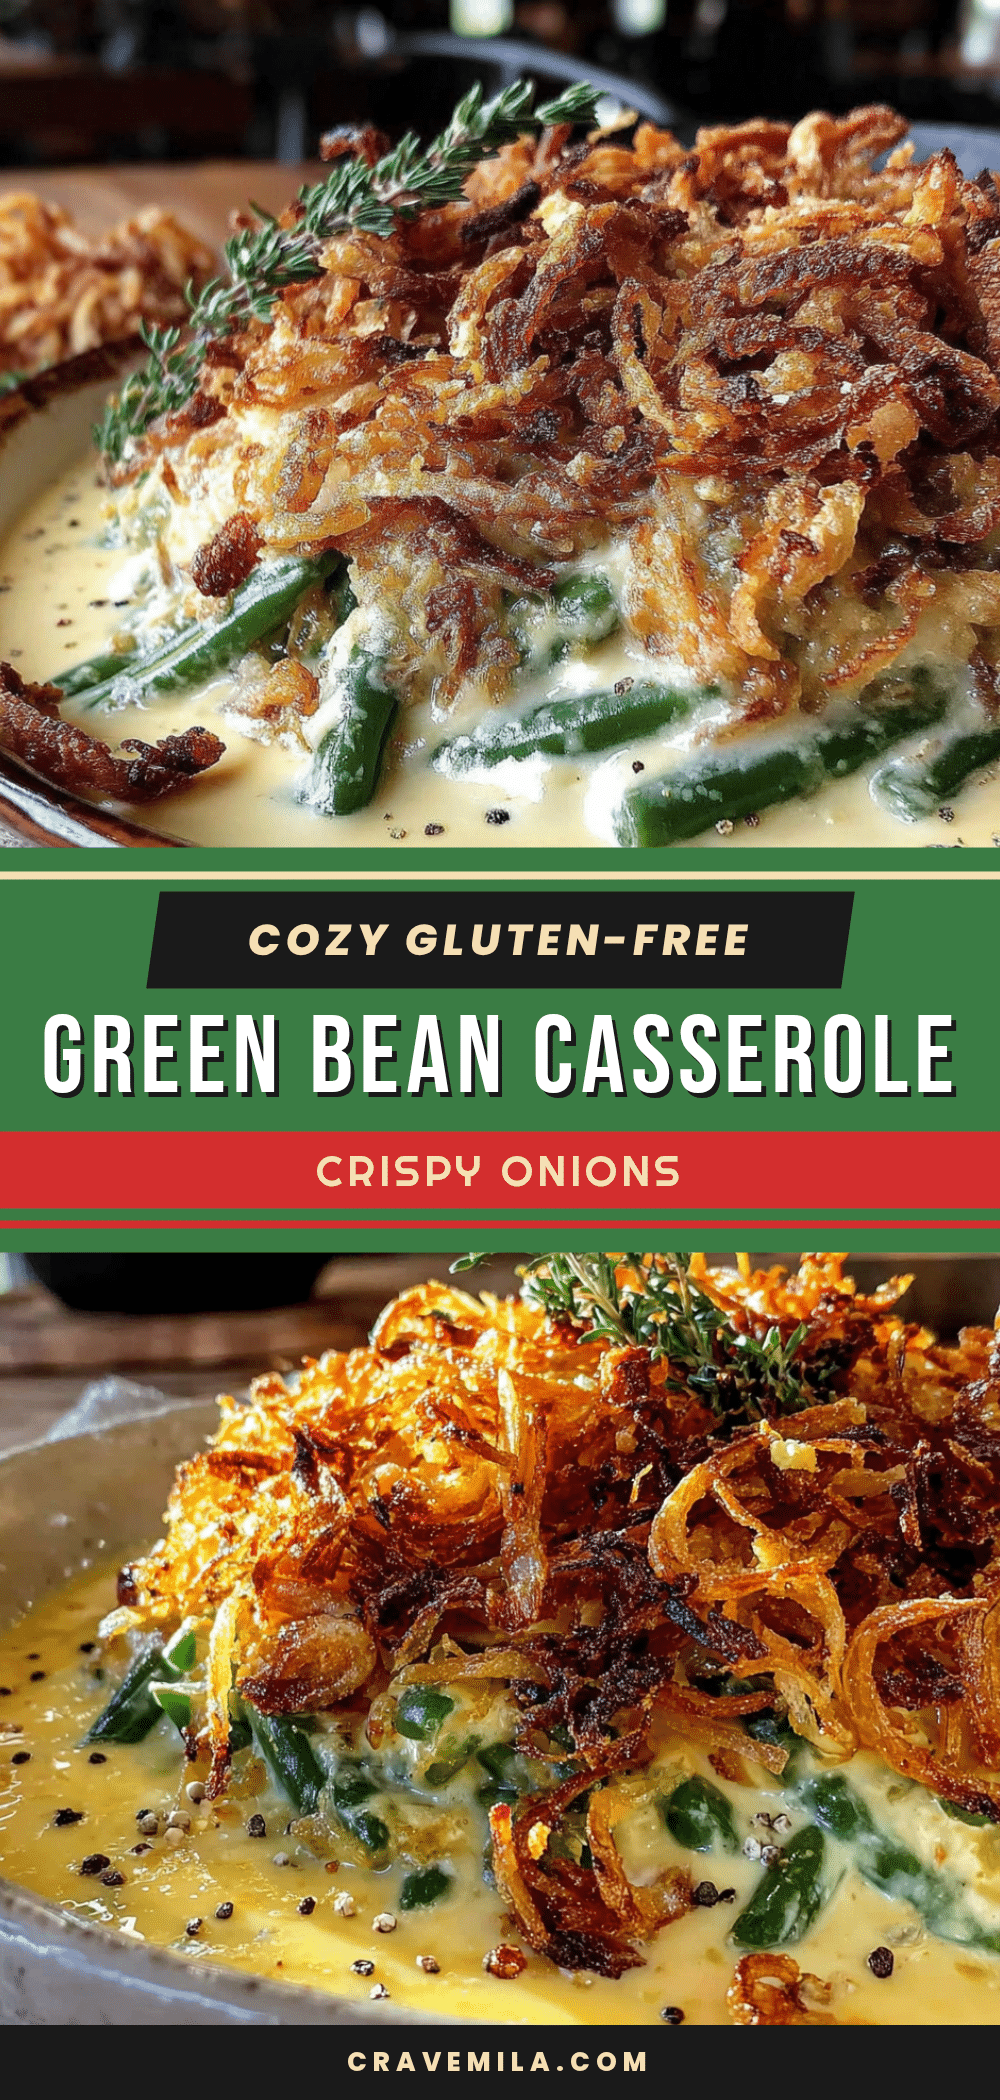
Cozy Gluten-Free Green Bean Casserole with Crispy Onions

A creamy, rich green bean casserole with homemade crispy onions, completely gluten-free. This comforting dish brings back the classic flavors without the gluten, perfect for holidays or any cozy meal.
- Prep Time: 15 minutes
- Cook Time: 30 minutes
- Total Time: 45 minutes
- Yield: 8 servings 1x
- Category: Side Dish
- Cuisine: American
Ingredients
- 1.5 pounds fresh green beans, trimmed and cut into 2-inch pieces
- 8 ounces cremini or white button mushrooms, sliced
- 3 tablespoons unsalted butter (or dairy-free butter)
- 1 medium yellow onion, finely diced
- 3 cloves garlic, minced
- 2 tablespoons cornstarch
- 1 cup low-sodium chicken or vegetable broth
- 1 cup heavy cream (or full-fat coconut milk for dairy-free)
- 1 tablespoon tamari or gluten-free soy sauce
- ½ teaspoon salt, plus more for blanching water
- ¼ teaspoon black pepper, freshly ground
- ½ teaspoon dried thyme
- 1 tablespoon nutritional yeast (optional)
- 1 large yellow onion, thinly sliced into rings
- ½ cup rice flour
- ¼ cup cornstarch
- ½ teaspoon salt
- ¼ teaspoon paprika
- ¼ teaspoon garlic powder
- 2 cups avocado or vegetable oil for frying
Instructions
- Prep the Green Beans: Bring a large pot of salted water to a boil. Add green beans and cook for exactly 3 minutes. Drain and transfer to a bowl of ice water to stop cooking. Drain again and set aside.
- Make the Crispy Onions: In a medium bowl, whisk together rice flour, cornstarch, salt, paprika, and garlic powder. Toss onion rings in the flour mixture until coated. Heat oil to 350°F in a medium saucepan. Fry onions in batches for 2-3 minutes until golden brown. Transfer to paper towels and sprinkle with salt. Set aside half for topping.
- Build the Creamy Mushroom Sauce: In a large skillet, melt butter over medium heat. Add diced onion and cook 4-5 minutes until soft. Add mushrooms and cook 5-7 minutes until browned. Add garlic and cook 30 seconds. Sprinkle cornstarch over mixture and stir for 1 minute. Slowly pour in broth while whisking, then add heavy cream, tamari, salt, pepper, thyme, and nutritional yeast. Simmer 3-4 minutes until thickened.
- Assemble the Casserole: Preheat oven to 375°F. In a large bowl, combine blanched green beans with mushroom sauce. Fold gently. Transfer to a greased 9×13-inch baking dish. Sprinkle half the crispy onions on top.
- Bake to Perfection: Bake for 20-25 minutes until bubbly. Remove from oven, top with remaining crispy onions, and bake for another 5 minutes. Let rest 5 minutes before serving.
Notes
Don’t skip blanching the green beans for best texture. For dairy-free, use vegan butter and full-fat coconut milk. Crispy onions can be made ahead and stored in an airtight container for up to 3 days. If sauce is too thin after baking, let rest 5-10 minutes; cornstarch will continue to thicken.
Nutrition
- Serving Size: 1 serving
- Calories: 285
- Sugar: 4
- Sodium: 480
- Fat: 19
- Saturated Fat: 9
- Carbohydrates: 22
- Fiber: 4
- Protein: 6
Keywords: gluten-free green bean casserole, crispy onions, holiday side dish, comfort food, gluten-free Thanksgiving



