Jen wasn’t trying to impress anyone. I’d stopped by her place on a random Tuesday afternoon to drop off a casserole dish she’d lent me, and the smell of roasted squash and something faintly caramelized hit me before I even got through the front door. She was in the kitchen, barefoot, wearing an old concert t-shirt, casually arranging slices of brie on a massive wooden board like she was just putting away groceries. But it wasn’t groceries. It was a full-blown Thanksgiving charcuterie board, complete with clusters of grapes, figs, and these little wedges of apple that were already starting to turn that perfect golden-brown from a brush of lemon juice. She didn’t even look up. “Grab a plate,” she said, “I’m just testing things out for next week.”
Now, I make charcuterie boards. I’ve made them for birthdays, for New Year’s Eve, for no reason at all. But what Jen was doing that afternoon was different. She wasn’t following a recipe from a magazine or trying to recreate something she saw on Instagram. She was treating it like a puzzle—fitting the cheese around the fruit, tucking the nuts into the gaps, making sure every color and texture had a spot. It was honest work, and the result was stunning. I stood there eating a piece of sharp cheddar with a dried fig and honestly, I felt a little embarrassed for every board I’d ever made. They were fine. This was something else.
That moment stuck with me. Maybe you’ve been there—watching someone do something so effortlessly that you realize you’ve been overthinking it the whole time. That’s what this board taught me. It’s not about having the fanciest ingredients or the most expensive cheese. It’s about balance, and a little bit of patience, and knowing that a good spread can make a room full of people feel taken care of. So when Thanksgiving rolls around and you’re stressed about timing the turkey and mashing the potatoes and remembering to set the table, this board is your secret weapon. It’s the one thing you can put out that looks like you spent hours on it, when really, you just let the ingredients do the talking.
Why You’ll Love This Recipe
Let me tell you why this Thanksgiving charcuterie board is going to be the star of your holiday spread—and I’m not just saying that because I’ve tested it on a dozen different crowds. There’s a reason I keep coming back to this arrangement, and it goes beyond the fact that it looks gorgeous on a table.
- Stress-Free Hosting: You can assemble this board in under 20 minutes, and I mean that. Chop the fruit, unwrap the cheese, dump the nuts in a bowl. That’s it. While your turkey is resting and your gravy is thickening, this board is already done and waiting.
- Simple Ingredients: No need to hunt down obscure cheeses or imported crackers. Everything on this board is available at your regular grocery store. I promise you don’t need to spend forty dollars on a wedge of something you can’t pronounce.
- Perfect for Thanksgiving: This board bridges the gap between appetizer and main course beautifully. It keeps people happy while they’re waiting for the big meal, and it doesn’t spoil anyone’s appetite because it’s balanced with fruit and cheese instead of heavy dips.
- Crowd-Pleaser: I’ve served this to picky eaters, to cheese snobs, to kids who only want the crackers. Everyone finds something they love. There’s a reason I call it the “no-waste” board—everything gets eaten.
- Unbelievably Delicious: The combination of sharp cheddar with sweet apple, creamy brie with dried figs, and the salty crunch of almonds is the kind of thing that makes people close their eyes after the first bite. It’s comfort food in appetizer form.
What makes this board different from the rest is the thought behind the pairings. I didn’t just throw things on a platter. I thought about which cheese works with which fruit, which cracker complements which spread. It’s not just another charcuterie board—it’s my best version, refined over several Thanksgivings and a lot of happy guests.
There’s a moment at every holiday gathering when the host finally sits down, takes a deep breath, and watches everyone eat. This board gives you that moment. It’s the kind of spread that makes people feel special without making you feel frantic. And honestly, isn’t that what Thanksgiving is all about?
What Ingredients You Will Need
This recipe uses simple, seasonal ingredients to deliver a stunning spread that feels both abundant and effortless. The key is choosing ingredients that complement each other in flavor and texture, so every bite feels intentional.
For the Cheese Selection (Choose 3-4 varieties)
- Sharp Cheddar (aged): A classic choice that holds its own against sweet fruit. Look for a block you can slice into wedges. I prefer a Vermont sharp cheddar for its crumbly texture and tangy finish.
- Brie or Camembert (soft-ripened): The creamy, buttery center is perfect with dried figs or a drizzle of honey. Leave it at room temperature for at least 30 minutes before serving for the best texture.
- Goat Cheese (chèvre): Its tangy, slightly acidic flavor cuts through the richness of the board. I love the log form because you can slice it into rounds or crumble it over the fruit.
- Gouda (smoked or aged): The nutty, slightly sweet flavor of gouda pairs beautifully with roasted nuts and apples. Smoked gouda adds an unexpected depth that everyone notices.
For the Fall Fruits
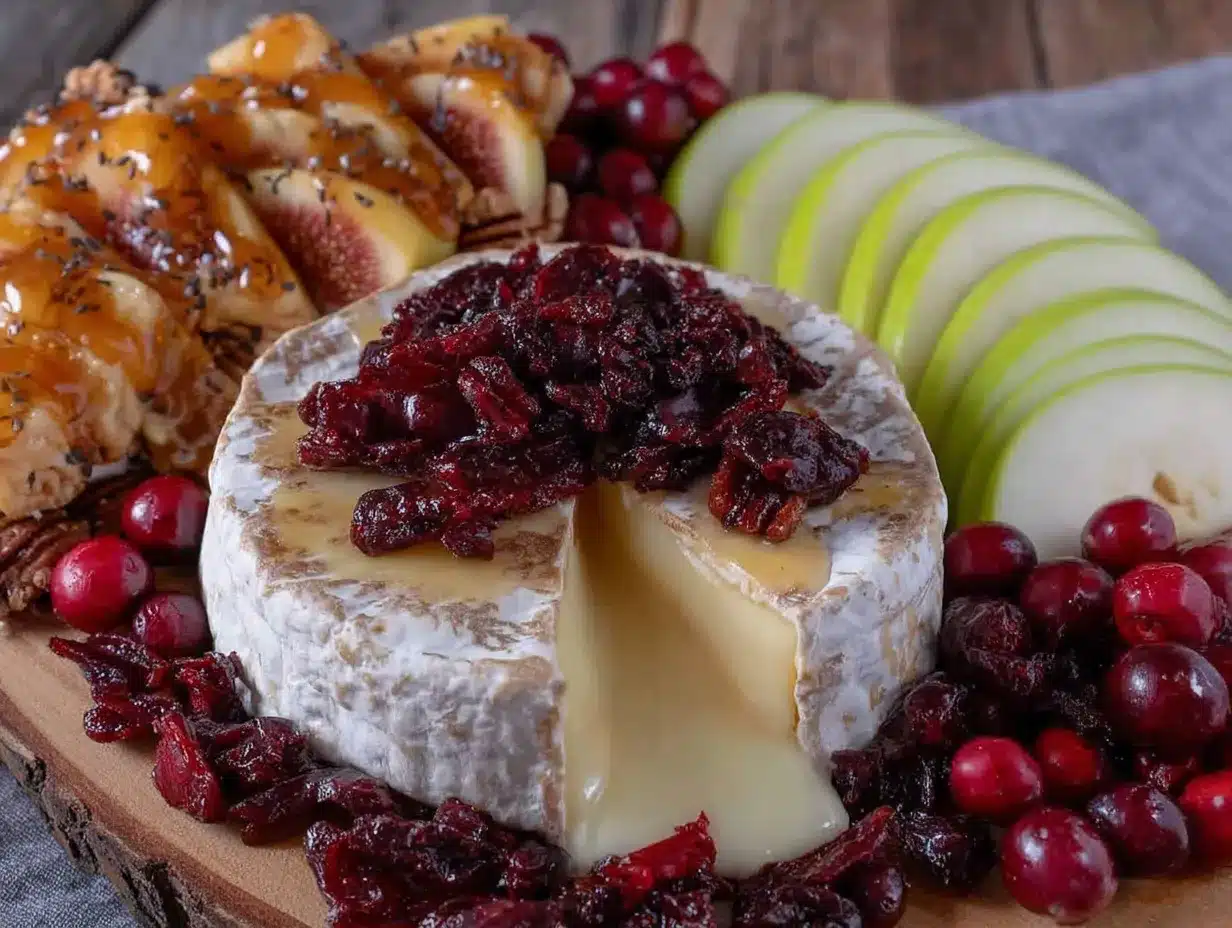
- Apples (Honeycrisp or Fuji): Slice them thin and toss with a little lemon juice to prevent browning. The sweetness and crunch are non-negotiable on a Thanksgiving board.
- Pears (Bartlett or Bosc): Their soft, juicy texture is a lovely contrast to the hard cheese. Slice them just before serving because they bruise easily.
- Figs (fresh or dried): If you can find fresh figs, they’re a showstopper. Otherwise, dried Black Mission figs are sweet and chewy and last longer on the board.
- Pomegranate Seeds: These little jewels add color, crunch, and a burst of tartness. They’re also a great way to use up leftover pomegranates from the holiday.
- Grapes (red or black seedless): A classic for a reason. They’re easy to pick up and pair with almost any cheese.
For the Savory Elements
- Roasted Almonds (salted): The saltiness balances the sweetness of the fruit. I recommend Marcona almonds if you can find them—they’re softer and richer.
- Pecans (candied or spiced): A little sweetness and crunch that screams fall. You can buy them pre-candied or make your own with a quick toss in maple syrup and cayenne.
- Prosciutto or Salami (optional but recommended): Thinly sliced cured meat adds a savory, salty element that ties everything together. I like prosciutto for its delicate texture.
For the Accompaniments
- Crackers (water crackers or rosemary flatbreads): Neutral crackers let the cheese shine. I avoid anything too flavored that might clash with the fruit.
- Baguette Slices (toasted): A sturdier option for spreading soft cheese. Lightly toast them with olive oil for extra flavor.
- Honey (local, if possible): A small bowl of honey for drizzling over brie or goat cheese is a game-changer. The floral notes complement the fall fruits beautifully.
- Fig Jam or Apple Butter: A spreadable option that adds another layer of sweetness. I’m partial to fig jam because it’s less common and always gets compliments.
For Garnish (Optional but Pretty)
- Fresh Rosemary Sprigs: They look like little Christmas trees and smell amazing. Tuck them around the board for a festive touch.
- Edible Flowers (pansies or nasturtiums): If you’re feeling fancy, a few flowers scattered on the board make it look like a magazine cover.
Equipment Needed
You don’t need a lot of fancy equipment to put this board together, but a few key tools make the process smoother. Here’s what I use:
- A Large Wooden Board or Slate Platter: This is your canvas. I use a 20-inch rectangular board from a local craft store, but any large, flat surface works. If you don’t have a board, a baking sheet lined with parchment paper does the job just fine.
- Small Bowls or Ramekins: These are for the honey, jam, and nuts. I have a set of mismatched ceramic bowls that I love because they add character. You can use any small dish you have on hand.
- A Good Cheese Knife (or Two): A soft cheese knife with holes in the blade is ideal for brie, and a hard cheese knife works for cheddar. If you only have one knife, a sharp paring knife is fine—just clean it between cheeses.
- Paring Knife and Cutting Board: For slicing apples, pears, and baguette. A mandoline slicer is nice for uniform apple slices, but not necessary.
- Serving Spoons or Tongs: For the nuts and dried fruit. I use small wooden spoons that match the board.
- Cheese Markers or Small Flags: These are optional but helpful if you’re serving guests who want to know what they’re eating. You can buy them online or make your own with toothpicks and paper.
Honestly, the most important tool is a little bit of patience. Take your time arranging everything. I’ve learned that rushing this step is what makes a board look messy. And if you don’t have a wooden board, don’t stress. I once used a large cutting board and it looked just as good.
Preparation Method
This is where the magic happens. Follow these steps, and you’ll have a board that looks like it took hours—when really, it’s just smart assembly.
- Prep Your Cheese (10 minutes before assembly): Remove your cheese from the refrigerator and unwrap it. Let it sit at room temperature for at least 30 minutes before serving. This is non-negotiable. Cold cheese doesn’t have the same flavor or texture. While it warms up, you can prep everything else.
- Slice the Fruit (5 minutes): Wash and dry your apples and pears. Slice them into thin wedges, about 1/4-inch thick. Toss the apple slices with a little lemon juice (about 1 tablespoon) to keep them from browning. For the pears, wait until just before serving to slice them because they bruise easily. Rinse the grapes and pat them dry. Cut the pomegranate in half and tap the seeds out into a bowl.
- Prepare the Savory Elements (3 minutes): If you’re using prosciutto, separate the slices and roll them loosely into small bundles. For salami, fold each slice in half and then in half again. Place the nuts in a small bowl or scatter them directly on the board. If you’re using candied pecans, make sure they’re not sticky before adding them.
- Arrange the Cheese (5 minutes): Place your cheese on the board first. This is the anchor of your spread. Space them out evenly so there’s a cheese in each quadrant of the board. For the cheddar, cut it into triangular wedges and fan them out. For the brie, leave it whole or cut it into smaller wedges. Place the goat cheese log in the center or slice it into rounds.
- Add the Fruit (5 minutes): Now, fill in the gaps around the cheese with your fruit. Cluster the apple slices together, fan them out, and place the pear slices nearby. Add the grapes in small bunches, and sprinkle the pomegranate seeds around like little jewels. Tuck the figs into any empty spaces.
- Add the Savory Elements (3 minutes): Place the prosciutto bundles and salami folds near the cheese. Scatter the almonds and pecans in the remaining gaps. Don’t be afraid to pile them up a little—it looks more abundant that way.
- Add the Accompaniments (3 minutes): Place your small bowls of honey, fig jam, and apple butter in the corners of the board or on the side. Arrange the crackers and baguette slices around the edges, fanning them out so they’re easy to grab. You can also put the crackers in a separate basket if your board is getting crowded.
- Garnish and Final Touches (2 minutes): Tuck fresh rosemary sprigs between the cheese and fruit for a pop of green. If you’re using edible flowers, scatter them sparingly. Step back and look at your board. Are there any empty spots? Fill them with extra nuts or a few more crackers. The goal is to make it look abundant, not sparse.
- Serve Immediately or Refrigerate: If you’re serving within an hour, leave the board at room temperature. If you need to prepare it ahead of time, cover it loosely with plastic wrap and refrigerate. Take it out 30 minutes before serving to let the cheese come to room temperature again.
One thing I’ve learned the hard way: don’t overthink the arrangement. Your first attempt might not look like the photos on Pinterest, and that’s okay. The beauty of a charcuterie board is that it’s meant to be eaten, not just looked at. The more you make it, the more natural it will feel.
Cooking Tips & Techniques
I’ve made this board more times than I can count, and I’ve made every mistake in the book. Here’s what I’ve learned so you don’t have to repeat my errors.
Don’t overcrowd the board. I know it’s tempting to pile everything on, but a crowded board is hard to navigate. Leave a little breathing room between the elements. If you have too much food, use a second board or a separate plate for the crackers.
Balance your flavors. Think about the contrast. A sharp cheese needs something sweet next to it. A creamy cheese needs something crunchy. A salty meat needs something acidic. If you’re tasting as you go (and you should be), adjust accordingly. I once put all the sweet things on one side and all the savory things on the other, and it felt like two different boards. Now I intermingle everything so every bite is a surprise.
Keep the fruit fresh. Apples and pears brown quickly. Toss them in lemon juice, but don’t overdo it or they’ll taste sour. Another trick is to use a little bit of pineapple juice—it works just as well and adds a hint of sweetness. I learned this from a chef friend who swears by it.
Think about serving temperature. Cheese should never be served straight from the fridge. It’s like eating a cold piece of butter—you miss all the flavor. Plan ahead and take the cheese out at least 30 minutes before you start assembling. If you’re serving the board as an appetizer before a big meal, set it out while the turkey is resting.
Use the right vessels. Small bowls for wet ingredients (honey, jam) are essential. If you put honey directly on the board, it will seep into the cheese and crackers and make everything sticky. Trust me, I learned this one the messy way. Also, use separate utensils for each cheese to avoid cross-contamination. It’s a small detail, but guests appreciate it.
Don’t forget the garnish. Rosemary sprigs aren’t just for looks—they add a subtle aromatic quality that ties everything together. I also like to add a few whole cinnamon sticks or star anise for a festive touch. They’re not edible, but they make the board look intentional.
Prep ahead of time. On Thanksgiving morning, I slice the fruit and store it in separate containers in the fridge. I arrange the cheese on the board and cover it with plastic wrap. I put the nuts in bowls and the crackers in a basket. Then, 30 minutes before guests arrive, I assemble everything. It takes 10 minutes, and I’m not stressed.
Variations & Adaptations
This board is endlessly adaptable, which is one of the reasons I love it. Here are a few variations I’ve tried over the years.
Vegetarian/Vegan Version
Skip the prosciutto and salami. Instead, add marinated artichoke hearts, roasted red peppers, and olives. For the cheese, use a high-quality vegan brie or a cashew-based cheese spread. I’ve used a brand called Miyoko’s and it was surprisingly good. Pair it with extra fruit and a balsamic glaze for depth.
Gluten-Free Version
Replace the crackers and baguette with gluten-free crackers (I like the ones from Simple Mills) or use sliced cucumber and bell pepper as the base. The rest of the board is naturally gluten-free, so you don’t need to change much. Just make sure your prosciutto and salami are gluten-free—most are, but it’s worth checking the label.
Spicy Fall Version
Add a kick to your board by including pepper jack cheese, spicy candied pecans (toss them in cayenne and brown sugar), and a drizzle of hot honey. The heat contrasts beautifully with the sweet fruit. I made this version for a Friendsgiving and it was gone in 20 minutes.
Dessert Charcuterie Board
Swap the savory elements for sweet ones. Use chocolate-covered almonds, dried cherries, dark chocolate bars (broken into pieces), and fresh berries. Add a small bowl of caramel sauce for dipping. Pair it with a soft, creamy cheese like mascarpone or a triple-cream brie. This is perfect for after the Thanksgiving meal when everyone wants something sweet but not a full slice of pie.
Seasonal Variations
In the summer, I swap the apples and pears for stone fruits like peaches and plums. In the winter, I add clementines and dried cranberries. The beauty of this board is that it works with whatever fruit is in season. Don’t feel locked into my ingredient list—use what looks good at the store.
Serving & Storage Suggestions
This board is best served at room temperature, so plan accordingly. I usually put it out 30 minutes before guests arrive and let it sit. If you’re serving it as an appetizer before a big meal, keep it light—people shouldn’t fill up on cheese before the turkey.
What to serve alongside: This board pairs beautifully with a crisp white wine like Sauvignon Blanc or a dry Riesling. For a non-alcoholic option, sparkling water with a slice of lemon or apple cider is perfect. If you’re serving it as part of a Thanksgiving spread, it works as a pre-dinner snack while the turkey is resting. I’ve also served it as a light lunch the next day with leftover turkey and cranberry sauce—it’s a great way to use up leftovers.
Storage: If you have leftovers (which is rare in my house), store the components separately. Wrap the cheese in wax paper or cheese paper and place it in the refrigerator. Store the fruit in an airtight container. The crackers and nuts can stay in their original packaging. Don’t store the assembled board in the fridge—the fruit will get soggy and the crackers will absorb moisture.
Reheating: You don’t need to reheat anything, but if you’re serving the board the next day, let the cheese come to room temperature again. The fruit might be a little softer, but it will still taste good. I’ve found that the flavors actually meld together overnight, so the leftovers can be even better than the original.
How flavors develop over time: The cheese and fruit will continue to release their flavors as they sit. That’s why I recommend letting the board rest for 15-20 minutes after assembly before serving. It gives everything a chance to come together. If you’re making the board ahead of time, don’t add the crackers until just before serving—they’ll get stale.
Nutritional Information & Benefits
This board is more balanced than you might think. Here’s a rough estimate per serving (assuming the board serves 8-10 people as an appetizer):
- Calories: 350-400 per serving
- Protein: 15-20g (from cheese and prosciutto)
- Fat: 25-30g (mostly from cheese and nuts)
- Carbohydrates: 20-25g (from fruit and crackers)
- Fiber: 4-6g (from fruit and nuts)
- Sugar: 12-15g (natural sugars from fruit)
Health benefits: Cheese is a good source of calcium and protein, and the nuts provide healthy fats and vitamin E. The fruit adds antioxidants and fiber. Pomegranate seeds are particularly high in vitamin C and anti-inflammatory compounds. Apples contain pectin, which is good for digestion. Honestly, this is one of the healthier appetizers you can serve at a holiday meal—it’s all whole foods with no processed ingredients.
Dietary considerations: This board is naturally low-carb if you skip the crackers. It’s also vegetarian-friendly if you omit the prosciutto (or use a plant-based alternative). For a dairy-free version, replace the cheese with nut-based alternatives. The main allergens are dairy (cheese) and tree nuts (almonds, pecans), so if you’re serving guests with allergies, be sure to label the components clearly.
I’m not a nutritionist, but I’ve always felt that this board is a smart choice for a holiday gathering. It keeps people satisfied without weighing them down, and it’s full of ingredients that actually make you feel good.
Conclusion
This Thanksgiving charcuterie board is more than just an appetizer—it’s a conversation starter, a stress reliever, and a way to bring people together before the big meal. I’ve made it for my family, for friends, for neighbors, and every time, it’s the first thing to disappear. There’s something about the combination of sweet fruit, creamy cheese, and salty nuts that just works, and it works without a lot of effort.
I want you to take this recipe and make it your own. Swap in your favorite cheese, use whatever fruit looks good at the store, and don’t be afraid to get creative. The best boards are the ones that reflect the person making them. If you love spicy food, add the pepper jack. If you’re a sweet tooth, double the honey. There’s no wrong way to do this.
Honestly, the thing I love most about this board is the way it makes people feel. When guests walk in and see that spread, they know they’re in for a good meal. It sets the tone for the whole evening. And when you’re the one who made it, you get to sit back and watch everyone enjoy themselves. That’s a pretty great feeling.
So go ahead, give it a try. And when you do, I’d love to hear about it. Leave a comment below and tell me which combination was your favorite. Share a photo of your board on Pinterest and tag me—I want to see your creation. Happy Thanksgiving, and happy snacking!
Frequently Asked Questions
How far in advance can I make this charcuterie board?
You can prep the components up to 24 hours in advance. Slice the fruit and store it in separate containers in the fridge. Wrap the cheese and keep it refrigerated. Assemble the board no more than 2 hours before serving to keep the fruit fresh and the crackers crispy.
What if I don’t have a wooden board?
No problem at all. Use a large cutting board, a baking sheet, a slate tile from a home improvement store, or even a clean pizza pan. The surface doesn’t matter as much as the arrangement. I’ve used a marble pastry board before and it looked beautiful.
Can I make this board dairy-free?
Absolutely. Replace the cheese with plant-based alternatives like cashew cheese, almond-based brie, or vegan cream cheese. There are some excellent options available now that taste surprisingly close to the real thing. Pair them with extra fruit and nuts for a satisfying spread.
How much food do I need for a crowd?
For a party of 10-12 people, plan on about 3-4 ounces of cheese per person, 2-3 ounces of meat per person, and a generous amount of fruit and nuts. It’s always better to have too much than too little—leftovers make a great snack the next day.
What’s the best way to keep the fruit from browning?
Toss apple and pear slices in a mixture of 1 tablespoon lemon juice and 1 cup of water. Let them sit for a minute, then drain and pat dry. You can also use pineapple juice or a commercial product like Fruit-Fresh. The key is to do this right before serving for the best results.
Pin This Recipe!
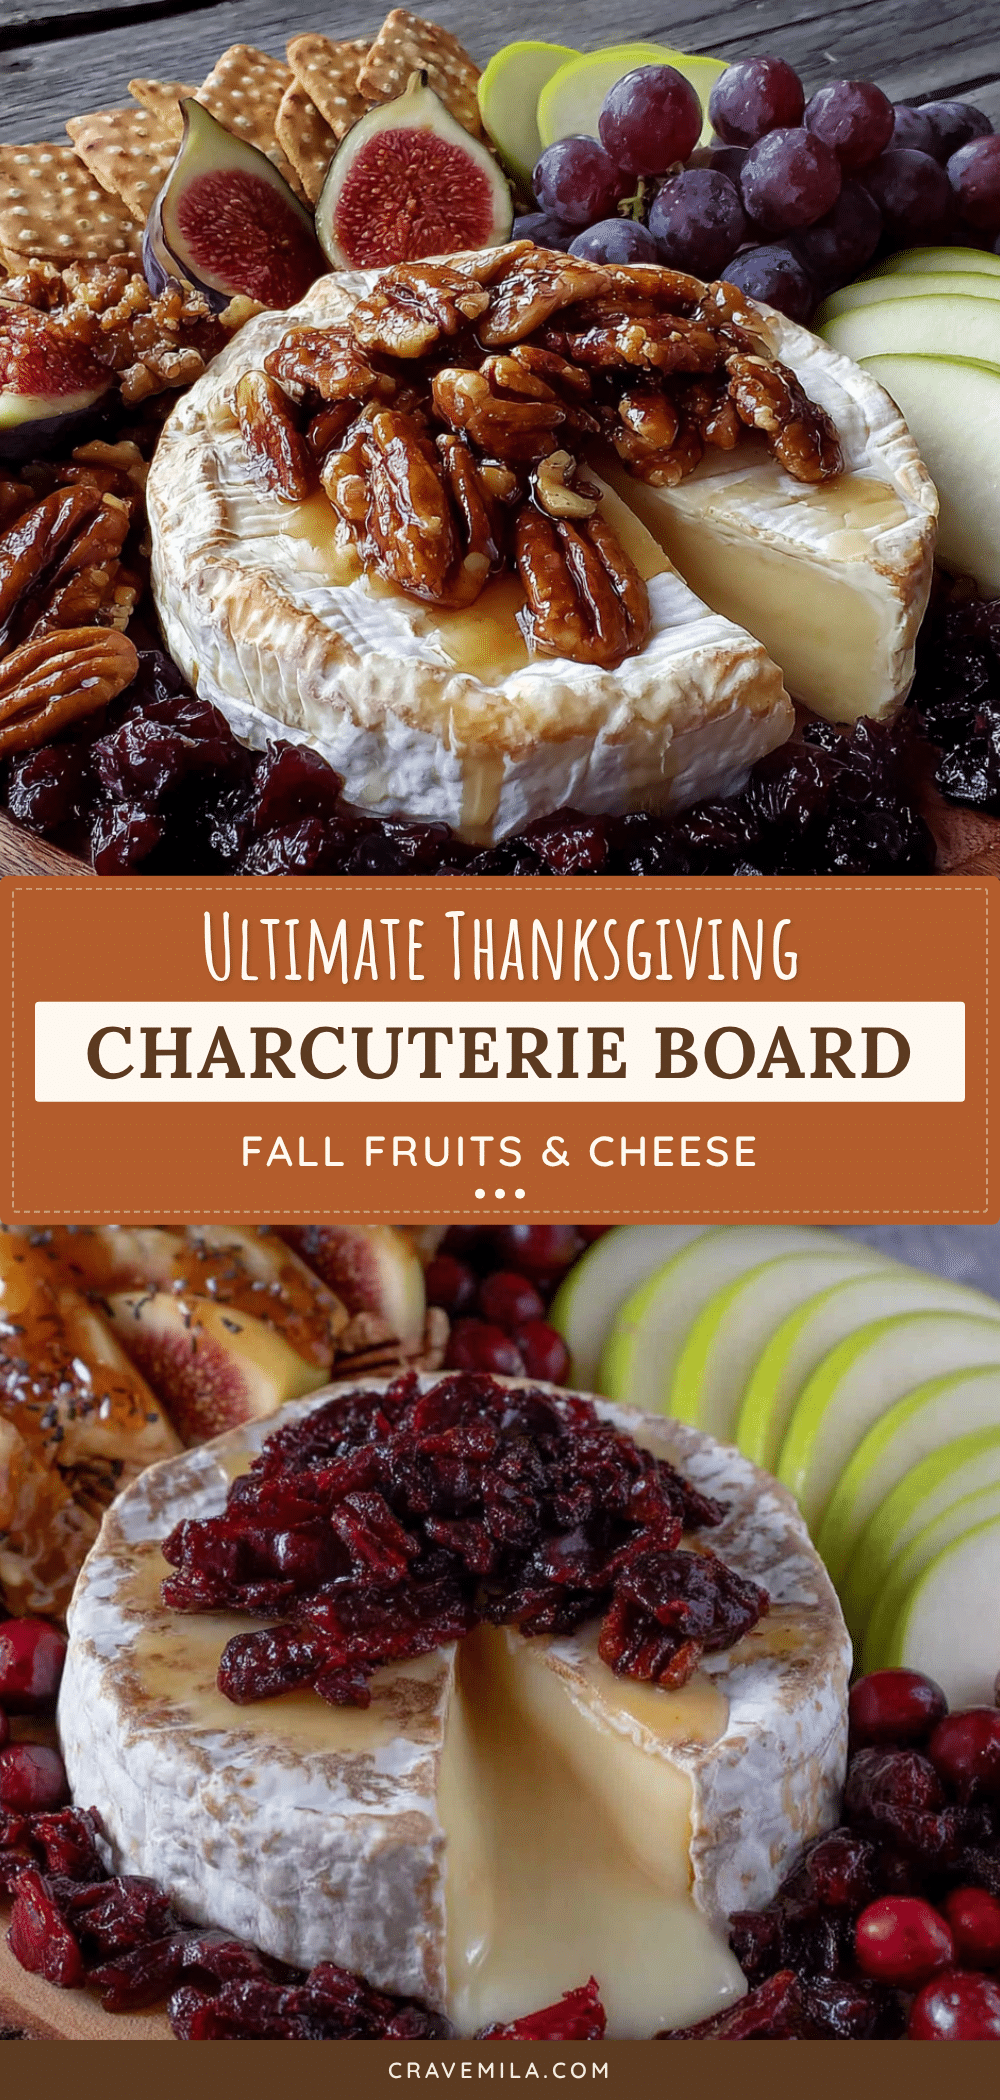
The Ultimate Thanksgiving Charcuterie Board with Fall Fruits
A stunning and stress-free Thanksgiving charcuterie board featuring seasonal fruits, artisan cheeses, and savory bites. Perfect for holiday entertaining, this board comes together in under 20 minutes and is sure to impress your guests.
- Prep Time: 20 minutes
- Cook Time: 0 minutes
- Total Time: 20 minutes
- Yield: 8-10 servings
- Category: Appetizer
- Cuisine: American
Ingredients
- Sharp Cheddar (aged), 8 oz
- Brie or Camembert (soft-ripened), 8 oz
- Goat Cheese (chèvre), 4 oz
- Gouda (smoked or aged), 8 oz
- Apples (Honeycrisp or Fuji), 2 large
- Pears (Bartlett or Bosc), 2 large
- Figs (fresh or dried), 8-10
- Pomegranate Seeds, 1/2 cup
- Grapes (red or black seedless), 1 cup
- Roasted Almonds (salted), 1/2 cup
- Pecans (candied or spiced), 1/2 cup
- Prosciutto or Salami, 4 oz
- Crackers (water crackers or rosemary flatbreads), 8 oz
- Baguette Slices (toasted), 1 baguette
- Honey, 1/4 cup
- Fig Jam or Apple Butter, 1/4 cup
- Fresh Rosemary Sprigs, for garnish
- Edible Flowers (optional), for garnish
- Lemon juice, 1 tablespoon (for fruit)
Instructions
- Prep Your Cheese (10 minutes before assembly): Remove your cheese from the refrigerator and unwrap it. Let it sit at room temperature for at least 30 minutes before serving.
- Slice the Fruit (5 minutes): Wash and dry your apples and pears. Slice them into thin wedges, about 1/4-inch thick. Toss the apple slices with a little lemon juice (about 1 tablespoon) to keep them from browning. For the pears, wait until just before serving to slice them. Rinse the grapes and pat them dry. Cut the pomegranate in half and tap the seeds out into a bowl.
- Prepare the Savory Elements (3 minutes): If you’re using prosciutto, separate the slices and roll them loosely into small bundles. For salami, fold each slice in half and then in half again. Place the nuts in a small bowl or scatter them directly on the board.
- Arrange the Cheese (5 minutes): Place your cheese on the board first. Space them out evenly so there’s a cheese in each quadrant of the board. For the cheddar, cut it into triangular wedges and fan them out. For the brie, leave it whole or cut it into smaller wedges. Place the goat cheese log in the center or slice it into rounds.
- Add the Fruit (5 minutes): Fill in the gaps around the cheese with your fruit. Cluster the apple slices together, fan them out, and place the pear slices nearby. Add the grapes in small bunches, and sprinkle the pomegranate seeds around. Tuck the figs into any empty spaces.
- Add the Savory Elements (3 minutes): Place the prosciutto bundles and salami folds near the cheese. Scatter the almonds and pecans in the remaining gaps.
- Add the Accompaniments (3 minutes): Place your small bowls of honey, fig jam, and apple butter in the corners of the board or on the side. Arrange the crackers and baguette slices around the edges, fanning them out so they’re easy to grab.
- Garnish and Final Touches (2 minutes): Tuck fresh rosemary sprigs between the cheese and fruit for a pop of green. If you’re using edible flowers, scatter them sparingly. Step back and look at your board. Fill any empty spots with extra nuts or a few more crackers.
- Serve Immediately or Refrigerate: If you’re serving within an hour, leave the board at room temperature. If you need to prepare it ahead of time, cover it loosely with plastic wrap and refrigerate. Take it out 30 minutes before serving to let the cheese come to room temperature again.
Notes
Let cheese come to room temperature for at least 30 minutes before serving for best flavor. Toss apple and pear slices in lemon juice to prevent browning. Assemble the board no more than 2 hours before serving to keep fruit fresh and crackers crispy. For a dairy-free version, replace cheese with plant-based alternatives. Store leftovers separately: wrap cheese in wax paper, store fruit in airtight container, and keep crackers and nuts in original packaging.
Nutrition
- Serving Size: 1 serving (approxima
- Calories: 375
- Sugar: 14
- Sodium: 520
- Fat: 28
- Saturated Fat: 12
- Carbohydrates: 22
- Fiber: 5
- Protein: 17
Keywords: Thanksgiving charcuterie board, fall charcuterie board, holiday appetizer, cheese board, easy appetizer, Thanksgiving appetizer



