There used to be a tiny café tucked inside a used bookstore in my old neighborhood that made the most incredible butternut squash apple soup. When the bookstore closed suddenly three years ago—turned into a chain coffee shop, if you can believe it—I honestly felt a little lost. That soup was my go-to comfort on rainy afternoons, and I’d spend way too long pretending to browse cookbooks just so I could linger over my bowl.
After maybe eight tries—including one disaster where I forgot the apples entirely and ended up with sad, sweet squash water—I finally cracked the code. The secret? Letting the crockpot do all the heavy lifting while the apples and squash get cozy together for hours. I mean, the original café version was good, but this one? It’s actually better. The slow cooker brings out this natural sweetness that makes you wonder why you ever bothered with heavy cream in the first place.
You know that feeling when you take a spoonful and just stop talking mid-conversation because the taste is that good? That’s this soup. It’s velvety without being heavy, sweet from the apples but balanced with savory notes, and it fills your whole house with the kind of smell that makes neighbors “just happen to stop by.” Honestly, I’ve made this for dinner parties where people asked for the recipe before they even finished their bowl. Not bad for something that basically cooks itself.
Why You’ll Love This Recipe
Let me tell you—after testing this soup about a dozen times (my family staged a gentle intervention), I can promise you this isn’t just another butternut squash soup recipe. It’s the one you’ll actually want to make again and again.
- Set It and Forget It: The crockpot does everything. No standing over a hot stove, no stirring every five minutes. Just chop, dump, and let magic happen while you go about your day.
- Surprisingly Light: Most creamy squash soups rely on heavy cream or coconut milk. This one gets its silky texture from the apples and a tiny splash of milk—you won’t miss the extra calories one bit.
- Simple Ingredients: Nothing fancy here. You probably already have onions, garlic, and broth in your kitchen. The squash and apples are the stars, and they’re easy to find at any grocery store.
- Perfect for Meal Prep: This soup tastes even better the next day. Make a big batch on Sunday, and you’ve got lunches sorted for half the week. It freezes beautifully too.
- Crowd-Pleaser: I’ve served this to picky kids, health-conscious friends, and my dad who “doesn’t do soup for dinner.” Everyone goes back for seconds. It’s that good.
What makes this version different from all the others out there? It’s the balance. The apples aren’t just an afterthought—they’re front and center, adding natural sweetness that lets you use less sugar. And the slow cooking means the flavors meld together in a way that stovetop versions just can’t match. You get this deep, caramelized taste without any extra effort.
This is the kind of soup that makes you feel good about eating well. It’s nourishing without being boring, comforting without being heavy. One bowl and you’ll understand why I spent three years trying to get it right.
What Ingredients You Will Need
This recipe uses simple, wholesome ingredients that work together to create something truly special. Most of these are pantry staples or easy to find at any grocery store, which makes this soup perfect for spontaneous cooking.
For the Soup Base
- 1 medium butternut squash (about 3 pounds), peeled, seeded, and cut into 1-inch cubes (pre-cut squash works great if you’re short on time—just look for fresh, firm pieces)
- 2 medium Honeycrisp or Gala apples, peeled, cored, and roughly chopped (sweet apples work best here; Granny Smith can be too tart unless you like a tangier soup)
- 1 medium yellow onion, diced (about 1 cup)
- 3 cloves garlic, minced (I use jarred minced garlic in a pinch, but fresh gives better flavor)
- 4 cups low-sodium vegetable broth (I prefer Pacific Foods or Swanson for consistent flavor)
- 1 teaspoon salt (plus more to taste)
- ½ teaspoon black pepper
- ½ teaspoon ground cinnamon (this is non-negotiable—it ties everything together)
- ¼ teaspoon ground nutmeg (freshly grated if you have it)
- ¼ teaspoon ground ginger (or 1 teaspoon fresh grated ginger for a brighter kick)
For the Creamy Finish
- ½ cup milk (any kind works—whole milk for richness, oat milk or almond milk for dairy-free, or even canned coconut milk for extra creaminess)
- 1 tablespoon butter or olive oil (optional, but adds a lovely silkiness)
Optional Garnishes
- Toasted pumpkin seeds for crunch
- A swirl of plain Greek yogurt or coconut cream
- A drizzle of maple syrup if you like it sweeter
- Fresh thyme or sage leaves
A quick note on squash: Look for one that feels heavy for its size with firm, unblemished skin. If you’re using pre-cut squash from the store, make sure the pieces are bright orange and not mushy at the edges. And don’t skip peeling—the skin gets tough during slow cooking and won’t blend smoothly.
For the apples, I’ve tested this with Fuji, Pink Lady, and Braeburn—all work beautifully. The key is using apples that are sweet but still hold their shape during cooking. Avoid mealy apples like Red Delicious; they’ll break down too much and make the soup grainy.
Equipment Needed
The beauty of this recipe is that it doesn’t require fancy equipment. Here’s what you’ll need:
- A 6-quart or larger slow cooker (anything smaller and you’ll have trouble fitting everything in; I use my Cuisinart 6.5-quart and it’s perfect)
- A sharp vegetable peeler (a good one makes squash prep so much faster—I swear by my OXO Good Grips peeler)
- A chef’s knife (for cutting the squash and apples)
- A cutting board
- An immersion blender (this is my preferred method—less cleanup and you blend right in the pot. A standard blender works too, just work in batches and be careful with hot liquid)
- Measuring cups and spoons
- A wooden spoon for stirring
If you don’t have an immersion blender, no worries. Let the soup cool for about 10 minutes, then carefully transfer it to a regular blender in batches. Fill the blender no more than halfway, hold the lid on with a kitchen towel, and blend until smooth. Trust me on the towel—I learned the hard way that hot soup expands and can pop the lid off!
Preparation Method
This recipe is almost embarrassingly easy. Seriously, the hardest part is chopping the squash, and even that gets faster with practice.
- Prep your squash (about 15 minutes): Cut off both ends of the butternut squash, then use a vegetable peeler to remove all the skin. Slice the squash in half lengthwise and scoop out the seeds with a spoon. Cut the flesh into 1-inch cubes. If you’re using pre-cut squash, just give it a quick rinse and pat it dry.
- Layer everything in the slow cooker: Add the cubed squash, chopped apples, diced onion, and minced garlic to your crockpot. Don’t worry about layering perfectly—just dump it all in. The slow cooker will take care of the rest.
- Add the seasonings and broth: Sprinkle the salt, pepper, cinnamon, nutmeg, and ginger over the vegetables. Pour in the vegetable broth, making sure everything is mostly submerged. Give it a gentle stir with your wooden spoon, but don’t stress about getting it perfectly mixed.
- Cook low and slow: Cover the slow cooker and cook on low for 6-7 hours or on high for 3-4 hours. You’ll know it’s done when the squash is fork-tender—it should fall apart easily when you poke it. I prefer low and slow because it gives the flavors more time to develop, but high works in a pinch.
- Blend until silky: Once the soup is cooked, turn off the slow cooker. If you’re using an immersion blender, blend the soup directly in the pot until completely smooth. If using a regular blender, let the soup cool for 10 minutes first, then blend in batches. Be patient here—you want it velvety, not chunky.
- Finish with milk and butter: Stir in the milk and butter (if using). This is where the soup transforms from good to “close your eyes and savor it” good. Taste and adjust seasonings—you might want a pinch more salt or an extra sprinkle of cinnamon.
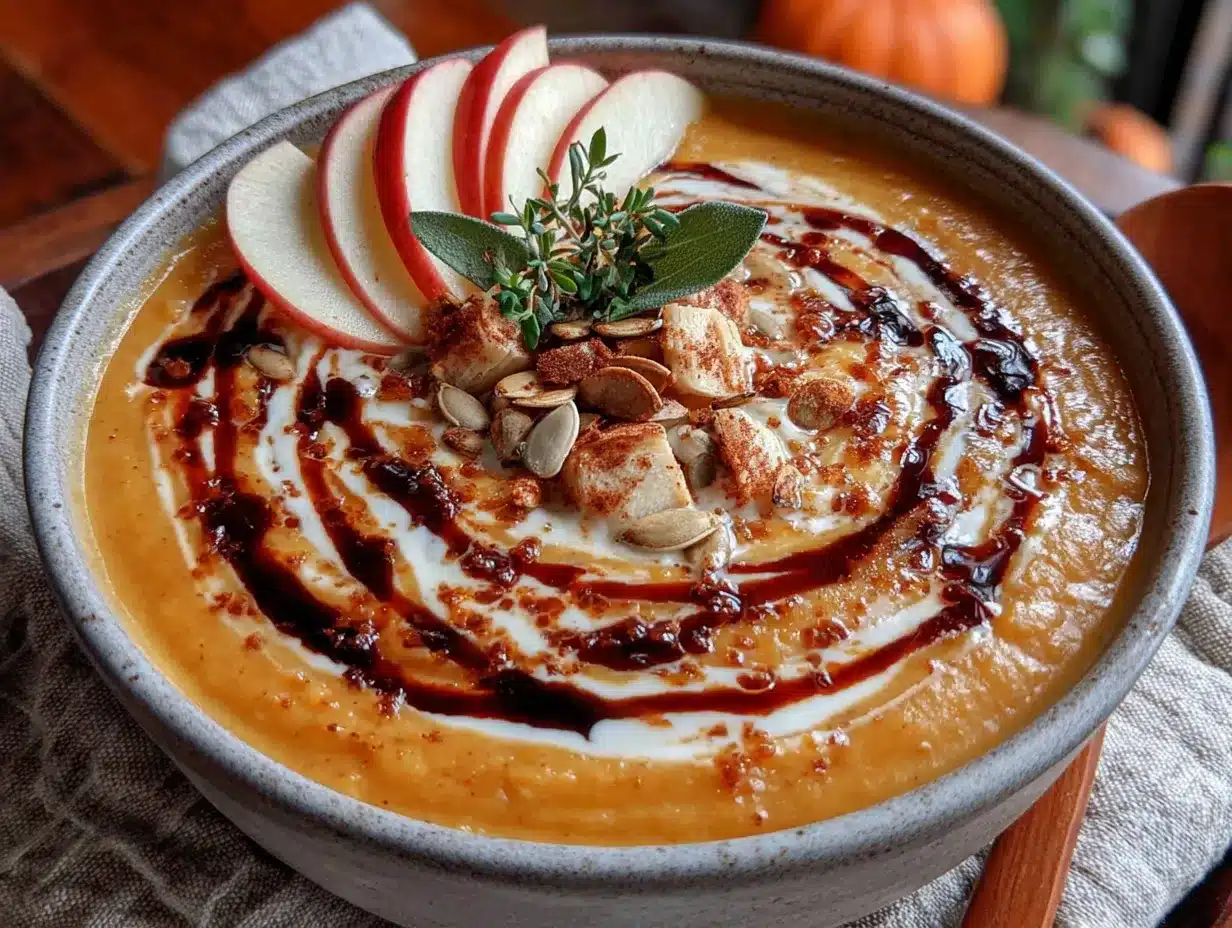
- Serve and garnish: Ladle the soup into bowls and add your favorite toppings. I love a swirl of Greek yogurt, a handful of toasted pumpkin seeds, and a tiny drizzle of maple syrup. The contrast of creamy soup, crunchy seeds, and cool yogurt is everything.
One thing I’ve learned the hard way: Don’t skip the blending step. I once tried to serve this as a chunky soup, and it just wasn’t the same. The magic really happens when everything gets pureed into that silky, uniform texture. It’s what makes this soup feel luxurious without any heavy cream.
Cooking Tips & Techniques
After making this soup more times than I care to count, I’ve picked up a few tricks that make a real difference:
Toast your spices first. This is a game-changer. Before adding the cinnamon, nutmeg, and ginger to the slow cooker, toast them in a dry pan over medium heat for about 30 seconds until fragrant. It takes almost no extra time, but the depth of flavor you get is incredible. I learned this after making a batch that tasted flat—the toasting wakes up the essential oils in the spices.
Don’t overfill your slow cooker. I know it’s tempting to cram everything in, but leaving a little space at the top helps the soup cook evenly. If your slow cooker is on the smaller side, just reduce the recipe by a third. The soup will still be amazing.
Watch your liquid levels. Butternut squash releases a surprising amount of water as it cooks. If your soup seems too thin after blending, don’t panic. Just cook it uncovered on high for 15-20 minutes to let some liquid evaporate. If it’s too thick, add a splash more broth or milk until it reaches your preferred consistency.
Season in layers. I add salt and pepper at the beginning, but I always taste and adjust after blending. Sometimes the apples make the soup sweeter than expected, and a little extra salt balances everything out perfectly. Trust your taste buds over the recipe.
Make it ahead for better flavor. This soup genuinely tastes better the next day. The flavors have time to meld and deepen overnight. I often make it on a Sunday, let it cool, and refrigerate it for Monday’s dinner. Reheat it gently on the stove or in the microwave, and it’s like the soup leveled up overnight.
One mistake I made that you should avoid: I once used a really tart Granny Smith apple because it was all I had. The soup came out so sour I had to add maple syrup to fix it—and even then, it wasn’t great. Stick with sweet apples for the best result, unless you’re specifically going for a tangier flavor profile.
Variations & Adaptations
One of the best things about this soup is how adaptable it is. Here are some ways to make it your own:
Make it vegan: Use olive oil instead of butter, and swap the milk for unsweetened oat milk or canned coconut milk. Coconut milk adds a lovely richness that complements the squash and apples beautifully. I’ve made this version for vegan friends, and they always ask for seconds.
Add some heat: If you like a little kick, add ¼ teaspoon of cayenne pepper or a minced jalapeño (seeds removed) along with the other spices. The heat pairs surprisingly well with the sweetness of the apples and squash. My husband loves this version, and it’s become our go-to for cold winter nights.
Boost the protein: Stir in a cup of cooked white beans (like cannellini or Great Northern) before blending. They blend right in and make the soup creamier while adding protein and fiber. You won’t even taste them, I promise. This is my favorite trick for making the soup more filling as a main dish.
Try different squash: Butternut is classic, but you can use kabocha, honeynut, or even sugar pumpkin. Each variety brings a slightly different sweetness and texture. Kabocha squash, for example, has a richer, almost chestnut-like flavor that’s amazing in this soup.
Switch up the apples: While I recommend sweet apples, you can experiment with different varieties. Fuji apples add intense sweetness, while Pink Lady apples bring a nice balance of sweet and tart. I once used a mix of Honeycrisp and Braeburn, and it was fantastic.
Make it a meal: Add a can of drained and rinsed chickpeas or some shredded rotisserie chicken in the last 30 minutes of cooking. The soup becomes hearty enough to stand alone as dinner, no sides needed. I do this on busy weeknights when I want something comforting but don’t have time to cook a full meal.
Serving & Storage Suggestions
This soup is versatile enough to work for casual lunches, fancy dinner parties, or cozy nights in. Here’s how to serve and store it:
Serving temperature: Serve this soup hot, but not boiling. I like to let it sit for about 5 minutes after blending so it cools to a comfortable eating temperature. You can also serve it at room temperature in warmer months—it’s surprisingly refreshing that way.
Presentation tips: For a beautiful presentation, ladle the soup into shallow bowls and add a swirl of Greek yogurt or coconut cream. Use the back of a spoon to create a spiral pattern. Top with toasted pumpkin seeds, a sprinkle of cinnamon, and a few fresh thyme leaves. It looks like something from a fancy restaurant, but it took you almost no effort.
What to serve with it: This soup pairs beautifully with crusty bread or a simple green salad. I love serving it with a grilled cheese sandwich for the ultimate comfort meal. For a lighter option, try it with a side of roasted vegetables or a quinoa salad. A glass of crisp white wine or a warm apple cider makes the perfect beverage pairing.
Storage instructions: Let the soup cool completely before storing. Transfer it to an airtight container and refrigerate for up to 5 days. The flavors actually improve after a day or two, so don’t be afraid to make it ahead.
Freezing: This soup freezes beautifully. Pour cooled soup into freezer-safe bags or containers, leaving about an inch of headspace for expansion. Freeze for up to 3 months. To thaw, transfer to the refrigerator overnight, then reheat gently on the stove or in the microwave. I like to freeze individual portions in silicone muffin cups for easy grab-and-go lunches.
Reheating: Reheat the soup on the stovetop over medium-low heat, stirring occasionally. If it thickens too much after refrigeration, add a splash of broth or milk to thin it out. You can also reheat individual portions in the microwave in 30-second bursts, stirring between each.
Nutritional Information & Benefits
This soup isn’t just delicious—it’s genuinely good for you. Here’s a rough breakdown per serving (based on 6 servings):
- Calories: Approximately 180-200 per serving
- Protein: 4-5 grams
- Fat: 5-7 grams (depending on milk choice)
- Carbohydrates: 32-35 grams
- Fiber: 6-8 grams
- Sugar: 12-15 grams (natural from squash and apples)
- Sodium: 400-500 mg (varies with broth)
Health highlights: Butternut squash is packed with vitamin A (over 400% of your daily needs per cup), vitamin C, and potassium. Apples add fiber and antioxidants, while the cinnamon helps regulate blood sugar. This soup is naturally gluten-free, dairy-free if you use plant-based milk, and low in calories for how satisfying it is.
Dietary considerations: This recipe is vegetarian as written. To make it vegan, use plant-based milk and skip the butter or use olive oil. It’s naturally gluten-free, so it works for those with celiac disease or gluten sensitivity. If you’re watching your sodium, use low-sodium broth and go easy on the added salt.
I love that this soup makes me feel good about eating well. It’s proof that healthy food doesn’t have to be boring or complicated. You get all the comfort of a creamy soup without any of the guilt.
Frequently Asked Questions
Can I make this soup on the stovetop instead of a crockpot?
Absolutely. Combine all the ingredients except the milk in a large pot. Bring to a boil, then reduce heat and simmer for 25-30 minutes until the squash is tender. Blend and finish with milk as directed. The slow cooker version develops deeper flavor, but the stovetop method works great when you’re short on time.
Do I have to peel the butternut squash?
Yes, for this recipe. The skin becomes tough during cooking and won’t blend smoothly, leaving your soup with unpleasant stringy bits. A sharp vegetable peeler makes the job quick, or you can buy pre-peeled and cubed squash from the store to save time.
Can I use frozen butternut squash?
You can, but the texture won’t be quite as good. Frozen squash tends to be more watery, so your soup might be thinner. If using frozen, don’t thaw it first—just add it directly to the slow cooker. You may need to cook it on low for an extra hour. I’ve done this in a pinch, and it still tastes great.
How can I make this soup thicker?
If your soup turns out thinner than you’d like, try these fixes: Cook it uncovered on high for 15-20 minutes to let some liquid evaporate. Or, stir in a tablespoon of cornstarch mixed with cold water and simmer for a few minutes. You can also blend in a cooked potato or some white beans for natural thickening.
Can I double this recipe?
Yes, as long as your slow cooker is big enough (at least 6 quarts). Double all the ingredients and cook on low for 7-8 hours or high for 4-5 hours. The cooking time might increase slightly because of the larger volume. Leftovers freeze beautifully, so doubling is a great way to meal prep.
Conclusion
This light and creamy crockpot butternut squash apple soup is everything I hoped it would be when I started chasing that memory from the bookstore café. It’s comforting without being heavy, sweet without being cloying, and so easy that you’ll find yourself making it on repeat all fall and winter long.
What I love most about this recipe is how forgiving it is. You can swap ingredients, adjust seasonings, or change up the toppings, and it always turns out delicious. It’s the kind of recipe that builds confidence in the kitchen because it’s practically impossible to mess up.
I’d love to hear how yours turns out! Did you try any fun variations? Do you have a favorite topping combination? Drop a comment below and let me know—I read every single one and I’m always looking for new ideas to try. And if you loved this soup, share it with a friend who needs a little comfort in their life. Happy cooking, friends!
Pin This Recipe!
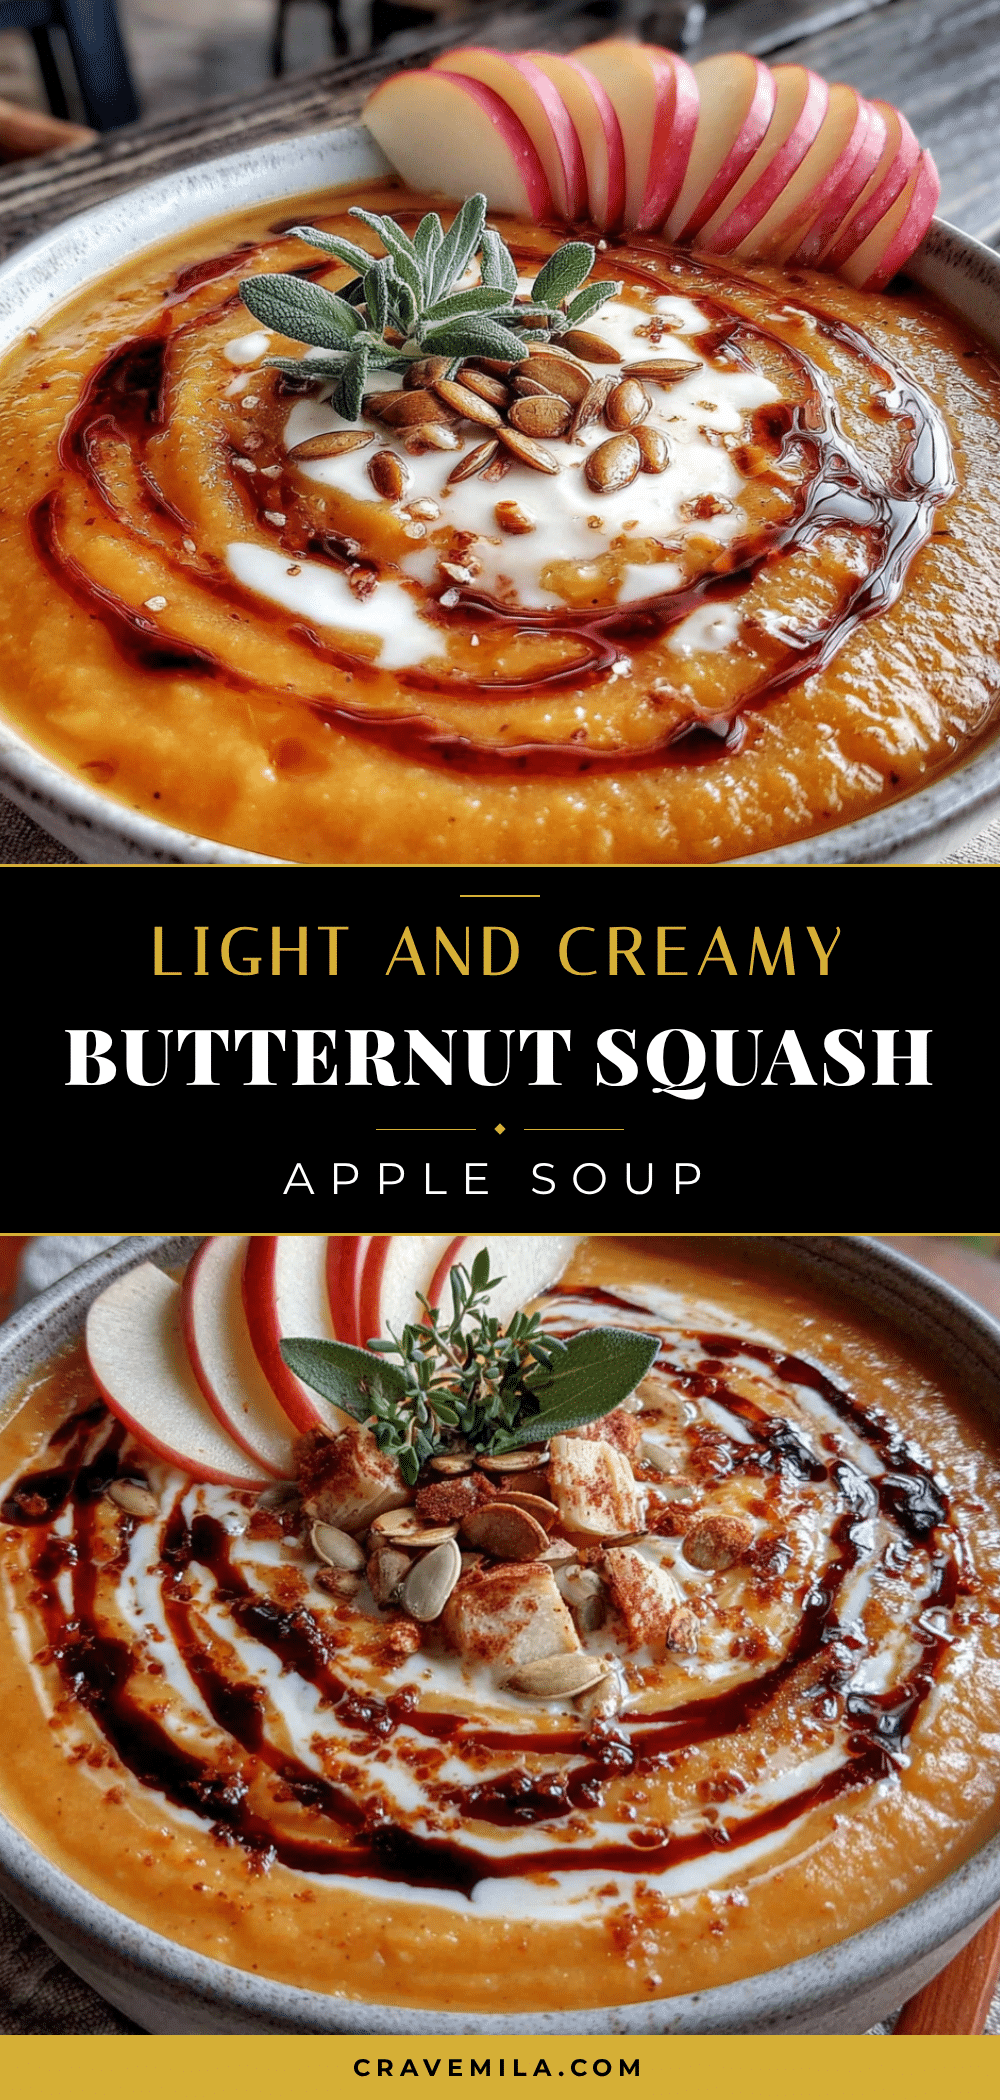
Easy Crockpot Butternut Squash Apple Soup

A velvety, naturally sweet butternut squash and apple soup made effortlessly in the slow cooker. This comforting, light, and healthy soup is perfect for fall and winter, requiring minimal hands-on time.
- Prep Time: 15 minutes
- Cook Time: 6 hours
- Total Time: 6 hours 15 minutes
- Yield: 6 servings 1x
- Category: Soup
- Cuisine: American
Ingredients
- 1 medium butternut squash (about 3 pounds), peeled, seeded, and cut into 1-inch cubes
- 2 medium Honeycrisp or Gala apples, peeled, cored, and roughly chopped
- 1 medium yellow onion, diced (about 1 cup)
- 3 cloves garlic, minced
- 4 cups low-sodium vegetable broth
- 1 teaspoon salt
- ½ teaspoon black pepper
- ½ teaspoon ground cinnamon
- ¼ teaspoon ground nutmeg
- ¼ teaspoon ground ginger
- ½ cup milk (any kind; whole, oat, almond, or coconut)
- 1 tablespoon butter or olive oil (optional)
- Toasted pumpkin seeds (for garnish, optional)
- Plain Greek yogurt or coconut cream (for garnish, optional)
- Maple syrup (for garnish, optional)
- Fresh thyme or sage leaves (for garnish, optional)
Instructions
- Prep the squash: Cut off both ends of the butternut squash, peel with a vegetable peeler, slice in half lengthwise, scoop out seeds, and cut into 1-inch cubes.
- Layer everything in the slow cooker: Add cubed squash, chopped apples, diced onion, and minced garlic to a 6-quart or larger slow cooker.
- Add seasonings and broth: Sprinkle salt, pepper, cinnamon, nutmeg, and ginger over the vegetables. Pour in vegetable broth, ensuring most ingredients are submerged. Stir gently.
- Cook low and slow: Cover and cook on low for 6-7 hours or on high for 3-4 hours, until squash is fork-tender.
- Blend until silky: Turn off slow cooker. Use an immersion blender to blend soup directly in the pot until completely smooth. Alternatively, let cool 10 minutes, then blend in batches in a standard blender.
- Finish with milk and butter: Stir in milk and butter (if using). Taste and adjust seasonings as needed.
- Serve and garnish: Ladle into bowls and top with desired garnishes like Greek yogurt, pumpkin seeds, or a drizzle of maple syrup.
Notes
For deeper flavor, toast spices (cinnamon, nutmeg, ginger) in a dry pan for 30 seconds before adding. Soup tastes even better the next day. If too thin, cook uncovered on high for 15-20 minutes. If too thick, add more broth or milk. Use sweet apples like Honeycrisp or Gala; avoid tart Granny Smith unless you want a tangier soup.
Nutrition
- Serving Size: 1 serving (about 1.5
- Calories: 190
- Sugar: 14
- Sodium: 450
- Fat: 6
- Saturated Fat: 2
- Carbohydrates: 33
- Fiber: 7
- Protein: 4
Keywords: butternut squash soup, apple soup, crockpot soup, slow cooker soup, fall soup, winter soup, healthy soup, creamy soup, vegetarian soup, gluten-free soup



