I’m not supposed to play favorites with recipes, but let’s be honest — we all have that one dish we’d rescue from a burning kitchen. Mine’s this roasted butternut squash mac and cheese with crispy sage. The funny thing is, I spent years insisting that butternut squash had no business anywhere near a cheese sauce. “Pumpkin in pasta? No thanks,” I’d say, nose in the air like some kind of squash snob. Then a friend brought this to a potluck last November, and I found myself standing over the slow cooker with a spoon, pretending to “test” it for the fourth time.
Honestly, I was caught red-handed. She walked in and just laughed. “Thought you hated squash in mac and cheese?” she said. I mean, what could I say? I had a mouthful of the creamiest, most velvety cheese sauce I’d ever tasted — and it was totally thanks to that roasted squash hiding in there. That night, I got the recipe, tweaked it about six times, and now it’s the one I make when the air gets crisp and I need something that feels like a hug in a bowl.
Maybe you’ve been there — skeptical of a twist on a classic, only to have your mind completely changed by that first bite. There’s something about the way the sweetness of roasted squash melts into sharp cheddar, topped with those salty, crackly sage leaves. It’s comfort food that doesn’t weigh you down, and honestly, it might just convert you too. I keep making it because every time I do, someone asks for the recipe — and that’s the best kind of proof, isn’t it?
Why You’ll Love This Recipe
This isn’t just another mac and cheese recipe. It’s the one I’ve tested in my own kitchen more times than I care to admit — and every batch taught me something. The first time, the sauce was too thin. The second, I burned the sage (RIP, little leaves). But by batch three, I had it dialed in. Here’s why this version is worth every single minute of prep:
- Quick & Easy: Comes together in about 45 minutes, and most of that is hands-off roasting time. Perfect for a cozy weeknight when you need something warm fast.
- Simple Ingredients: No weird fancy cheese blends or hard-to-find items. Just good cheddar, a butternut squash, and some pantry staples.
- Perfect for Cozy Evenings: This is the dish you make when the wind is howling outside and you want something that fills the kitchen with that warm, nutty smell.
- Crowd-Pleaser: I’ve served this to kids, picky eaters, and full-on cheese snobs. Everyone goes back for seconds. It’s magic.
- Unbelievably Delicious: The texture is next-level — creamy without being heavy, with those crispy sage leaves on top that shatter when you bite into them.
What makes this recipe different? It’s the roasted squash, blended right into the cheese sauce. No flour, no roux fuss. The squash adds natural sweetness and that silky texture without needing heavy cream. It’s comfort food reimagined — healthier, faster, but with the same soul-soothing satisfaction that makes you close your eyes after the first bite.
What Ingredients You Will Need
This recipe uses simple, wholesome ingredients to deliver that bold, cozy flavor without any fuss. Most of these are pantry staples or easy fall finds. Here’s what you’ll need:
For the Roasted Squash
- 1 medium butternut squash (about 2-3 pounds), peeled, seeded, and cubed into 1-inch pieces
- 2 tablespoons olive oil (I like using a good quality extra virgin here)
- 1/2 teaspoon salt
- 1/4 teaspoon black pepper
For the Pasta and Cheese Sauce
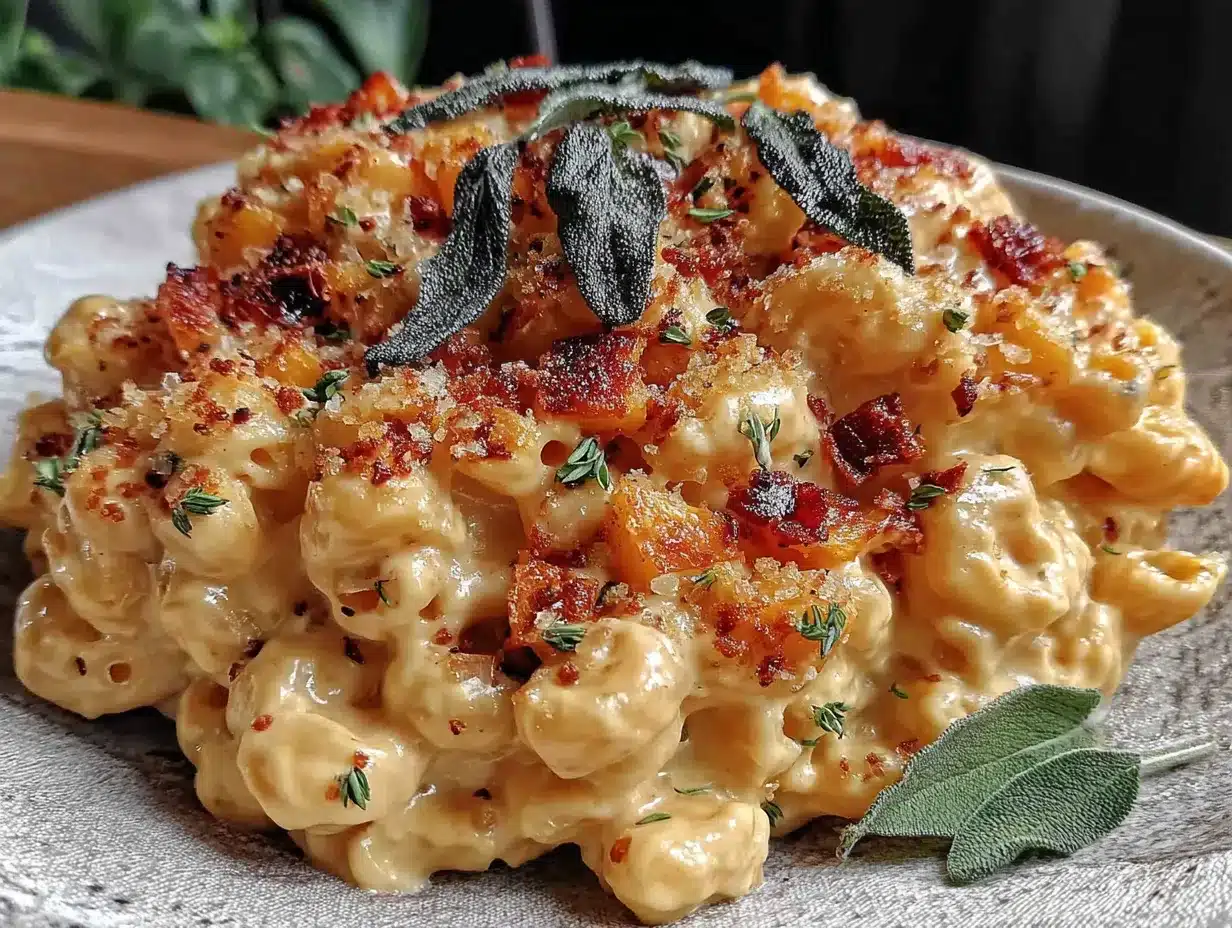
- 1 pound (16 oz) pasta — cavatappi, elbow macaroni, or shells work great. I prefer cavatappi because those ridges hold onto the sauce like a dream.
- 2 tablespoons unsalted butter
- 1 small shallot, minced (about 2 tablespoons) — adds a gentle onion flavor without being overpowering
- 2 cloves garlic, minced
- 1 cup whole milk (use 2% if that’s what you have, but avoid skim — the sauce needs that fat)
- 1/2 cup reserved pasta water (this is key for the perfect consistency)
- 2 cups (8 oz) sharp cheddar cheese, freshly shredded — please don’t buy pre-shredded! It has anti-caking agents that make the sauce grainy.
- 1/2 cup (2 oz) Parmesan cheese, finely grated
- 1/4 teaspoon nutmeg, freshly grated if possible (it makes a difference)
- 1/4 teaspoon smoked paprika (optional, but adds a lovely warmth)
- Salt and pepper to taste
For the Crispy Sage Topping
- 2 tablespoons butter
- 10-12 fresh sage leaves
- 1/4 cup panko breadcrumbs (optional, for extra crunch)
Ingredient Tips: Look for a butternut squash that feels heavy for its size — that means it’s fresh and moist inside. For the cheese, I recommend a good block of sharp cheddar like Cabot or Tillamook. The sharper the cheese, the more flavor you get without needing to use a ton. If you’re dairy-sensitive, you can swap the milk for unsweetened oat milk and use a dairy-free cheddar, but honestly, the texture is best with real dairy here.
Equipment Needed
You don’t need a fancy kitchen for this one. Here’s what I use:
- Baking sheet — rimmed, for roasting the squash without making a mess
- Large pot — for boiling the pasta and later mixing everything together
- Small skillet — for toasting the sage and breadcrumbs
- Blender or food processor — to puree the roasted squash until silky smooth. I’ve used both, and honestly, an immersion blender in a tall cup works just as well if you don’t want to wash extra dishes.
- Box grater — for shredding your cheese. I know it’s extra work, but trust me on this one.
- Wooden spoon — for stirring the sauce without scratching your pot
- Chef’s knife and cutting board — for prepping that squash. A sharp knife makes all the difference.
If you don’t have a blender, you can mash the roasted squash with a fork until it’s mostly smooth — it won’t be as silky, but it still works great. And if you don’t have a box grater, just buy block cheese and ask the deli counter to shred it for you. No shame in that!
Preparation Method
- Preheat your oven to 400°F (200°C). Line a rimmed baking sheet with parchment paper for easy cleanup. I forgot to do this once and spent 20 minutes scrubbing — learn from my mistakes.
- Prep the squash. Peel the butternut squash with a vegetable peeler, then cut it in half lengthwise. Scoop out the seeds with a spoon and discard them. Cut the flesh into 1-inch cubes. Toss the cubes with 2 tablespoons olive oil, 1/2 teaspoon salt, and 1/4 teaspoon pepper. Spread them in a single layer on the baking sheet. Roast for 25-30 minutes, flipping halfway through, until the squash is fork-tender and the edges are starting to caramelize. Your kitchen will smell incredible at this point.
- Cook the pasta. While the squash roasts, bring a large pot of salted water to a boil. Add your pasta and cook according to package directions until al dente — usually about 8-10 minutes. Before you drain it, scoop out 1 cup of the pasta water and set it aside. Then drain the pasta and set it aside in the colander. Don’t rinse it! That starch helps the sauce stick.
- Make the squash puree. Once the squash is done roasting, let it cool for a few minutes. Transfer it to a blender or food processor, add 1/4 cup of the reserved pasta water, and blend until completely smooth. It should look like a thick, velvety orange puree. Set this aside.
- Start the cheese sauce. In the same large pot you used for the pasta (one less dish to wash!), melt 2 tablespoons of butter over medium heat. Add the minced shallot and cook for 2-3 minutes until it’s soft and translucent. Add the minced garlic and cook for another 30 seconds — just until fragrant. Don’t let it burn, or it’ll get bitter.
- Build the sauce. Pour in the cup of milk and the remaining 1/4 cup of pasta water. Stir in the squash puree until everything is well combined. Let this warm through for about 2 minutes, stirring occasionally. The sauce should be smooth and a little thin at this point — that’s okay, it’ll thicken as the cheese melts in.
- Add the cheese. Reduce the heat to low. Add the shredded cheddar and Parmesan cheese a handful at a time, stirring constantly until each addition is fully melted before adding the next. This prevents clumping and gives you that silky, restaurant-quality texture. Stir in the nutmeg and smoked paprika, then season with salt and pepper to taste. Remember, the cheese is salty, so taste before you add too much salt!
- Combine everything. Add the cooked pasta back into the pot with the cheese sauce. Stir gently until every piece of pasta is coated in that gorgeous, creamy sauce. If the sauce seems too thick, add a splash more pasta water to loosen it up. If it’s too thin, let it simmer on low for a minute or two — it’ll thicken as it cools.
- Make the crispy sage topping. In a small skillet, melt 2 tablespoons of butter over medium heat. Add the sage leaves in a single layer. Cook for about 30-60 seconds per side, until they turn darker green and get crispy. Be careful — they burn fast! Transfer the crispy sage leaves to a paper towel-lined plate. If you’re using breadcrumbs, add them to the same skillet and toast for 2 minutes until golden, stirring constantly.
- Serve immediately. Spoon the mac and cheese into bowls, top with the crispy sage leaves, and sprinkle with the toasted breadcrumbs if using. Serve hot, and try not to burn your tongue — I always do because I can’t wait.
Cooking Tips & Techniques
I’ve made this recipe so many times that I’ve collected a few hard-earned lessons along the way. Here are the ones that matter most:
- Don’t skip roasting the squash. I tried boiling it once to save time, and the sauce came out watery and bland. Roasting concentrates the natural sugars and gives you that deep, caramelized flavor that makes this dish special. It’s worth the extra 25 minutes, I promise.
- Grate your own cheese. I know, I know — it’s annoying. But pre-shredded cheese is coated with cellulose and starches to prevent clumping, and those same starches prevent it from melting smoothly. You’ll end up with a grainy sauce instead of that silky, velvety texture. Just grate it. Your future self will thank you.
- Watch the sage closely. The first time I made crispy sage, I walked away for “just a second” to check my phone. By the time I came back, the leaves were black and the kitchen smelled like burnt herbs. Sage goes from perfect to burnt in about 15 seconds, so stay right there and watch it.
- Reserve that pasta water. This is the single best tip I can give you for any pasta dish. The starchy water helps bind the sauce to the pasta and gives it that silky, restaurant-quality consistency. Don’t forget to scoop some out before you drain!
- Taste as you go. I know it sounds obvious, but I’ve definitely under-seasoned a batch or two because I was rushing. The squash adds sweetness, the cheese adds saltiness, and the nutmeg adds warmth — but you need to taste and adjust to get that perfect balance.
Variations & Adaptations
One of the things I love about this recipe is how flexible it is. Here are some ways I’ve changed it up depending on what I have in the fridge or who I’m feeding:
- Make it vegetarian (it already is!) or add protein: Sometimes I stir in some crispy bacon bits or leftover shredded rotisserie chicken for a heartier meal. It’s also amazing with crumbled Italian sausage — just cook it first and stir it in at the end.
- Try a different squash: Butternut is my go-to, but roasted acorn squash, kabocha, or even canned pumpkin puree (not pumpkin pie filling!) work beautifully. Each one gives a slightly different sweetness level, so adjust your seasoning accordingly.
- Go gluten-free: Use your favorite gluten-free pasta — I like the brown rice pasta from Trader Joe’s. Just be careful not to overcook it, because gluten-free pasta can get mushy fast. The rest of the recipe is naturally gluten-free if you skip the breadcrumb topping.
- Add some greens: Stir in a handful of fresh spinach or baby kale right at the end, just until it wilts. The bright green against that orange sauce is gorgeous, and it makes you feel a little virtuous about all that cheese.
- Make it dairy-free: Use unsweetened oat milk or cashew milk instead of whole milk, and swap the cheeses for your favorite dairy-free versions. I’ve tried this with Violife cheddar shreds and it actually melts pretty well — just keep the heat low to prevent separation.
Serving & Storage Suggestions
This mac and cheese is best served immediately, while it’s still hot and the sage leaves are crispy. I like to serve it in wide, shallow bowls with a simple side salad dressed with lemon vinaigrette — the acidity cuts through the richness perfectly. A glass of crisp white wine or a light beer also pairs beautifully.
Storage: If you have leftovers (lucky you!), let the mac and cheese cool completely, then transfer it to an airtight container. It will keep in the refrigerator for up to 4 days. The texture will be denser after chilling, but the flavor actually gets even better as the squash and cheese meld together overnight.
Reheating: The best way to reheat is on the stovetop. Add a splash of milk or water to loosen the sauce, and warm it over medium-low heat, stirring gently. You can also microwave it in 30-second bursts, stirring in between, but the sauce won’t be as creamy. For the topping, I recommend making fresh crispy sage — leftover sage leaves get soggy in the fridge, and nobody wants that.
Freezing: This recipe freezes surprisingly well! Portion it into freezer-safe containers, leaving a little room for expansion. It will keep for up to 3 months. To thaw, move it to the fridge overnight, then reheat on the stovetop with a splash of milk. The texture won’t be quite as silky as fresh, but it’s still a million times better than anything from a box.
Nutritional Information & Benefits
Here’s the thing — this mac and cheese is definitely comfort food, but it’s got some sneaky nutritional perks thanks to that butternut squash. One serving (about 1.5 cups) contains approximately:
- Calories: 480-520
- Protein: 18g
- Fat: 22g
- Carbohydrates: 55g
- Fiber: 6g
- Vitamin A: 180% of the daily value (hello, squash!)
- Calcium: 35% of the daily value
Butternut squash is packed with vitamin A, which is great for your immune system and eye health. It’s also a good source of fiber, which helps keep you full and satisfied. The cheese adds calcium and protein, making this a fairly balanced meal on its own. Is it health food? No. But it’s a whole lot better for you than the boxed stuff, and you get to feel good about eating that gorgeous orange vegetable.
Dietary Considerations: This recipe contains dairy and gluten. For a gluten-free version, use gluten-free pasta and skip the breadcrumbs. For a dairy-free version, use plant-based milk and cheese alternatives as noted above.
Conclusion
This roasted butternut squash mac and cheese with crispy sage is the kind of recipe that earns a permanent spot in your fall rotation. It’s creamy, it’s comforting, and it has that little touch of elegance from the crispy sage that makes it feel special without being fussy. Whether you’re making it for a quiet night in or serving it to guests who need a little warming up, this dish delivers every single time.
I’d love to hear how it turns out for you! Did you add bacon? Try it with a different cheese? Burn the sage like I did the first time? Drop a comment below and let me know — your tweaks might inspire someone else’s dinner tonight. And if you loved it, share it with a friend who needs a little comfort in their life. Happy cooking!
Frequently Asked Questions
Can I use frozen butternut squash instead of fresh?
Absolutely! Frozen butternut squash cubes work great here. Just thaw them first, pat them dry with paper towels to remove excess moisture, and roast them as directed. You might need to add 5-10 minutes to the roasting time since frozen squash releases more water.
Why did my cheese sauce turn out grainy?
This usually happens for one of two reasons: either you used pre-shredded cheese (which has anti-caking agents), or you overheated the sauce. Always shred your own cheese from a block, and keep the heat on low when melting it in. High heat can cause the cheese proteins to separate and turn grainy.
Can I make this ahead of time for a party?
Yes! You can assemble the entire dish (pasta, sauce, and all) up to 24 hours in advance. Just cover it and refrigerate. When you’re ready to serve, bake it in a 350°F oven for 20-25 minutes until bubbly, then add the fresh crispy sage on top. The texture won’t be quite as creamy as stovetop, but it’s still delicious.
What’s the best pasta shape for this recipe?
I love cavatappi because those corkscrew shapes grab onto the sauce beautifully. Shells, elbows, and rotini also work great. Avoid long, thin pasta like spaghetti or linguine — the sauce tends to slide right off, and you want every bite to be coated in that creamy goodness.
Can I skip the sage topping?
You can, but I wouldn’t! The crispy sage adds this amazing texture and a subtle, earthy flavor that balances the sweetness of the squash. If you really don’t have sage, try crispy fried shallots or just a sprinkle of toasted breadcrumbs with a pinch of dried thyme. The crunch is what makes this dish feel special.
Pin This Recipe!
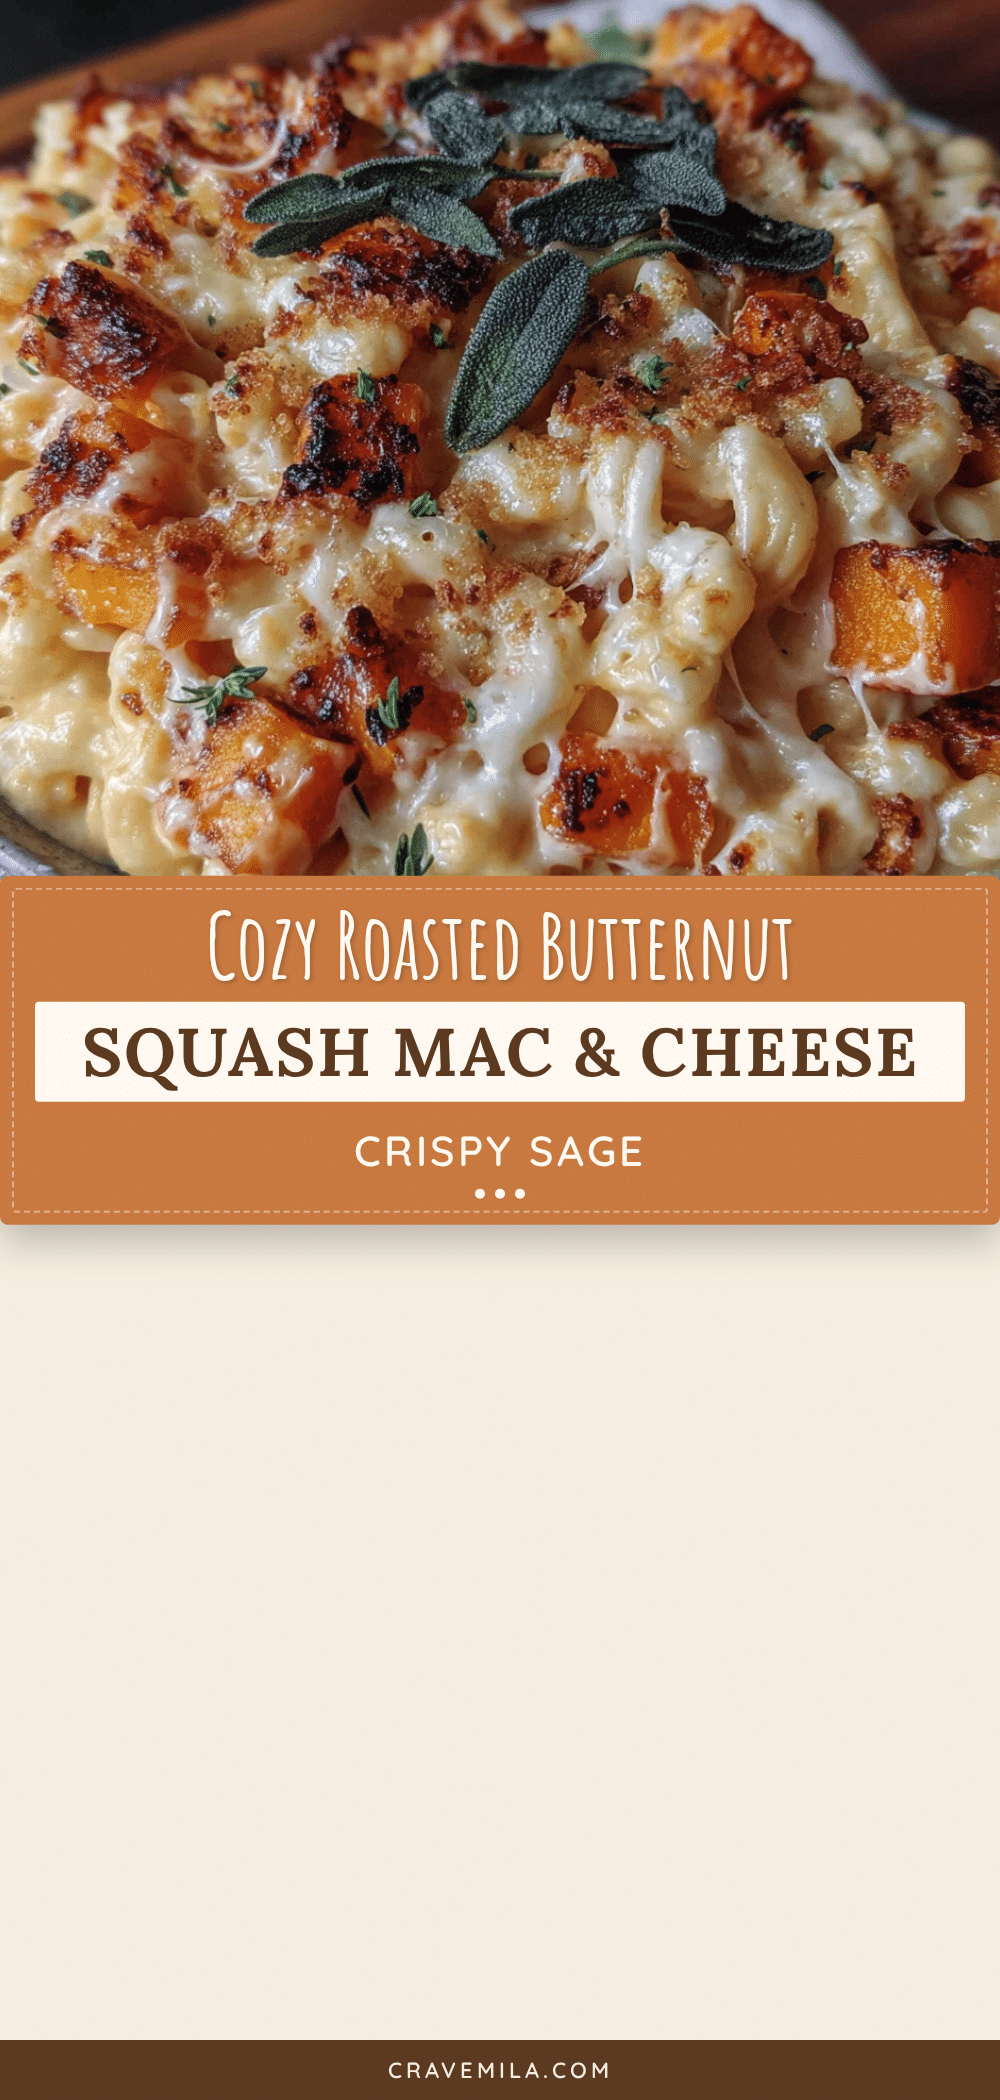
Cozy Roasted Butternut Squash Mac and Cheese with Crispy Sage

This creamy mac and cheese gets a healthy twist with roasted butternut squash blended into the cheese sauce, topped with crispy sage leaves for a comforting fall dish that’s quick and easy to make.
- Prep Time: 15 minutes
- Cook Time: 30 minutes
- Total Time: 45 minutes
- Yield: 4 servings 1x
- Category: Main Course
- Cuisine: American
Ingredients
- 1 medium butternut squash (about 2–3 pounds), peeled, seeded, and cubed into 1-inch pieces
- 2 tablespoons olive oil
- 1/2 teaspoon salt
- 1/4 teaspoon black pepper
- 1 pound (16 oz) pasta (cavatappi, elbow macaroni, or shells)
- 2 tablespoons unsalted butter
- 1 small shallot, minced (about 2 tablespoons)
- 2 cloves garlic, minced
- 1 cup whole milk
- 1/2 cup reserved pasta water
- 2 cups (8 oz) sharp cheddar cheese, freshly shredded
- 1/2 cup (2 oz) Parmesan cheese, finely grated
- 1/4 teaspoon nutmeg, freshly grated if possible
- 1/4 teaspoon smoked paprika (optional)
- Salt and pepper to taste
- 2 tablespoons butter (for topping)
- 10–12 fresh sage leaves
- 1/4 cup panko breadcrumbs (optional)
Instructions
- Preheat your oven to 400°F (200°C). Line a rimmed baking sheet with parchment paper.
- Peel the butternut squash, cut in half lengthwise, scoop out seeds, and cut into 1-inch cubes. Toss with 2 tablespoons olive oil, 1/2 teaspoon salt, and 1/4 teaspoon pepper. Spread in a single layer on the baking sheet. Roast for 25-30 minutes, flipping halfway, until fork-tender and edges are caramelized.
- While squash roasts, bring a large pot of salted water to a boil. Cook pasta according to package directions until al dente. Before draining, reserve 1 cup of pasta water. Drain pasta (do not rinse) and set aside.
- Let roasted squash cool slightly, then transfer to a blender or food processor with 1/4 cup reserved pasta water. Blend until completely smooth. Set aside.
- In the same large pot, melt 2 tablespoons butter over medium heat. Add minced shallot and cook 2-3 minutes until soft. Add minced garlic and cook 30 seconds until fragrant.
- Pour in 1 cup milk and remaining 1/4 cup pasta water. Stir in squash puree until combined. Warm through for about 2 minutes, stirring occasionally.
- Reduce heat to low. Add shredded cheddar and Parmesan cheese a handful at a time, stirring constantly until each addition is fully melted. Stir in nutmeg and smoked paprika. Season with salt and pepper to taste.
- Add cooked pasta back into the pot with cheese sauce. Stir gently until every piece is coated. If sauce is too thick, add a splash more pasta water; if too thin, let simmer on low for a minute or two.
- In a small skillet, melt 2 tablespoons butter over medium heat. Add sage leaves in a single layer. Cook 30-60 seconds per side until crispy. Transfer to paper towel-lined plate. If using breadcrumbs, toast in same skillet for 2 minutes until golden.
- Serve immediately, topped with crispy sage leaves and toasted breadcrumbs if using.
Notes
Don’t skip roasting the squash—it concentrates the natural sugars and prevents a watery sauce. Always grate your own cheese from a block to avoid grainy sauce. Watch the sage closely as it burns quickly. Reserve pasta water to help bind the sauce to the pasta. Taste as you go to balance sweetness, saltiness, and warmth.
Nutrition
- Serving Size: 1.5 cups
- Calories: 500
- Sugar: 8
- Sodium: 650
- Fat: 22
- Saturated Fat: 12
- Carbohydrates: 55
- Fiber: 6
- Protein: 18
Keywords: butternut squash mac and cheese, roasted squash mac and cheese, crispy sage, fall comfort food, easy mac and cheese, vegetarian mac and cheese



