There used to be a tiny bakery tucked inside a dusty antique mall on the edge of town that made the most incredible pumpkin cookie sandwich I have ever had. When they closed their doors three summers ago, I actually pulled over in my car and sat there for a minute. I kid you not — I felt a little lost. After a dozen tries — some too dry, some that fell apart, one batch that my kids politely called “interesting” — I finally got it. These Best Pumpkin Pie Cookies with Cream Cheese Filling are the exact replica of that memory, and honestly, they might be even better.
The first time I nailed the texture, I texted my sister-in-law a photo with the caption “I did it.” She didn’t even ask what I was talking about. She just knew. That’s the kind of recipe this is — the one you obsess over until it’s right, and then you make it for every fall gathering for the rest of your life. These cookies have that perfect pumpkin pie spice warmth, a soft, almost cake-like center, and a tangy cream cheese filling that cuts through the sweetness just enough. My youngest, who usually picks around anything that looks like a “fancy cookie,” ate three in one sitting. That’s the real test, right?
Maybe you’ve been there — chasing a recipe from a place that no longer exists, trying to capture a specific taste that brings back a whole season. That’s exactly what this is. And let me tell you, the effort is worth it. These cookies freeze beautifully, they travel well for school bake sales, and they make your kitchen smell like autumn in the best possible way. So grab your mixing bowl, and let’s bring that bakery back to life.
Why You’ll Love This Recipe
I have tested this recipe more times than I care to admit, and every single batch confirmed one thing: these cookies are a total winner. They are not just another pumpkin cookie. They are the cookie that disappears from the cooling rack before you even get the filling made.
- Kid-Approved and Budget-Friendly — Made with simple pantry ingredients like canned pumpkin, flour, sugar, and cream cheese. No expensive extracts or hard-to-find spices. My kids literally ask for these by name.
- Quick & Easy — From start to finish, you are looking at about 35 minutes. The dough comes together in one bowl, and the filling whips up while the cookies cool. Perfect for a busy Tuesday afternoon when the craving hits.
- Perfect for Fall Gatherings — Whether it is a Halloween party, a Thanksgiving potluck, or just a cozy Sunday afternoon, these cookies fit right in. They look impressive but are secretly simple to make.
- Crowd-Pleaser — I have brought these to two different playdates and one family dinner. Every single time, someone asked for the recipe. They have that magical balance of familiar pumpkin flavor and a creamy surprise in the middle.
- Unbelievably Delicious — The texture is what gets me. The cookie itself is soft and tender, almost like a little pumpkin cake, and the cream cheese filling is smooth, tangy, and just sweet enough. Together, they are pure comfort.
What makes this recipe different from the rest? It is the ratio. I spent a long time figuring out the exact amount of pumpkin puree versus flour so the cookies hold their shape without being dry. And the cream cheese filling? I use a tiny pinch of salt in it, which sounds weird but makes the whole thing taste more like a real bakery treat. This is not just another pumpkin cookie recipe — it is the one you will come back to every single fall.
What Ingredients You Will Need
This recipe uses simple, wholesome ingredients that you probably already have in your kitchen. No fancy trips to a specialty store. Just good, honest baking ingredients that come together to make something truly special.
For the Pumpkin Cookies
- 1 cup (226g) unsalted butter, softened — I always use unsalted so I can control the salt level. Let it sit out for about 30 minutes before you start.
- 1 cup (200g) granulated sugar — Regular white sugar works perfectly here. It gives the cookies a nice structure.
- 1/2 cup (100g) packed light brown sugar — This adds a little moisture and a hint of molasses flavor that pairs beautifully with pumpkin.
- 1 large egg, room temperature — A cold egg can seize up the butter mixture, so let it sit out with the butter.
- 1 teaspoon vanilla extract — Pure vanilla if you have it, but imitation works fine too. I have used both.
- 1 cup (245g) canned pumpkin puree — Not pumpkin pie filling. Just pure pumpkin. Libby’s is my go-to brand because it is consistently thick and not watery.
- 2 cups (250g) all-purpose flour — Spoon and level your flour. Scooping directly from the bag packs it down and makes dry cookies.
- 1 teaspoon baking soda — Helps the cookies puff up nicely.
- 1/2 teaspoon baking powder — Adds a little extra lift.
- 1/2 teaspoon salt — Balances the sweetness and brings out the pumpkin flavor.
- 2 teaspoons pumpkin pie spice — You can use store-bought or make your own with 1 teaspoon cinnamon, 1/2 teaspoon ginger, 1/4 teaspoon nutmeg, 1/4 teaspoon cloves.
For the Cream Cheese Filling
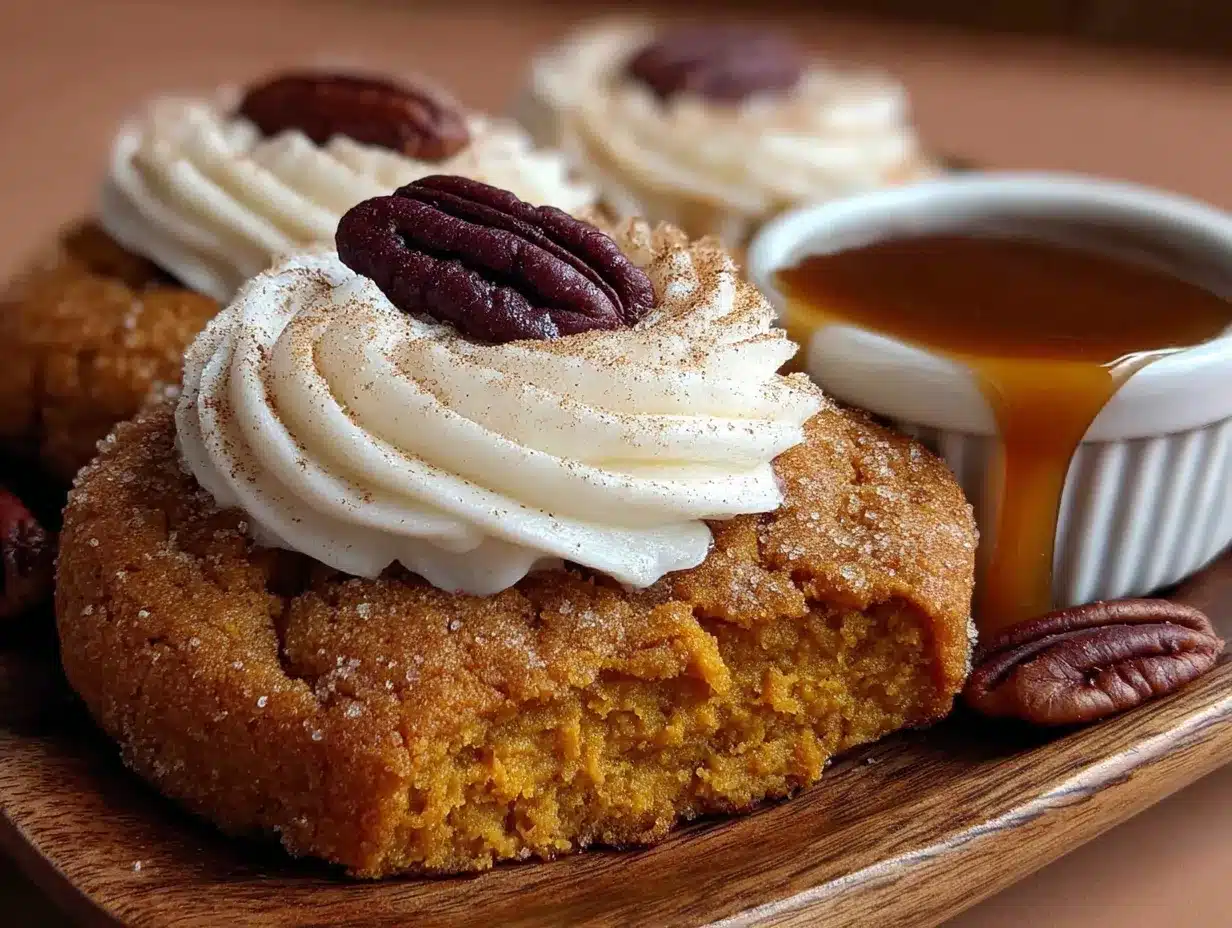
- 4 oz (113g) cream cheese, softened — Full-fat cream cheese gives the best texture. Let it soften completely so the filling is smooth and lump-free.
- 1/4 cup (56g) unsalted butter, softened — Same as above. Soft butter is key.
- 1 cup (120g) powdered sugar — Sift it if you have the patience. It makes the filling extra smooth, but I have skipped it in a hurry and it was still fine.
- 1/2 teaspoon vanilla extract — A little goes a long way here.
- Pinch of salt — Trust me on this one. It makes the filling taste more like a real bakery cream cheese frosting.
Equipment Needed
You do not need anything fancy for these cookies. Here is what I use every single time I make them:
- Mixing bowls — One large for the cookie dough, one medium for the filling. I use glass bowls because they are easy to clean and don’t hold onto smells.
- Electric hand mixer or stand mixer — A hand mixer works perfectly. If you have a stand mixer with the paddle attachment, even better. You can also mix by hand with a wooden spoon, but it takes a little more elbow grease.
- Baking sheets — Two standard half-sheet pans work great. Line them with parchment paper for easy cleanup.
- Cookie scoop or tablespoon — I use a 1.5-tablespoon cookie scoop for even cookies. A regular tablespoon works too, just make sure they are all the same size.
- Cooling rack — Let the cookies cool completely before filling them. A wire rack speeds this up.
- Spatula — For scraping down the bowl and transferring the filling to a piping bag or ziplock bag.
- Piping bag or ziplock bag — To pipe the filling neatly. Snip a small corner off a ziplock bag if you do not have a piping bag. I have done this more times than I can count.
Preparation Method
Let me walk you through this step by step. I have made these cookies so many times that I could do it in my sleep, but I will share every little trick I have learned along the way.
Step 1: Preheat and Prep
Preheat your oven to 350°F (175°C). Line two baking sheets with parchment paper. Do not skip the parchment — it prevents the cookies from sticking and makes cleanup a breeze. I learned this the hard way after scrubbing a baking sheet for twenty minutes.
Step 2: Make the Cookie Dough
In a large mixing bowl, beat the softened butter, granulated sugar, and brown sugar together until light and fluffy. This takes about 2 to 3 minutes with a hand mixer on medium speed. You want the mixture to look pale and feel soft when you scrape it with a spatula. Add the egg and vanilla extract, and beat until combined. Scrape down the sides of the bowl.
Add the pumpkin puree and mix on low speed until it is fully incorporated. The mixture will look a little curdled at this point — do not panic. That is normal. Pumpkin has a lot of water, and it takes a minute for everything to come together.
In a separate small bowl, whisk together the flour, baking soda, baking powder, salt, and pumpkin pie spice. Add the dry ingredients to the wet ingredients in two additions, mixing on low speed after each addition until just combined. Do not overmix. Overmixing develops the gluten and makes the cookies tough. Stop as soon as you do not see any more streaks of flour.
Step 3: Scoop and Bake
Scoop rounded tablespoons of dough onto the prepared baking sheets, spacing them about 2 inches apart. These cookies spread a little, so give them room. I fit about 12 cookies per sheet. Bake for 10 to 12 minutes, or until the edges are set and the tops look slightly cracked. The centers will look a little soft — that is perfect. They will continue to set as they cool.
Let the cookies cool on the baking sheet for 5 minutes, then transfer them to a wire rack to cool completely. This is important. If you try to fill them while they are still warm, the cream cheese filling will melt right off. I speak from experience.
Step 4: Make the Cream Cheese Filling
While the cookies are cooling, make the filling. In a medium bowl, beat the softened cream cheese and butter together until smooth and creamy. This takes about 2 minutes. Add the powdered sugar, vanilla extract, and a pinch of salt. Beat on low speed until the sugar is incorporated, then increase to medium speed and beat for another 1 to 2 minutes until the filling is light and fluffy.
Step 5: Assemble the Cookies
Once the cookies are completely cool, pair them up by size. Spoon the cream cheese filling into a piping bag or a ziplock bag with a small corner snipped off. Pipe a generous amount of filling onto the flat side of one cookie, then gently press another cookie on top to make a sandwich. Repeat with the remaining cookies.
For the best texture, refrigerate the assembled cookies for about 15 to 20 minutes before serving. This sets the filling and makes the cookies easier to handle. If you are serving them right away, they are still delicious — just a little softer.
Cooking Tips & Techniques
I have made every mistake you can imagine with these cookies, so let me save you some trouble.
Do not overbake the cookies. The edges should look set and slightly golden, but the centers will still look soft and a little puffy. They will continue to bake from the residual heat of the pan. Overbaked cookies turn dry and crumbly, and they will not hold the filling well. I pulled a batch that was too done once, and half of them cracked when I tried to sandwich them.
Let the cookies cool completely. I know it is tempting to rush this step, but warm cookies and cream cheese filling do not mix. The filling will slide right off and make a mess. Give them a full 30 minutes on the cooling rack. Use that time to clean up your kitchen or make the filling.
Use room temperature ingredients. Cold butter does not cream properly with the sugar, and cold cream cheese makes lumpy filling. Set everything out on the counter about 30 minutes before you start. If you forget, you can microwave the cream cheese for about 10 seconds, but do not overdo it. Melted cream cheese is a different story entirely.
Chill the assembled cookies. This is the secret to clean, beautiful cookie sandwiches. After you pipe the filling and press the cookies together, pop them in the fridge for 15 to 20 minutes. The filling firms up, and the cookies hold together perfectly. I have brought these to parties in a container straight from the fridge, and they were a hit.
Use a cookie scoop for even cookies. Matching up cookies of the same size makes the sandwiches look professional and uniform. If you do not have a scoop, use a tablespoon and level it off with a knife. It takes a little extra time, but it is worth it.
Variations & Adaptations
One of the best things about this recipe is how flexible it is. I have tried several variations over the years, and they all turned out great.
Gluten-Free Version — Substitute the all-purpose flour with a 1-to-1 gluten-free baking flour blend. I have used Bob’s Red Mill with good results. The cookies will be slightly more delicate, so handle them gently when assembling. Let them cool completely before filling.
Dairy-Free Version — Use vegan butter and dairy-free cream cheese. I have tried this with Miyoko’s cream cheese and it worked beautifully. The filling might be a little softer, so chill the assembled cookies for at least 30 minutes before serving.
Spiced Variation — Add a pinch of cayenne pepper or a teaspoon of orange zest to the cookie dough. The cayenne gives a subtle warmth that pairs surprisingly well with the pumpkin, and the orange zest brightens up the whole flavor. I made a batch with orange zest for a fall brunch, and everyone kept asking what made them taste so fresh.
Pumpkin Chocolate Chip Version — Fold in 1/2 cup of semi-sweet chocolate chips to the cookie dough before baking. The chocolate and pumpkin combination is honestly underrated. My kids love this version best.
Mini Cookie Version — Use a teaspoon-sized scoop and bake for 8 to 9 minutes. These are perfect for lunchboxes or Halloween parties. You will get about 48 mini cookies, which makes 24 mini sandwiches.
Serving & Storage Suggestions
These cookies are best served chilled or at room temperature. I actually prefer them straight from the fridge — the filling is firm and the cookie stays soft. They are perfect for fall bake sales, Halloween parties, Thanksgiving dessert tables, or just a cozy afternoon treat with a cup of coffee or apple cider.
For storage, place the assembled cookies in an airtight container in the refrigerator. They will stay fresh for up to 5 days. The flavors actually get better after a day or two — the pumpkin and spice meld together, and the filling sets up perfectly. I have tested this extensively, and day two is my personal favorite.
To freeze, arrange the unassembled cookies in a single layer on a baking sheet and freeze until solid. Transfer them to a freezer-safe bag or container. They will keep for up to 3 months. When you are ready to serve, thaw the cookies in the refrigerator, make the filling fresh, and assemble. I do this every fall so I have cookies ready for unexpected guests.
If you are bringing these to a gathering, assemble them at home and keep them chilled in a cooler or insulated bag. They travel well and do not get crushed easily if you pack them in a single layer with parchment paper between each layer.
Nutritional Information & Benefits
Here is the estimated nutritional breakdown for one cookie sandwich (based on 12 servings):
| Nutrient | Amount per Serving |
|---|---|
| Calories | 285 |
| Total Fat | 15g |
| Saturated Fat | 9g |
| Cholesterol | 55mg |
| Sodium | 210mg |
| Total Carbohydrates | 36g |
| Dietary Fiber | 1g |
| Sugars | 24g |
| Protein | 3g |
Pumpkin is a great source of vitamin A and fiber, which supports eye health and digestion. The cream cheese filling adds calcium and protein. While these are definitely a treat, using real pumpkin and moderate sugar makes them a better choice than many store-bought fall desserts. If you are watching your sugar intake, you can reduce the sugar in the cookie dough by 1/4 cup without affecting the texture too much.
These cookies contain dairy (butter, cream cheese) and gluten (flour). For allergen-friendly options, check the variations section above.
Conclusion
These Best Pumpkin Pie Cookies with Cream Cheese Filling are everything I wanted them to be — soft, spiced, creamy, and completely irresistible. They bring back that memory of the little bakery every single time I make them, and now they have become a new tradition in my own kitchen. My kids ask for them the moment the weather turns cool, and honestly, I am happy to oblige.
I hope you give these a try and make them your own. Maybe you will add a little extra cinnamon, or swap in chocolate chips, or make them mini for a party. That is the beauty of a good recipe — it leaves room for you. If you make them, I would love to hear how they turned out. Drop a comment below and let me know if your family loved them as much as mine does. Happy baking, friend. Fall is here, and it is delicious.
Frequently Asked Questions
Can I use fresh pumpkin instead of canned?
Yes, you can. Just make sure to roast and puree the pumpkin until it is very smooth, then drain any excess liquid by pressing it through a fine-mesh sieve or a clean kitchen towel. Fresh pumpkin has more water than canned, so draining is important to avoid soggy cookies. I have done it before, and it works, but canned is more consistent and easier.
Why did my cookies turn out flat?
Flat cookies usually mean the butter was too soft or the dough was overmixed. Make sure your butter is softened but not melted. If the kitchen is warm, chill the scooped dough on the baking sheet for 10 minutes before baking. Also, check that your baking soda and baking powder are fresh — old leavening agents lose their power.
Can I make the dough ahead of time?
Absolutely. You can refrigerate the cookie dough for up to 3 days. Let it sit at room temperature for about 10 minutes before scooping and baking, as cold dough is harder to scoop evenly. You can also freeze the scooped dough balls on a baking sheet and transfer them to a freezer bag. Bake from frozen, adding 1 to 2 minutes to the baking time.
How do I keep the cream cheese filling from being too runny?
Make sure your cream cheese and butter are softened but not warm or melted. If the filling looks too soft after mixing, pop it in the refrigerator for 10 to 15 minutes to firm up before piping. Also, sifting the powdered sugar helps prevent lumps and keeps the texture smooth.
Can I leave out the cream cheese filling?
Sure. The pumpkin cookies are delicious on their own — they taste like soft, spiced pumpkin cakes. You can dust them with powdered sugar or drizzle a simple glaze made from powdered sugar and milk if you prefer. But honestly, the filling is what makes them special. I would at least try it once.
Pin This Recipe!
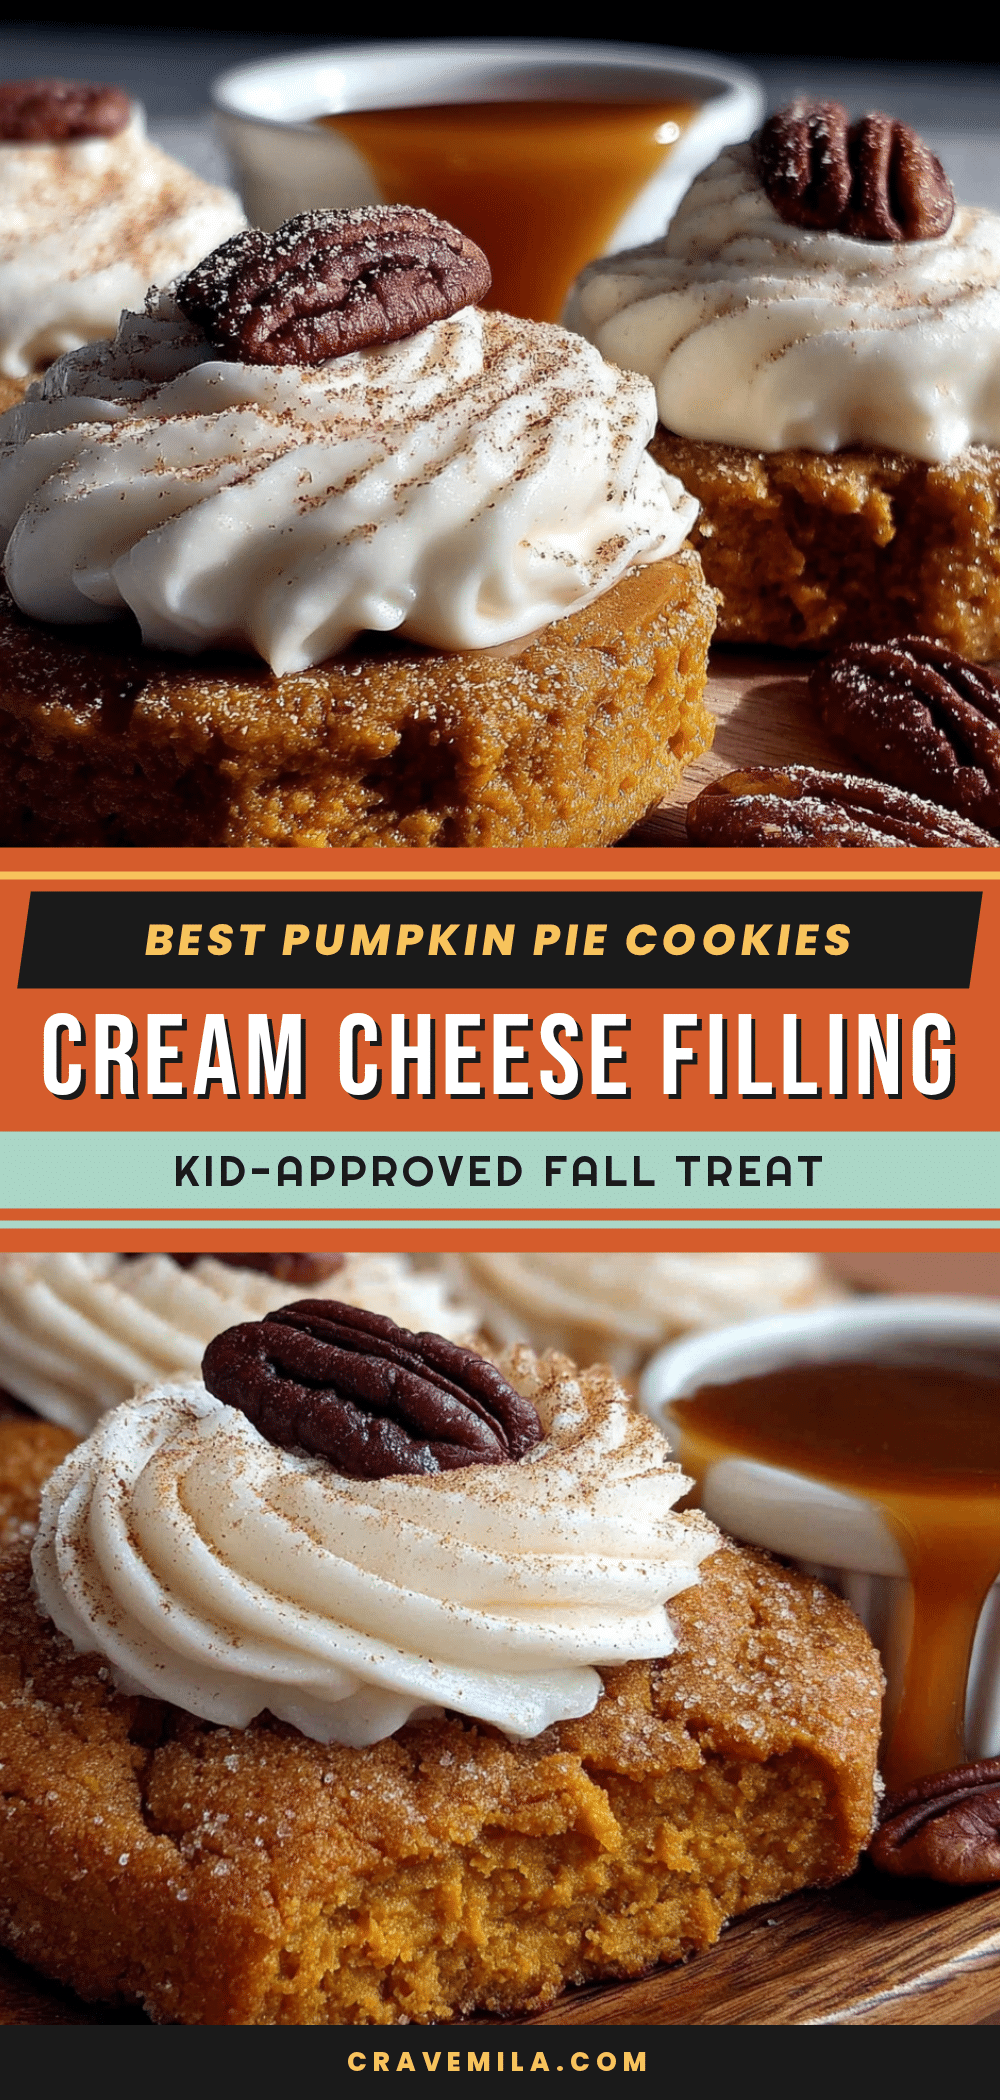
Best Pumpkin Pie Cookies with Cream Cheese Filling

Soft, spiced pumpkin cookies sandwiched with a tangy cream cheese filling. These taste just like pumpkin pie in cookie form and are perfect for fall gatherings.
- Prep Time: 15 minutes
- Cook Time: 12 minutes
- Total Time: 35 minutes
- Yield: 12 servings 1x
- Category: Dessert
- Cuisine: American
Ingredients
- 1 cup (226g) unsalted butter, softened
- 1 cup (200g) granulated sugar
- 1/2 cup (100g) packed light brown sugar
- 1 large egg, room temperature
- 1 teaspoon vanilla extract
- 1 cup (245g) canned pumpkin puree
- 2 cups (250g) all-purpose flour
- 1 teaspoon baking soda
- 1/2 teaspoon baking powder
- 1/2 teaspoon salt
- 2 teaspoons pumpkin pie spice
- 4 oz (113g) cream cheese, softened
- 1/4 cup (56g) unsalted butter, softened
- 1 cup (120g) powdered sugar
- 1/2 teaspoon vanilla extract
- Pinch of salt
Instructions
- Preheat oven to 350°F (175°C). Line two baking sheets with parchment paper.
- In a large mixing bowl, beat softened butter, granulated sugar, and brown sugar together until light and fluffy, about 2-3 minutes.
- Add egg and vanilla extract, beat until combined. Scrape down sides of bowl.
- Add pumpkin puree and mix on low speed until fully incorporated. Mixture may look curdled.
- In a separate bowl, whisk together flour, baking soda, baking powder, salt, and pumpkin pie spice.
- Add dry ingredients to wet ingredients in two additions, mixing on low speed until just combined. Do not overmix.
- Scoop rounded tablespoons of dough onto prepared baking sheets, spacing 2 inches apart.
- Bake for 10-12 minutes, until edges are set and tops look slightly cracked. Centers will look soft.
- Let cookies cool on baking sheet for 5 minutes, then transfer to a wire rack to cool completely.
- While cookies cool, make filling: Beat softened cream cheese and butter together until smooth and creamy, about 2 minutes.
- Add powdered sugar, vanilla extract, and pinch of salt. Beat on low until incorporated, then medium speed for 1-2 minutes until light and fluffy.
- Once cookies are completely cool, pair them by size. Pipe filling onto flat side of one cookie, then gently press another cookie on top.
- Refrigerate assembled cookies for 15-20 minutes before serving for best texture.
Notes
Do not overbake cookies; edges should be set but centers soft. Let cookies cool completely before filling. Use room temperature ingredients for best results. Chill assembled cookies for clean sandwiches. Cookies can be stored in refrigerator for up to 5 days. Unassembled cookies can be frozen for up to 3 months.
Nutrition
- Serving Size: 1 cookie sandwich
- Calories: 285
- Sugar: 24
- Sodium: 210
- Fat: 15
- Saturated Fat: 9
- Carbohydrates: 36
- Fiber: 1
- Protein: 3
Keywords: pumpkin cookies, cream cheese filling, fall cookies, pumpkin pie cookies, cookie sandwiches



