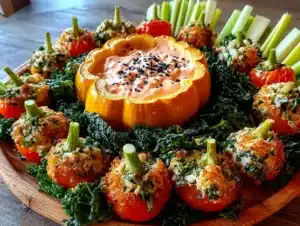
I swore I hated veggie trays. For years. They felt like the sad, obligatory guest at every party—the one nobody really wants but feels guilty ignoring. You know the scene: a limp celery stick next to a rubbery carrot, both huddling near a puddle of ranch dressing that’s seen better days. Honestly, I’d rather have skipped the pretense and gone straight for the chips.
Then last October, my neighbor Margot texted me a photo. It was her kitchen table, covered in what looked like a tiny, edible pumpkin patch. She’d arranged a veggie tray to look like a fall farm scene, complete with a bell pepper scarecrow and cucumber fences. And there, right in the middle, was a little bowl of hummus shaped like a pumpkin. I laughed out loud. “That’s ridiculous,” I typed back. But I was already mentally clearing my calendar for Saturday to copy her idea. I mean, who was I kidding?
The truth is, I got caught. I was at her place that weekend, and I watched her kids—who normally treat vegetables like a punishment—actually reaching for broccoli trees and cauliflower ghosts. They were building little scenes on their plates, dipping everything into a roasted red pepper dip I’d never seen her make before. I stood there, holding a baby carrot shaped like a tiny pumpkin stem, and I thought, okay. Maybe I was wrong about veggie trays. Maybe they just needed a personality transplant. This Fall Harvest Halloween Veggie Tray Pumpkin Patch is what happened next. It’s the recipe that changed my mind—and now I make it every year for our block party.
Why You’ll Love This Fall Harvest Halloween Veggie Tray Pumpkin Patch
Let’s be real for a second. Halloween parties are usually a sugar bomb. Candy corn, chocolate bars, cupcakes with scary frosting—it’s a lot. And while I love a good treat, I also like having something on the table that doesn’t make me feel like I need a nap after one bite. This veggie tray is that thing. It’s the hero the snack table didn’t know it needed.
- Quick & Easy : You can put this together in about 20 minutes, maybe 30 if you get fancy with the decorations. No cooking required—just chopping and arranging.
- Simple Ingredients : Everything comes from the produce section. No weird specialty items, no expensive gourmet dips. You probably already have most of this in your fridge.
- Perfect for Halloween Parties : It fits right in with the spooky theme, but it’s also wholesome enough for a school party or a family gathering. It’s a conversation starter, honestly.
- Crowd-Pleaser : I’ve seen kids who swear they hate vegetables pick up a “pumpkin” pepper and eat it just because it looked fun. Parents love it because it’s healthy. It’s a win-win.
- Unbelievably Delicious : The secret is in the dip. A smoky roasted red pepper hummus that tastes way better than anything store-bought. It’s creamy, a little sweet, and has just a hint of heat. You’ll want to put it on everything.
What makes this different from every other veggie tray out there? It’s the presentation. It’s not just vegetables on a platter—it’s a scene. It tells a story. And that story makes people smile before they even take a bite. I’ve tested this at three different parties now, and every single time, someone asks me for the “recipe” for the arrangement. There’s something about seeing food that looks like a tiny farm that just makes people happy. It’s comfort food for the eyes, you know?
What Ingredients You Will Need
This recipe uses simple, whole ingredients to create a display that’s as beautiful as it is delicious. The key is choosing fresh, crisp vegetables that hold their shape well and offer a nice variety of colors and textures. Here’s what you’ll need to build your own pumpkin patch.
- For the Pumpkin Patch Base:
- 1 large orange bell pepper (this becomes your main pumpkin—choose one with a nice, round shape)
- 1 small bunch of celery (for the fence posts and pumpkin stems)
- 1 large cucumber (sliced into rounds for the “ground” and cut into planks for fences)
- 1 pint of cherry tomatoes (red and yellow mix—they look like little pumpkins and gourds)
- 1 head of broccoli (cut into small florets—these become your “trees”)
- 1 head of cauliflower (cut into small florets—these make perfect “ghosts” or “clouds”)
- 1 bunch of baby carrots (with tops if possible—they look like little carrots pulled from the ground)
- 1 large red bell pepper (for the scarecrow or for making “jack-o-lantern” faces)
- For the Dip (Roasted Red Pepper Hummus):
- 1 can (15 oz) chickpeas, drained and rinsed (I prefer Biona or Westbrae for the creamiest texture)
- 1/2 cup roasted red peppers (from a jar, drained—or roast your own if you have time)
- 1/4 cup tahini (stir it well before using—it separates)
- 2 tablespoons olive oil (plus more for drizzling)
- 1 clove garlic (or 1/2 teaspoon garlic powder if you’re in a rush)
- 1 tablespoon lemon juice (fresh is best, but bottled works in a pinch)
- 1/2 teaspoon smoked paprika (this gives it that warm, fall flavor)
- 1/4 teaspoon cumin (adds a little earthiness)
- Salt and pepper to taste
- 2-3 tablespoons ice water (to thin it out—this is my secret for super smooth hummus)
- For Decoration (Optional but Fun):
- Fresh rosemary sprigs (they look like tiny pine trees or bushes)
- Black olives (sliced—for making “spider” bodies or scarecrow eyes)
- Pretzel sticks (for fence posts or scarecrow arms)
- Pumpkin seeds (pepitas—sprinkle them around like “seeds” on the ground)
Substitution Guidance: If you’re avoiding nightshades, swap the bell peppers for extra cucumber and use a beet-based hummus instead. For a nut-free version, skip the tahini and use sunflower seed butter—it works surprisingly well. And if you can’t find baby carrots with tops, just use regular baby carrots and cut a small slit in the top to insert a piece of parsley stem. It’s not perfect, but it’s close enough!
Equipment Needed
You don’t need much for this, which is part of the appeal. Here’s what I use:
- Large cutting board: A big wooden board works best for the display, but a large white platter or even a baking sheet lined with parchment paper will do the trick.
- Sharp chef’s knife: A good knife makes all the difference when you’re cutting bell peppers into shapes. I use my Victorinox—it’s affordable and stays sharp forever.
- Small paring knife: For carving the little faces into the bell pepper pumpkins. A tiny serrated knife works great too.
- Vegetable peeler: For making cucumber ribbons or for peeling the outer layer off the celery if it’s stringy.
- Food processor: For the hummus. A high-speed blender works too, but you might need to scrape down the sides more often. I’ve made this with an immersion blender in a pinch, and it worked—just took a little longer.
- Small cookie cutters: If you want to get fancy, use a small leaf-shaped or star-shaped cutter to cut shapes out of bell pepper slices. Not necessary, but fun.
- Serving bowl: A small, round bowl for the hummus. I like using a white ceramic one that looks like a pumpkin when I put it in the center.
Preparation Method
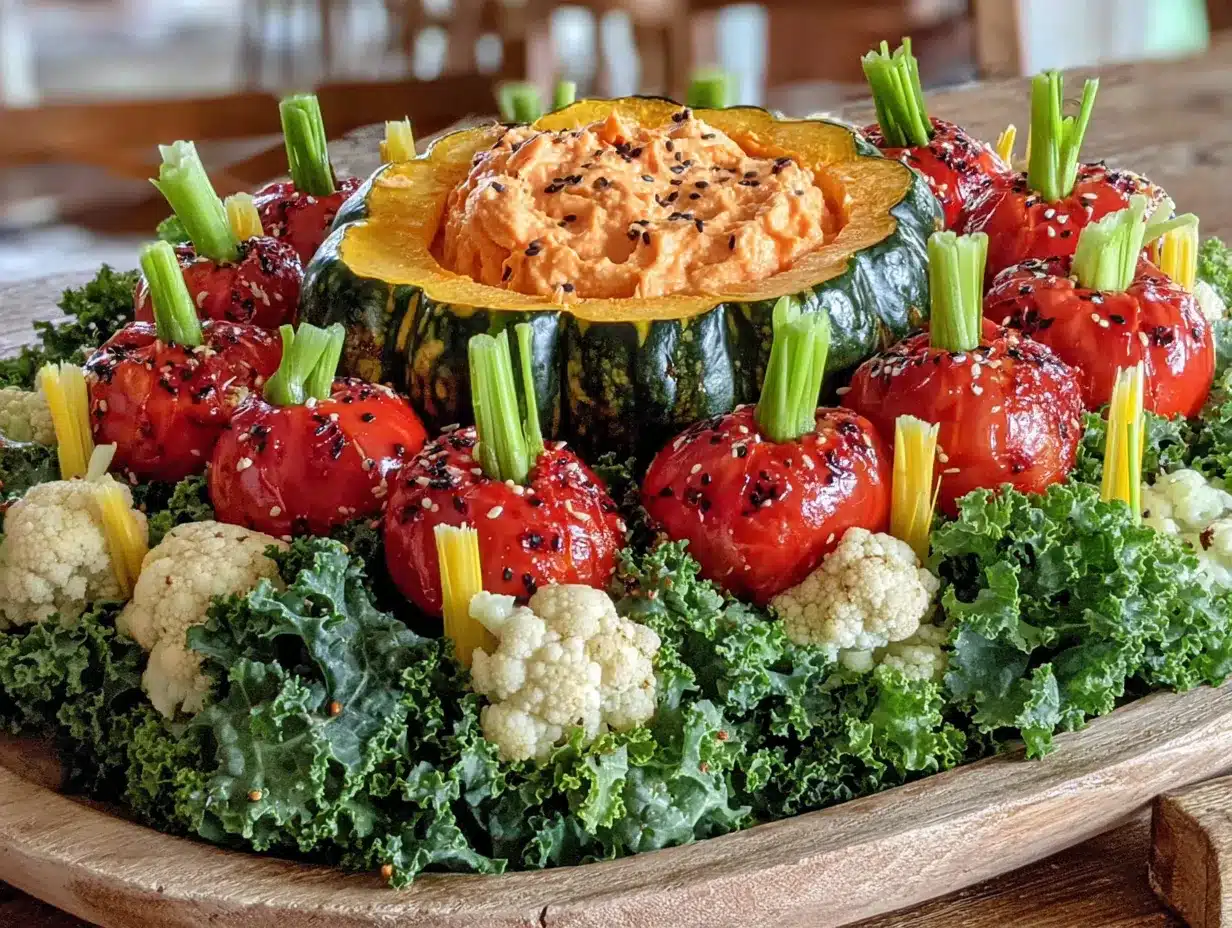
Alright, let’s build a pumpkin patch. Take your time with this—it’s more like crafting than cooking, and that’s the fun part.
- Make the Hummus First (10 minutes): In your food processor, combine the drained chickpeas, roasted red peppers, tahini, olive oil, garlic, lemon juice, smoked paprika, and cumin. Process until smooth, scraping down the sides as needed. With the motor running, drizzle in the ice water one tablespoon at a time until the hummus is creamy and smooth—it should be slightly looser than you think, because it will thicken in the fridge. Season with salt and pepper. Taste it. Adjust the lemon or paprika if needed. Transfer to your serving bowl and use the back of a spoon to create a little swirl on top. Drizzle with olive oil and sprinkle with a pinch of smoked paprika. Set aside.
- Prepare the Vegetables (15 minutes): Wash everything thoroughly. Pat it dry—wet vegetables don’t hold their shape as well on the platter. Cut the broccoli and cauliflower into small florets. Slice the cucumber into even rounds, about 1/4-inch thick. Cut the celery stalks into 3-inch pieces. If your celery has leaves, save a few for decoration—they look like little bushes.
- Create the Pumpkin Patch Centerpiece (5 minutes): Take your large orange bell pepper. Using the paring knife, cut a small circle around the stem and lift it out—save the stem piece. This is your pumpkin top. Now, carve a simple jack-o-lantern face into one side of the pepper. Two triangle eyes and a little zigzag mouth. Don’t overthink it—imperfect faces are cuter. Place the “lid” back on top, and insert a small piece of celery into the stem hole to look like a pumpkin stem. Set this in the center of your board.
- Build the Scarecrow (Optional, 5 minutes): Take a large red bell pepper and cut it in half. Use one half as the scarecrow’s body. Cut a small slit near the top and insert a pretzel stick for arms. Use two black olive slices for eyes and a small triangle of carrot for the nose. Place this off to one side of the board.
- Arrange the Scene (10 minutes): Start by placing the hummus bowl in the center of your board. Arrange the cucumber rounds around it like a patch of ground. Place the orange bell pepper pumpkin next to the hummus. Create a “fence” using celery sticks and pretzel sticks along one edge of the board. Group the broccoli florets together like a little forest. Scatter the cauliflower “ghosts” around. Arrange the cherry tomatoes in small clusters—they look like mini pumpkins and gourds. Place the baby carrots as if they’re growing out of the cucumber ground. Use rosemary sprigs for bushes and trees.
- Add the Final Touches (5 minutes): Sprinkle pumpkin seeds around the board like fallen seeds. If you have extra bell pepper pieces, cut them into small leaf shapes and tuck them near the vegetables. Place the bowl of hummus in the center, and if you want, carve a small bell pepper into a mini pumpkin to sit right next to it. Step back and look at your creation. Move things around until it feels balanced.
Pro tip: Don’t overcrowd the board. Leave a little space between the vegetables so people can actually grab them without knocking everything over. And if you’re serving this at a party, make the hummus the day before—it actually tastes better after the flavors have had time to meld.
Cooking Tips & Techniques
I’ve made this veggie tray about a dozen times now, and I’ve learned a few things the hard way. Here’s what I wish I’d known from the start.
Choose your vegetables wisely. Not all bell peppers are created equal. Look for ones that are firm and have a nice, symmetrical shape—they’ll be easier to carve and they’ll hold up better on the board. I once used a slightly soft bell pepper, and it collapsed into a sad, wrinkly mess within an hour. Learn from my mistake.
Prep everything before you start arranging. This is one of those recipes where mise en place actually matters. Chop all your vegetables, make your hummus, and have everything ready before you start placing things on the board. Once you start arranging, you don’t want to have to stop and wash a cutting board. I speak from experience—I once had hummus on my hands and a knife in the sink and a half-finished scarecrow staring at me. It was chaos.
Keep it cold. Vegetables stay crisp when they’re cold. If you’re making this ahead of time, store the cut vegetables in a sealed container with a damp paper towel on top. They’ll stay fresh for up to 24 hours. Assemble the tray no more than two hours before serving—after that, the cucumber starts to weep and things get a little sad.
Don’t skip the ice water in the hummus. I know it sounds weird, but adding a little ice water while the food processor is running makes the hummus incredibly smooth and creamy. It’s a trick I learned from a chef friend, and it works every time. The cold water emulsifies the tahini and olive oil into the chickpeas, creating a texture that’s almost silky.
Embrace imperfection. Your scarecrow might look a little lopsided. Your pumpkin faces might be a little crooked. That’s okay—actually, it’s better. The charm of this tray is that it looks handmade and playful. If everything was perfectly symmetrical, it would look like a catering display. You want it to look like someone had fun making it.
Variations & Adaptations
This recipe is incredibly flexible. Here are a few ways I’ve adapted it over the years.
- Dairy-Free and Vegan: The hummus is already vegan, so you’re good there. If you want a creamy dip option, try a cashew-based ranch. Soak 1/2 cup cashews in hot water for 20 minutes, then blend with 1/4 cup water, 1 tablespoon lemon juice, 1 teaspoon onion powder, 1 teaspoon garlic powder, and salt. It’s thick, creamy, and completely plant-based.
- Low-Carb/Keto: Swap the carrots for extra cucumber and bell pepper slices. Replace the hummus with a roasted garlic and cauliflower dip. Roast a head of cauliflower with garlic cloves until tender, then blend with olive oil, tahini, and lemon juice. It’s surprisingly rich and satisfying.
- Seasonal Variation: In the summer, I use yellow squash and zucchini cut into rounds, and I swap the hummus for a beet dip (roasted beets blended with Greek yogurt and garlic). In the spring, I add blanched asparagus spears and sugar snap peas. The base idea stays the same—you’re building a scene—but the vegetables change with the season.
- Spooky Upgrade: For a more Halloween-themed tray, use a small melon baller to scoop out cucumber “eyeballs” and fill them with hummus or cream cheese. Cut black olives into spider shapes (slice an olive in half lengthwise, then cut the halves into thin strips for legs). Arrange them on the board like they’re crawling through the pumpkin patch.
- Gluten-Free: This recipe is naturally gluten-free, but double-check your pretzel sticks if you’re using them for the fence. Some brands contain wheat. Swap them for gluten-free pretzels or just use extra celery sticks.
Serving & Storage Suggestions
This veggie tray is best served at room temperature, so take it out of the fridge about 20 minutes before your guests arrive. The flavors of the hummus really open up when it’s not ice cold, and the vegetables are more pleasant to eat when they’re not straight out of the crisper drawer.
Presentation: If you’re bringing this to a party, assemble it on a large, flat board or a rimmed baking sheet. Cover it loosely with plastic wrap for transport. When you arrive, just remove the wrap and do a quick touch-up—rearrange any vegetables that shifted during the drive. I always bring a few extra pieces in a baggie for last-minute adjustments.
Storage: Leftover vegetables can be stored in an airtight container in the fridge for up to three days. The hummus keeps for five days. Don’t store the assembled tray—the vegetables will get soggy from the moisture. Instead, break it down and store everything separately. The hummus actually gets better after a day or two as the flavors meld.
Reheating: You don’t need to reheat anything, but if the hummus has thickened in the fridge, stir in a teaspoon of water or lemon juice to loosen it up. Let it sit at room temperature for 15 minutes before serving.
Flavor Development: The hummus is best after it’s had at least an hour to rest. The garlic and spices mellow and blend together, creating a more rounded flavor. I always make it the night before a party. The vegetables, on the other hand, are best fresh—they lose their crunch after a day in the fridge.
Nutritional Information & Benefits
This isn’t just a pretty party platter—it’s genuinely good for you. Here’s a rough breakdown per serving (about 1 cup of vegetables with 2 tablespoons of hummus):
- Calories: Approximately 150-180
- Protein: 6-8 grams (from the chickpeas and tahini)
- Fiber: 5-7 grams (hello, digestive health!)
- Vitamin A: 120% of your daily value (carrots and bell peppers are packed with it)
- Vitamin C: 80% of your daily value (bell peppers are actually higher in vitamin C than oranges)
- Iron: 10% of your daily value (from the chickpeas and spinach if you add it)
The real benefit here is the variety. You’re eating a rainbow of vegetables, each with its own unique set of nutrients. The broccoli provides sulforaphane, a compound linked to cancer prevention. The cauliflower is rich in choline, which supports brain health. And the hummus is a great source of plant-based protein and healthy fats. It’s a snack that actually fuels your body instead of just filling it up.
Dietary Considerations: This recipe is naturally vegan, gluten-free, dairy-free, and nut-free (if you skip the cashew ranch). It’s also low in added sugar and contains no artificial ingredients. If you’re watching your sodium, use no-salt-added chickpeas and skip the salt in the hummus—the roasted red peppers add plenty of flavor on their own.
Frequently Asked Questions
Can I make this veggie tray ahead of time?
Yes, but with a caveat. You can prep all the vegetables and make the hummus up to 24 hours in advance. Store the cut vegetables in separate containers with a damp paper towel to keep them crisp. Assemble the tray no more than two hours before serving to keep everything looking fresh.
What if I can’t find orange bell peppers?
No problem! You can use a small pumpkin or a butternut squash as the centerpiece instead. Just hollow it out and fill it with hummus or dip. Or use a yellow or red bell pepper—the color will be different, but it’ll still look like a pumpkin patch. You can even use a small cantaloupe if you’re feeling adventurous.
How do I keep the vegetables from drying out?
Cover the assembled tray with a damp paper towel and then plastic wrap if you’re not serving it immediately. The moisture from the paper towel will keep the vegetables crisp without making them soggy. Remove the paper towel before serving, obviously.
Can I use store-bought hummus?
You can, but I wouldn’t recommend it. The roasted red pepper hummus is really the star of this tray, and homemade is so much better. If you’re short on time, buy a plain hummus and stir in some chopped roasted red peppers and a pinch of smoked paprika. It’s not quite the same, but it’s close enough in a pinch.
How do I get kids to eat the vegetables?
Let them help build the tray! Kids are way more likely to eat something they helped create. Give them a few pieces to arrange, let them place the “ghosts” (cauliflower) in the patch, or let them pick which vegetables go where. The more ownership they feel, the more willing they’ll be to try everything. Trust me on this—I’ve tested it with my niece and nephew, and it works every time.
Conclusion
Look, I know a veggie tray isn’t the most exciting thing in the world. But this one? This one is different. It’s not just a pile of vegetables on a plate—it’s a conversation starter, a little piece of edible art, and honestly, it’s just fun. I’ve made this for three Halloweens now, and every time, someone asks me for the “recipe.” Not for the hummus (though that gets requests too), but for the arrangement itself. There’s something about seeing a tiny pumpkin patch on a table that makes people smile.
I love this recipe because it proves that healthy food doesn’t have to be boring. It can be playful, creative, and genuinely joyful. And it reminds me that sometimes the best dishes aren’t about fancy techniques or exotic ingredients—they’re about seeing something familiar in a new way. So go ahead, build your own pumpkin patch. Carve a crooked face into a bell pepper. Make a scarecrow that looks a little goofy. And when your friends ask you how you did it, just smile and say you learned it from a neighbor.
I’d love to see your creations! Tag me in your photos or leave a comment below telling me what you put in your pumpkin patch. Did you add a ghost? A spider? A little fence made of pretzels? Share your version—I’m always looking for new ideas. And if you make this for a party, let me know how it went. Honestly, I just want to see more tiny vegetable farms in the world.
Pin This Recipe!
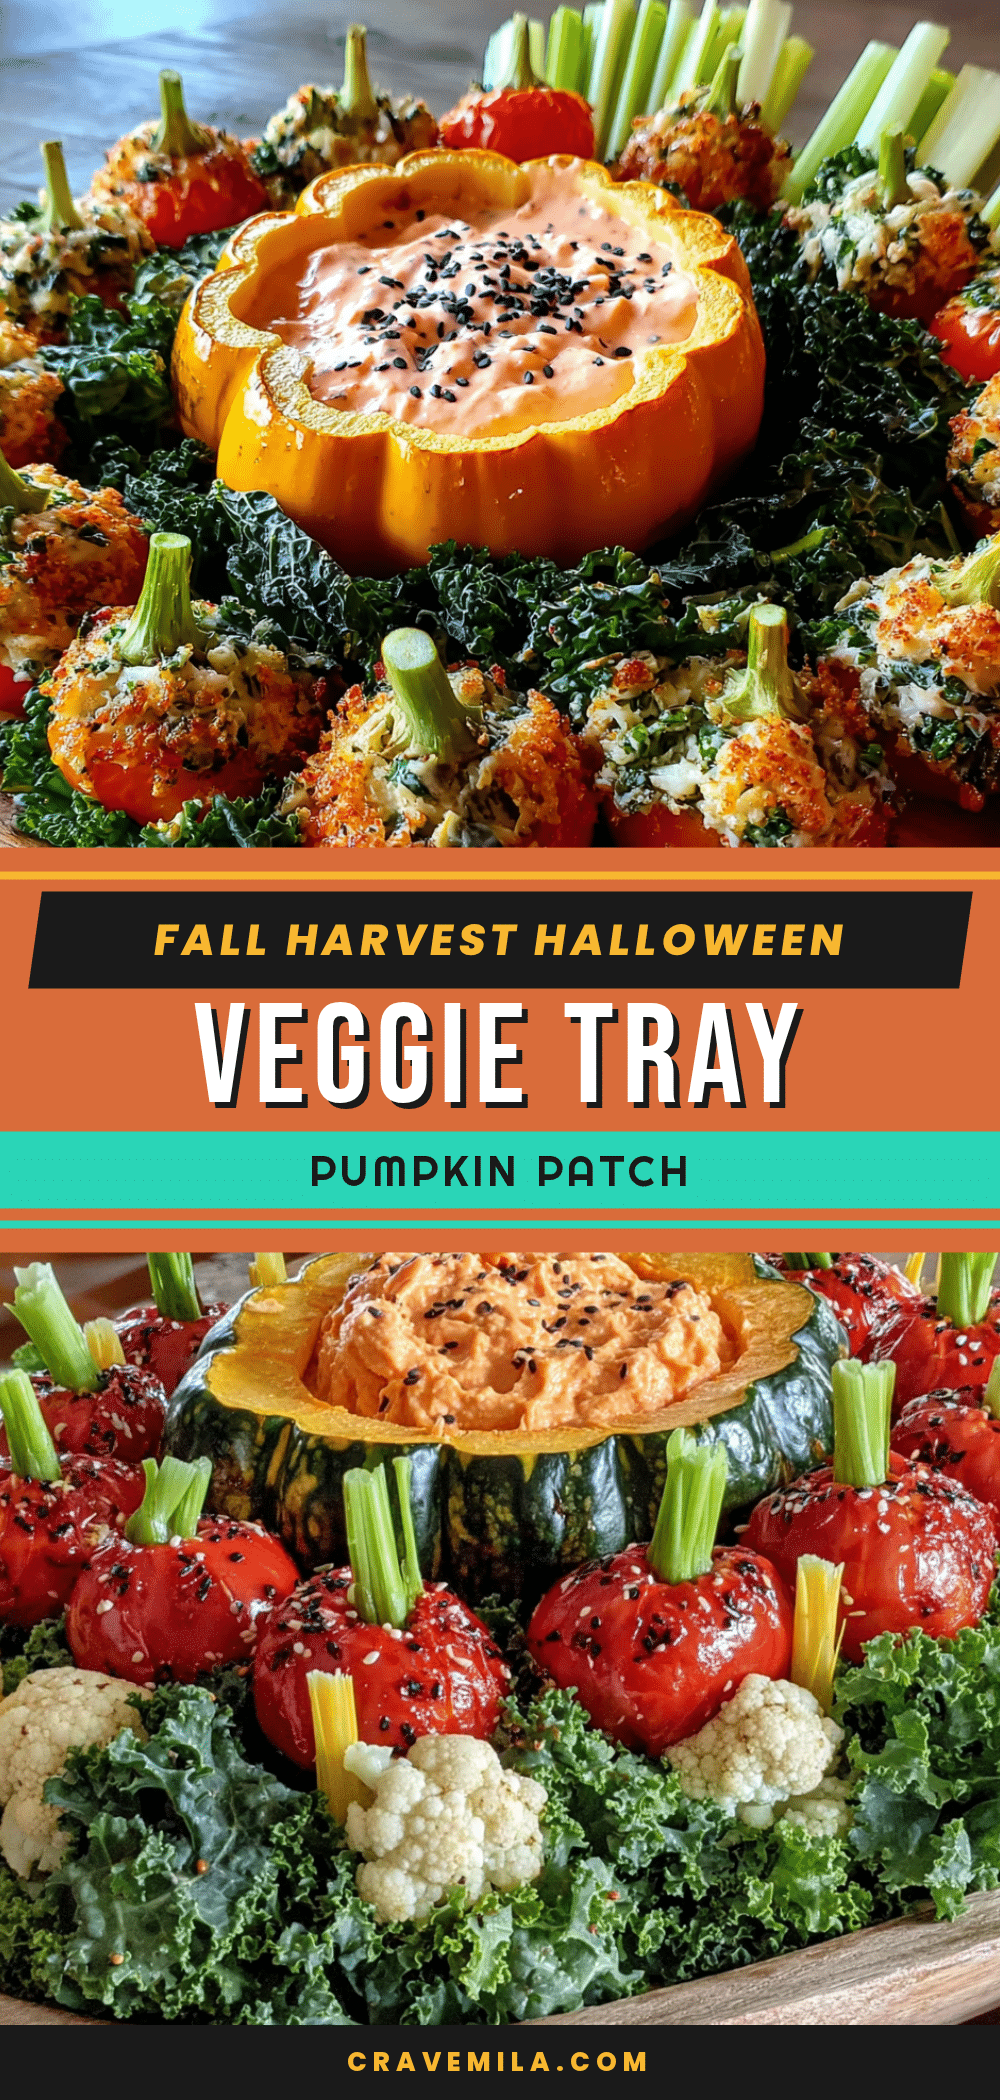
Easy Fall Harvest Halloween Veggie Tray Pumpkin Patch
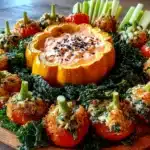
A playful and healthy Halloween party snack that transforms fresh vegetables into a charming pumpkin patch scene, complete with a roasted red pepper hummus dip. Perfect for fall gatherings and sure to delight both kids and adults.
- Prep Time: 20 minutes
- Cook Time: 0 minutes
- Total Time: 20 minutes
- Yield: 8 servings 1x
- Category: Appetizer
- Cuisine: American
Ingredients
- 1 large orange bell pepper
- 1 small bunch of celery
- 1 large cucumber
- 1 pint cherry tomatoes (red and yellow mix)
- 1 head of broccoli
- 1 head of cauliflower
- 1 bunch of baby carrots (with tops if possible)
- 1 large red bell pepper
- 1 can (15 oz) chickpeas, drained and rinsed
- 1/2 cup roasted red peppers (from a jar, drained)
- 1/4 cup tahini
- 2 tablespoons olive oil
- 1 clove garlic (or 1/2 teaspoon garlic powder)
- 1 tablespoon lemon juice
- 1/2 teaspoon smoked paprika
- 1/4 teaspoon cumin
- Salt and pepper to taste
- 2–3 tablespoons ice water
- Fresh rosemary sprigs (optional)
- Black olives (optional)
- Pretzel sticks (optional)
- Pumpkin seeds (pepitas, optional)
Instructions
- Make the hummus first: In a food processor, combine the drained chickpeas, roasted red peppers, tahini, olive oil, garlic, lemon juice, smoked paprika, and cumin. Process until smooth, scraping down the sides as needed. With the motor running, drizzle in the ice water one tablespoon at a time until the hummus is creamy and smooth. Season with salt and pepper. Transfer to a serving bowl, create a swirl on top, drizzle with olive oil, and sprinkle with smoked paprika. Set aside.
- Prepare the vegetables: Wash and pat dry all vegetables. Cut broccoli and cauliflower into small florets. Slice cucumber into 1/4-inch rounds. Cut celery stalks into 3-inch pieces. Save a few celery leaves for decoration.
- Create the pumpkin patch centerpiece: Cut a small circle around the stem of the orange bell pepper and lift it out, saving the stem piece. Carve a simple jack-o-lantern face (two triangle eyes and a zigzag mouth) into one side. Place the lid back on and insert a small piece of celery into the stem hole to look like a pumpkin stem. Set in the center of the board.
- Build the scarecrow (optional): Cut the red bell pepper in half. Use one half as the body. Cut a small slit near the top and insert a pretzel stick for arms. Use two black olive slices for eyes and a small triangle of carrot for the nose. Place off to one side of the board.
- Arrange the scene: Place the hummus bowl in the center of the board. Arrange cucumber rounds around it like ground. Place the orange bell pepper pumpkin next to the hummus. Create a fence using celery sticks and pretzel sticks along one edge. Group broccoli florets together like a forest. Scatter cauliflower ‘ghosts’ around. Arrange cherry tomatoes in small clusters. Place baby carrots as if growing out of the cucumber ground. Use rosemary sprigs for bushes and trees.
- Add final touches: Sprinkle pumpkin seeds around the board. Cut extra bell pepper pieces into small leaf shapes and tuck near vegetables. Step back and adjust until balanced.
Notes
Prep vegetables and hummus up to 24 hours in advance. Assemble tray no more than 2 hours before serving. Keep vegetables cold and crisp. The hummus benefits from resting at least an hour for flavors to meld. Embrace imperfect carving for a playful look.
Nutrition
- Serving Size: 1 cup vegetables wit
- Calories: 165
- Sugar: 6
- Sodium: 220
- Fat: 8
- Saturated Fat: 1
- Carbohydrates: 18
- Fiber: 6
- Protein: 7
Keywords: Halloween veggie tray, fall harvest, pumpkin patch, vegetable platter, roasted red pepper hummus, healthy Halloween snack