I was standing in line at the hardware store—of all places—waiting to return a paint sprayer that had absolutely defeated me, when the guy behind me, who looked like he hadn’t smiled since the Carter administration, started talking about dirt cups. Not the gardening kind. The dessert kind. He was holding a bag of gummy worms and a box of instant pudding, and he told me, with complete seriousness, that his dirt cups had won the block party contest three years running. I wasn’t expecting dessert advice from a grumpy man in a flannel shirt holding a paint chip, but there I was, listening to him explain exactly why Oreo crumbs work better than chocolate graham crackers. Honestly, it was the last place I’d expect a Halloween recipe to come from, but that’s exactly when this whole thing started.
He told me the secret was in the layering—not too thick, not too thin—and that you had to crush the Oreos by hand because a food processor makes them too fine. I mean, who knew? I scribbled his instructions on the back of my receipt while the cashier waited. Let me tell you, that paint sprayer return took forever, but the dirt cup recipe I got in exchange? That was the real win. I’ve been making these spooky Halloween dirt cups with Oreo crumbs and gummy worms every year since, and they never last more than ten minutes at any party. Maybe you’ve been there—standing in a totally random place when a recipe finds you?
Why You’ll Love This Recipe
These spooky Halloween dirt cups are the kind of dessert that makes everyone smile, from the youngest ghost at the party to the adults pretending they’re too old for gummy worms. I’ve tested this recipe at least a dozen times, tweaking the pudding consistency and the crumb texture until it felt just right. Here’s why I keep coming back to it:
- Quick & Easy: Comes together in under 20 minutes, with no baking required. Perfect for last-minute Halloween prep or when the kids are bouncing off the walls.
- Simple Ingredients: No fancy grocery trips needed. You likely already have milk, vanilla extract, and maybe even the Oreos in your pantry.
- Perfect for Halloween Parties: Great for classroom treats, neighborhood get-togethers, or that spooky movie night you’ve been planning.
- Crowd-Pleaser: Always gets rave reviews from kids and adults alike. I’ve never seen a dirt cup left unfinished.
- Unbelievably Delicious: The creamy pudding against the crunchy Oreo crumbs is next-level comfort food. It’s the texture combo that keeps you coming back for one more spoonful.
What makes this recipe different from the rest? It’s the hand-crushed Oreo technique—it leaves those little chunks of cream filling that make the “dirt” look more realistic and taste way better. Plus, I use a slightly thicker pudding base so the gummy worms stay put instead of sinking to the bottom. This isn’t just another version of dirt cups—it’s the best version, tested by a grumpy hardware store stranger and refined in my own kitchen. Trust me on this one.
What Ingredients You Will Need
This recipe uses simple, everyday ingredients to deliver that spooky, satisfying dessert experience without any fuss. Most of these are pantry staples, which makes these spooky Halloween dirt cups perfect for a spontaneous treat.
For the Pudding Base
- 2 cups cold milk (whole milk gives the creamiest texture, but 2% works fine too)
- 1 box (3.9 oz) instant chocolate pudding mix (I prefer Jell-O brand for consistency, but store brands work well)
- 1 teaspoon vanilla extract (optional, but it rounds out the chocolate flavor nicely)
For the “Dirt” Layer
- 1 package (14.3 oz) Oreo cookies (regular, not double-stuffed—the filling-to-cookie ratio matters here)
- 2 tablespoons melted butter (unsalted, to help the crumbs clump slightly for a more realistic dirt texture)
For the Spooky Decorations
- 1 bag gummy worms (about 30-40 worms, depending on how creepy you want them)
- Optional: 10-12 gummy spiders or gummy eyeballs (for extra Halloween flair)
- Optional: 2-3 mint leaves or small plastic tombstone decorations (for garnish)
Ingredient Tips: Look for Oreos that aren’t crushed in the package—you want whole cookies for the best hand-crushing experience. For the gummy worms, I like the sour ones because the tangy flavor contrasts beautifully with the sweet pudding. If you’re making these for a school party, check for nut-free certifications on your pudding mix. And honestly, don’t skip the melted butter in the crumbs—it makes the “dirt” feel more like actual moist soil, which is exactly what you want for a Halloween treat.
Equipment Needed
- 6-8 clear plastic cups or small glass jars (4-6 ounce size works best for individual servings)
- Large mixing bowl (for the pudding)
- Whisk (a hand whisk is fine, but an electric mixer speeds things up)
- Ziploc bag or clean kitchen towel (for crushing Oreos without making a mess)
- Rolling pin or heavy-bottomed pan (to crush the cookies)
- Small bowl (for mixing melted butter with crumbs)
- Spoon or small spatula (for layering)
- Measuring cups and spoons
If you don’t have clear cups, small mason jars or even paper cups work—you just won’t see the spooky layers as clearly. I’ve used both, and honestly, the clear cups make a huge difference for presentation. Also, if you don’t have a rolling pin, a wine bottle works perfectly for crushing Oreos. Just wrap it in a towel first so you don’t get chocolate on the label. Trust me, I learned that the hard way.
Preparation Method
- Make the chocolate pudding: In a large mixing bowl, whisk together the instant pudding mix and 2 cups of cold milk. Whisk vigorously for about 2 minutes until the mixture starts to thicken. Add the vanilla extract if using, and whisk for another 30 seconds. Let the pudding sit for 5 minutes to fully set. It should be thick but still spoonable—think yogurt consistency.
- Crush the Oreos: Place the entire package of Oreos into a large Ziploc bag (or between two sheets of parchment paper). Seal the bag, removing as much air as possible. Using a rolling pin or heavy pan, gently crush the cookies until they resemble coarse dirt. You want a mix of fine crumbs and small chunks—don’t pulverize them completely. The little flecks of white cream filling are what make it look like real soil.
- Add melted butter to the crumbs: Transfer the crushed Oreos to a small bowl. Drizzle the 2 tablespoons of melted butter over the crumbs and toss with a fork until evenly distributed. This step is optional but highly recommended—it gives the “dirt” a slightly clumpy, moist texture that looks incredibly realistic.
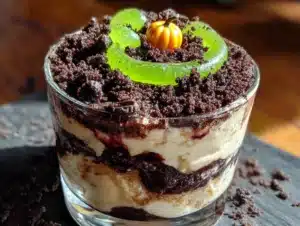
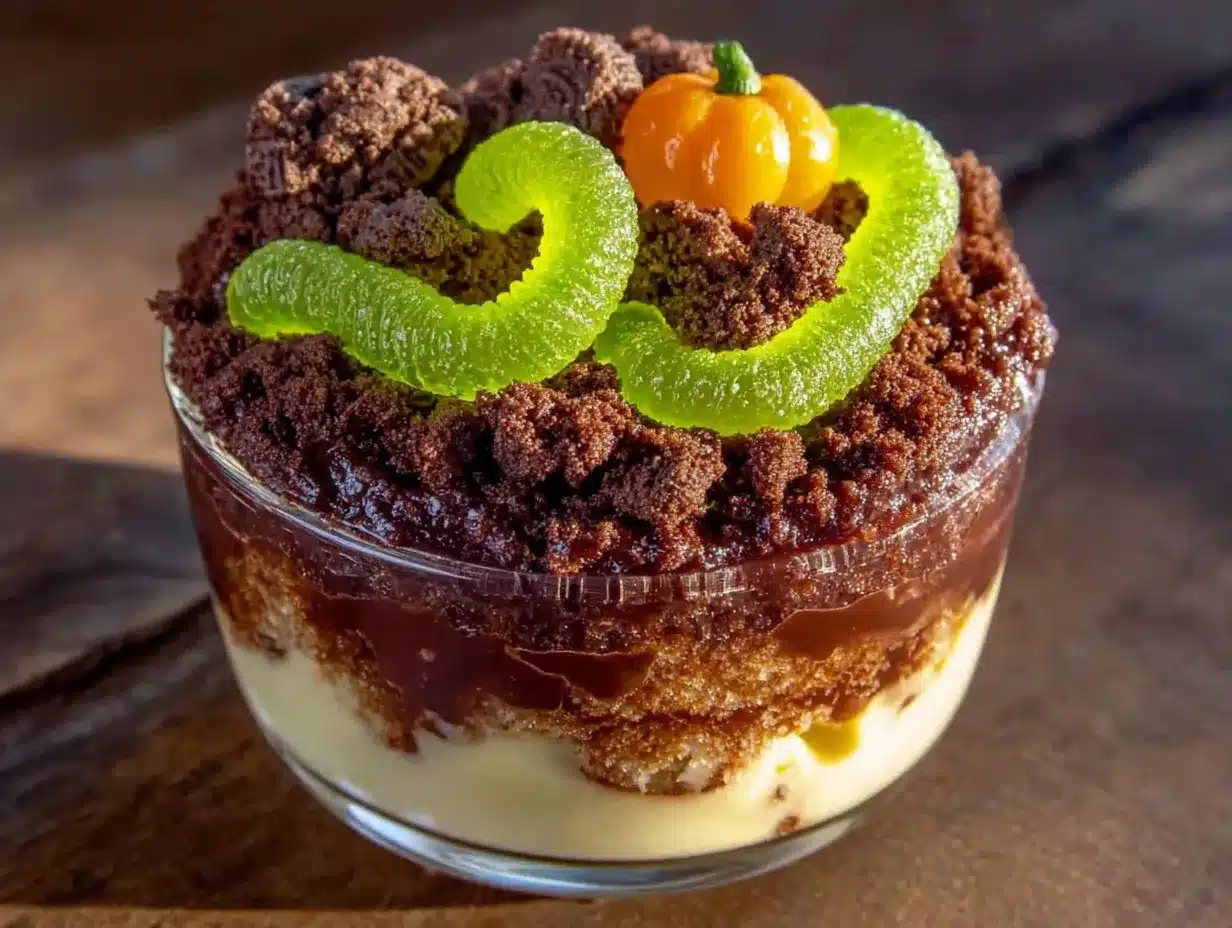
- Layer the cups: Start with a generous tablespoon of Oreo crumbs at the bottom of each clear cup. Press down lightly with the back of a spoon to create an even base layer. Then add 2-3 tablespoons of chocolate pudding on top, spreading it gently to the edges. Repeat with another layer of crumbs, then another layer of pudding. End with a final layer of crumbs on top—about 2 tablespoons per cup. You want the top to look like a little mound of dirt.
- Add the gummy worms: Here’s where the fun begins. Gently press 3-4 gummy worms into each cup, positioning them so they appear to be crawling out of the “dirt.” Some should be half-buried in the top layer, while others can be dangling over the edge of the cup for maximum creep factor. If you’re using gummy spiders or eyeballs, place them on top of the crumbs now.
- Chill before serving: Place the assembled dirt cups in the refrigerator for at least 30 minutes before serving. This allows the pudding to fully set and the flavors to meld together. The cups will keep in the fridge for up to 2 days, though the Oreo crumbs will soften slightly over time—which honestly makes them taste even better.
Visual cues: The pudding should be thick enough that it doesn’t run when you spoon it. The Oreo crumbs should look like dark, slightly clumpy soil—not like fine dust. And when you press a gummy worm into the top layer, it should stay put without sliding down into the pudding.
Cooking Tips & Techniques
I’ve made these spooky Halloween dirt cups more times than I can count, and I’ve definitely learned a few things the hard way. Here are my best tips:
- Don’t overmix the pudding. Whisk it just until it thickens, then stop. Overmixing can make it grainy or cause it to separate. I speak from experience—I once whisked for five straight minutes and ended up with weirdly textured pudding.
- Crush Oreos by hand, not in a food processor. A food processor turns them into fine dust, which looks more like potting soil than actual dirt. You want those little chunks of cookie and cream filling for texture. A Ziploc bag and a rolling pin are your best friends here.
- Let the pudding set completely before layering. If you rush this step, the layers will blend together and you’ll lose that distinct dirt-and-mud look. Give it the full 5 minutes, plus the 30-minute chill time at the end.
- Use cold milk. Cold milk helps the instant pudding set up faster and more evenly. I’ve tried it with room-temperature milk, and the pudding never gets quite as thick.
- Press the gummy worms in gently. If you shove them in too hard, they’ll disappear into the pudding. You want them peeking out, looking like they’re trying to escape. That’s the whole point of this dessert!
One thing I messed up early on was making the cups too big. I used 8-ounce cups, and they were just too much dessert for one person. Stick with 4-6 ounce cups for individual servings—they’re the perfect size for a Halloween treat.
Variations & Adaptations
These spooky Halloween dirt cups are endlessly customizable. Here are a few ways I’ve adapted them over the years:
- Dairy-Free Version: Use almond milk or oat milk instead of regular milk, and swap the butter for coconut oil. The pudding will set slightly softer, but it still works beautifully. I’ve tested this with oat milk, and honestly, I couldn’t tell the difference.
- Gluten-Free Option: Use gluten-free chocolate sandwich cookies instead of Oreos. There are several good brands available now, and they crush just as well. Just check the pudding mix label to make sure it’s gluten-free too.
- Flavor Twist: Swap the chocolate pudding for vanilla or butterscotch pudding. The “dirt” looks a little different against a lighter base, but it’s still delicious. I made a batch with butterscotch last year, and it tasted like a campfire s’more in a cup.
- Extra Spooky Factor: Add a few drops of green or purple food coloring to the pudding for a witchy vibe. Or mix some crushed freeze-dried strawberries into the top layer for “bloody” dirt. My kids went absolutely wild for that version.
- Adult Version: Add a tablespoon of Kahlua or Baileys to the pudding mixture before setting. It adds a grown-up twist that pairs perfectly with the chocolate and gummy worms.
Serving & Storage Suggestions
These spooky Halloween dirt cups are best served cold, straight from the refrigerator. The contrast between the chilled, creamy pudding and the crunchy Oreo crumbs is what makes them so satisfying. I like to serve them on a tray with a few extra gummy worms scattered around for a creepy, “infested” look.
Storage: Cover each cup with plastic wrap or a lid and store in the refrigerator for up to 2 days. The Oreo crumbs will soften over time, but that’s not a bad thing—they start to taste like actual moist dirt, which is perfect for the Halloween theme. I actually prefer them after they’ve sat overnight because the flavors meld together so nicely.
Freezing: You can freeze these cups for up to 1 month, but the texture will change. The pudding becomes icy and the crumbs get soggy when thawed. If you’re making them ahead for a party, I’d recommend assembling them no more than 24 hours in advance for the best results.
Reheating: Don’t. These are meant to be served cold. If you want a warm dessert, you’re looking for a different recipe entirely.
These cups pair beautifully with a hot cup of coffee or a glass of cold milk. For a Halloween party spread, serve them alongside pumpkin-shaped sugar cookies or a bowl of caramel popcorn for a sweet-and-salty combo that everyone will love.
Nutritional Information & Benefits
Let’s be real—these spooky Halloween dirt cups are a treat, not a health food. But here’s the estimated nutrition per serving (based on 6 servings):
- Calories: Approximately 380-420 per cup
- Fat: 16-18g
- Carbohydrates: 55-60g
- Protein: 6-8g
- Sugar: 40-45g
Health Highlights: The milk provides calcium and vitamin D, and the chocolate pudding contains a small amount of iron. The gummy worms? Well, they’re mostly sugar, but they make people smile, and that counts for something in my book. If you’re looking for a slightly healthier version, use low-fat milk and sugar-free pudding mix—it cuts the calories by about 100 per serving.
Allergen Note: This recipe contains dairy and wheat (from the Oreos). For nut-free versions, check your pudding mix label carefully. The gummy worms may contain gelatin, so they’re not suitable for vegetarians or vegans.
From a wellness perspective, I believe in balance. These dirt cups are a once-a-year treat for Halloween, and they bring so much joy to kids and adults alike. Sometimes the best thing you can do for your health is to enjoy a ridiculous, spooky dessert with the people you love.
Conclusion
These spooky Halloween dirt cups with Oreo crumbs and gummy worms are everything a Halloween dessert should be—fun, creepy, and absolutely delicious. They come together in minutes, use ingredients you probably already have, and they always steal the show at any party. Whether you’re making them for a classroom celebration, a neighborhood gathering, or just a cozy night in with a scary movie, these little cups of dirt will not disappoint.
I love how customizable they are—you can make them as simple or as elaborate as you want. Add gummy spiders, sprinkle on some edible glitter, or throw in a few candy pumpkins for a harvest twist. The possibilities are endless, and that’s what makes this recipe so special.
So grab a bag of Oreos, some gummy worms, and a few clear cups. Make these spooky Halloween dirt cups your own, and don’t forget to hide a few extra gummy worms in the fridge for yourself. You’ve earned them. And hey—if you make these, come back and tell me how they turned out. I’d love to hear about your own unexpected recipe discoveries too.
Frequently Asked Questions
Can I make these dirt cups the night before?
Absolutely! In fact, they taste even better the next day because the flavors have time to meld together. Just keep them covered in the refrigerator, and add the gummy worms right before serving so they stay firm and don’t get too soft.
How do I keep the gummy worms from sinking into the pudding?
The key is to let the pudding set completely before adding the worms. Give it the full 5 minutes after whisking, then chill the assembled cups for at least 30 minutes. The thick pudding will hold the worms in place nicely.
Can I use sugar-free pudding mix?
Yes, sugar-free instant pudding works perfectly. Just follow the package instructions for the milk amount. The texture will be slightly less creamy, but it’s a great option if you’re watching your sugar intake.
What other candies can I use instead of gummy worms?
Gummy spiders, gummy eyeballs, candy bones, or even crushed candy corn all work great. For a less spooky version, try using gummy bears or sour worms. The possibilities are endless!
How long do these dirt cups last in the fridge?
They’ll keep for up to 2 days in an airtight container in the refrigerator. The Oreo crumbs will soften over time, but that actually makes them taste more like real dirt—which is perfect for the Halloween theme. After 2 days, the pudding may start to separate, so I’d recommend eating them within that window.
Pin This Recipe!
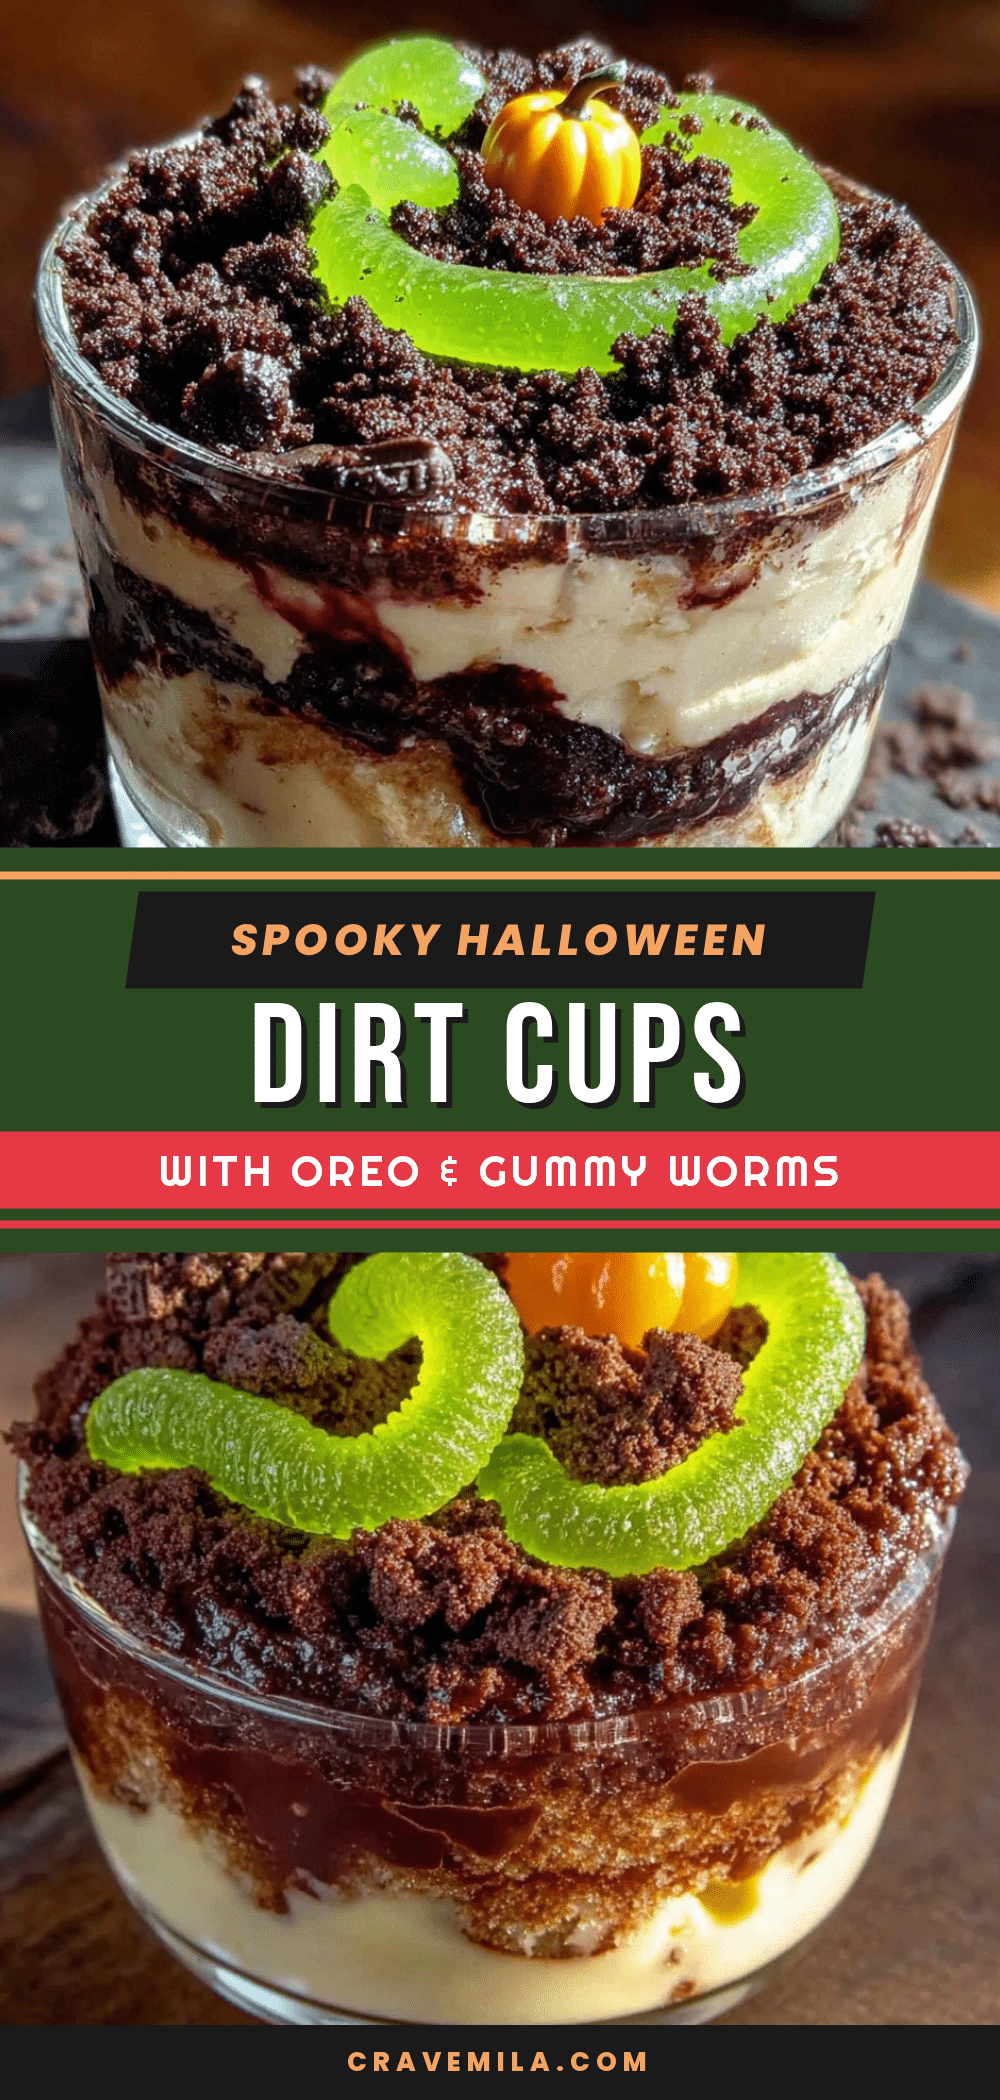
Spooky Halloween Dirt Cups with Oreo Crumbs & Gummy Worms
These spooky Halloween dirt cups are a quick, no-bake dessert featuring layers of creamy chocolate pudding and hand-crushed Oreo crumbs, topped with gummy worms for a creepy-crawly effect. Perfect for Halloween parties, they come together in under 20 minutes and are a guaranteed crowd-pleaser for kids and adults alike.
- Prep Time: 15 minutes
- Cook Time: 0 minutes
- Total Time: 45 minutes (includes 30 minutes chilling)
- Yield: 6 servings 1x
- Category: Dessert
- Cuisine: American
Ingredients
- 2 cups cold milk (whole milk preferred, 2% works)
- 1 box (3.9 oz) instant chocolate pudding mix (Jell-O brand recommended)
- 1 teaspoon vanilla extract (optional)
- 1 package (14.3 oz) Oreo cookies (regular, not double-stuffed)
- 2 tablespoons unsalted butter, melted
- 1 bag gummy worms (about 30–40 worms)
- Optional: 10-12 gummy spiders or gummy eyeballs
- Optional: 2-3 mint leaves or small plastic tombstone decorations
Instructions
- Make the chocolate pudding: In a large mixing bowl, whisk together the instant pudding mix and 2 cups of cold milk. Whisk vigorously for about 2 minutes until the mixture starts to thicken. Add the vanilla extract if using, and whisk for another 30 seconds. Let the pudding sit for 5 minutes to fully set. It should be thick but still spoonable—think yogurt consistency.
- Crush the Oreos: Place the entire package of Oreos into a large Ziploc bag (or between two sheets of parchment paper). Seal the bag, removing as much air as possible. Using a rolling pin or heavy pan, gently crush the cookies until they resemble coarse dirt. You want a mix of fine crumbs and small chunks—don’t pulverize them completely. The little flecks of white cream filling are what make it look like real soil.
- Add melted butter to the crumbs: Transfer the crushed Oreos to a small bowl. Drizzle the 2 tablespoons of melted butter over the crumbs and toss with a fork until evenly distributed. This step is optional but highly recommended—it gives the ‘dirt’ a slightly clumpy, moist texture that looks incredibly realistic.
- Layer the cups: Start with a generous tablespoon of Oreo crumbs at the bottom of each clear cup. Press down lightly with the back of a spoon to create an even base layer. Then add 2-3 tablespoons of chocolate pudding on top, spreading it gently to the edges. Repeat with another layer of crumbs, then another layer of pudding. End with a final layer of crumbs on top—about 2 tablespoons per cup. You want the top to look like a little mound of dirt.
- Add the gummy worms: Gently press 3-4 gummy worms into each cup, positioning them so they appear to be crawling out of the ‘dirt.’ Some should be half-buried in the top layer, while others can be dangling over the edge of the cup for maximum creep factor. If you’re using gummy spiders or eyeballs, place them on top of the crumbs now.
- Chill before serving: Place the assembled dirt cups in the refrigerator for at least 30 minutes before serving. This allows the pudding to fully set and the flavors to meld together. The cups will keep in the fridge for up to 2 days, though the Oreo crumbs will soften slightly over time—which honestly makes them taste even better.
Notes
For best results, crush Oreos by hand (not in a food processor) to achieve a coarse, realistic dirt texture. Use cold milk for the pudding to ensure it sets properly. Let the pudding set completely before layering to prevent layers from blending. Press gummy worms gently into the top layer so they appear to be crawling out. For a dairy-free version, use almond or oat milk and coconut oil instead of butter. For a gluten-free option, use gluten-free chocolate sandwich cookies. These cups can be made up to 24 hours in advance for best texture.
Nutrition
- Serving Size: 1 cup (4-6 ounces)
- Calories: 400
- Sugar: 43
- Sodium: 380
- Fat: 17
- Saturated Fat: 8
- Carbohydrates: 58
- Fiber: 2
- Protein: 7
Keywords: Halloween dirt cups, Oreo dirt cups, gummy worms dessert, no-bake Halloween dessert, chocolate pudding cups, spooky dessert, easy Halloween treat