It was 11:47 PM on a random Wednesday in late October, and I was hit with the weirdest craving—not for candy corn or pumpkin spice, but for something savory and fun. I didn’t have the energy for carving a real pumpkin, but I had a bag of bell peppers sitting in my crisper drawer and a sudden, slightly unhinged idea. What if I made the peppers themselves look like little jack-o-lanterns? Honestly, it felt a bit silly at that hour, but something about the late night made me think, why not just try it?
I grabbed a paring knife and started carving faces into the orange peppers—tiny triangles for eyes, a jagged grin for the mouth. It was messy, and I definitely got seeds all over my counter, but the result was ridiculous and perfect. I stuffed them with a quick mix of rice, black beans, and spices I had on hand, tossed them in the oven, and waited. When they came out, the faces had softened just enough to look like they were grinning back at me, and the smell of cumin and smoked paprika filled my tiny kitchen.
That first bite was pure vindication. The peppers were tender but still held their shape, the filling was warm and cozy, and the whole thing felt like a tiny Halloween miracle I’d stumbled on at midnight. Maybe you’ve been there—needing something creative and comforting without a trip to the store. This recipe is that moment turned into a meal. It’s the kind of thing you make when you want a little spooky fun without the mess of a real pumpkin, and honestly, I haven’t stopped making them since.
Why You’ll Love This Recipe
Let me tell you—these jack-o-lantern stuffed bell peppers are the Halloween dinner you didn’t know you needed. I’ve tested this recipe about five times now (my family is very patient), and every single time, someone says, “Wait, these are just peppers? They look so cool!” That’s the magic of it. You get all the festive fun of a carved pumpkin, but with actual dinner on the table in under an hour.
- Quick & Easy: From fridge to table in about 45 minutes, perfect for a busy Halloween night before trick-or-treating starts.
- Simple Ingredients: Bell peppers, rice, beans, cheese, and spices—no weird specialty items required.
- Perfect for Halloween Dinner: Kids and adults both love the spooky faces, and it’s a great way to get everyone excited about eating veggies.
- Crowd-Pleaser: Even picky eaters can’t resist a pepper that’s grinning at them from the plate.
- Unbelievably Delicious: The smoky, cheesy filling pairs perfectly with the sweet roasted pepper—it’s comfort food with a costume on.
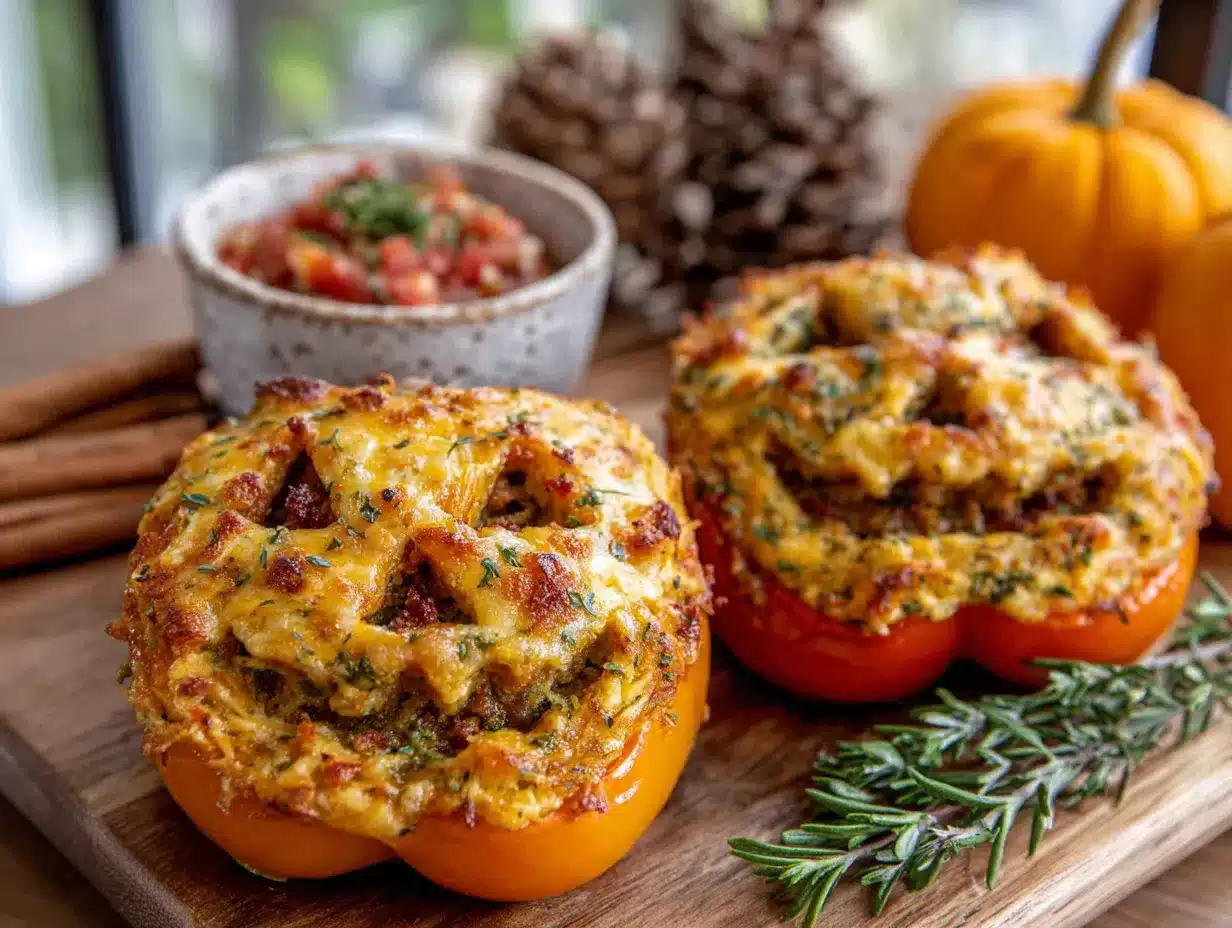
What makes this recipe different from the dozens of stuffed pepper recipes out there? It’s the carving technique, honestly. I spent a whole afternoon figuring out how to cut the faces so they hold up during baking without collapsing into a sad, droopy mess. The trick is to make the eyes and mouth small enough that the pepper keeps its structure, and to leave the stem on as a little hat. It’s a small detail, but it makes all the difference when you pull them out of the oven.
This isn’t just another stuffed pepper recipe—it’s the kind that makes you text a photo to your group chat before anyone takes a bite. It’s Halloween fun that actually tastes good, and that’s a rare combo. Whether you’re hosting a spooky dinner party or just want to surprise your kids on Halloween night, these peppers deliver the wow factor without the stress.
What Ingredients You Will Need
This recipe uses simple, wholesome ingredients to deliver bold flavor and satisfying texture without the fuss. Most of these are pantry staples, so you likely already have everything you need—no last-minute grocery runs required.
For the Peppers
- 4 large orange bell peppers (look for ones that sit flat and have a nice round shape—good “faces” start with good peppers)
- 1 tablespoon olive oil (for brushing the peppers before baking)
For the Filling
- 1 cup cooked rice (white, brown, or even cauliflower rice works—use whatever you have leftover)
- 1 can (15 oz) black beans, drained and rinsed (I prefer Bush’s or Goya for consistent texture)
- 1 cup corn kernels (frozen or canned, just drain well)
- 1 small onion, finely diced (about 1/2 cup)
- 2 cloves garlic, minced
- 1 teaspoon ground cumin
- 1 teaspoon smoked paprika (this gives the filling a deep, cozy flavor)
- 1/2 teaspoon chili powder (adjust based on your spice preference)
- Salt and pepper to taste
- 1 cup shredded cheddar or Monterey Jack cheese, divided (use a sharp cheddar for more flavor punch)
- 2 tablespoons tomato paste (adds richness and helps bind the filling)
- 1/4 cup vegetable broth or water (to keep the filling moist)
For Garnish (Optional but Fun)
- Sour cream or Greek yogurt (for dipping—makes the faces look even spookier)
- Fresh cilantro or parsley, chopped
- Sliced black olives (for extra “spider” decoration if you’re feeling fancy)
Ingredient Selection Tips: When choosing bell peppers, look for ones that are firm and have a flat bottom so they stand up straight in the baking dish. Orange peppers work best for that pumpkin look, but you can use red or yellow too—they just won’t have the same jack-o-lantern vibe. For the cheese, I recommend shredding it yourself from a block; pre-shredded cheese has anti-caking agents that don’t melt as smoothly, and for stuffed peppers, you want that gooey, stretchy texture.
Substitution Guidance: For a gluten-free option, this recipe is naturally gluten-free as written. To make it vegan, use dairy-free cheese and skip the sour cream garnish. If you don’t have black beans, pinto or kidney beans work just fine. And if you’re short on time, use a packet of Spanish rice mix instead of plain rice—just adjust the seasoning so it doesn’t get too salty.
Equipment Needed
You don’t need much for this recipe, which is part of its charm. Here’s what you’ll want to have on hand:
- Sharp paring knife (this is the most important tool—a dull knife will tear the pepper skin and ruin your jack-o-lantern faces. I use a Victorinox 4-inch paring knife and it’s perfect for this job)
- Cutting board (preferably one with a groove to catch pepper juice)
- Small mixing bowl (for combining the filling)
- Baking dish (an 8×8 or 9×9 inch dish works well; you want the peppers to fit snugly so they don’t tip over)
- Aluminum foil (for covering the dish during the first part of baking)
- Measuring cups and spoons
- Large skillet (for sautéing the filling ingredients)
- Wooden spoon or spatula
Budget-Friendly Options: If you don’t have a paring knife, a small serrated knife or even a clean craft knife can work in a pinch—just be careful. No baking dish? Use a cast iron skillet or even a muffin tin to keep the peppers upright. I once used a loaf pan for a single pepper and it worked surprisingly well.
Maintenance Tip: After carving peppers, rinse your knife immediately to prevent the seeds from sticking and drying on the blade. Trust me, dried pepper seeds are annoying to scrub off.
Preparation Method
- Preheat your oven to 375°F (190°C). While it’s heating, get your peppers ready. Rinse them and pat them dry. Using your sharp paring knife, carefully slice the top off each pepper about 1/2 inch from the stem. Set the tops aside—you’ll use the stem as a little hat later. Scoop out the seeds and membranes from inside each pepper. Give them a gentle rinse to remove any stray seeds.
- Now for the fun part—carving the faces. Using your paring knife, cut small triangle eyes and a jagged mouth into the front of each pepper. Keep the cuts small—about 1/2 inch wide for the eyes and no more than 1 inch for the mouth. The key is to cut all the way through the pepper wall so the filling is visible, but don’t make the openings too big or the pepper will collapse during baking. I learned this the hard way on my first attempt—my pepper looked like it had a stroke. If you mess up a cut, just flip the pepper around and carve the face on a different side. No one will know.
- Heat a large skillet over medium heat and add a drizzle of olive oil. Sauté the diced onion for 3-4 minutes until it’s soft and translucent. Add the minced garlic and cook for another 30 seconds until fragrant. Don’t let the garlic burn—it gets bitter fast.
- Add the drained black beans, corn, tomato paste, cumin, smoked paprika, chili powder, salt, and pepper to the skillet. Stir everything together and cook for 2-3 minutes until the mixture is well combined and heated through. If it seems dry, add the 1/4 cup of vegetable broth or water. Let it simmer for another minute.
- Remove the skillet from heat and stir in the cooked rice and half of the shredded cheese (about 1/2 cup). Mix until the cheese is melted and everything is evenly distributed. Taste the filling and adjust seasoning if needed—this is your chance to make it perfect.
- Spoon the filling into each carved pepper, packing it gently but firmly. Don’t overstuff—you want the filling to be level with the top of the pepper, not mounded. Place the filled peppers upright in your baking dish. If they wobble, trim a tiny slice off the bottom to make them flat (just don’t cut through the bottom).
- Sprinkle the remaining cheese on top of each pepper, dividing it evenly. Place the pepper tops (with the stems) on top of the cheese like little hats. Brush the outside of the peppers lightly with olive oil—this helps them roast evenly and gives them a nice sheen.
- Cover the baking dish with aluminum foil and bake for 25 minutes. The foil traps steam and helps the peppers soften without drying out. After 25 minutes, remove the foil and bake for another 10-15 minutes until the cheese is bubbly and golden, and the peppers are tender but still hold their shape.
- Let the peppers rest for 5 minutes before serving. This is crucial—they’ll be piping hot inside, and the filling needs a moment to set. Plus, it gives you time to arrange them on a plate and admire your handiwork. Serve with a dollop of sour cream on the side for dipping, and watch everyone’s faces light up when they see the grinning peppers.
Sensory Cues: When the peppers are done, the skin should be slightly wrinkled and tender when pierced with a fork, but the walls should still be firm enough to hold their shape. The cheese on top should be melted and lightly browned in spots. The aroma will be smoky, savory, and slightly sweet from the roasted peppers—it smells exactly like fall comfort food should.
Cooking Tips & Techniques
Let me save you from the mistakes I made. The first time I made these, I carved the faces way too big, and my pepper basically turned into a flat, sad pancake in the oven. It still tasted good, but it looked like a horror movie in a bad way. Here’s what I learned:
Keep the faces small. I know you want big, dramatic jack-o-lantern grins, but trust me—smaller cuts hold up better. Think of it like carving a real pumpkin: you want the features to be proportional to the pepper. A pepper is about the size of your fist, so the mouth should be no wider than your thumb.
Don’t skip the foil. Some recipes say you can bake stuffed peppers without covering them, but for these jack-o-lantern versions, the foil is non-negotiable. Without it, the exposed filling dries out and the pepper skin gets tough before the inside is fully cooked. The foil creates a steamy environment that cooks everything evenly.
Use room temperature ingredients. If your rice or beans are straight from the fridge, the filling will take longer to heat through, and you risk the peppers overcooking while you wait for the center to get hot. Let your ingredients sit out for 10-15 minutes before mixing.
Toast your spices. Before adding the liquid, let the cumin and smoked paprika cook in the hot pan for about 30 seconds. This wakes up their oils and makes the flavor deeper and more aromatic. It’s a tiny step that makes a big difference.
Multitasking strategy: While the peppers are baking, use that time to clean up your carving mess and set the table. The active prep time is only about 20 minutes, so the oven does most of the work. If you’re serving these for a Halloween party, you can prep the peppers (carved and filled, but unbaked) up to 24 hours in advance. Just keep them covered in the fridge and add 10 minutes to the baking time.
Variations & Adaptations
One of the best things about this recipe is how flexible it is. I’ve made about six different versions, and each one was delicious in its own way.
Vegetarian Mexican-Style: Swap the black beans for refried beans and add a spoonful of salsa to the filling. Top with crumbled queso fresco instead of cheddar. This version is creamier and has a more traditional Mexican flavor profile.
Spicy Italian Twist: Use Italian sausage (cooked and crumbled) instead of beans, and swap the cumin and paprika for dried oregano and basil. Use mozzarella and Parmesan on top. The orange pepper still looks like a pumpkin, but the filling tastes like a hearty Italian stuffed pepper.
Low-Carb Version: Replace the rice with riced cauliflower (about 1 1/2 cups). Sauté it in the skillet first to remove excess moisture before adding the other ingredients. The texture is a bit lighter, but the flavor is still bold and satisfying.
Kid-Friendly “Pizza” Peppers: Use pepperoni, pizza sauce, and mozzarella cheese in the filling. Skip the cumin and paprika entirely. My nephew refused to eat stuffed peppers until I made this version—now he asks for them by name.
Vegan Option: Use a plant-based ground “meat” or extra mushrooms instead of cheese. For the topping, use a dairy-free cheese shred that melts well (I like Violife or Miyoko’s). Add a tablespoon of nutritional yeast to the filling for a cheesy flavor without the dairy.
My personal favorite variation? I made a batch with leftover chili once, just mixed it with some rice and cheese, and stuffed it into the peppers. It was honestly the best version I’ve ever had—proof that this recipe is more of a template than a rigid formula. Feel free to experiment with whatever you have in your fridge.
Serving & Storage Suggestions
These peppers are best served hot, straight from the oven, with the cheese still bubbly and the filling steaming. I like to arrange them on a platter with the “faces” facing outward so everyone can see the grins. A dollop of sour cream on the side for dipping adds a cool, tangy contrast to the warm, smoky filling.
What to Serve With Them: These peppers are a complete meal on their own, but they pair beautifully with a simple side salad dressed with lime vinaigrette. If you’re serving a crowd, a pot of black bean soup or a bowl of tortilla chips with guacamole makes it a full Halloween spread. For drinks, a spicy margarita or a cold Mexican beer complements the smoky flavors perfectly.
Storage Instructions: Leftover stuffed peppers keep well in the refrigerator for up to 4 days. Store them in an airtight container, and don’t worry if the faces get a bit droopy—they’ll still taste great. The flavors actually meld together overnight, making leftovers even more delicious the next day.
Reheating Tips: The best way to reheat these is in the oven at 350°F for about 15 minutes, covered with foil to prevent drying. You can also microwave them for 2-3 minutes, but the peppers will be softer and the cheese won’t be as melty. If you’re in a hurry, the microwave works fine—just know the texture won’t be quite the same.
Freezer Instructions: These peppers freeze beautifully. Let them cool completely, then wrap each one individually in plastic wrap and place them in a freezer bag. They’ll keep for up to 3 months. To reheat from frozen, bake at 375°F for 30-35 minutes, covered with foil, then uncover for the last 5 minutes to crisp up the cheese.
One thing I love about this recipe is that the peppers actually get better after a day in the fridge. The flavors have time to mingle, and the pepper softens just a bit more. So if you’re planning a Halloween party, make them a day ahead and just reheat before serving—it’ll save you stress and the result is even tastier.
Nutritional Information & Benefits
Here’s the approximate nutritional breakdown for one stuffed pepper (using the basic recipe with black beans, rice, and cheddar cheese):
| Nutrient | Amount per Serving |
|---|---|
| Calories | 320-350 |
| Protein | 14g |
| Carbohydrates | 38g |
| Fiber | 9g |
| Fat | 12g |
| Saturated Fat | 6g |
| Sodium | 480mg |
Health Highlights: Bell peppers are packed with vitamin C—one orange pepper provides more than 150% of your daily needs. They’re also rich in vitamin A, which is great for eye health and immune function. Black beans add a solid dose of plant-based protein and fiber, which helps keep you full and supports digestive health. The rice provides complex carbohydrates for steady energy, and the cheese adds calcium for bone health.
Dietary Considerations: This recipe is naturally gluten-free and can easily be made vegan or dairy-free with simple substitutions. It’s also nut-free, making it safe for school lunches or parties. If you’re watching your sodium, use low-sodium beans and broth, and go easy on the added salt—the cheese and spices provide plenty of flavor on their own.
I love that this recipe feels indulgent and fun, but it’s actually a balanced meal with protein, fiber, and vegetables. It’s the kind of dinner that makes you feel good about eating something festive—no guilt, just pure enjoyment.
Conclusion
These jack-o-lantern stuffed bell peppers are proof that Halloween dinner doesn’t have to be a bowl of candy or a frozen pizza. They’re fun, festive, and genuinely delicious—the kind of recipe that makes people stop and smile before they even take a bite. I’ve made them for Halloween parties, family dinners, and even just for myself on that random Wednesday night when the craving hit, and they never disappoint.
What I love most about this recipe is how customizable it is. You can make it as simple or as fancy as you want, and it always delivers that “wow” factor. Whether you’re carving faces with your kids or impressing guests at a spooky soiree, these peppers bring a little bit of magic to the table.
So grab a bag of orange bell peppers, a sharp knife, and your favorite filling ingredients. Carve some silly faces, stuff them full of goodness, and bake up a dinner that’s equal parts creepy and cozy. And when you do, I’d love to hear about it—drop a comment below and tell me what faces you carved, or tag me in your photos. Happy Halloween, and happy cooking!
Frequently Asked Questions
Can I use red or yellow bell peppers instead of orange?
Absolutely! While orange peppers give the best pumpkin-like appearance, red and yellow peppers work just fine. They’ll still look cute with carved faces, just not quite as “jack-o-lantern” orange. Green peppers work too, but they have a slightly more bitter flavor and won’t give that festive Halloween vibe.
How far in advance can I prepare these?
You can prep these up to 24 hours ahead. Carve the peppers, make the filling, stuff them, and keep them covered in the fridge. When you’re ready to bake, add about 10 minutes to the cooking time since you’re starting from cold. This is a lifesaver for Halloween parties!
Can I make these in an air fryer?
Yes! Preheat your air fryer to 350°F. Place the stuffed peppers in the basket (work in batches if needed) and cook for 15-18 minutes. Check at the 12-minute mark—air fryers cook faster than ovens. The faces might get a bit more crispy edges, which actually looks pretty cool and spooky.
My pepper collapsed during baking. What went wrong?
This usually happens when the face cutouts are too large or the pepper was overbaked. Next time, make smaller cuts (no wider than your thumb) and check the peppers at the 25-minute mark. Also, make sure you’re not overstuffing—too much filling can push against the walls and cause them to buckle. If it happens again, just call it a “melted jack-o-lantern” and enjoy it anyway!
Can I use ground meat instead of beans?
Definitely. Brown 1/2 pound of ground beef, turkey, or chicken with the onions and garlic, then proceed with the recipe. Drain any excess fat before adding the other ingredients. The cooking time stays the same. For a spicier version, try ground chorizo—it pairs beautifully with the sweet roasted peppers.
Pin This Recipe!
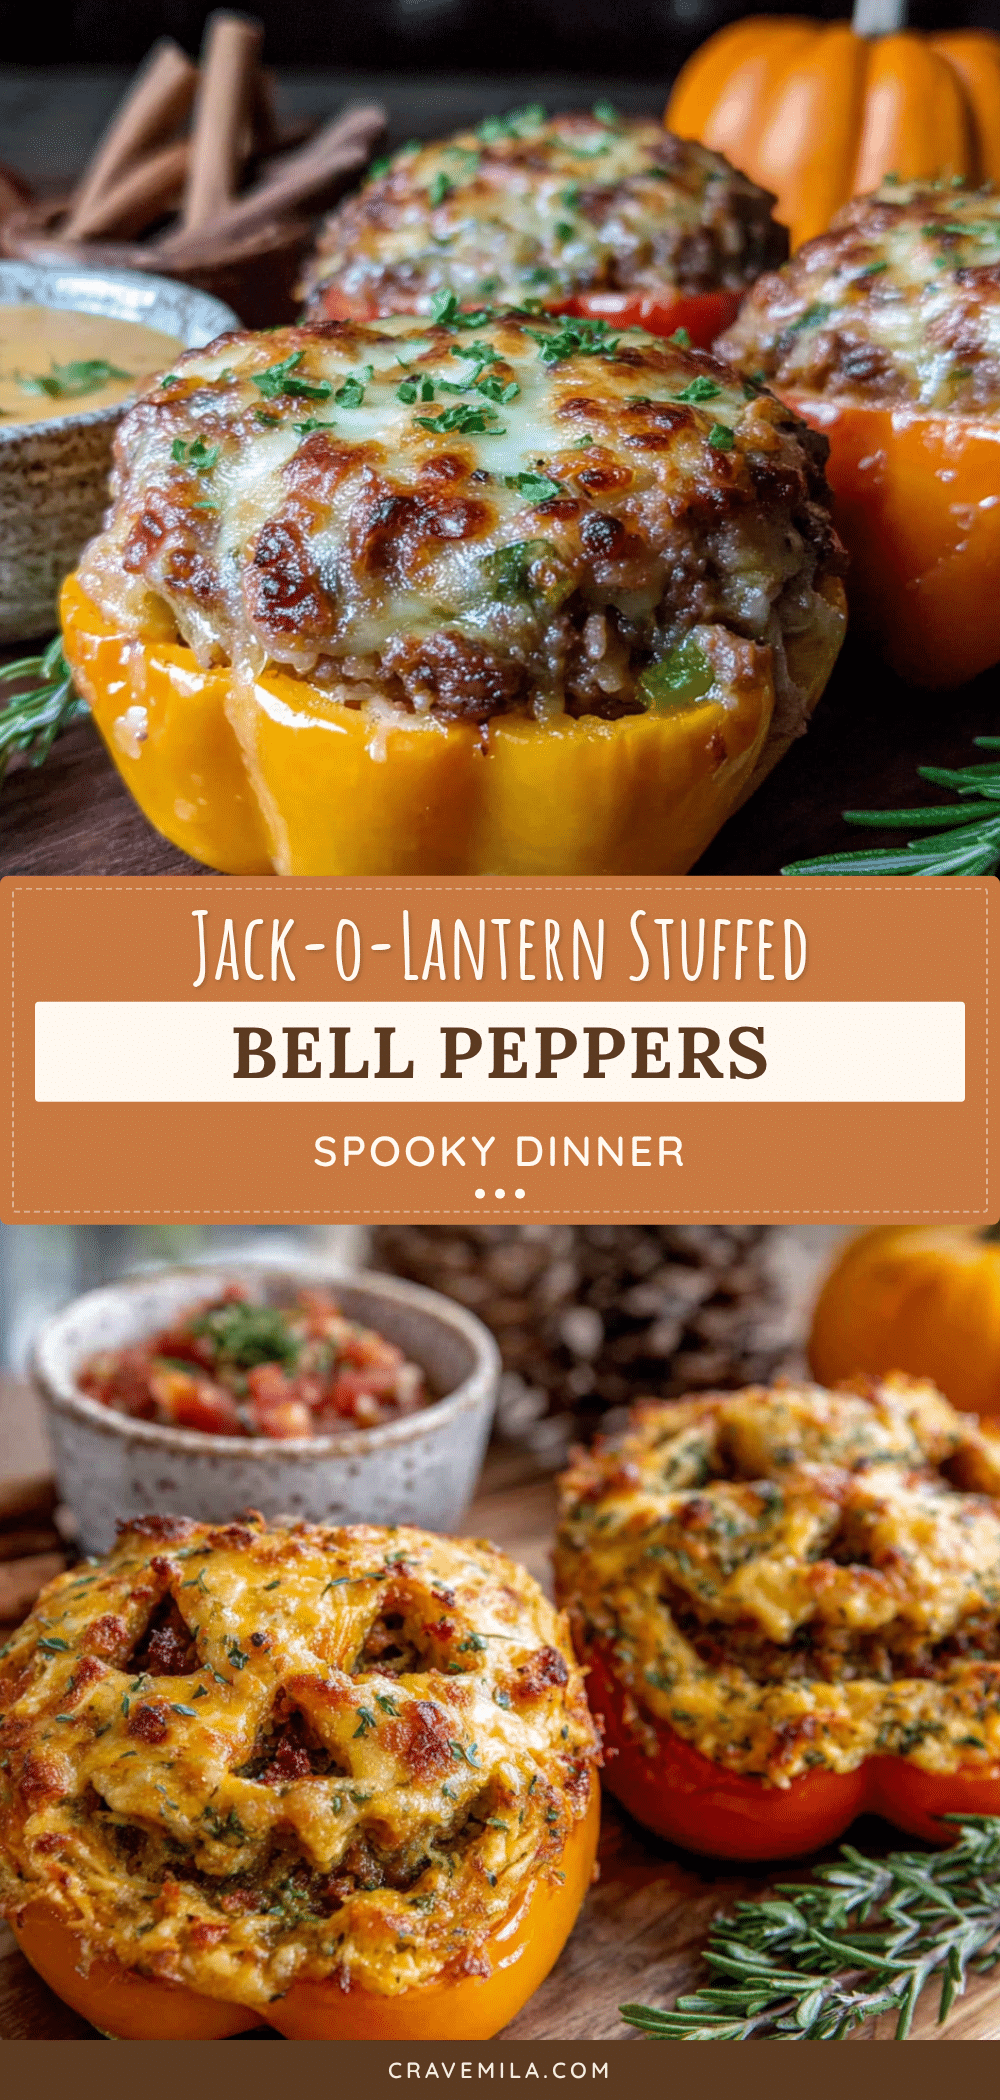
Halloween Jack-o-Lantern Stuffed Bell Peppers: Easy Spooky Dinner
These jack-o-lantern stuffed bell peppers are a fun and festive Halloween dinner that’s quick, easy, and delicious. Carved orange peppers are filled with a smoky, cheesy rice and black bean mixture, then baked until tender and bubbly.
- Prep Time: 20 minutes
- Cook Time: 35-40 minutes
- Total Time: 55-60 minutes
- Yield: 4 servings 1x
- Category: Main Course
- Cuisine: American
Ingredients
- 4 large orange bell peppers
- 1 tablespoon olive oil
- 1 cup cooked rice (white, brown, or cauliflower rice)
- 1 can (15 oz) black beans, drained and rinsed
- 1 cup corn kernels (frozen or canned, drained)
- 1 small onion, finely diced (about 1/2 cup)
- 2 cloves garlic, minced
- 1 teaspoon ground cumin
- 1 teaspoon smoked paprika
- 1/2 teaspoon chili powder
- Salt and pepper to taste
- 1 cup shredded cheddar or Monterey Jack cheese, divided
- 2 tablespoons tomato paste
- 1/4 cup vegetable broth or water
- Sour cream or Greek yogurt for garnish (optional)
- Fresh cilantro or parsley, chopped (optional)
- Sliced black olives for garnish (optional)
Instructions
- Preheat your oven to 375°F (190°C). Rinse and pat dry the bell peppers. Using a sharp paring knife, carefully slice the top off each pepper about 1/2 inch from the stem. Set the tops aside. Scoop out the seeds and membranes from inside each pepper. Rinse gently to remove any stray seeds.
- Carve small triangle eyes and a jagged mouth into the front of each pepper. Keep cuts small—about 1/2 inch wide for eyes and no more than 1 inch for the mouth. Cut all the way through the pepper wall so the filling is visible, but don’t make openings too big.
- Heat a large skillet over medium heat and add a drizzle of olive oil. Sauté the diced onion for 3-4 minutes until soft and translucent. Add the minced garlic and cook for another 30 seconds until fragrant.
- Add the drained black beans, corn, tomato paste, cumin, smoked paprika, chili powder, salt, and pepper to the skillet. Stir and cook for 2-3 minutes until well combined and heated through. If dry, add the 1/4 cup vegetable broth or water and simmer for another minute.
- Remove the skillet from heat. Stir in the cooked rice and half of the shredded cheese (about 1/2 cup) until melted and evenly distributed. Taste and adjust seasoning if needed.
- Spoon the filling into each carved pepper, packing gently but firmly. The filling should be level with the top of the pepper, not mounded. Place filled peppers upright in a baking dish. If they wobble, trim a tiny slice off the bottom to make them flat.
- Sprinkle the remaining cheese on top of each pepper. Place the pepper tops (with stems) on top of the cheese like little hats. Brush the outside of the peppers lightly with olive oil.
- Cover the baking dish with aluminum foil and bake for 25 minutes. Remove the foil and bake for another 10-15 minutes until the cheese is bubbly and golden, and the peppers are tender but still hold their shape.
- Let the peppers rest for 5 minutes before serving. Serve with a dollop of sour cream on the side for dipping.
Notes
Keep the face cutouts small to prevent the pepper from collapsing during baking. Don’t skip the foil covering—it helps the peppers cook evenly. For best results, use room temperature ingredients. You can prep the peppers (carved and filled, unbaked) up to 24 hours in advance; add 10 minutes to baking time if starting from cold.
Nutrition
- Serving Size: 1 stuffed pepper
- Calories: 320350
- Sugar: 6
- Sodium: 480
- Fat: 12
- Saturated Fat: 6
- Carbohydrates: 38
- Fiber: 9
- Protein: 14
Keywords: Halloween, stuffed bell peppers, jack-o-lantern, spooky dinner, vegetarian, gluten-free, easy dinner, festive



