This was supposed to be a batch of homemade pigs in a blanket. I had the crescent roll dough thawing on the counter, the hot dogs ready to go, and I was feeling pretty smug about finally making something from scratch instead of opening a can. Then my three-year-old decided to “help” by dumping half a bag of shredded mozzarella into the mixing bowl I was using for something else entirely. I stared at the cheese mountain, then at the clock—twenty minutes until the school bus arrived—and I just stood there, honestly, not sure whether to laugh or cry. What came out was nothing like the plan. And better.
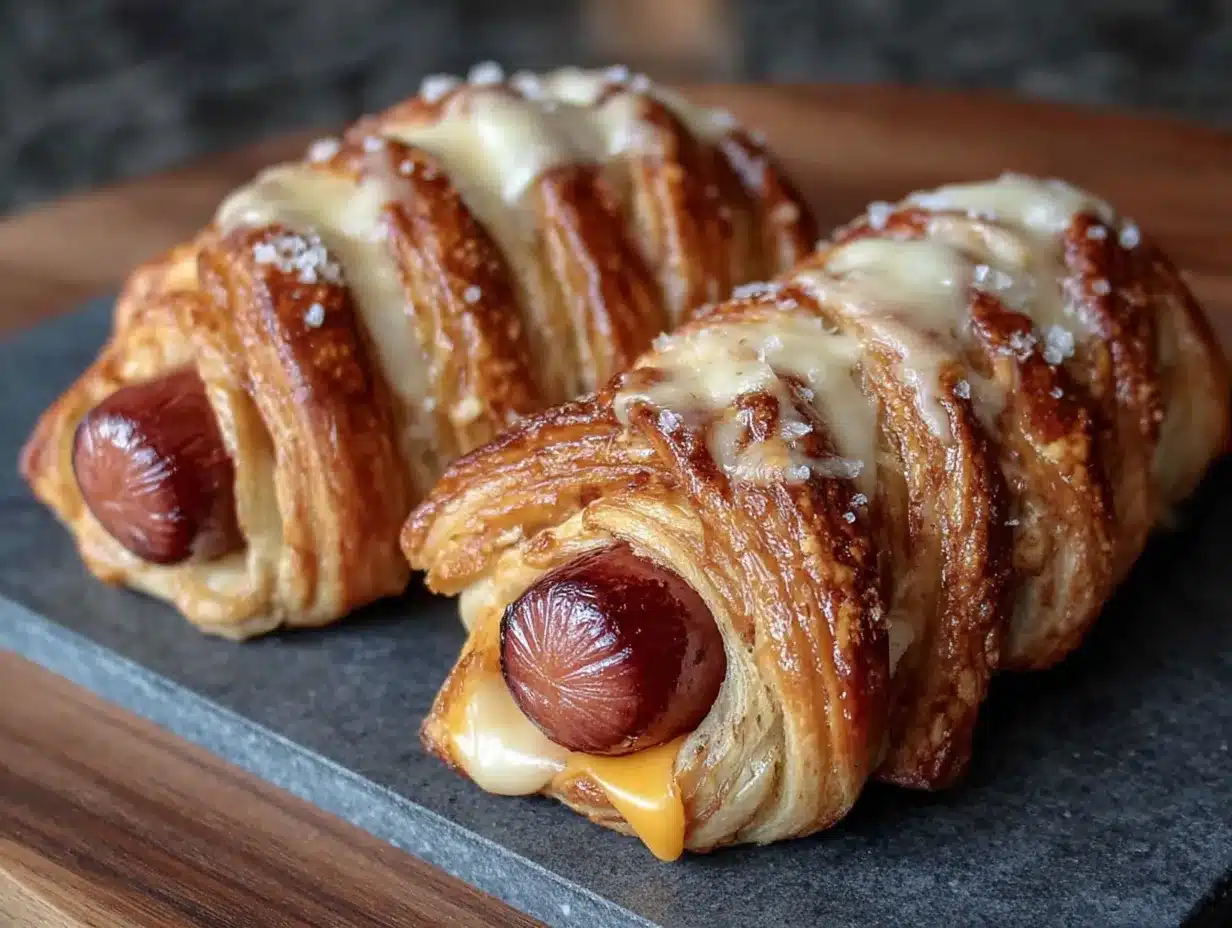
I grabbed the wrong cheese—I mean, I grabbed extra cheese—and the dough was already a little too warm from sitting out. Instead of fighting it, I just rolled with the mess. I wrapped the hot dogs haphazardly, pressed the cheese right into the dough, and threw them in the oven, fully expecting a disaster. What came out were these ridiculous, slightly lopsided, incredibly cheesy mummy hot dogs that my kids devoured before I could even take a picture. The golden, crispy dough, the melty cheese peeking through the seams, the way the “bandages” puffed up perfectly uneven—it was an accident that became a tradition.
Maybe you’ve been there, staring at a kitchen counter that looks like a crime scene, wondering how dinner got so sideways. Honestly, that’s where the best recipes come from. These mummy hot dogs aren’t just a Halloween novelty—they’re my go-to for any night when I need something fast, fun, and guaranteed to make everyone happy. And the best part? They’re actually lighter than you’d think, thanks to a few smart swaps I figured out after that first cheese-covered experiment. Let me tell you, once you try these, you’ll never go back to plain hot dogs again.
Why You’ll Love This Recipe
I’ve tested this recipe more times than I care to admit—through burnt edges, undercooked dough, and one particularly sad batch where the cheese all leaked out onto the baking sheet. But after all those trials, I landed on a version that’s not just foolproof, but genuinely delicious. And yes, it’s lighter than the classic version, so you can feel good about serving it on a Tuesday night or at a Halloween party.
- Quick & Easy: Comes together in under 20 minutes, start to finish. Perfect for those after-school chaos hours or last-minute party snacks.
- Simple Ingredients: You likely already have everything in your kitchen—hot dogs, crescent roll dough, cheese, and a few pantry staples. No fancy grocery trips needed.
- Perfect for Halloween & Beyond: Great for spooky parties, but honestly, my kids beg for these year-round. They’re fun for movie nights, birthday parties, or just a silly Tuesday dinner.
- Crowd-Pleaser: I’ve served these at three different gatherings now, and they disappear every time. Kids love the mummy look, adults love the cheesy goodness.
- Unbelievably Delicious: The combination of flaky, buttery dough, savory hot dog, and melted cheese is next-level comfort food. And because we’re using a lighter cheese blend, you get all the flavor without the heaviness.
What makes this recipe different from the rest? It’s the technique of pressing the shredded cheese right into the dough before wrapping. Most recipes just sprinkle cheese on top, but that means it falls off or burns. By nestling it into the dough layers, every bite has that perfect cheesy pull. Plus, I use a blend of part-skim mozzarella and a sharp cheddar for maximum flavor with less fat. It’s not just another version—it’s my best version, tested by a very picky family.
This recipe isn’t just good—it’s the kind that makes you close your eyes after the first bite. It’s comfort food reimagined: lighter, faster, but with the same soul-soothing satisfaction. Perfect for impressing guests without stress, or turning a simple meal into something memorable.
What Ingredients You Will Need
This recipe uses simple, wholesome ingredients to deliver bold flavor and satisfying texture without the fuss. Most of these are pantry staples, and I’ve included easy substitutions for dietary needs.
- Hot dogs: 8 standard-size hot dogs (I prefer all-beef for better flavor, but turkey or chicken work great for a lighter option). Look for uncured or nitrate-free if that’s your thing.
- Crescent roll dough: 1 can (8 ounces) refrigerated crescent roll dough (I recommend Pillsbury for consistent results, but any brand works). For a lighter version, use the reduced-fat crescent rolls.
- Shredded mozzarella cheese: 1/2 cup part-skim shredded mozzarella (adds that perfect stretchy texture without being greasy).
- Shredded cheddar cheese: 1/4 cup sharp shredded cheddar (adds bold flavor; you only need a little because it’s punchy).
- Cream cheese: 2 tablespoons, softened (this is my secret ingredient—it makes the cheese mixture extra creamy and helps it stick to the dough). Use reduced-fat if you like.
- Garlic powder: 1/2 teaspoon (adds a savory depth that balances the cheese).
- Onion powder: 1/4 teaspoon (optional, but I love the subtle sweetness).
- Salt: A pinch (the cheese and hot dogs are already salty, so go easy).
- Black pepper: A pinch of freshly ground.
- Egg wash: 1 large egg, beaten with 1 tablespoon water (for that golden, shiny finish).
- Sesame seeds or poppy seeds: 1 tablespoon (optional, for garnish—adds a nice crunch and visual appeal).
- Mustard or ketchup: For serving (optional, but my kids love dipping).
For the cheese blend, I recommend Sargento or Kraft for consistent melting. If you’re dairy-free, use your favorite shredded vegan cheese—just note that it won’t stretch the same way. For a gluten-free option, use gluten-free crescent roll dough (I’ve had good luck with the brand from Whole Foods). And if you want to go even lighter, swap the hot dogs for chicken or turkey sausages—they’re usually lower in fat and still delicious.
Equipment Needed
You don’t need a fancy kitchen to pull these off. Here’s what you’ll need:
- Baking sheet: A standard half-sheet pan works perfectly. Line it with parchment paper for easy cleanup—trust me, the cheese can get sticky.
- Mixing bowl: A small bowl for combining the cheese mixture.
- Pastry brush: For the egg wash. If you don’t have one, use a clean silicone spatula or even a paper towel.
- Sharp knife or pizza cutter: For cutting the crescent dough into strips. A pizza cutter makes it faster and cleaner.
- Cutting board: Any clean surface for rolling out the dough.
- Measuring spoons: For the spices.
- Oven: Preheated to 375°F (190°C).
I’ve made these with a cheap baking sheet from the dollar store and they turned out fine, so don’t stress about equipment. If you don’t have a pastry brush, just use your fingers to spread the egg wash—it’s not fancy, but it works. And if you’re making a big batch, you can prep everything on a sheet of wax paper and transfer to the baking sheet.
Preparation Method
Follow these steps, and you’ll have golden, cheesy mummies in no time. I’ve included all the little details I wish someone had told me the first time.
- Preheat your oven to 375°F (190°C). Line a baking sheet with parchment paper. This is non-negotiable—the cheese will stick to an unlined pan and you’ll be scrubbing for hours.
- Make the cheese mixture. In a small bowl, combine the shredded mozzarella, shredded cheddar, softened cream cheese, garlic powder, onion powder, salt, and pepper. Mix with a fork until it forms a cohesive, slightly sticky paste. The cream cheese is the glue here—don’t skip it. If the mixture seems too dry, add another teaspoon of softened cream cheese.
- Prepare the hot dogs. Pat the hot dogs dry with a paper towel. This helps the cheese mixture stick better. If you’re using longer hot dogs, you can cut them in half crosswise to make mini mummies—my kids love these for lunchboxes.
- Roll out the crescent dough. Unroll the crescent roll dough onto a cutting board. Press the perforations together gently to seal them—you want one solid sheet of dough. If the dough cracks, just press it back together with your fingers. Don’t overwork it, or it’ll get tough.
- Cut the dough into strips. Using a sharp knife or pizza cutter, cut the dough lengthwise into 8 strips, each about 1 inch wide. For thinner “bandages,” cut into 12 strips. I prefer thicker strips because they puff up more and look more mummy-like.
- Spread the cheese mixture. Take each strip of dough and spread a thin layer of the cheese mixture along the center. Don’t overload it—about 1 teaspoon per strip is perfect. Too much cheese and it’ll all leak out in the oven.
- Wrap the hot dogs. Take one hot dog and place it at one end of a cheese-covered dough strip. Wrap the dough around the hot dog at a slight angle, overlapping slightly as you go, like you’re wrapping a bandage. Leave a small gap at the top for the “face” of the mummy—about 1/2 inch. Press the end of the dough gently to seal it. Repeat with the remaining hot dogs and strips.
- Place on baking sheet. Arrange the wrapped hot dogs on the prepared baking sheet, leaving about 1 inch of space between each. They’ll puff up as they bake, so don’t crowd them.
- Apply the egg wash. In a small bowl, beat the egg with 1 tablespoon of water. Using a pastry brush, lightly brush the tops of each mummy. This gives them that beautiful golden color. If you’re using seeds, sprinkle them on now.
- Bake for 12-15 minutes. Bake until the dough is golden brown and puffed, and the cheese is bubbly. The internal temperature should reach 165°F (74°C) if you’re using a meat thermometer. For a crispier texture, bake for an extra 1-2 minutes, but watch closely—the cheese can burn quickly.
- Cool slightly before serving. Let them rest on the baking sheet for 2-3 minutes. This allows the cheese to set slightly so it doesn’t burn your mouth. Then transfer to a serving platter. Add little mustard or ketchup dots for eyes if you’re feeling festive!
Sensory cues: When the dough is properly wrapped, it should feel slightly springy but not sticky. During baking, you’ll smell the buttery dough and melted cheese—that’s your cue to check on them. The finished mummies should be golden brown with visible cheese peeking through the seams. If the cheese is browning too fast, tent loosely with foil for the last 2 minutes.
Troubleshooting: If the dough tears while wrapping, just press it back together—it’ll seal as it bakes. If the cheese leaks out, don’t panic—it’ll crisp up into delicious little cheese crisps that you can snack on. And if your mummies look more like sad ghosts, just call them “abstract art” and move on. They’ll still taste great.
Cooking Tips & Techniques
After making these more times than I can count, I’ve learned a few things the hard way. Here are my best tips:
- Don’t overfill the dough. I know it’s tempting to pile on the cheese, but less is more. A thin layer spreads better and melts more evenly. My first batch had cheese volcanoes erupting everywhere.
- Chill the dough if it gets too soft. If your kitchen is warm, the crescent dough can get sticky and hard to work with. Just pop it in the fridge for 5 minutes before cutting. I learned this after a particularly frustrating session where the dough kept tearing.
- Use room temperature cream cheese. Cold cream cheese won’t mix evenly with the shredded cheese. Let it sit out for 15 minutes before starting. If you forget, microwave it for 5-10 seconds—but watch it, because melted cream cheese is a different beast.
- Angle the wraps for a true mummy look. If you wrap straight across, it looks more like a hot dog in a blanket. A slight diagonal angle creates that classic bandage effect. My kids actually critique the “authenticity” of my mummies now.
- Double the batch for parties. These disappear fast. I usually make 16 for a gathering and they’re gone within 10 minutes. Just use two baking sheets and rotate them halfway through baking.
- Make them ahead. You can assemble the mummies up to 4 hours ahead and keep them covered in the fridge. Just add 2-3 minutes to the baking time. I’ve even frozen them assembled (before baking) for up to a month—just bake from frozen, adding 5 minutes.
One mistake I made early on: I used pre-shredded cheese from a bag, and it didn’t melt as smoothly because of the anti-caking agents. Shredding your own cheese from a block makes a noticeable difference in texture. It takes an extra 2 minutes, but it’s worth it for that gooey pull.
Variations & Adaptations
This recipe is incredibly flexible. Here are some of my favorite twists:
- Spicy Mummies: Add 1/4 teaspoon of cayenne pepper or a dash of hot sauce to the cheese mixture. Use pepper jack cheese instead of cheddar for extra kick. My husband loves these with sriracha drizzle on top.
- Veggie Mummies: Swap the hot dogs for vegetarian or vegan sausages. I like the Field Roast brand—they hold up well and have great texture. Use vegan cheese and crescent dough for a fully plant-based version.
- Breakfast Mummies: Use breakfast sausages instead of hot dogs, and add a scrambled egg inside the wrap. Bake as directed, then serve with maple syrup for dipping. It’s weirdly delicious.
- Mini Mummies: Cut the hot dogs into thirds and use smaller strips of dough. Perfect for appetizers or lunchboxes. Bake for 10-12 minutes instead of 12-15.
- Pizza Mummies: Add a teaspoon of pizza sauce to the cheese mixture, and use mozzarella only. Serve with extra marinara for dipping. My kids call these “pizza snakes.”
- Gluten-Free Mummies: Use gluten-free crescent roll dough (check the freezer section at natural food stores). The texture is slightly different—more biscuit-like—but still delicious.
I once tried a “dessert mummy” version with chocolate-hazelnut spread and marshmallows instead of cheese. It was… interesting. Let’s just say some experiments are better left on the cutting room floor. Stick with the savory versions for guaranteed success.
Serving & Storage Suggestions
These mummies are best served warm, right out of the oven, when the cheese is at its stretchiest. But they’re still good at room temperature, which makes them perfect for parties.
- Serving temperature: Serve warm, but not piping hot—let them cool for 2-3 minutes so the cheese doesn’t burn tongues. For a party, I keep them in a warm oven (200°F) on a baking sheet until ready to serve.
- Presentation ideas: Arrange on a platter with little dots of mustard for eyes. You can also use edible googly eyes from the baking aisle. For a Halloween party, serve on a black platter with “spider web” lines made of sour cream.
- Dipping sauces: Ketchup, mustard, ranch dressing, barbecue sauce, or sriracha mayo. My personal favorite is a mix of honey and Dijon mustard—sweet and tangy.
- Storage: Store leftovers in an airtight container in the refrigerator for up to 3 days. The dough will soften slightly, but they’re still tasty.
- Reheating: Reheat in a 350°F oven for 5-7 minutes, or in an air fryer at 350°F for 3-4 minutes. The microwave works in a pinch (30 seconds), but the dough will be soft, not crispy.
- Freezing: Freeze baked mummies in a single layer on a baking sheet, then transfer to a freezer bag. Reheat from frozen at 350°F for 10-12 minutes. I always keep a bag in the freezer for emergencies.
The flavors actually develop a bit overnight—the cheese melds with the dough and the hot dog, creating a more cohesive taste. I’ve been known to eat them cold straight from the fridge the next day. No judgment.
Nutritional Information & Benefits
Here’s the thing: these are still hot dogs wrapped in dough, so they’re not health food. But by using part-skim cheese and reduced-fat crescent rolls, you can cut the fat and calories significantly without sacrificing flavor. Here’s the approximate breakdown per mummy (using light ingredients):
- Calories: 210-250
- Protein: 10-12g
- Fat: 12-15g (with about 5g saturated)
- Carbohydrates: 18-22g
- Fiber: 0.5g
- Sugar: 3-4g
- Sodium: 500-600mg
The mozzarella adds a decent amount of calcium (about 15% of your daily needs per mummy), and the hot dogs provide some iron and B vitamins. If you use turkey or chicken hot dogs, you’ll cut the fat by about half. And honestly, compared to a fast food meal, these are a win—you control the ingredients, and they’re made with real food.
For those watching sodium, look for low-sodium hot dogs and skip the added salt in the cheese mixture. The cheese and hot dogs are already salty enough. And if you’re counting carbs, use the reduced-fat crescent rolls—they have slightly fewer carbs than the original.
I’m not a nutritionist, but I’ve learned that balance is key. These mummies are a fun treat, not an everyday dinner. Serve them with a big salad or some veggie sticks, and you’ve got a meal that feels indulgent but is actually pretty reasonable.
Conclusion
These light and cheesy mummy hot dogs started as a kitchen accident, but they’ve become one of my most-requested recipes. They’re proof that sometimes the best things come from mistakes—and that you don’t need fancy ingredients or hours of prep to make something memorable. Whether you’re making them for Halloween, a party, or just a fun weeknight dinner, they’re guaranteed to bring smiles.
I love how customizable they are—swap the cheese, change the protein, adjust the spices. Make them your own. And if your kids end up with cheese on their faces and dough crumbs everywhere, well, that’s part of the fun. Honestly, the messy ones taste the best.
I’d love to hear how yours turn out! Drop a comment below with your favorite variation, or tag me in your photos on social media. And if you make a mistake along the way? Don’t panic—it might just become your new favorite recipe.
Frequently Asked Questions
Can I use a different type of dough?
Absolutely! Puff pastry works beautifully—just roll it out slightly thinner and cut into strips. Pizza dough also works, but it’s denser and takes a few extra minutes to bake. Crescent roll dough is just the easiest and gives the best flaky texture.
How do I keep the cheese from leaking out?
Make sure you press the cheese mixture firmly into the dough, and don’t overfill. Also, wrapping the dough tightly around the hot dog helps seal it. If some cheese does leak, it’ll crisp up into tasty bits—just scrape them off the pan and snack on them.
Can I make these in an air fryer?
Yes! Preheat the air fryer to 350°F (175°C) and cook for 8-10 minutes, flipping halfway through. They’ll be extra crispy. Just don’t overcrowd the basket—work in batches if needed.
What’s the best way to add “eyes” to the mummies?
Use small dots of mustard or ketchup for simple eyes. For a cuter look, use edible candy eyes from the baking aisle—just press them on right after baking while the dough is still warm. You can also use tiny dollops of cream cheese with a black sesame seed in the center.
Can I make these dairy-free?
Yes! Use dairy-free shredded cheese (I like Daiya or Violife) and skip the cream cheese, or use a dairy-free cream cheese alternative. The texture will be slightly different—less stretchy—but still delicious. Just make sure your crescent roll dough is also dairy-free (most are, but check the label).
Pin This Recipe!
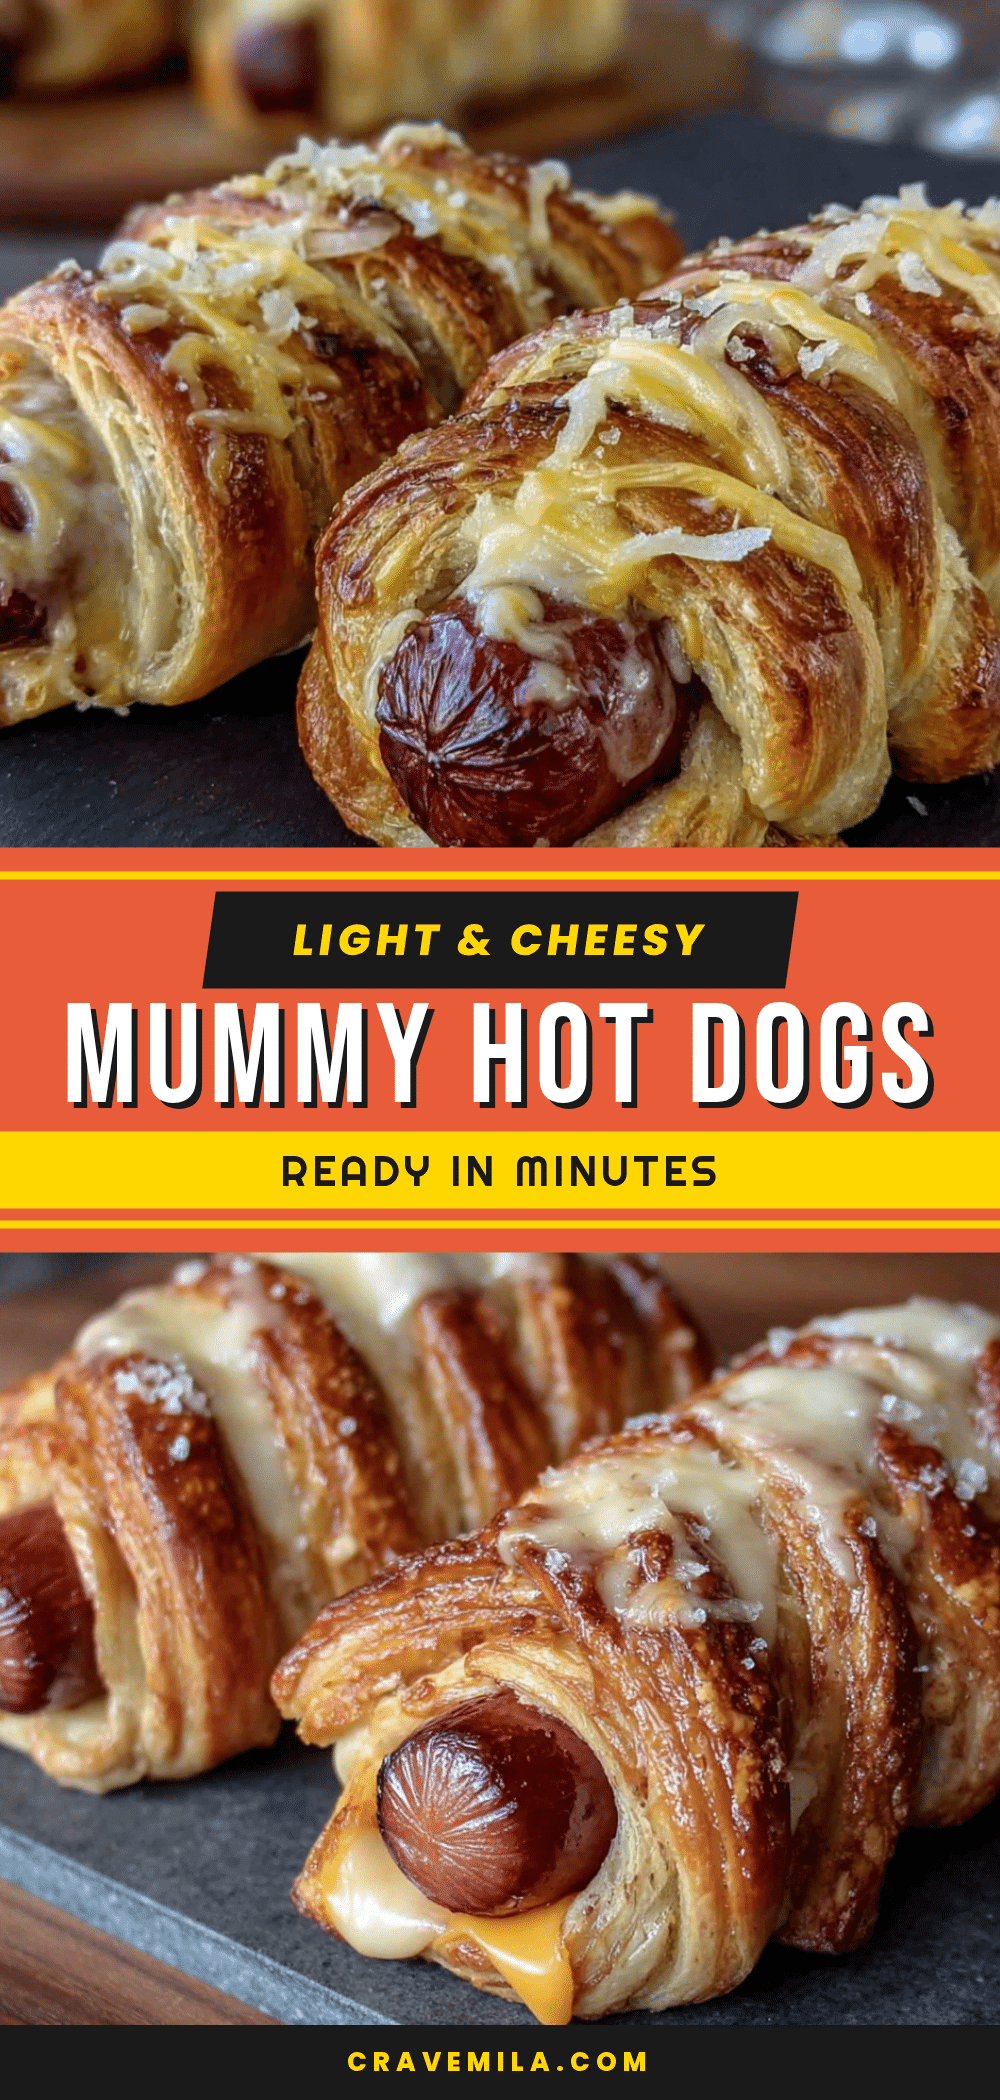
Mummy Hot Dogs: Easy Light & Cheesy Recipe in Minutes

These light and cheesy mummy hot dogs started as a kitchen accident but have become a go-to for fast, fun, and guaranteed crowd-pleasing meals. Made with crescent roll dough, a blend of mozzarella and cheddar, and a few smart swaps, they’re perfect for Halloween or any night you need a quick, delicious snack.
- Prep Time: 10 minutes
- Cook Time: 12-15 minutes
- Total Time: 22-25 minutes
- Yield: 8 servings 1x
- Category: Appetizer
- Cuisine: American
Ingredients
- 8 standard-size hot dogs (all-beef, turkey, or chicken)
- 1 can (8 ounces) refrigerated crescent roll dough (reduced-fat optional)
- 1/2 cup part-skim shredded mozzarella cheese
- 1/4 cup sharp shredded cheddar cheese
- 2 tablespoons cream cheese, softened (reduced-fat optional)
- 1/2 teaspoon garlic powder
- 1/4 teaspoon onion powder (optional)
- Pinch of salt
- Pinch of freshly ground black pepper
- 1 large egg, beaten with 1 tablespoon water (for egg wash)
- 1 tablespoon sesame seeds or poppy seeds (optional, for garnish)
- Mustard or ketchup (for serving, optional)
Instructions
- Preheat your oven to 375°F (190°C). Line a baking sheet with parchment paper.
- In a small bowl, combine the shredded mozzarella, shredded cheddar, softened cream cheese, garlic powder, onion powder, salt, and pepper. Mix with a fork until it forms a cohesive, slightly sticky paste.
- Pat the hot dogs dry with a paper towel. If using longer hot dogs, you can cut them in half crosswise to make mini mummies.
- Unroll the crescent roll dough onto a cutting board. Press the perforations together gently to seal them into one solid sheet.
- Using a sharp knife or pizza cutter, cut the dough lengthwise into 8 strips, each about 1 inch wide.
- Take each strip of dough and spread a thin layer of the cheese mixture along the center (about 1 teaspoon per strip).
- Place one hot dog at one end of a cheese-covered dough strip. Wrap the dough around the hot dog at a slight angle, overlapping slightly as you go, leaving a small gap at the top for the ‘face’ (about 1/2 inch). Press the end of the dough gently to seal. Repeat with remaining hot dogs and strips.
- Arrange the wrapped hot dogs on the prepared baking sheet, leaving about 1 inch of space between each.
- Brush the tops of each mummy with the egg wash. If using seeds, sprinkle them on now.
- Bake for 12-15 minutes, until the dough is golden brown and puffed, and the cheese is bubbly. For a crispier texture, bake for an extra 1-2 minutes.
- Let them rest on the baking sheet for 2-3 minutes before serving. Add little mustard or ketchup dots for eyes if desired.
Notes
For best results, use room temperature cream cheese and shred your own cheese from a block for smoother melting. If the dough gets too soft, chill it for 5 minutes before cutting. Assemble up to 4 hours ahead and refrigerate, or freeze unbaked for up to a month. Reheat in a 350°F oven for 5-7 minutes or in an air fryer at 350°F for 3-4 minutes.
Nutrition
- Serving Size: 1 mummy
- Calories: 230
- Sugar: 3.5
- Sodium: 550
- Fat: 13.5
- Saturated Fat: 5
- Carbohydrates: 20
- Fiber: 0.5
- Protein: 11
Keywords: mummy hot dogs, Halloween recipe, easy appetizer, cheesy hot dogs, crescent roll recipe, quick snack, kid-friendly, party food