My nephew Leo asked why I couldn’t just dump the pumpkin puree straight into the dough without browning the butter first. I started to explain why that wouldn’t work — then stopped. I looked at the pot of melting butter, watching those little milk solids turn golden and nutty, and realized he was right to question the ritual.
We were in my kitchen last Tuesday, the one with the wobbly table leg that Leo’s dog, Barnaby, always tries to fix. I was trying to teach him how to make these crispy brown butter pumpkin snickerdoodle cookies. It was supposed to be a lesson in patience and technique. I wanted him to understand the science of Maillard reaction and how it builds flavor depth.
But Leo just shrugged and said, “Does it taste better, or is it just fancy?” Honestly, that question hit me harder than I expected. I had spent years believing that the brown butter step was non-negotiable for a “good” cookie. I thought it was the secret weapon that separated amateur bakers from the pros. But looking at Leo’s skeptical face, I wondered if I was just following rules because everyone else did.
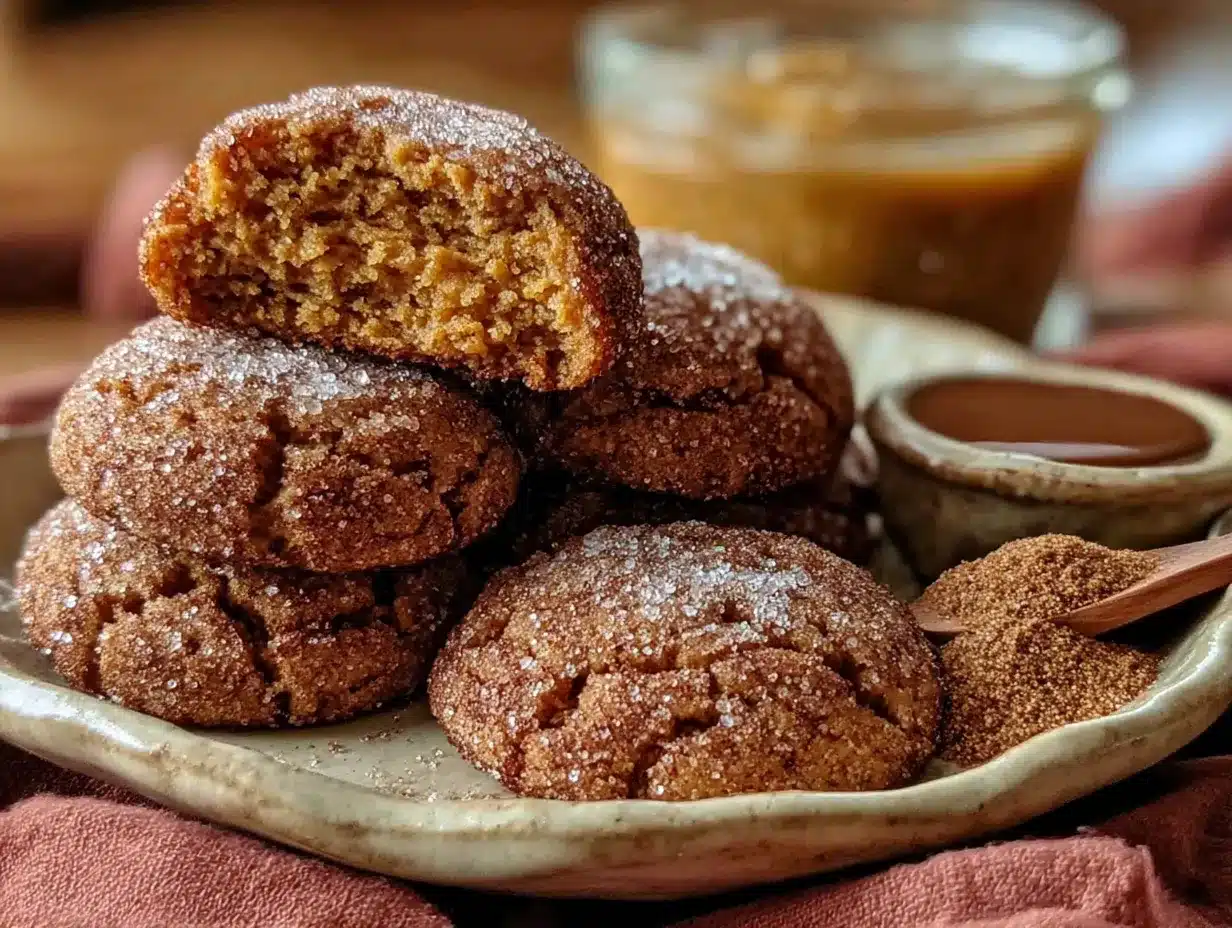
I decided to try his way for one batch. No browning. Just plain melted butter. The other batch I browned until it smelled like toasted hazelnuts. When they came out of the oven, the difference wasn’t just subtle — it was night and day. The unbrowned batch was soft and cakey. The browned batch? Crispy edges, chewy centers, and a flavor that felt like autumn in a bite.
Leo took a bite of the brown butter version and his eyes went wide. He didn’t say anything, just pointed at the plate. That moment stuck with me. It wasn’t about being right; it was about discovering why this recipe actually works. The brown butter adds a nutty complexity that cuts through the sweetness of the pumpkin and cinnamon. It’s what makes these cookies addictive.
I mean, let’s face it, we all love a good cookie. But there’s something special about a cookie that balances crispiness with chewiness. These crispy brown butter pumpkin snickerdoodle cookies do exactly that. They aren’t just another pumpkin treat. They are a lesson in paying attention to the details.
Maybe you’ve been there, standing over a pot of butter, wondering if the extra step is worth the effort. I know I have. But once you taste the difference, you won’t go back. This recipe stayed with me because it taught me that sometimes, the “fancy” steps are actually the most important ones. And sometimes, a kid’s question can remind us why we cook in the first place.
Why You’ll Love This Recipe
There is a specific kind of magic that happens when you combine the warm spices of fall with the rich, nutty depth of browned butter. This isn’t just another pumpkin cookie recipe. It is the result of countless test batches, burned batches, and delicious failures. I have spent years perfecting this balance, and I can tell you with confidence that these cookies are the real deal.
- Quick & Easy: Despite the brown butter step, these cookies come together in under 45 minutes. The prep is simple, and the baking time is short, making them perfect for busy weeknights or last-minute cravings when you need a sweet fix.
- Simple Ingredients: You likely already have everything in your kitchen. Flour, sugar, butter, pumpkin puree, and cinnamon are pantry staples. You don’t need a fancy grocery trip to make these. Just grab what you have and start mixing.
- Perfect for Fall Gatherings: Whether it’s a cozy dinner with friends or a holiday potluck, these cookies are a crowd-pleaser. They have a sophisticated flavor profile that adults love, but the snickerdoodle twist makes them familiar and comforting for kids too.
- Unbelievably Delicious: The texture is next-level. You get the snap of a crispy edge, followed by a soft, chewy center. The brown butter adds a savory note that balances the sweetness, creating a flavor combo that is pure comfort food.
- What Makes It Different: Many pumpkin cookies are dense and cakey. This recipe uses a higher ratio of brown sugar and a careful mixing technique to ensure crispiness. The brown butter is the key. It adds a toasty, nutty flavor that plain butter just can’t match. It’s not just a pumpkin cookie; it’s a snickerdoodle with a fall twist.
- Emotional Connection: This recipe is the kind that makes you close your eyes after the first bite. It’s comfort food reimagined — healthier in spirit if you use whole wheat flour, but with the same soul-soothing satisfaction. It’s perfect for impressing guests without stress, or turning a simple Tuesday evening into something memorable.
Ingredient Needed
This recipe uses simple, wholesome ingredients to deliver bold flavor and satisfying texture without the fuss. The beauty of baking lies in the quality of your components. Since there are few ingredients, each one plays a critical role. You want fresh spices, high-quality butter, and the right type of pumpkin to ensure the best results.
For the Dough
- Unsalted Butter: 1 cup (2 sticks), high-fat content. I recommend Plugrá or Kerrygold for their superior flavor and water content. You will need to brown this, so start with a solid block.
- Pumpkin Puree: 1/2 cup. Make sure you use 100% pure pumpkin, not pumpkin pie filling. The filling has added sugars and spices that will throw off the balance. Look for brands like Libby’s for consistency.
- Granulated Sugar: 1 cup. This helps with the crispiness of the edges. White sugar draws out moisture, creating that desirable snap.
- Brown Sugar: 1 cup, packed. Light or dark brown sugar works. Dark sugar adds a deeper molasses flavor, which pairs well with the spices. Muscovado is a great option if you want a richer taste.
- Large Eggs: 2 large eggs, room temperature. Room temperature eggs emulsify better with the butter and sugar, creating a smoother dough.
- Pumpkin Extract: 1 teaspoon. Optional, but highly recommended. It boosts the pumpkin flavor without adding extra moisture. Nicolas brand is a favorite among bakers.
- Vanilla Extract: 2 teaspoons. Use pure vanilla extract, not imitation. It adds warmth and rounds out the spices.
- All-Purpose Flour: 2 1/2 cups. This is the structure of the cookie. If you need a gluten-free option, use a 1-to-1 gluten-free flour blend. Bob’s Red Mill works well.
- Baking Soda: 1 teaspoon. This helps the cookies spread and brown. Make sure it is fresh for maximum lift.
- Baking Powder: 1/2 teaspoon. Adds a little extra rise and tenderness.
- Salt: 1 teaspoon. Enhances all the flavors. Don’t skip this, even if you like sweet cookies.
- Cinnamon: 2 teaspoons. Ground cinnamon is standard, but for a more complex flavor, use a mix of cinnamon and a pinch of nutmeg or ginger.
For the Coating
- Granulated Sugar: 1/2 cup. For rolling the dough balls.
- Cinnamon: 2 teaspoons. Mixed with the sugar for that classic snickerdoodle crunch.
When selecting your pumpkin, look for firm, small-curd puree. In summer, you can swap in fresh roasted pumpkin if you want a more intense flavor, but canned puree is convenient and consistent. For the butter, don’t skimp on quality. Good butter makes good cookies. If you are dairy-free, you can use a high-quality vegan butter stick, but the browning process may vary slightly.
Equipment Needed
You don’t need a fancy kitchen to make these cookies. The right tools just make the process smoother. Here is what you will need:
- Heavy-Bottomed Saucepan: Essential for browning the butter evenly. A light pan might burn the butter quickly. I prefer a stainless steel pan because it lets you see the color change clearly.
- Mixing Bowls: One large bowl for the wet ingredients and one medium bowl for the dry ingredients. Glass or ceramic bowls are nice because they don’t retain heat.
- Electric Mixer: A hand mixer or stand mixer makes creaming the butter and sugar much easier. It saves time and ensures a light, fluffy texture.
- Rubber Spatula: Great for scraping down the sides of the bowl and folding in the flour. Silicone spatulas are heat-resistant and flexible.
- Baking Sheets: Light-colored aluminum sheets are best. Dark sheets can cause the bottoms to burn. If you only have dark sheets, lower the oven temperature by 25 degrees.
- Parchment Paper: Prevents sticking and makes cleanup a breeze. You can reuse parchment paper a few times if it stays clean.
- Cooling Rack: Allows air to circulate under the cookies, preventing sogginess. Wire racks are standard and durable.
- Cookie Scoop: Ensures uniform size. This helps them bake evenly. A 1.5-tablespoon scoop is ideal for these cookies.
If you don’t have a saucepan, you can brown the butter in a microwave-safe bowl in short intervals, stirring frequently. However, the stovetop gives you more control. For budget-friendly options, any standard saucepan and baking sheet will work. The key is consistency, not expensive gear.
Preparation Method
- Brown the Butter (10 minutes): Melt the butter in a heavy-bottomed saucepan over medium heat. Stir constantly with a wooden spoon. The butter will foam, then crackle. Watch closely. Once the foam subsides and you see golden brown specks at the bottom, and smell a nutty aroma, remove from heat immediately. This takes about 5-7 minutes. Pour the brown butter into a heat-safe bowl to stop the cooking process. Let it cool for 10 minutes until it is warm but not hot. Tip: If you leave it in the pan, it will keep cooking and might burn.
- Cream Butter and Sugars (3 minutes): In a large mixing bowl, combine the slightly cooled brown butter, granulated sugar, and brown sugar. Using an electric mixer on medium speed, beat until light and fluffy. This incorporates air, which helps the cookies rise. Scrape down the sides of the bowl with a spatula to ensure even mixing.
- Add Wet Ingredients (2 minutes): Add the room temperature eggs one at a time, beating well after each addition. Mix in the pumpkin puree, vanilla extract, and pumpkin extract. Beat until fully combined. The mixture might look slightly curdled; this is normal. Just keep mixing until it looks smooth.
- Mix Dry Ingredients (1 minute): In a separate medium bowl, whisk together the all-purpose flour, baking soda, baking powder, salt, and cinnamon. Whisking ensures that the leavening agents are evenly distributed, preventing bitter spots.
- Combine Wet and Dry (2 minutes): Gradually add the dry ingredients to the wet ingredients. Mix on low speed until just combined. Do not overmix. Overmixing develops gluten, which can make the cookies tough. The dough should be thick and slightly sticky.
- Chill the Dough (30 minutes): Cover the bowl with plastic wrap and refrigerate for at least 30 minutes. This step is crucial. It firms up the butter, preventing the cookies from spreading too much. It also allows the flavors to meld. If you skip this, your cookies might be too flat.
- Preheat Oven and Prepare Sheets (5 minutes): Preheat your oven to 350°F (175°C). Line two baking sheets with parchment paper. This ensures even baking and easy removal.
- Make the Cinnamon Sugar Coating (1 minute): In a small bowl, mix the 1/2 cup granulated sugar with the 2 teaspoons cinnamon. This will be used to roll the dough balls.
- Scoop and Roll (5 minutes): Use a cookie scoop to portion the dough into balls. Roll each ball in the cinnamon sugar mixture until fully coated. Place them on the prepared baking sheets, spacing them about 2 inches apart. They will spread.
- Bake (12-14 minutes): Bake for 12-14 minutes. The edges should be golden brown and crispy, while the centers look slightly soft and underbaked. They will firm up as they cool. Do not overbake, or they will lose their chewiness. Warning: Watch the edges closely. If they start to darken too much, remove them early.
- Cool (10 minutes): Let the cookies cool on the baking sheet for 5 minutes. Then transfer them to a wire rack to cool completely. This prevents them from breaking apart. Enjoy warm or at room temperature.
Cooking Tips & Techniques
Browning butter is an art, not a science. The key is to pay attention. Once the milk solids turn brown, the butter is almost burnt. Remove it from the heat immediately. The residual heat will continue to cook it slightly. If you are nervous, stop when it is just golden. You can always brown it more next time, but you can’t un-burn it.
Another common mistake is using cold eggs. Cold eggs can seize the butter, creating a grainy texture. Let your eggs sit out for 30 minutes before baking. If you forget, you can warm them in a bowl of warm water for a few minutes.
Don’t skip the chilling step. I know it’s tempting to bake right away, but chilled dough produces better cookies. It prevents excessive spreading and helps the flavors develop. If you are in a hurry, you can freeze the dough balls for 15 minutes, but chilling in the fridge is best.
When mixing the dough, stop as soon as the flour disappears. Overmixing leads to tough cookies. You want a tender crumb. If your dough is too sticky to handle, add a tablespoon of flour. If it is too dry, add a teaspoon of milk or cream.
For consistent results, use a kitchen scale to measure your ingredients. Volume measurements can vary. 1 cup of flour can be anywhere from 120 to 140 grams. A scale ensures accuracy every time.
Finally, trust your senses. The recipe gives you times and temperatures, but your oven might run hot or cold. Use an oven thermometer to check the actual temperature. Adjust baking time based on how your cookies look, not just the clock.
Variations & Adaptations
These cookies are versatile and can be adapted to suit different tastes and dietary needs. Here are a few ideas:
- Gluten-Free: Substitute the all-purpose flour with a 1-to-1 gluten-free flour blend. Bob’s Red Mill or King Arthur work well. Add a teaspoon of xanthan gum if your blend doesn’t include it.
- Dairy-Free: Use a high-quality vegan butter stick. Note that vegan butter may have a higher water content, so you might need to adjust the flour slightly. Use maple syrup instead of brown sugar if you want to avoid refined sugars.
- Spice It Up: Add a pinch of cardamom, ginger, or cloves to the dry ingredients for a more complex spice profile. Pumpkin Pie Spice is a convenient shortcut if you don’t want to mix individual spices.
- Add-Ins: Fold in 1/2 cup of white chocolate chips, pecans, or walnuts for extra texture and flavor. The nuttiness pairs beautifully with the brown butter.
- Mini Cookies: Make bite-sized cookies for parties. Reduce the baking time to 8-10 minutes. These are perfect for gift boxes or tasting menus.
I personally love adding chopped pecans to these cookies. The crunch complements the soft center perfectly. It’s a variation I’ve tried many times, and it never disappoints. Feel free to experiment and find your favorite combination.
Serving & Storage Suggestions
These cookies are best served slightly warm, straight from the oven. The warmth enhances the aroma of the brown butter and cinnamon. They pair wonderfully with a glass of cold milk, a cup of black coffee, or a spiced latte. For a cozy evening, serve them with a slice of sharp cheddar cheese.
Store leftovers in an airtight container at room temperature for up to 5 days. Place a piece of bread in the container to keep the cookies soft. If you prefer crispier cookies, leave them uncovered for a few hours.
To freeze the dough, scoop the dough balls and place them on a baking sheet. Freeze until solid, then transfer to a freezer bag. Bake from frozen, adding 1-2 minutes to the baking time. The cookies freeze well for up to 3 months.
Reheating is simple. Warm them in the microwave for 10-15 seconds. This restores the soft texture. For a crispier texture, bake at 350°F for 5 minutes. The flavors develop over time, so these cookies often taste even better the next day.
Nutritional Information & Benefits
Each cookie contains approximately 150 calories, 8g of fat, 20g of carbohydrates, and 2g of protein. The pumpkin puree adds a touch of vitamin A and fiber, making these cookies slightly more nutritious than traditional sugar cookies. The brown butter provides healthy fats, and the cinnamon helps regulate blood sugar levels.
For those watching their sugar intake, you can reduce the sugar in the dough by 1/4 cup. The cookies will still be sweet enough, but less sugary. If you are gluten-sensitive, the gluten-free adaptation is safe to enjoy. Just be mindful of cross-contamination if you are celiac.
I love these cookies because they offer a balance of indulgence and nourishment. The pumpkin adds moisture and nutrients, while the spices provide antioxidants. It’s a treat that feels good to eat.
Conclusion
These crispy brown butter pumpkin snickerdoodle cookies are a must-try for anyone who loves fall baking. The combination of nutty brown butter, spiced pumpkin, and cinnamon sugar creates a flavor profile that is both familiar and exciting. I hope you enjoy making them as much as I do.
Feel free to customize the recipe with your favorite add-ins or spices. Baking is about experimentation, so don’t be afraid to make it your own. I would love to hear how they turn out for you. Leave a comment below with your thoughts or share a photo on social media.
Happy baking! May your kitchen be filled with warmth and delicious smells.
Frequently Asked Questions
Can I use pumpkin pie filling instead of pure pumpkin puree?
No, pumpkin pie filling contains added sugars and spices that will alter the taste and texture of the cookies. Always use 100% pure pumpkin puree for the best results.
Why are my cookies too flat?
This usually happens if the butter is too warm or the dough isn’t chilled enough. Make sure to chill the dough for at least 30 minutes before baking. Also, ensure your baking powder and soda are fresh.
Can I freeze the baked cookies?
Yes, you can freeze baked cookies for up to 3 months. Store them in an airtight container with parchment paper between layers. Thaw at room temperature before serving.
What is the best way to brown butter?
Melt the butter in a light-colored saucepan over medium heat. Stir constantly and watch for golden brown specks and a nutty aroma. Remove from heat immediately to prevent burning.
Can I make these cookies gluten-free?
Yes, substitute the all-purpose flour with a 1-to-1 gluten-free flour blend. The texture may be slightly different, but the flavor will still be delicious.
Pin This Recipe!
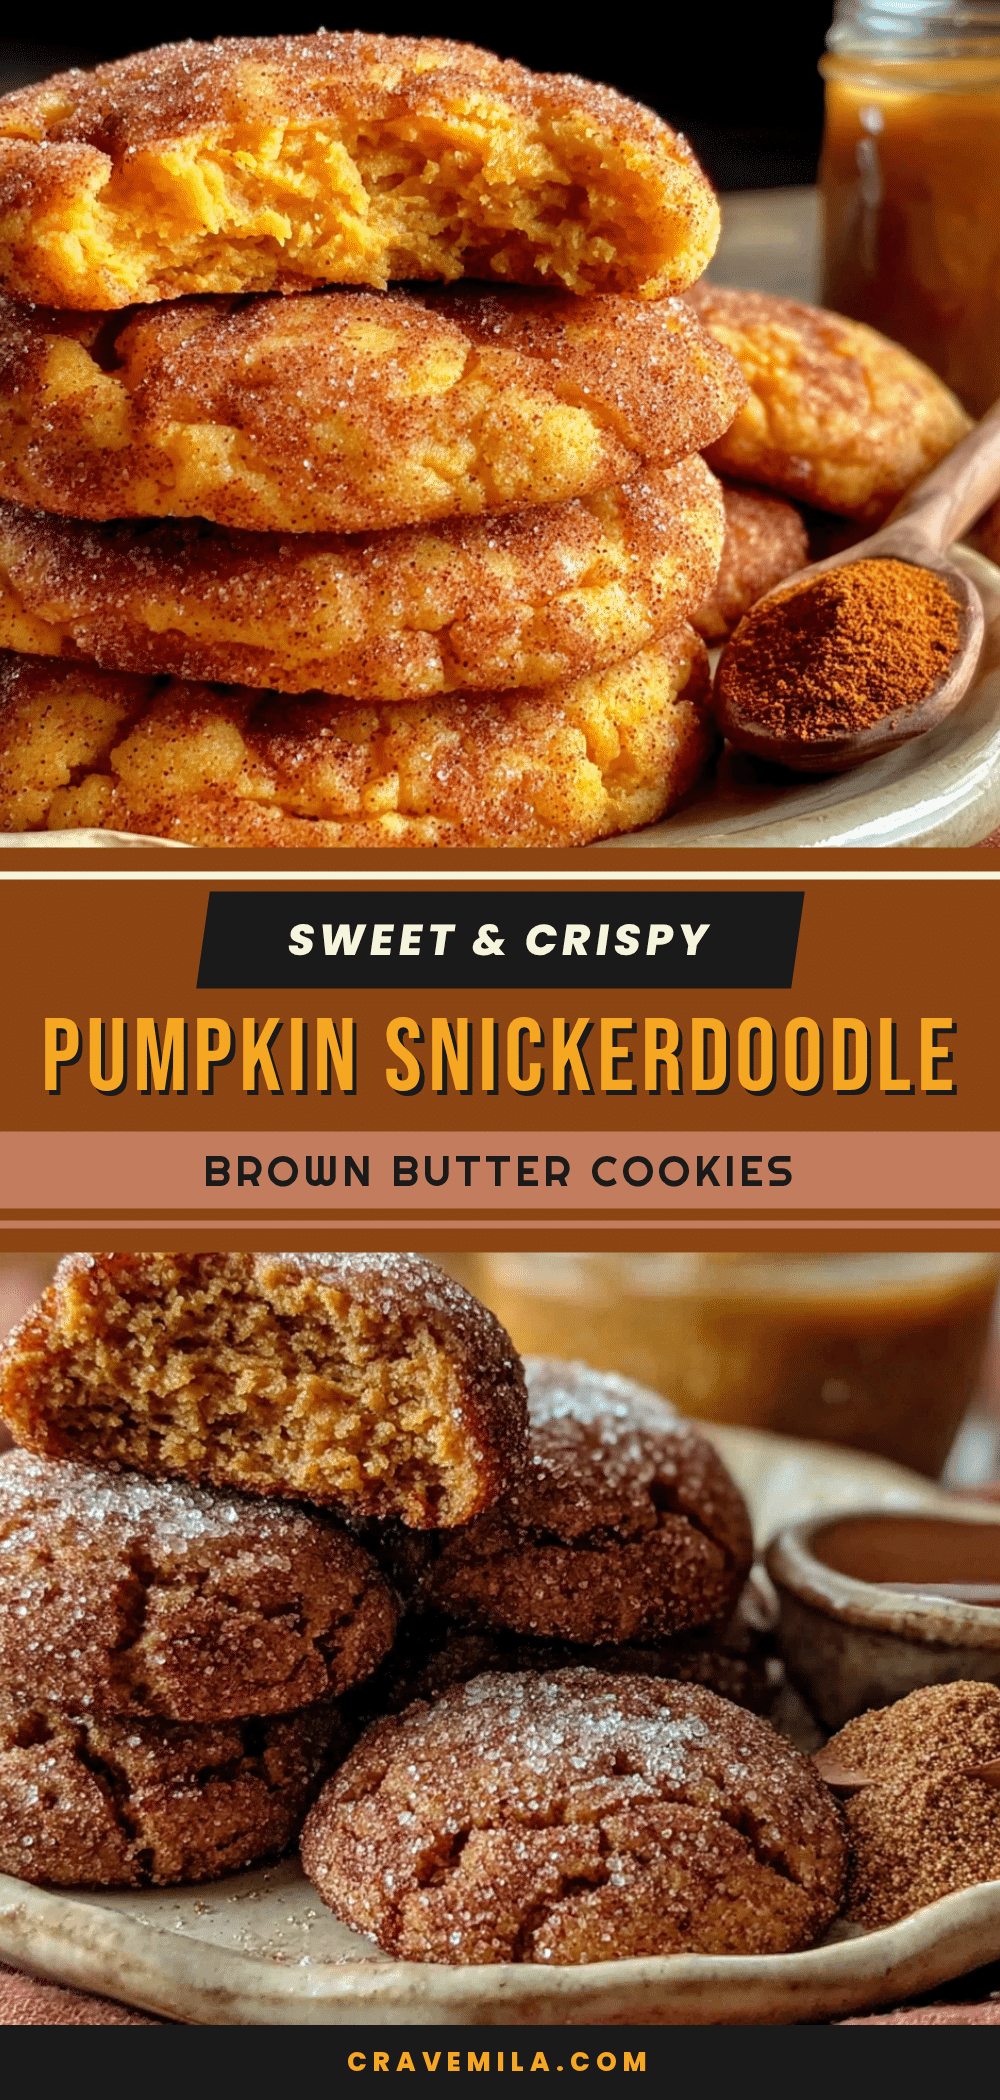
Crispy Brown Butter Pumpkin Snickerdoodle Cookies
These cookies feature a nutty, complex flavor from browned butter, balanced with warm pumpkin spices and a cinnamon-sugar coating. They offer a perfect texture contrast with crispy edges and chewy centers.
- Prep Time: 30 minutes
- Cook Time: 15 minutes
- Total Time: 45 minutes
- Yield: Approximately 24 cookies 1x
- Category: Dessert
- Cuisine: American
Ingredients
- 1 cup (2 sticks) unsalted butter
- 1/2 cup pumpkin puree
- 1 cup granulated sugar
- 1 cup packed brown sugar
- 2 large eggs, room temperature
- 1 teaspoon pumpkin extract
- 2 teaspoons vanilla extract
- 2 1/2 cups all-purpose flour
- 1 teaspoon baking soda
- 1/2 teaspoon baking powder
- 1 teaspoon salt
- 2 teaspoons ground cinnamon
- 1/2 cup granulated sugar (for coating)
- 2 teaspoons ground cinnamon (for coating)
Instructions
- Brown the butter in a heavy-bottomed saucepan over medium heat, stirring constantly until golden brown specks form and a nutty aroma develops (5-7 minutes). Pour into a heat-safe bowl and cool for 10 minutes.
- In a large mixing bowl, combine the cooled brown butter, granulated sugar, and brown sugar. Beat with an electric mixer on medium speed until light and fluffy.
- Add eggs one at a time, beating well after each addition. Mix in pumpkin puree, vanilla extract, and pumpkin extract until combined.
- In a separate medium bowl, whisk together flour, baking soda, baking powder, salt, and cinnamon.
- Gradually add dry ingredients to wet ingredients, mixing on low speed until just combined. Do not overmix.
- Cover the dough and refrigerate for at least 30 minutes to firm up the butter.
- Preheat oven to 350°F (175°C) and line baking sheets with parchment paper.
- Mix 1/2 cup granulated sugar and 2 teaspoons cinnamon in a small bowl for the coating.
- Scoop dough into balls, roll in the cinnamon sugar mixture, and place on baking sheets 2 inches apart.
- Bake for 12-14 minutes until edges are golden brown and crispy but centers look slightly soft.
- Cool on the baking sheet for 5 minutes, then transfer to a wire rack to cool completely.
Notes
Ensure eggs are at room temperature to prevent seizing the butter. Do not skip the chilling step as it prevents excessive spreading. Use a kitchen scale for accurate flour measurement. Vegan butter can be used for a dairy-free version, though water content may vary.
Nutrition
- Serving Size: 1 cookie
- Calories: 150
- Sugar: 14
- Sodium: 180
- Fat: 8
- Saturated Fat: 5
- Carbohydrates: 20
- Fiber: 1
- Protein: 2
Keywords: pumpkin cookies, snickerdoodle, brown butter, fall baking, crispy cookies, pumpkin spice, gluten-free option