It was 10:47 PM on a random Wednesday, and a very specific vision of a football field made entirely of food popped into my head. I didn’t have a fancy wooden board shaped like a stadium, but I had a giant cutting board, some leftover deli meat, and the stubborn idea that I could make game-day snacks look way more fun. I mean, honestly, who needs a reason to turn dinner into a miniature sports stadium?
I started pulling things from the fridge—cheese cubes became players, pretzel sticks turned into goalposts, and before I knew it, my quiet kitchen felt like the pre-game locker room. Maybe you’ve been there, standing in front of an open fridge at a weird hour, convinced you can make something spectacular out of odds and ends. This football charcuterie board was born from that exact moment of late-night inspiration, and let me tell you, it was the best decision I made all week.
The next Sunday, I brought it to a friend’s watch party, and everyone lost their minds. People were taking photos before they even grabbed a cracker. That’s when I knew this wasn’t just a snack board—it was the snack board. It stayed with me because it’s ridiculously easy to pull off, yet looks like you spent hours planning it. And honestly, isn’t that the dream for any host?
Why You’ll Love This Recipe
This isn’t your average cheese platter. It’s a conversation starter, a crowd-pleaser, and honestly, the easiest way to become the MVP of any game-day gathering. I’ve tested this layout at three different parties now, and it never fails to get a round of applause before anyone even takes a bite.
- Quick & Easy: This board comes together in under 20 minutes. No cooking, no baking, just smart arranging. Perfect for last-minute guests or halftime hunger.
- Simple Ingredients: You probably already have most of these items in your fridge. No need for a specialty grocery run—just raid your pantry and deli drawer.
- Perfect for Game Day: Whether it’s the Super Bowl, a college rivalry, or just a regular Sunday match, this board screams “football fan” without any effort.
- Crowd-Pleaser: Both kids and adults go wild for it. The visual appeal makes everyone want to grab a cracker and dig in immediately.
- Unbelievably Delicious: The combination of salty meats, creamy cheeses, crunchy veggies, and sweet dips creates a flavor explosion that keeps people coming back for more.
What makes this different from every other charcuterie board out there? It’s the layout. By shaping your ingredients into yard lines and end zones, you turn a simple snack into an edible football field. I’ve tried several arrangements, and this one uses a clever trick with sliced cheese to create those iconic white lines. It’s not just another version—it’s my best version, perfected through trial and error (and a few messy boards along the way).
This recipe isnt just good—it is the kind that makes you close your eyes after the first bite. It’s comfort food reimagined for the big screen, with the same soul-soothing satisfaction of a touchdown celebration. Perfect for impressing guests without stress, or turning a simple snack into something memorable.
What Ingredients You Will Need
This recipe uses simple, crowd-pleasing ingredients to deliver bold flavor and satisfying texture without the fuss. Most items are pantry staples or easy to find at any grocery store. I’ve included some of my favorite brands and substitution tips to make this board your own.
- For the Field Base:
- 1 large rectangular wooden board or baking sheet (at least 16×12 inches)
- 1 bag of green spinach tortilla chips or green bell pepper strips (for the field color)
- 1 cup spinach leaves or kale (to create a green “grass” base)
- For the Yard Lines:
- 8-10 slices of provolone or mozzarella cheese (cut into thin strips, about 1/2 inch wide)
- 1/4 cup cream cheese, softened (to help anchor the cheese strips)
- For the End Zones:
- 1/2 cup red and yellow bell pepper strips (cut into small squares or triangles)
- 1/4 cup black olives, sliced (for goalpost bases)
- For the Players (Protein):
- 1/2 pound salami or pepperoni slices (I prefer Boar’s Head for consistent texture)
- 1/2 pound turkey or ham slices, rolled into small pinwheels
- 1/2 cup cheddar cheese cubes (about 1/2 inch each)
- For the Goalposts:
- 10-12 pretzel sticks (the straight kind, not twists)
- 1/4 cup cream cheese or hummus (to secure pretzels)
- For the Crowd (Dips & Extras):
- 1/2 cup ranch or blue cheese dressing (in a small bowl)
- 1/2 cup salsa or guacamole (in another small bowl)
- 1 cup cherry tomatoes, halved
- 1/2 cup cucumber slices
- 1/4 cup nuts (almonds or cashews, optional for crunch)
For the cheese strips, look for pre-sliced provolone at the deli counter—it’s easier to cut into even strips. If you want a dairy-free option, swap the cheese strips with thin slices of firm tofu or zucchini. For a gluten-free board, use gluten-free pretzels and crackers. I’ve also tried using carrot sticks instead of pretzels for goalposts, and it works great for a low-carb version.
Equipment Needed
You don’t need anything fancy to pull this off. Here’s what I use every time:
- Large rectangular board or baking sheet: A wooden cutting board works beautifully, but a rimmed baking sheet is actually easier because it keeps everything contained. I’ve used both, and honestly, the baking sheet wins for stability.
- Cheese knife or sharp paring knife: For cutting cheese strips and trimming veggies. A dull knife will tear the cheese, so keep it sharp.
- Small bowls: Two or three ramekins or small dipping bowls for the dips. I love using tiny ceramic bowls that match the team colors.
- Toothpicks or cocktail picks: Optional but handy for individual servings, especially if you’re serving kids.
- Paper towels: For blotting excess moisture from veggies. Wet veggies make the board soggy.
If you don’t have a rectangular board, a large pizza pan works perfectly. I once used a clean cookie sheet covered in parchment paper, and it looked just as good. The key is having a flat, food-safe surface that’s at least 16 inches long. Budget-friendly tip: check dollar stores for large plastic cutting boards—they’re cheap and work great.
Preparation Method
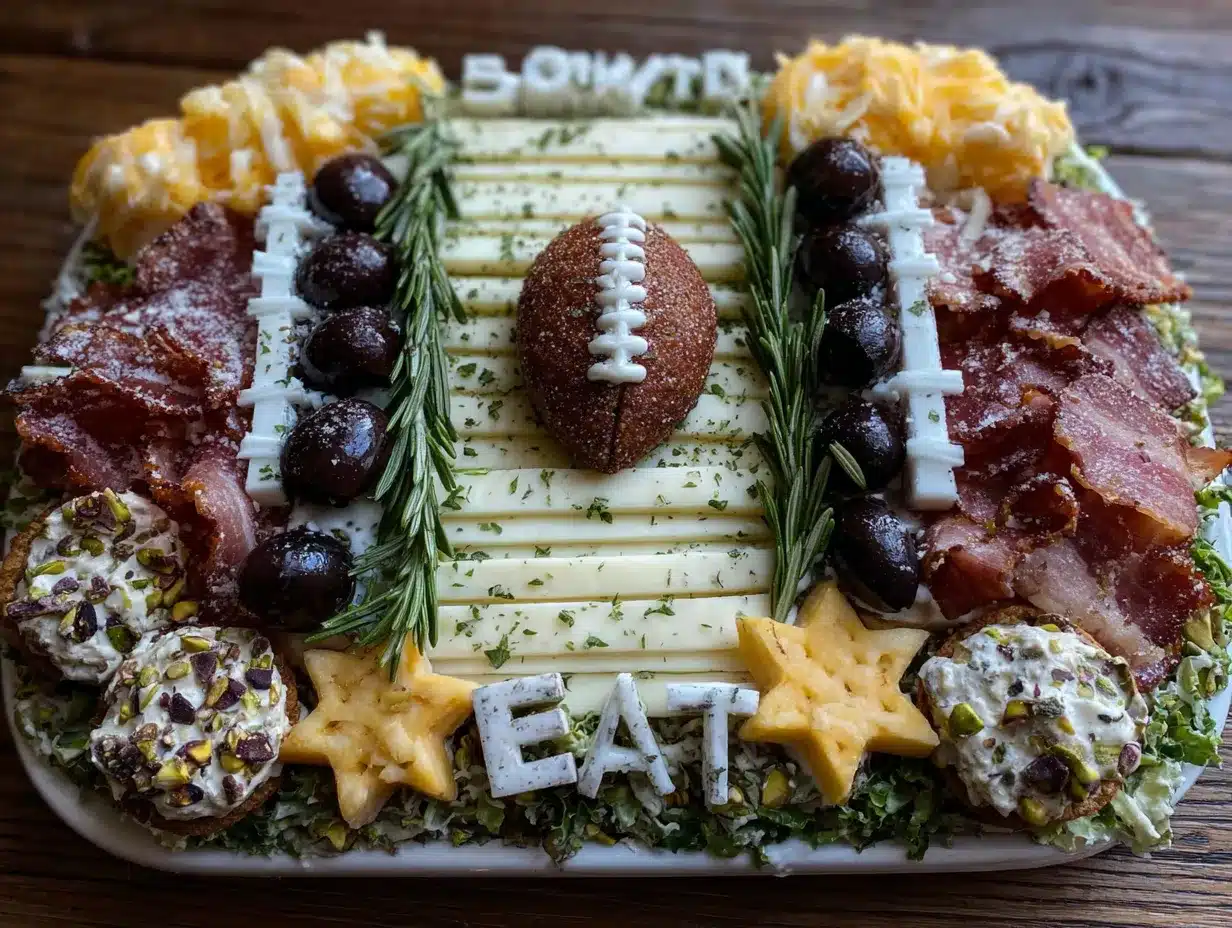
Follow these steps carefully, and you’ll have a football field that looks like it belongs on the cover of a food magazine. I’ve included time estimates and sensory cues so you know exactly what to look for at each stage.
- Prepare the base (5 minutes): Lay your board or baking sheet flat on the counter. Arrange the spinach leaves or kale in a thin, even layer across the entire surface. This creates the “grass” base. It should look like a green field—dense enough that you can’t see the board underneath, but not piled high. You want it to look like freshly mowed grass, not a compost heap.
- Create the yard lines (5 minutes): Take your provolone or mozzarella slices and cut them into thin strips, about 1/2 inch wide. You’ll need about 8-10 strips total. Place a small dollop of cream cheese at each spot where the strip will go—this helps anchor them. Lay the cheese strips horizontally across the board, spacing them about 2 inches apart. This creates the yard lines. They should be straight and evenly spaced, like a real football field. If they curl up at the edges, press them down gently with your finger.
- Build the end zones (3 minutes): At each short end of the board, create a 3-inch-wide section using red and yellow bell pepper strips. Arrange them in alternating rows, like checkerboard squares. This represents the end zones. Use black olive slices at the corners to mark the goal line. The colors should be vibrant—if the peppers look dull, they’re not fresh enough.
- Assemble the goalposts (2 minutes): Take two pretzel sticks for each goalpost. Place a small dab of cream cheese at the base of each pretzel stick. Stick them into the board at the edge of each end zone, forming an upside-down U shape. The cream cheese acts as glue. For extra stability, press the pretzel ends into a small mound of hummus or cream cheese. The goalposts should stand upright and look like miniature field goals.
- Add the players (5 minutes): Arrange the salami or pepperoni slices in rows across the field, as if they’re players in formation. Place cheddar cheese cubes between them to represent blockers or defenders. Roll the turkey or ham slices into tight pinwheels and place them at the center of the field, like the kickoff team. The meat should be evenly distributed so every section of the board has protein options.
- Fill in the crowd (5 minutes): Place the small bowls of dip at the corners of the board—one for ranch or blue cheese, one for salsa or guacamole. Arrange cherry tomato halves and cucumber slices around the edges, like fans in the stands. Sprinkle nuts or extra olives in any empty spaces. The board should look full but not overcrowded. You want people to be able to grab items without knocking everything over.
- Final check (1 minute): Step back and look at your board. Does it resemble a football field? Adjust any crooked cheese strips or wayward pretzels. The visual impact is everything here. If something looks off, don’t be afraid to rearrange—it’s food, not surgery. I once spent 10 minutes repositioning cheese strips until they were perfectly parallel, and it was totally worth it.
Total active time: about 20 minutes. The board stays fresh at room temperature for up to 2 hours, so you can make it ahead and serve it right before kickoff.
Cooking Tips & Techniques
Over the years, I’ve learned a few tricks that make this board look professional without the stress. Here are my hard-earned lessons:
Keep it dry: Wet ingredients ruin the board. Pat your bell peppers, tomatoes, and cucumbers dry with a paper towel before arranging them. Moisture makes the cheese strips slide and the crackers get soggy. I learned this the hard way when my beautiful yard lines turned into a mushy mess after 10 minutes.
Use cream cheese as glue: A tiny dab of cream cheese under each cheese strip keeps them from curling up. It’s invisible to guests but makes a huge difference in presentation. I also use it to anchor the pretzel goalposts—just a pea-sized amount at the base does the trick.
Cut cheese strips evenly: Use a ruler or measure by eye—each strip should be about 1/2 inch wide. Uneven strips make the field look sloppy. If you’re not confident cutting freehand, use a pizza cutter for straight lines. It’s faster and more precise than a knife.
Arrange in zones: Group similar items together. Don’t scatter everything randomly. The eye should be able to distinguish the field (green base), the players (meat and cheese), and the crowd (veggies and dips). This makes the board easier to navigate and more visually appealing.
Timing is everything: Assemble the board no more than 1 hour before serving. The spinach base will wilt if it sits too long, and the cheese strips can dry out. If you need to prep ahead, cut all the ingredients and store them separately in the fridge. Assemble just before guests arrive.
My biggest failure: I once used too much cream cheese as glue, and the whole board tasted like a dairy bomb. Now I use it sparingly—just enough to anchor, not enough to eat. Guests should taste the cheese strips, not the glue underneath.
Variations & Adaptations
This board is endlessly customizable. Here are some variations I’ve tried and loved:
1. Vegetarian Version: Skip the meat entirely and use grilled portobello mushrooms or marinated artichoke hearts as the “players.” Add extra cheese varieties like gouda or brie for richness. I made this for a vegetarian friend, and she said it was the best charcuterie board she’d ever seen.
2. Low-Carb/Keto Version: Replace the tortilla chips with celery sticks and cucumber rounds. Use full-fat cheese and meats, and skip the pretzels—use cucumber spears for goalposts instead. The board stays low-carb but still looks festive.
3. Team Colors Theme: Match the end zones and dips to your favorite team’s colors. For example, use blue cheese dressing and orange cheddar for the Denver Broncos, or guacamole and red peppers for the Kansas City Chiefs. I did this for a Super Bowl party, and the host kept it as a centerpiece all night.
4. Breakfast Board: Turn it into a morning game-day spread with breakfast sausage links as goalposts, scrambled eggs as the field base, and fruit slices as end zones. It’s a fun twist for early kickoffs.
5. Dessert Board: Use chocolate-covered pretzels for goalposts, brownie bites as players, and colored frosting for yard lines. The end zones can be filled with mini marshmallows and candy corn. I tried this for a kids’ party, and it disappeared in 10 minutes.
For allergen substitutions, use nut-free dips if serving kids, and offer dairy-free cheese alternatives for lactose-intolerant guests. The beauty of this board is that every component can be swapped without ruining the visual effect.
Serving & Storage Suggestions
Serve this board at room temperature for the best flavor. Cold cheese and meat taste dull, so let it sit out for 15 minutes before guests arrive. Place it in the center of the table where everyone can reach it easily. I like to put it on a large cutting board with a few small plates and napkins nearby.
What to serve with it: This board is a meal in itself, but it pairs beautifully with a light salad or a bowl of chili. For drinks, serve cold beer, sparkling water with lemon, or a simple red wine like a Zinfandel. The salty meats and creamy cheeses balance perfectly with a crisp, cold beverage.
Storage: If you have leftovers (rare, but possible), separate the components. Store meats and cheeses in airtight containers in the fridge for up to 3 days. Discard the spinach base and any wet veggies—they don’t reheat well. The cheese strips can be reused in sandwiches or salads.
Reheating: This board is served cold, so no reheating needed. If you used warm dips like queso, reheat them separately in the microwave and add them to the board just before serving.
Flavor development: The board tastes best within the first hour of assembly. After that, the crackers can get soft and the veggies may wilt. If you’re making it ahead, keep all components separate and assemble just before serving. Trust me, the extra 5 minutes of assembly time are worth it for the fresh taste.
Nutritional Information & Benefits
This board is designed for sharing, so nutritional values vary based on what you grab. Here’s an estimate for a typical serving (about 1/8 of the board):
- Calories: Approximately 350-450 per serving
- Protein: 15-20 grams (from meats and cheese)
- Fat: 25-30 grams (mostly from cheese and dips)
- Carbohydrates: 15-20 grams (from veggies and crackers)
- Fiber: 3-5 grams (from vegetables and nuts)
Health benefits: The vegetables provide essential vitamins and antioxidants. Bell peppers are rich in vitamin C, and spinach offers iron and calcium. The protein from meats and cheese helps keep you full and satisfied during long games. If you’re watching sodium, choose low-sodium meats and skip the salty pretzels.
Dietary considerations: This board can be made gluten-free by using gluten-free crackers and pretzels. It’s naturally low-carb if you skip the crackers and focus on meats, cheese, and veggies. For a dairy-free version, use plant-based cheese and hummus instead of cream cheese dips.
Allergens: Common allergens include dairy (cheese, cream cheese), gluten (pretzels, crackers), and nuts. Always check labels and offer alternatives for guests with allergies. I usually put a small card next to the board listing the main allergens—it’s a thoughtful touch that guests appreciate.
From a wellness perspective, I love that this board encourages mindful eating. Because everything is bite-sized and visually engaging, people tend to eat slowly and savor each piece. It’s a fun way to enjoy game-day snacks without overindulging.
Conclusion
This football charcuterie board is the easiest way to win game day. It takes 20 minutes, uses simple ingredients, and looks like you spent hours on it. Honestly, that’s the kind of cooking I live for—maximum impact with minimum effort.
I love this recipe because it brings people together. There’s something magical about watching friends and family gather around a board shaped like a football field, laughing and grabbing their favorite bites. It turns a simple snack into an experience, and that’s what cooking is all about.
Now I want to see your creations! Try this board for your next game-day party, and let me know how it turns out. Did you add your own twist? Did the kids love it? Share your photos and stories in the comments below. And if you have a team color variation, I’d love to hear about it. Let’s make every game day delicious together!
Frequently Asked Questions
Can I make this board ahead of time?
Yes, but assemble it no more than 1 hour before serving. You can prep all ingredients the night before—cut the cheese strips, slice the veggies, and roll the meat pinwheels. Store everything separately in the fridge. When you’re ready to serve, just arrange everything on the board. This saves time and keeps everything fresh.
What if I don’t have a rectangular board?
No problem! Use a large baking sheet, a clean pizza pan, or even a piece of parchment paper laid flat on the table. The shape doesn’t have to be perfect—just aim for a rectangle. I’ve used a cookie sheet covered in foil before, and it worked beautifully. The key is having a flat surface that’s big enough to hold everything.
How do I keep the cheese strips from curling?
Use a tiny dab of cream cheese under each strip to anchor it to the spinach base. This keeps them flat and straight. Also, make sure the cheese is at room temperature when you cut it—cold cheese is brittle and curls more easily. If your strips still curl, press them down gently with the back of a spoon.
Can I use different dips?
Absolutely! The dips are totally customizable. Try queso, buffalo chicken dip, spinach artichoke dip, or even a simple yogurt-based herb dip. Just make sure they’re thick enough to stay in the bowl without spilling. I love using a spicy chipotle ranch for extra kick. The dips are a great way to match your team’s colors too.
How many people does this board serve?
This board serves about 8-10 people as a snack or appetizer. If it’s the main dish for a party, plan for 4-6 people. The portions are generous, but people tend to eat more when the food looks this fun. I usually double the recipe for larger gatherings and use two boards side by side.
Pin This Recipe!
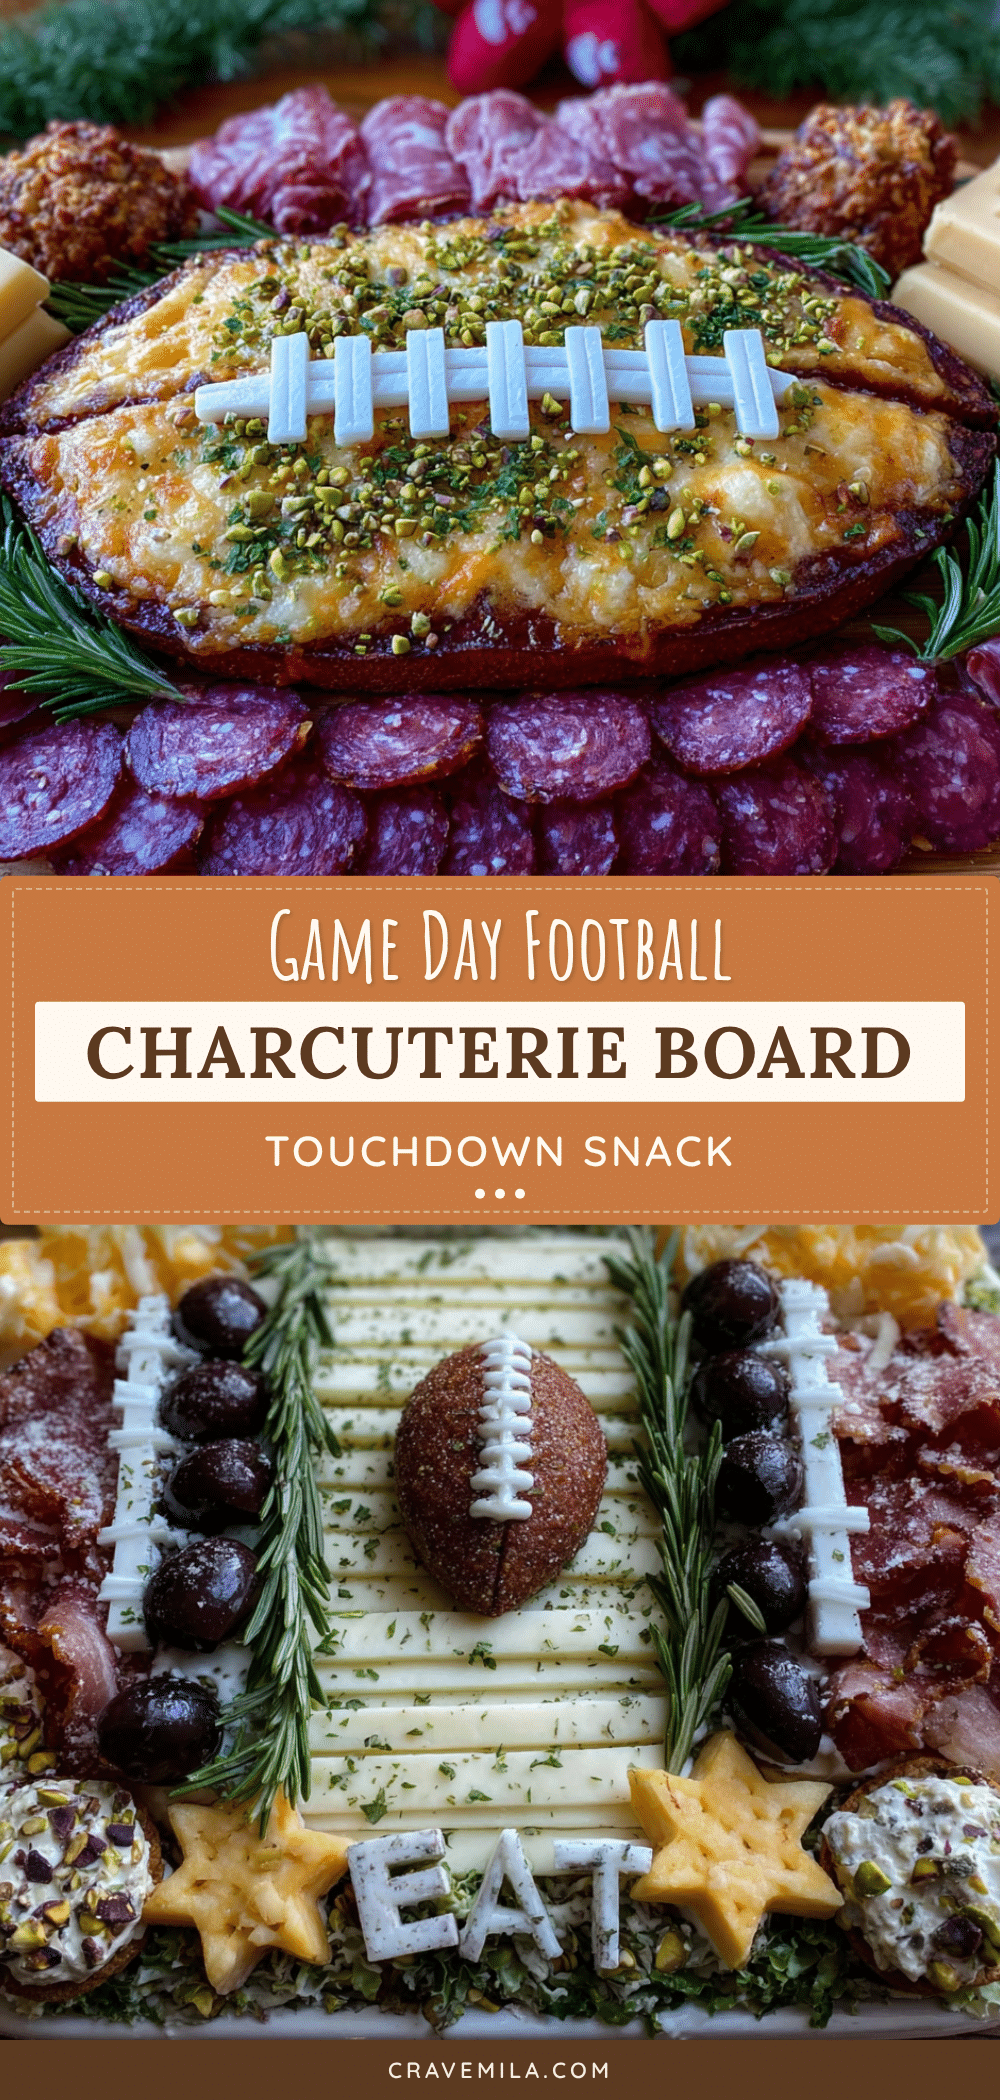
Best Easy Football Field Charcuterie Board for Game Day
Turn game-day snacks into a miniature sports stadium with this football field charcuterie board. It’s a conversation starter, crowd-pleaser, and the easiest way to become the MVP of any gathering.
- Prep Time: 20 minutes
- Cook Time: 0 minutes
- Total Time: 20 minutes
- Yield: 8-10 servings 1x
- Category: Appetizer
- Cuisine: American
Ingredients
- 1 large rectangular wooden board or baking sheet (at least 16x12 inches)
- 1 bag of green spinach tortilla chips or green bell pepper strips
- 1 cup spinach leaves or kale
- 8–10 slices of provolone or mozzarella cheese
- 1/4 cup cream cheese, softened
- 1/2 cup red and yellow bell pepper strips
- 1/4 cup black olives, sliced
- 1/2 pound salami or pepperoni slices
- 1/2 pound turkey or ham slices
- 1/2 cup cheddar cheese cubes
- 10–12 pretzel sticks
- 1/4 cup cream cheese or hummus
- 1/2 cup ranch or blue cheese dressing
- 1/2 cup salsa or guacamole
- 1 cup cherry tomatoes, halved
- 1/2 cup cucumber slices
- 1/4 cup nuts (almonds or cashews, optional)
Instructions
- Prepare the base (5 minutes): Lay your board or baking sheet flat on the counter. Arrange the spinach leaves or kale in a thin, even layer across the entire surface to create the ‘grass’ base.
- Create the yard lines (5 minutes): Cut provolone or mozzarella slices into thin strips, about 1/2 inch wide. Place a small dollop of cream cheese at each spot where the strip will go to anchor them. Lay the cheese strips horizontally across the board, spacing them about 2 inches apart.
- Build the end zones (3 minutes): At each short end of the board, create a 3-inch-wide section using red and yellow bell pepper strips arranged in alternating rows. Use black olive slices at the corners to mark the goal line.
- Assemble the goalposts (2 minutes): Take two pretzel sticks for each goalpost. Place a small dab of cream cheese at the base of each pretzel stick and stick them into the board at the edge of each end zone, forming an upside-down U shape.
- Add the players (5 minutes): Arrange salami or pepperoni slices in rows across the field. Place cheddar cheese cubes between them. Roll turkey or ham slices into tight pinwheels and place them at the center of the field.
- Fill in the crowd (5 minutes): Place small bowls of dip at the corners of the board. Arrange cherry tomato halves and cucumber slices around the edges. Sprinkle nuts or extra olives in any empty spaces.
- Final check (1 minute): Step back and look at your board. Adjust any crooked cheese strips or wayward pretzels to ensure it resembles a football field.
Notes
Keep ingredients dry to prevent sogginess. Use cream cheese as glue to anchor cheese strips and pretzels. Assemble no more than 1 hour before serving. For best results, cut cheese strips evenly and arrange in zones.
Nutrition
- Serving Size: 1/8 of the board
- Calories: 350450
- Sugar: 58
- Sodium: 8001000
- Fat: 2530
- Saturated Fat: 1012
- Carbohydrates: 1520
- Fiber: 35
- Protein: 1520
Keywords: football charcuterie board, game day snack, football field appetizer, easy charcuterie board, party platter



