I’m not supposed to play favorites with recipes, but let me tell you—this one was an accident. It was the morning of the big game, and I had promised to bring sliders to my friend Dave’s tailgate. I had a whole plan: I was going to make some fancy, slow-cooked Italian sausage ragu, spend hours simmering it, and assemble these little masterpieces. Then my oven decided to act up. The temperature gauge was off by about fifty degrees, I had completely forgotten to buy the ground sausage for the ragu, and I was already running late because I spent twenty minutes looking for my car keys (they were in the fridge, honestly). I stood in my kitchen, staring at a package of whole Italian sausages and three bell peppers, and I just started chopping. I threw everything on a sheet pan, tossed it in the oven, and hoped for the best. What came out was nothing like my original plan—and it was better.
These Easy Sheet Pan Sausage and Pepper Tailgate Sliders are the kind of recipe that makes you wonder why you ever overcomplicated things. The sausages get all crispy and caramelized on the edges, the peppers soften into sweet, jammy strips, and the whole thing comes together on a soft slider bun with a smear of garlicky mayo. It’s messy, it’s satisfying, and it’s exactly what you want to eat while standing in a parking lot in a team jersey. Maybe you’ve been there—stressed out, running late, and convinced the whole day is ruined. This recipe is proof that sometimes the best things happen when you stop trying so hard.
Why You’ll Love This Recipe
I’ve made these sliders for three different tailgates now, and every single time, someone asks for the recipe. That’s not me bragging—that’s me telling you that this is one of those rare dishes that works every time, no matter your skill level in the kitchen. Here’s why you’re going to love it:
- Quick & Easy: From start to finish, these sliders are ready in about 40 minutes. Most of that is hands-off oven time, so you can get your cooler packed or your playlist sorted while dinner cooks itself.
- Simple Ingredients: You need Italian sausage, bell peppers, onion, slider buns, and a few pantry staples. No fancy grocery trips, no obscure spices—just real food you probably already have.
- Perfect for Tailgating: These sliders are portable, easy to eat standing up, and they hold up well in a warm cooler for hours. They’re the ultimate game-day food.
- Crowd-Pleaser: I’ve served these to picky kids, vegetarian friends (who ate the peppers and onions on their own), and serious meat lovers. Everyone goes back for seconds.
- Unbelievably Delicious: The magic here is in the sheet pan method. The sausages get a gorgeous caramelized exterior while the peppers soften and sweeten in the rendered fat. It’s next-level comfort food with almost zero effort.
What makes this recipe different from every other sausage and pepper slider out there? It’s the technique. By cooking everything on a single sheet pan, the flavors meld together in a way that stovetop cooking just can’t replicate. The sausages release their juices, the peppers soak them up, and everything gets a little charred and perfect. This isn’t just another version—it’s the best version, and I say that with the confidence of someone who has definitely ruined a few pans of sausages in her time.
What Ingredients You Will Need
This recipe uses a short list of straightforward ingredients to deliver big, bold flavor. Most of these are pantry staples, and the ones that aren’t are easy to find at any grocery store. Here’s what you’ll need:
- Italian Sausage Links (2 pounds): I use a mix of sweet and hot Italian sausage for the best balance of flavor. Johnsonville is my go-to brand because they hold their shape well and have a nice snap when you bite into them. Look for links that are plump and evenly colored—avoid any that look dry or shriveled.
- Bell Peppers (3 large): I usually use a mix of red, yellow, and orange peppers for sweetness and color. Green peppers work too, but they’re a little more bitter. Cut them into 1/2-inch strips so they soften evenly without turning to mush.
- Yellow Onion (1 large): Sliced into half-moons, the onion adds a savory backbone to the whole dish. It caramelizes beautifully on the sheet pan, getting sweet and jammy.
- Olive Oil (3 tablespoons): You need just enough to coat the vegetables without making them greasy. A good extra virgin olive oil works fine here—no need for anything fancy.
- Garlic (4 cloves, minced): Fresh garlic is non-negotiable here. The jarred stuff won’t give you the same punch of flavor. Toss it with the vegetables before roasting.
- Dried Oregano (1 teaspoon): This brings that classic Italian flavor that pairs so perfectly with sausage and peppers. You can substitute Italian seasoning if that’s what you have.
- Salt and Black Pepper (to taste): Go easy on the salt since the sausages are already seasoned. A good crack of black pepper is all you need.
- Slider Buns (12-16): I prefer brioche slider buns for their soft texture and buttery flavor. They hold up well to the juicy sausages without falling apart. Martin’s or Pepperidge Farm both make excellent options.
- Mayonnaise (1/4 cup): Mixed with a little minced garlic and lemon juice, this becomes a simple spread that takes the sliders to another level. Use full-fat mayo for the best texture—Duke’s is my personal favorite.
- Provolone Cheese (8 slices, halved): Optional but highly recommended. The cheese melts into the sausage and peppers, holding everything together. You can also use mozzarella or fontina.
If you want to swap the Italian sausage for chicken sausage, go for it—just know that the cooking time might be slightly shorter since chicken sausage tends to cook faster. For a dairy-free version, skip the cheese and use a vegan mayo for the spread. The recipe is forgiving, which is one of the reasons I love it.
Equipment Needed
You don’t need any special equipment for this recipe, which is part of its beauty. Here’s what you’ll need:
- Sheet Pan (half-sheet, 18×13 inches): This is the star of the show. A good-quality sheet pan with slightly raised edges prevents the juices from spilling into your oven. I use Nordic Ware—they’re sturdy, don’t warp, and clean up easily.
- Chef’s Knife: A sharp 8-inch chef’s knife makes quick work of slicing peppers and onions. Dull knives are dangerous, so take a minute to sharpen yours if needed.
- Cutting Board: A large wooden or plastic cutting board gives you room to work. I prefer wood because it’s gentler on my knives.
- Mixing Bowl: For tossing the vegetables with oil and seasonings. Any medium-sized bowl will do.
- Tongs: You’ll use these to flip the sausages halfway through cooking. Silicone-tipped tongs won’t scratch your sheet pan.
- Small Bowl: For mixing the garlic mayo spread. A ramekin works too if you don’t want extra dishes.
Don’t have a sheet pan? A large rimmed baking dish will work in a pinch, though the sausages might not get as crispy since the sides are higher. I’ve also used a cast iron skillet for a smaller batch—just reduce the cooking time by about 5 minutes since cast iron holds heat so well.
Preparation Method
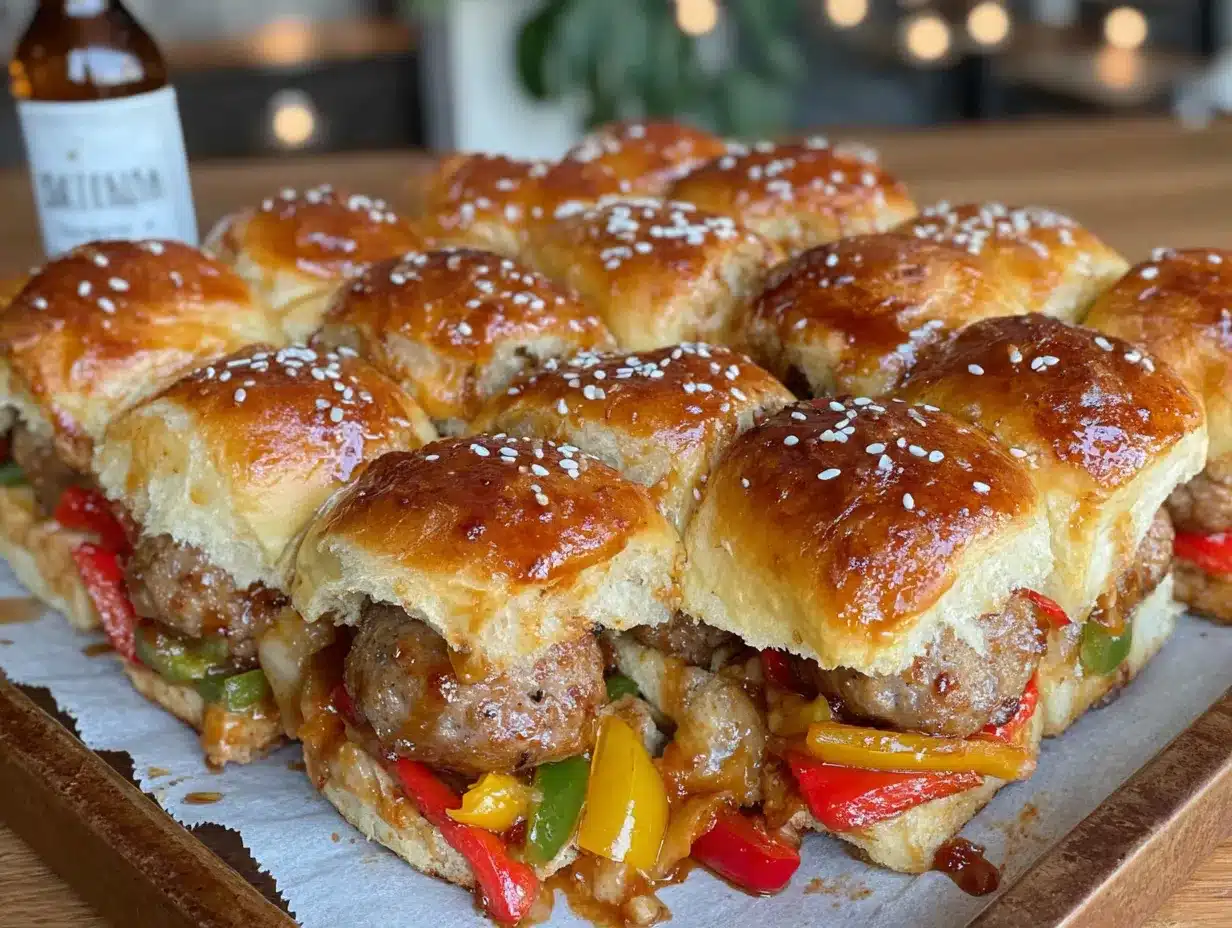
Let’s get cooking. This method is straightforward, but I’ve added a few notes from my own kitchen disasters to help you avoid the same mistakes I made.
- Preheat your oven to 400°F (200°C). Give it a full 15 minutes to come to temperature. I learned this the hard way—rushing the preheat leads to uneven cooking, and nobody wants a cold sausage in the middle of a warm bun.
- Prepare the vegetables. Slice your bell peppers into 1/2-inch strips and your onion into thin half-moons. Don’t stress about perfection here—uniformity helps with even cooking, but rustic chunks are totally fine. Toss the peppers and onions in a large bowl with the olive oil, minced garlic, oregano, and a pinch of salt and pepper. Use your hands to mix everything—it’s the fastest way to coat every piece.
- Arrange on the sheet pan. Spread the seasoned vegetables evenly across the sheet pan in a single layer. Nestle the Italian sausage links on top of the vegetables, spacing them out so they’re not touching. This is important—if the sausages are crowded, they’ll steam instead of getting that beautiful caramelized exterior.
- Roast for 20 minutes. Place the sheet pan on the middle rack of your oven. Set a timer—I always forget and end up with overdone sausages. After 20 minutes, pull the pan out and use tongs to flip each sausage. Give the vegetables a quick stir so they cook evenly.
- Roast for another 15-20 minutes. Return the pan to the oven and continue roasting until the sausages are golden brown and reach an internal temperature of 160°F (71°C). The peppers should be soft and starting to char at the edges. If you’re adding cheese, lay a half-slice of provolone on each sausage during the last 2 minutes of cooking.
- Make the garlic mayo. While the sausages are roasting, stir together the mayonnaise, one minced garlic clove, and a squeeze of lemon juice in a small bowl. Set it aside—this simple spread is what makes the sliders taste like they came from a fancy food truck.
- Toast the buns. Split your slider buns and place them cut-side up on a separate baking sheet. Pop them in the oven for the last 3-4 minutes of cooking time, or until they’re lightly golden. Watch them carefully—buns go from toasted to burnt in about 30 seconds.
- Assemble the sliders. Spread a thin layer of garlic mayo on the bottom half of each bun. Place a sausage link on top (cut in half crosswise if the links are long), then pile on the roasted peppers and onions. Top with the other half of the bun and serve immediately.
A quick note on timing: if you’re making these for a tailgate, you can roast the sausages and peppers up to an hour ahead of time and keep them warm in a slow cooker on low. Just add the buns and mayo right before serving so nothing gets soggy.
Cooking Tips & Techniques
After making these sliders about a dozen times (plus a few spectacular failures), I’ve picked up some tricks that make a real difference. Here’s what I’ve learned:
Don’t crowd the pan. This is the number one mistake I see people make. If your sheet pan is packed too tight, the sausages will steam instead of roast. You want air circulating around each link so the exterior gets that gorgeous brown crust. If you’re doubling the recipe, use two sheet pans instead of one.
Use a meat thermometer. I know, I know—it feels fussy. But sausages are tricky because they can look done on the outside and still be undercooked in the middle. I use a Thermapen instant-read thermometer, and it has saved me from serving raw sausage more times than I can count. You’re looking for 160°F (71°C) for pork sausage.
Let the sausages rest. After they come out of the oven, let the sausages sit for 5 minutes before slicing or assembling the sliders. This lets the juices redistribute so they don’t run out all over your cutting board. I learned this one the hard way—my first batch of sliders was delicious but suspiciously dry.
Toast your buns. This seems like a small step, but it makes a huge difference. A toasted bun holds up better to the juicy sausage and peppers, and it adds a pleasant crunch that contrasts with the soft fillings. If you’re short on time, you can toast the buns in a dry skillet on the stovetop.
Double the vegetables. Honestly, the peppers and onions are the best part. They soak up all the rendered fat and sausage juices, becoming sweet, savory, and incredibly flavorful. I always make extra because people inevitably want more on their sliders, and they’re amazing as a side dish the next day.
One failure I’ll never forget: I once tried to rush the process by cooking everything at 450°F (230°C). The sausages charred on the outside but were still raw in the middle, and the peppers burned to a crisp. Stick with 400°F—it’s the sweet spot for even cooking.
Variations & Adaptations
This recipe is incredibly flexible, and I’ve tried several variations over the years. Here are a few of my favorites:
Spicy Chorizo Version: Swap the Italian sausage for Mexican chorizo links. The spicy, smoky flavor pairs beautifully with the sweet peppers. Reduce the cooking time by about 5 minutes since chorizo is typically finer-ground and cooks faster. I made this version for a friend’s birthday tailgate, and it was gone in fifteen minutes.
Vegetarian Option: Use plant-based Italian sausage links instead of pork. Brands like Beyond Meat and Field Roast make excellent options that hold up well to roasting. The cooking time is about the same, though you’ll want to check the package instructions. I’ve served these to vegetarian friends who swore they couldn’t tell the difference.
Low-Carb Adaptation: Skip the buns entirely and serve the sausage and peppers over a bed of roasted zucchini noodles or cauliflower rice. The garlic mayo works beautifully as a dressing. This is my go-to version when I’m trying to eat lighter during the week.
Cheese Variations: While provolone is my standard, I’ve also used smoked mozzarella (amazing), pepper jack (adds a nice kick), and even crumbled feta (sprinkle it on right before serving). Each cheese changes the character of the slider in a fun way.
Tailgate Breakfast Sliders: This is a weird one, but hear me out. Use breakfast sausage links instead of Italian sausage, and add a fried egg to each slider. The runny yolk mixes with the garlic mayo and creates this incredible sauce. I tried this on a whim during a 10 AM tailgate, and it was a revelation.
The beauty of this recipe is that it’s a template, not a rigid formula. Change the protein, swap the vegetables, play with the seasonings—it’s hard to go wrong as long as you keep the basic sheet pan method intact.
Serving & Storage Suggestions
These sliders are best served warm, right after assembly. The contrast between the toasted bun, the hot sausage, and the cool garlic mayo is pure magic. If you’re serving them at a tailgate, I recommend setting up a “slider bar” with the sausages and peppers in a slow cooker on warm, the toasted buns in a basket, and the garlic mayo in a small bowl. Let everyone build their own—it’s more fun that way.
For sides, you can’t go wrong with classic potato chips and a simple coleslaw. I also love serving these with a side of pickled jalapeños or banana peppers for a tangy kick. If you’re feeling ambitious, a batch of my crispy garlic parmesan potato wedges makes an excellent companion.
To store leftovers, separate the sausages and peppers from the buns and mayo. Keep the sausages and peppers in an airtight container in the refrigerator for up to 4 days. The buns should be stored at room temperature in a sealed bag. The garlic mayo will keep in the fridge for up to a week.
For reheating, I recommend the oven or a skillet over the microwave. The microwave makes the sausages rubbery and the peppers mushy. To reheat in the oven, spread the sausages and peppers on a sheet pan and warm them at 350°F (175°C) for 8-10 minutes. Toast fresh buns and assemble. The flavors actually deepen overnight, so leftovers might taste even better the next day.
You can also freeze the cooked sausages and peppers for up to 3 months. Let them cool completely, then transfer to a freezer-safe bag. To serve, thaw overnight in the refrigerator and reheat as directed above. This is my secret weapon for last-minute game-day gatherings.
Nutritional Information & Benefits
While these sliders are definitely a treat, they’re not without their nutritional merits. Here’s a rough estimate per slider (based on 12 sliders with provolone cheese and garlic mayo):
| Nutrient | Amount Per Slider |
|---|---|
| Calories | 320 |
| Protein | 18g |
| Fat | 20g |
| Carbohydrates | 22g |
| Fiber | 2g |
| Sugar | 5g |
| Sodium | 680mg |
The bell peppers are a fantastic source of vitamin C—just one slider provides about 30% of your daily needs. The onions contain quercetin, a powerful antioxidant with anti-inflammatory properties. And the garlic? It’s been used for centuries to support immune health. Even the olive oil brings heart-healthy monounsaturated fats to the table.
If you’re watching your sodium intake, look for low-sodium Italian sausage and skip the added salt in the vegetable toss. You can also use turkey or chicken sausage to reduce the fat content by about 40%. For a gluten-free version, serve the sausage and peppers over rice or quinoa instead of on buns.
I’m not a nutritionist, but I believe in balance. These sliders are a celebration food, and there’s nothing wrong with enjoying them as part of a varied diet. Pair them with a big green salad or some fresh fruit, and you’ve got a meal that feels indulgent without going overboard.
Conclusion
These Easy Sheet Pan Sausage and Pepper Tailgate Sliders are proof that the best recipes often come from the most chaotic moments. What started as a kitchen disaster turned into one of my most-requested dishes, and I honestly think that’s because the simplicity of the method lets the ingredients shine. The sausages get crispy, the peppers get sweet, and the whole thing comes together in under an hour with almost no cleanup. That’s my kind of cooking.
I hope you make these sliders your own. Swap in your favorite sausage, pile on extra peppers, or skip the cheese if that’s your thing. The recipe is forgiving, and the results are always delicious. Whether you’re feeding a crowd at a tailgate or just looking for an easy weeknight dinner that feels special, these sliders deliver every single time.
I’d love to hear how yours turn out. Did you try a variation? Did your family love them? Drop a comment below and let me know—I read every single one, and your feedback helps me create better recipes for all of us. And if you’re looking for more game-day inspiration, my smoky bacon jalapeno popper dip is always a hit alongside these sliders.
Now go forth and tailgate like a champion. Your oven’s preheated, the peppers are sliced, and a platter of perfect sliders is waiting for you. You’ve got this.
Frequently Asked Questions
Can I make these sliders ahead of time?
Absolutely. You can roast the sausages and peppers up to two days in advance and store them in the refrigerator. When you’re ready to serve, reheat everything on a sheet pan at 350°F (175°C) for about 10 minutes, then assemble with fresh toasted buns and garlic mayo. This is actually my preferred method for large gatherings—it takes the stress out of last-minute cooking.
What’s the best way to keep sliders warm for a tailgate?
A slow cooker set to warm is your best friend here. Transfer the cooked sausages and peppers to the slow cooker, add a splash of chicken broth or water to keep everything moist, and let them hang out on warm for up to 2 hours. Keep the buns and garlic mayo separate until you’re ready to serve, and let everyone build their own sliders.
Can I use frozen peppers and onions?
You can, but I don’t recommend it. Frozen vegetables release a lot of water as they cook, which will steam the sausages instead of roasting them. If you’re in a pinch, thaw the frozen vegetables completely and pat them dry with paper towels before tossing them with oil and seasonings. Fresh vegetables really do give the best results here.
How do I prevent the buns from getting soggy?
Toasting the buns is the key. A light toasting creates a barrier that prevents the juices from the sausage and peppers from soaking into the bread. I also recommend spreading the garlic mayo on both halves of the bun—the fat in the mayo acts as an additional moisture barrier. And don’t assemble the sliders until right before serving.
Can I grill the sausages and peppers instead of using the oven?
Yes, and it’s fantastic. Grill the sausages over medium heat for about 12-15 minutes, turning occasionally, until they reach 160°F (71°C). While the sausages are cooking, toss the peppers and onions in a grill basket or on a piece of heavy-duty foil and grill until they’re charred and tender, about 8-10 minutes. The smoky flavor from the grill adds another layer of deliciousness.
Pin This Recipe!
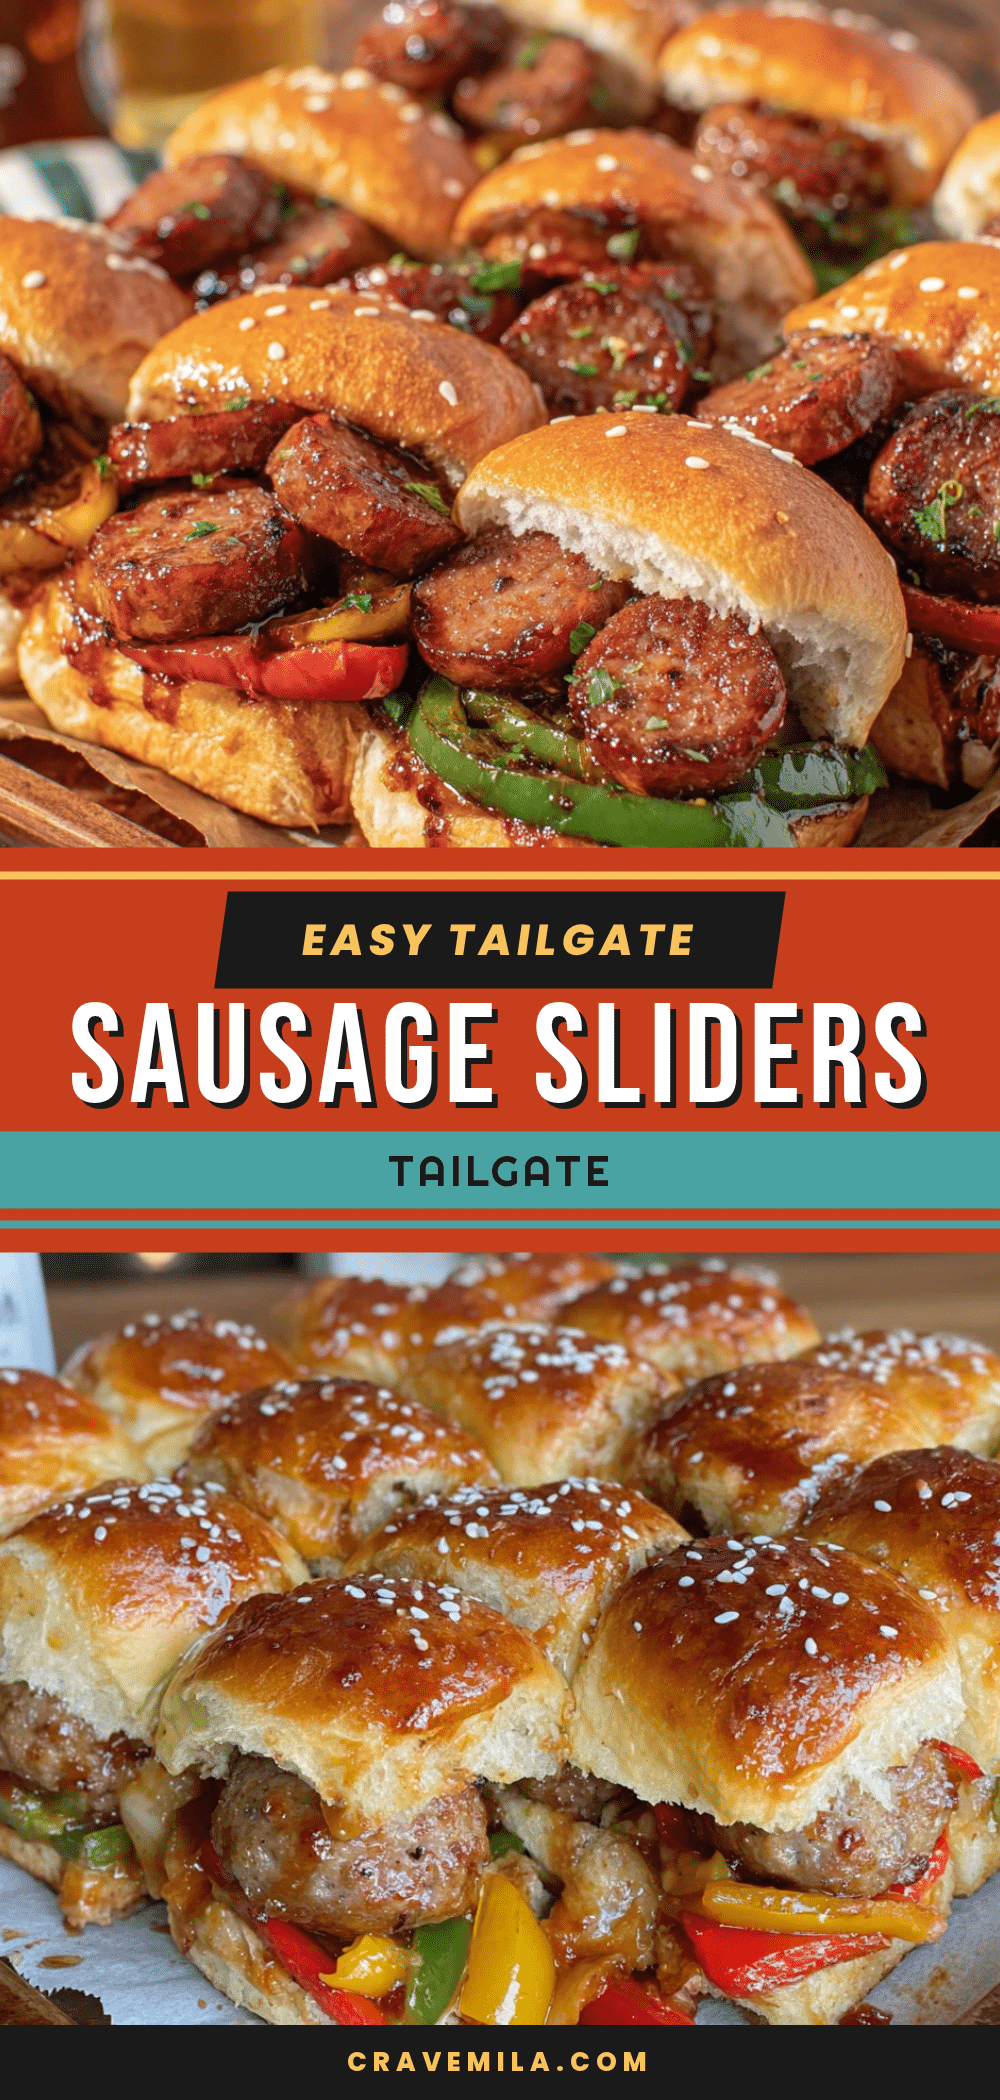
Easy Sheet Pan Sausage & Pepper Sliders for Tailgating
These Easy Sheet Pan Sausage and Pepper Tailgate Sliders are the kind of recipe that makes you wonder why you ever overcomplicated things. The sausages get all crispy and caramelized on the edges, the peppers soften into sweet, jammy strips, and the whole thing comes together on a soft slider bun with a smear of garlicky mayo.
- Prep Time: 15 minutes
- Cook Time: 35-40 minutes
- Total Time: 50-55 minutes
- Yield: 12-16 sliders 1x
- Category: Main Course
- Cuisine: Italian-American
Ingredients
- 2 pounds Italian sausage links (sweet and hot mix)
- 3 large bell peppers (red, yellow, orange), cut into 1/2-inch strips
- 1 large yellow onion, sliced into half-moons
- 3 tablespoons olive oil
- 4 cloves garlic, minced
- 1 teaspoon dried oregano
- Salt and black pepper to taste
- 12–16 slider buns (brioche recommended)
- 1/4 cup mayonnaise
- 1 clove garlic, minced (for mayo)
- 1 squeeze lemon juice
- 8 slices provolone cheese, halved (optional)
Instructions
- Preheat your oven to 400°F (200°C).
- Slice bell peppers into 1/2-inch strips and onion into thin half-moons. Toss with olive oil, minced garlic, oregano, salt, and pepper.
- Spread seasoned vegetables evenly on a sheet pan. Nestle sausage links on top, spaced apart.
- Roast for 20 minutes. Flip sausages and stir vegetables.
- Roast for another 15-20 minutes until sausages reach 160°F (71°C) and peppers are soft. Add cheese during last 2 minutes if using.
- Mix mayonnaise, 1 minced garlic clove, and lemon juice in a small bowl.
- Toast slider buns cut-side up in the oven for 3-4 minutes until lightly golden.
- Assemble sliders: spread garlic mayo on bottom bun, add sausage (cut in half if long), top with peppers and onions, and close with top bun.
Notes
Don’t crowd the pan to ensure caramelization. Use a meat thermometer for perfect doneness. Let sausages rest 5 minutes before slicing. Toast buns to prevent sogginess. Double the vegetables for extra flavor.
Nutrition
- Serving Size: 1 slider
- Calories: 320
- Sugar: 5
- Sodium: 680
- Fat: 20
- Saturated Fat: 7
- Carbohydrates: 22
- Fiber: 2
- Protein: 18
Keywords: sheet pan, sausage, pepper, sliders, tailgating, game day, easy, quick



