This was supposed to be a fancy layered pudding cake for a summer potluck. I had everything planned out—the custard, the homemade whipped cream, the whole nine yards. But the power went out halfway through my prep. The custard never set, the cream was melting on the counter, and I was already running late with a pan of slop and a sinking feeling in my stomach. I grabbed the box of graham crackers I had stashed for snacking, a jar of marshmallow fluff, and some chocolate bars from the pantry, and just started layering. Honestly, I was too annoyed to even think straight.
What came out of the fridge the next morning was nothing like the plan—and better. Way better. The graham crackers had softened into something almost like cake, the chocolate had melded into the marshmallow, and the whole thing tasted like a campfire memory you didn’t know you needed. I mean, I stood there eating a slice at 7 a.m. with a fork, no shame. That’s when I knew this Easy No-Bake S’mores Icebox Cake was a keeper. Maybe you’ve been there—when a kitchen disaster turns into the best thing you’ve accidentally made. This recipe is that happy accident, and I’ve been making it on purpose ever since.
It’s become my go-to for every summer barbecue, last-minute dessert request, and lazy Sunday when I want something sweet without turning on the oven. The best part? It takes about 15 minutes to put together, and then the fridge does all the work. No baking, no stress, just pure s’mores magic in a dish.
Why You’ll Love This Recipe
Let me tell you, after testing this recipe about six times (yes, six—my family was thrilled), I can confidently say this is the best no-bake dessert I’ve ever made. It’s not just another version of a s’mores dessert; it’s the version. Here’s why it stands out:
- Quick & Easy: Comes together in under 15 minutes, perfect for busy weeknights or last-minute cravings. No oven, no stove, no fuss.
- Simple Ingredients: No fancy grocery trips needed. You likely already have graham crackers, chocolate bars, and marshmallow fluff in your pantry.
- Perfect for Summer: Great for potlucks, barbecues, and camping trips when you don’t want to heat up the kitchen.
- Crowd-Pleaser: Always gets rave reviews from kids and adults alike. I’ve seen people go back for thirds.
- Unbelievably Delicious: The texture is pure magic—soft, creamy, with that classic s’mores flavor in every bite.
What makes this recipe different from the rest is the layering technique. Instead of just stacking ingredients, I let the marshmallow fluff and chocolate melt together overnight, creating this fudgy, gooey layer that seeps into the graham crackers. It’s not just a cake—it’s an experience. This recipe isn’t just good; it is the kind that makes you close your eyes after the first bite. It’s comfort food reimagined—no campfire required, but with the same soul-soothing satisfaction. Perfect for impressing guests without stress, or turning a simple summer evening into something memorable.
What Ingredients You Will Need
This recipe uses simple, wholesome ingredients to deliver bold flavor and satisfying texture without the fuss. Most of these are pantry staples, so you can whip this up any time the craving hits.
- Graham crackers: 1 full box (about 14-16 whole crackers). You’ll break them to fit your dish. I recommend Honey Maid for that classic flavor.
- Chocolate bars: 6 regular-sized Hershey’s milk chocolate bars (1.55 oz each). You can also use dark chocolate if you prefer a less sweet version.
- Marshmallow fluff: 1 jar (7 oz). This is key for that creamy, sticky layer. Jet-Puffed works great.
- Heavy whipping cream: 2 cups (480 ml). You’ll whip this into stiff peaks for the creamy layers. Cold cream is a must for best results.
- Powdered sugar: 1/4 cup (30 g). Just enough to sweeten the cream without making it grainy.
- Vanilla extract: 1 teaspoon (5 ml). Pure vanilla adds warmth and depth.
- Butter: 2 tablespoons (28 g), melted. This gets mixed with the graham cracker crumbs for the base layer (optional, but adds richness).
- Mini marshmallows: 1 cup (optional, for garnish). Toast them under the broiler for that campfire look.
For ingredient selection tips, look for graham crackers that are crisp and not stale—they need to soften properly overnight. If you’re dairy-free, use coconut cream whipped with a bit of powdered sugar instead of heavy cream. For a gluten-free option, use gluten-free graham crackers (like Kinnikinnick). I’ve tried both, and they work beautifully.
Equipment Needed
You don’t need much for this recipe, which is part of its charm. Here’s what you’ll need:
- 9×13-inch baking dish: This is the perfect size for layering. A glass dish works best so you can see the layers.
- Electric mixer: Hand mixer or stand mixer for whipping the cream. You can do it by hand, but your arm will thank you for the mixer.
- Large mixing bowl: For whipping the cream. Make sure it’s chilled for best results.
- Spatula: For spreading the marshmallow fluff and cream evenly.
- Small saucepan or microwave-safe bowl: For melting the butter (if using).
- Plastic wrap: To cover the dish while it chills overnight.
If you don’t have a 9×13 dish, you can use a 8×8 pan for a thicker cake—just adjust the layers. I’ve even used a loaf pan for a smaller version. No electric mixer? A whisk and some elbow grease will work, just make sure the cream is very cold. Budget tip: I bought my glass dish at a thrift store for $3, and it works perfectly.
Preparation Method
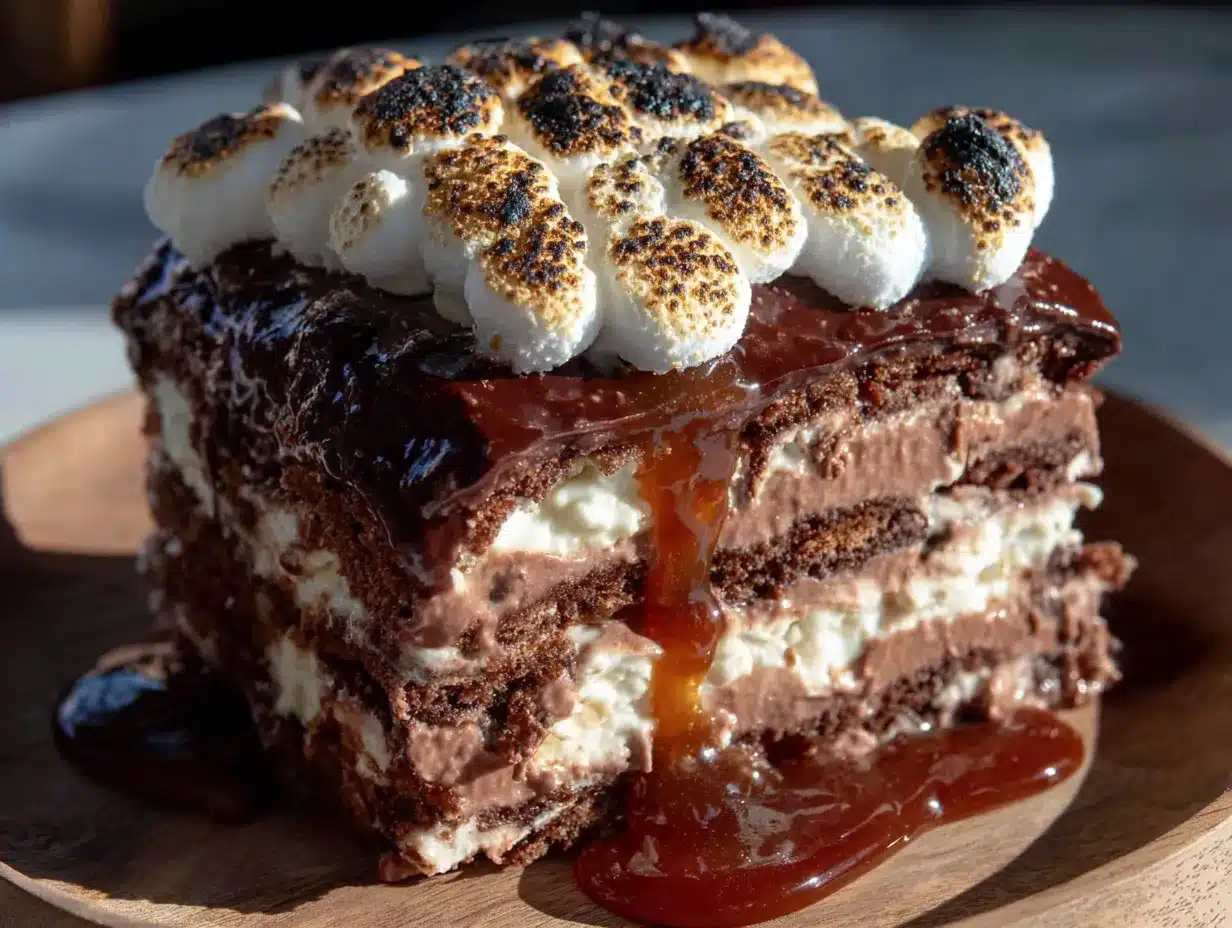
This is where the magic happens. Follow these steps, and you’ll have a dessert that looks like you spent hours on it.
- Whip the cream (5 minutes): In a large chilled bowl, add 2 cups of cold heavy whipping cream, 1/4 cup powdered sugar, and 1 teaspoon vanilla extract. Beat on medium-high speed until stiff peaks form. You’ll know it’s ready when the cream holds its shape and doesn’t slide off the whisk. Be careful not to over-beat, or you’ll end up with butter. Set aside.
- Prepare the graham crackers (2 minutes): Break the graham crackers into pieces that fit your dish. You don’t need to be precise—just make sure they cover the bottom in a single layer. If you’re using the butter base, mix 2 tablespoons melted butter with about 1/2 cup crushed graham crackers and press into the bottom of the dish. This adds a nice crunch.
- Layer 1 – Graham crackers: Arrange a single layer of graham crackers at the bottom of your 9×13 dish. Break pieces to fill gaps.
- Layer 2 – Chocolate: Place chocolate bars evenly over the graham crackers. Break them into pieces if needed. You want full coverage, so don’t be shy.
- Layer 3 – Marshmallow fluff: Warm the marshmallow fluff in the microwave for about 10 seconds to make it spreadable. Dollop it over the chocolate and spread gently with a spatula. It doesn’t have to be perfect—just get it even.
- Layer 4 – Whipped cream: Spread half of the whipped cream over the marshmallow fluff. Use an even hand, and don’t press too hard.
- Repeat layers: Add another layer of graham crackers, then chocolate, then marshmallow fluff, then the remaining whipped cream. Finish with a final layer of graham crackers on top.
- Chill (6 hours or overnight): Cover the dish tightly with plastic wrap and refrigerate for at least 6 hours, but overnight is best. The graham crackers will soften into a cake-like texture, and the flavors will meld together beautifully.
- Garnish and serve: Before serving, top with mini marshmallows and toast them under the broiler for 1-2 minutes (watch closely—they burn fast!). You can also drizzle with melted chocolate or sprinkle crushed graham crackers on top. Serve cold.
One time, I forgot to add the second layer of chocolate, and it still turned out great. Don’t stress if your layers aren’t perfect—the fridge hides all mistakes.
Cooking Tips & Techniques
After making this cake more times than I can count, I’ve picked up a few tricks that make a big difference.
- Chill your bowl and beaters: For the fluffiest whipped cream, put your mixing bowl and beaters in the freezer for 10 minutes before whipping. Cold cream whips faster and holds its shape longer.
- Don’t skip the overnight chill: I know, it’s tempting to dig in after a few hours, but the texture really transforms overnight. The graham crackers need time to soften completely. Trust me on this—I’ve made the mistake of rushing, and it’s just not the same.
- Warm the marshmallow fluff: Cold fluff is impossible to spread. A quick 10-second zap in the microwave makes it silky and easy to work with. If you don’t have a microwave, set the jar in a bowl of warm water for a few minutes.
- Use full-fat cream: Low-fat or half-and-half won’t whip properly. Heavy cream with at least 36% milk fat is the way to go.
- Toast the marshmallows carefully: The broiler works fast—I once looked away for 10 seconds and ended up with a charcoal topping. Keep the door open and watch like a hawk.
One of my biggest failures? I tried using Cool Whip once to save time. The cake was soupy and sad. Stick with real whipped cream—it’s worth the extra 5 minutes.
Variations & Adaptations
This recipe is super flexible. Here are a few ways to make it your own:
- Peanut Butter S’mores Cake: Spread a thin layer of peanut butter over the graham crackers before adding the chocolate. The salty-sweet combo is incredible. I tried this on a whim, and now it’s my husband’s favorite version.
- Berry S’mores Cake: Add a layer of fresh strawberries or raspberries between the chocolate and marshmallow fluff. The tartness cuts through the sweetness beautifully. Perfect for summer when berries are in season.
- Vegan Version: Use dairy-free graham crackers, coconut cream (chilled and whipped), and vegan chocolate bars. I’ve tested this with my vegan friend, and she said it was “life-changing.”
- Gluten-Free Option: Swap regular graham crackers with gluten-free ones. Kinnikinnick brand works best. No other changes needed.
- Cookies and Cream Twist: Replace half the graham crackers with chocolate sandwich cookies (like Oreos). It adds a fun crunch and extra chocolate flavor.
Don’t be afraid to experiment. This cake is forgiving—I’ve added crushed pretzels, drizzled caramel, and even sprinkled sea salt on top. All were delicious.
Serving & Storage Suggestions
This cake is best served cold, straight from the fridge. The texture is like a creamy, dreamy icebox cake with that classic s’mores flavor. Here’s how to serve and store it:
- Serving temperature: Serve chilled. Cut into squares with a sharp knife, wiping the blade clean between cuts for neat slices.
- Presentation: Top with toasted mini marshmallows, a drizzle of melted chocolate, and a sprinkle of crushed graham crackers. A dollop of extra whipped cream on the side is never a bad idea.
- Complementary dishes: Pair with a glass of cold milk, a scoop of vanilla ice cream, or a cup of coffee. For a summer party, serve alongside fresh fruit salad or grilled peaches.
- Storage: Cover the dish tightly with plastic wrap or transfer leftovers to an airtight container. Store in the refrigerator for up to 5 days. The flavors actually get better on day 2 or 3 as the layers meld together.
- Freezing: You can freeze this cake for up to 2 months. Wrap the entire dish in plastic wrap, then foil. Thaw in the refrigerator overnight before serving. The texture might be slightly softer, but it’s still delicious.
- Reheating: No need to reheat—this is a cold dessert. If you want that campfire feel, pop individual slices in the microwave for 10 seconds to warm the chocolate slightly.
I’ve found that this cake is even better the next day. The graham crackers have fully softened, and the chocolate and marshmallow have melded into a fudgy layer. It’s like magic in a dish.
Nutritional Information & Benefits
Let’s be real—this is a treat, not a health food. But here’s a rough idea of what you’re working with per serving (based on 12 servings):
- Calories: Approximately 380-420
- Fat: 22g (13g saturated)
- Carbohydrates: 45g (30g sugar)
- Protein: 4g
- Fiber: 1g
- Sodium: 200mg
While it’s not low-calorie, there are a few bright spots. The heavy cream provides calcium and vitamin A, and the dark chocolate (if you use it) has antioxidants. Plus, it’s a great way to satisfy a sweet craving without baking a complicated cake. I like to serve smaller portions and pair it with fresh fruit for balance. Everything in moderation, right?
For dietary considerations: This recipe is not gluten-free (unless you use GF graham crackers), not dairy-free (unless you make substitutions), and contains common allergens like milk and wheat. Always check labels if you’re cooking for someone with allergies.
Conclusion
This Easy No-Bake S’mores Icebox Cake is the kind of dessert that feels like a hug in a dish. It’s simple enough for a weekday treat but impressive enough for a party. No oven, no stress, just pure s’mores joy. I love how forgiving it is—you can tweak it, swap ingredients, or add your own twist, and it always turns out amazing.
I hope you give this recipe a try. Whether you’re making it for a summer barbecue, a camping trip (without the campfire), or just because you need a little sweetness in your life, I promise it’ll become a favorite. Let me know in the comments how it turned out—did you add any fun variations? Did your family fight over the last slice? I’d love to hear your stories. And if you share it on social media, tag me so I can see your beautiful creation. Happy no-baking, friends!
Frequently Asked Questions
Can I make this s’mores icebox cake ahead of time?
Absolutely! In fact, it’s better made a day ahead. The graham crackers need at least 6 hours to soften, but overnight is ideal. Make it the night before your event, and you’ll have a stress-free dessert ready to go.
Can I use marshmallows instead of marshmallow fluff?
You can, but it won’t spread as easily. If you use mini marshmallows, just scatter them evenly over the chocolate layer. They won’t melt into the same creamy texture, but it’ll still taste great. For best results, stick with fluff.
How do I keep the graham crackers from getting too soggy?
The key is the chill time. If you let it sit for exactly 6 hours, the crackers will be soft but still have a little bite. Overnight, they become cake-like. If you prefer a firmer texture, reduce the chill time to 4 hours. I prefer overnight for that melt-in-your-mouth feel.
Can I use dark chocolate instead of milk chocolate?
Yes! Dark chocolate works beautifully and cuts the sweetness. I’ve used 70% cacao bars, and it gives the cake a more sophisticated flavor. Just make sure it’s a good-quality chocolate that melts well.
How long does this cake last in the fridge?
It stays fresh for up to 5 days in the refrigerator. Keep it covered tightly with plastic wrap. The texture will continue to soften, so it’s best within the first 3 days. It’s also freezer-friendly for up to 2 months.
Pin This Recipe!
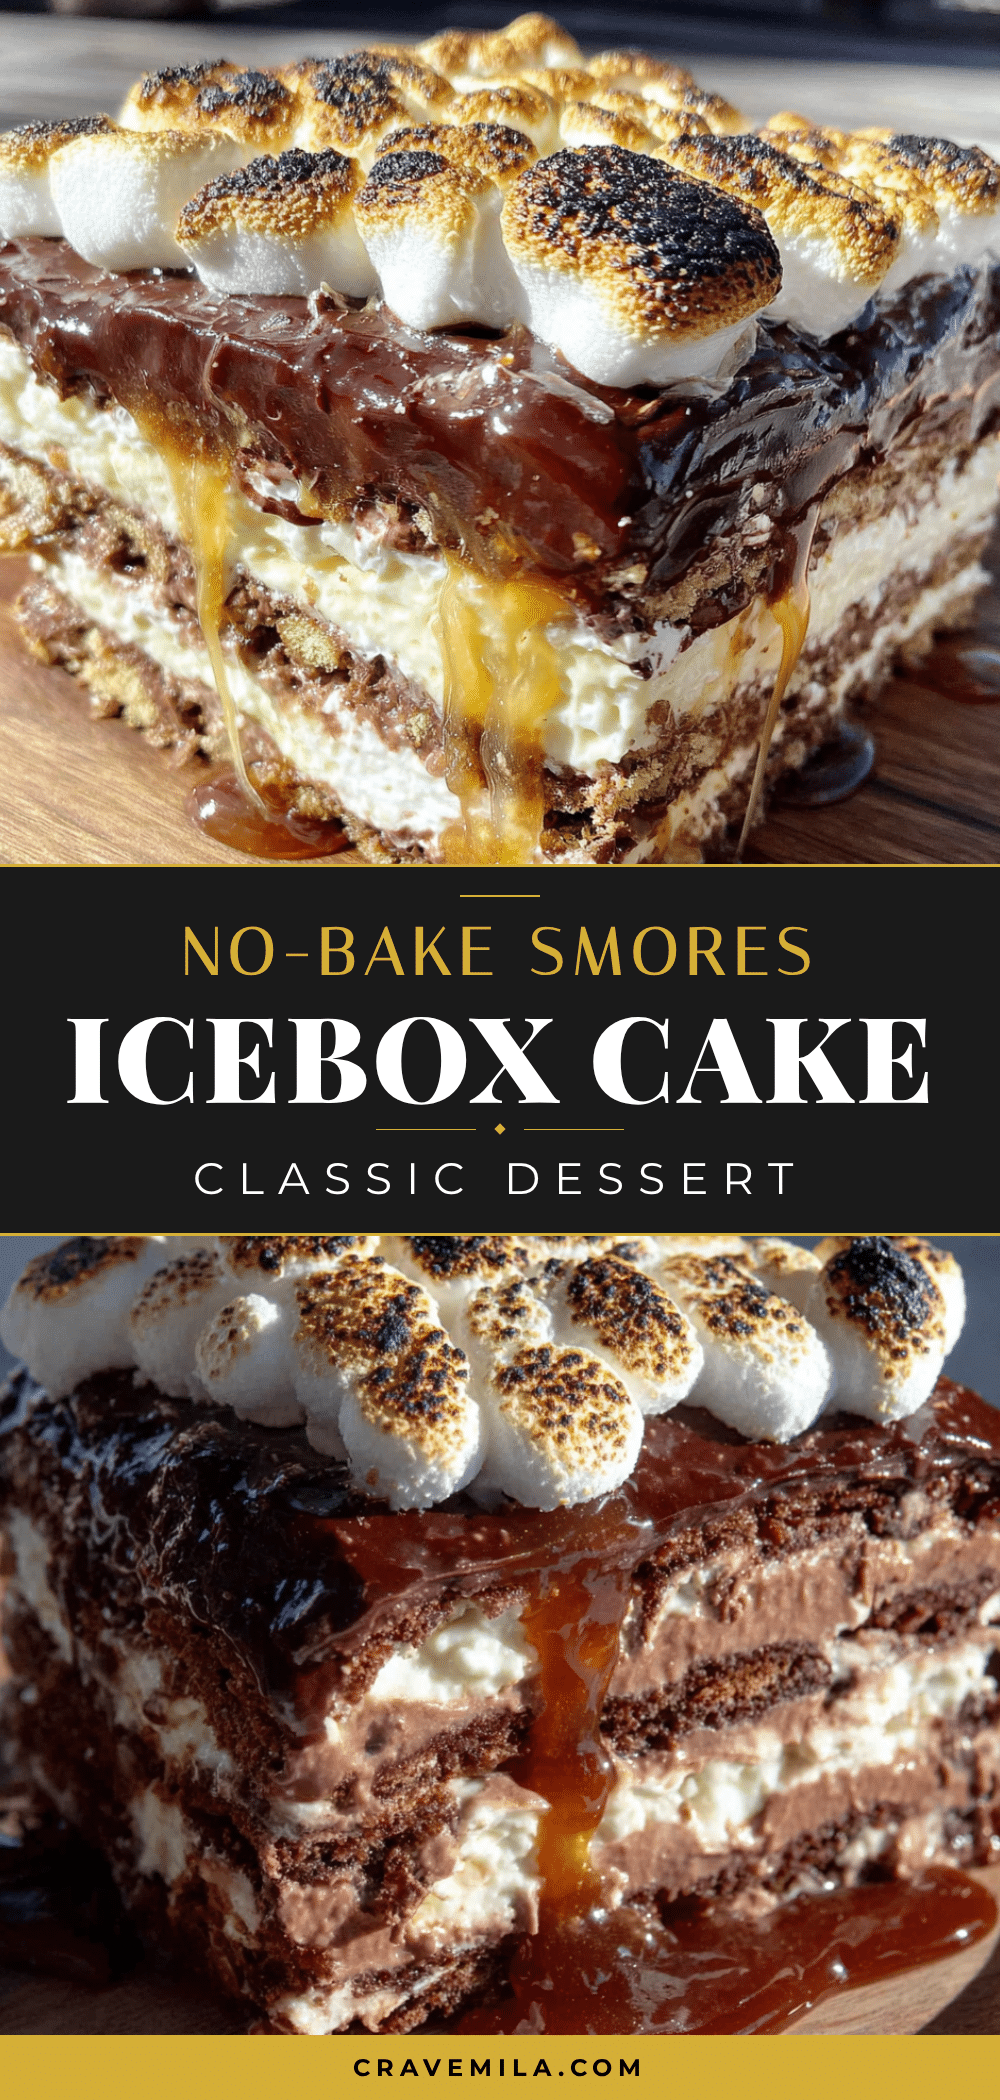
Easy No-Bake Smores Icebox Cake: Best Summer Dessert
This easy no-bake s’mores icebox cake is a happy accident turned into a go-to summer dessert. Layers of graham crackers, chocolate, marshmallow fluff, and whipped cream soften overnight into a creamy, campfire-inspired treat without turning on the oven.
- Prep Time: 15 minutes
- Cook Time: 0 minutes
- Total Time: 6 hours 15 minutes (includes chilling)
- Yield: 12 servings 1x
- Category: Dessert
- Cuisine: American
Ingredients
- 1 full box graham crackers (about 14–16 whole crackers)
- 6 regular-sized Hershey’s milk chocolate bars (1.55 oz each)
- 1 jar marshmallow fluff (7 oz)
- 2 cups heavy whipping cream (480 ml)
- 1/4 cup powdered sugar (30 g)
- 1 teaspoon vanilla extract (5 ml)
- 2 tablespoons butter (28 g), melted (optional, for base)
- 1 cup mini marshmallows (optional, for garnish)
Instructions
- Whip the cream: In a large chilled bowl, add 2 cups cold heavy whipping cream, 1/4 cup powdered sugar, and 1 teaspoon vanilla extract. Beat on medium-high speed until stiff peaks form. Set aside.
- Prepare the graham crackers: Break graham crackers into pieces that fit your dish. If using butter base, mix 2 tablespoons melted butter with about 1/2 cup crushed graham crackers and press into bottom of dish.
- Layer 1 – Graham crackers: Arrange a single layer of graham crackers at the bottom of a 9×13-inch dish.
- Layer 2 – Chocolate: Place chocolate bars evenly over the graham crackers, breaking into pieces if needed.
- Layer 3 – Marshmallow fluff: Warm marshmallow fluff in microwave for 10 seconds. Dollop over chocolate and spread gently.
- Layer 4 – Whipped cream: Spread half of the whipped cream over the marshmallow fluff.
- Repeat layers: Add another layer of graham crackers, then chocolate, then marshmallow fluff, then remaining whipped cream. Finish with a final layer of graham crackers on top.
- Chill: Cover tightly with plastic wrap and refrigerate for at least 6 hours, preferably overnight.
- Garnish and serve: Before serving, top with mini marshmallows and toast under broiler for 1-2 minutes. Serve cold.
Notes
Chill your bowl and beaters for fluffiest whipped cream. Don’t skip overnight chill for best texture. Warm marshmallow fluff for easy spreading. Use full-fat cream (at least 36% milk fat). Toast marshmallows carefully under broiler. Cake keeps up to 5 days in fridge or 2 months frozen.
Nutrition
- Serving Size: 1 slice (1/12 of cak
- Calories: 400
- Sugar: 30
- Sodium: 200
- Fat: 22
- Saturated Fat: 13
- Carbohydrates: 45
- Fiber: 1
- Protein: 4
Keywords: no-bake dessert, s'mores icebox cake, summer dessert, easy dessert, graham cracker cake, marshmallow fluff, chocolate dessert



