My neighbor wasn’t trying to impress anyone. I’d stopped by to borrow a ladder on a Tuesday afternoon, and the smell hit me before I even got through the screen door. Garlic, butter, and something impossibly savory—like the best restaurant kitchen in town had somehow moved into her modest ranch house. She shrugged when I asked what she was cooking. “Just chicken thighs. Nothing fancy.” But that golden, craggy crust told a different story entirely. I stood there in her entryway, ladder completely forgotten, watching her pull a tray of the crispiest chicken I’d ever seen out of her air fryer.
Let me tell you, I practically begged for the recipe. She laughed and scribbled it on a torn envelope while I tried not to drool on her counter. The secret, she said, wasn’t some fancy technique—it was patience with the coating and a little trick with Parmesan that she’d figured out during a late-night cooking experiment. I mean, honestly, that’s how the best recipes happen, right? When you’re just messing around in the kitchen and stumble onto something magical.
That first batch I made at home? Total disaster. I rushed the coating, the garlic burned, and the chicken came out soggy instead of crispy. But I called her up, she talked me through it, and the second attempt was pure gold. Maybe you’ve been there—that moment when a simple recipe should work but just doesn’t, and you’re convinced you’re doing something wrong. Turns out, it’s all about a few small details. This crispy garlic Parmesan chicken thighs recipe has become my go-to for busy weeknights, lazy Sundays, and everything in between. It’s the kind of meal that makes you close your eyes after the first bite and forget you ever ordered takeout.
Why You’ll Love This Recipe
Look, I’ve tested a lot of chicken recipes in my time. Some are good, some are great, and some make you question why you ever bothered with delivery. This one falls firmly in the last category. After tweaking my neighbor’s original method through at least a dozen trials, I can confidently say this is the best air fryer chicken thighs recipe I’ve ever made. Here’s why it works:
- Quick & Easy: From prep to plate in about 30 minutes. Perfect for those nights when you need dinner on the table fast and don’t want to think too hard about it.
- Simple Ingredients: You probably have most of this stuff in your kitchen right now. No weird specialty items or expensive cuts of meat—just good, honest ingredients that work together beautifully.
- Perfect for Busy Weeknights: This recipe was born from a Tuesday afternoon, and it’s been saving my dinner routine ever since. It’s reliable, forgiving, and always delivers.
- Crowd-Pleaser: I’ve served these crispy garlic Parmesan chicken thighs to picky kids, skeptical in-laws, and friends who “don’t really like chicken.” Every single person went back for seconds.
- Unbelievably Crispy: The air fryer does something magical here. That coating gets shatteringly crisp without being greasy, and the meat stays juicy and tender underneath. It’s the best of both worlds.
What makes this recipe different from the rest? It’s the technique of toasting the Parmesan and panko together before coating the chicken. Most recipes just dump everything in a bowl and hope for the best. But taking that extra few minutes to brown the coating ingredients in a dry pan? That’s the game-changer. It creates a crust that’s deeply golden, incredibly crunchy, and packed with nutty, savory flavor. This isn’t just another version of crispy chicken—it’s the version you’ll come back to again and again.
What Ingredients You Will Need
This recipe uses simple, wholesome ingredients to deliver bold flavor and satisfying texture without the fuss. Most of these are pantry staples, which makes this dish perfect for spontaneous cooking sessions. Here’s what you’ll need:
For the Chicken
- 6 bone-in, skin-on chicken thighs (about 2.5 lbs total) — Bone-in thighs stay juicier during air frying. I prefer skin-on for maximum crispiness, but you can use skinless if needed.
- 2 tablespoons olive oil — Helps the coating stick and promotes browning. Avocado oil works great too.
- 1 teaspoon salt — I use fine sea salt for even distribution.
- ½ teaspoon black pepper — Freshly ground is always better.
- 1 teaspoon garlic powder — Adds flavor throughout, not just on the surface.
For the Crispy Coating
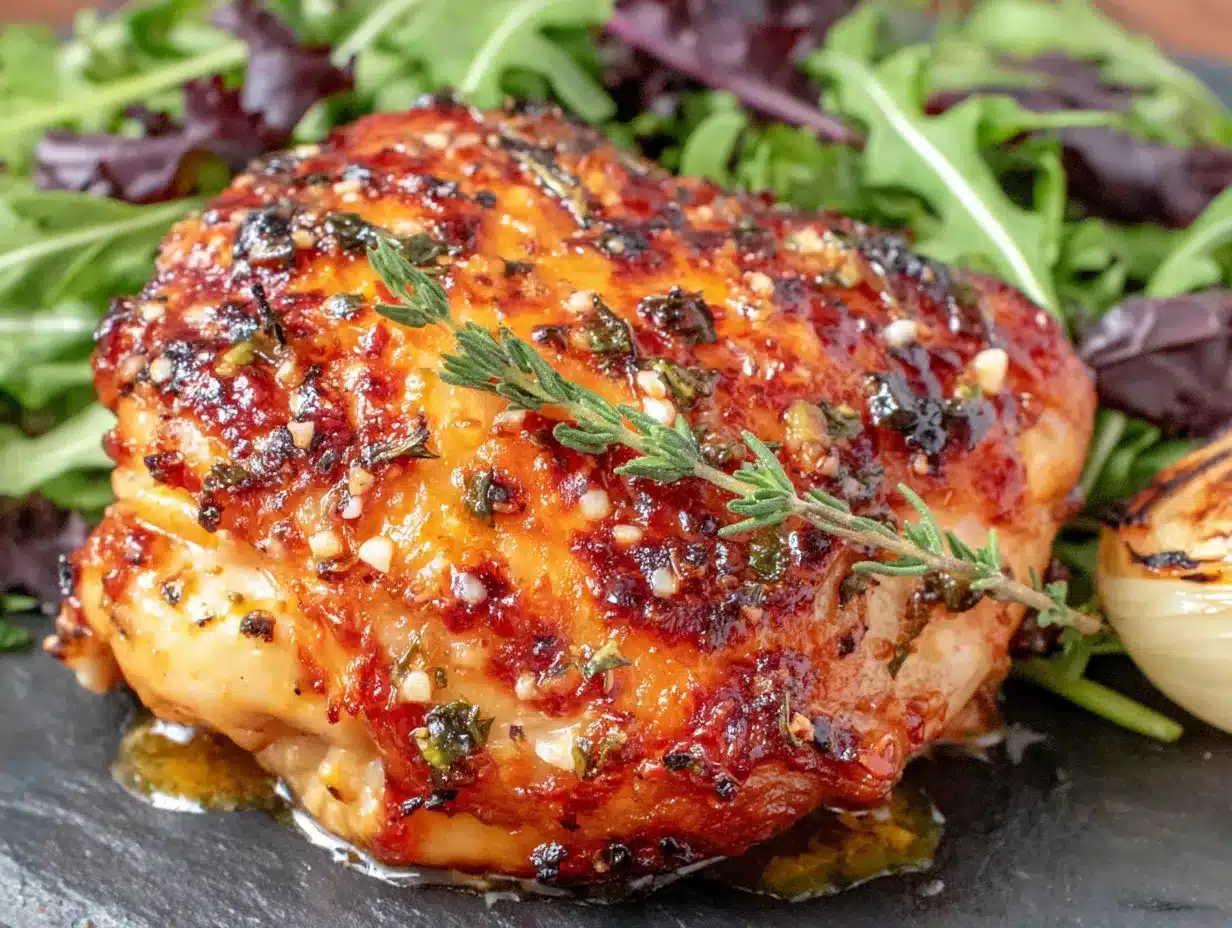
- 1 cup panko breadcrumbs — These give you that ultra-crispy texture. Regular breadcrumbs won’t work as well here—they’re too fine and don’t get as crunchy.
- ½ cup freshly grated Parmesan cheese — Please, please don’t use the stuff in the green can. Freshly grated Parmesan melts and crisps differently. It’s worth the extra minute of grating.
- 4 cloves garlic, minced — Fresh garlic is non-negotiable here. The pre-minced stuff in jars has a different flavor that can turn bitter during cooking.
- 2 tablespoons unsalted butter — Adds richness and helps the coating brown beautifully.
- 1 teaspoon dried Italian seasoning — A blend of oregano, basil, rosemary, and thyme works perfectly.
- ½ teaspoon red pepper flakes (optional) — Adds a gentle kick without overwhelming the dish.
For Garnish (Optional but Recommended)
- 2 tablespoons fresh parsley, chopped — Adds color and freshness.
- Extra grated Parmesan for serving — Because you can never have too much cheese.
- Lemon wedges — A squeeze of lemon brightens everything up beautifully.
Ingredient Tip: I’ve tested this recipe with both boneless and bone-in thighs. Boneless cook faster (about 15-18 minutes), but bone-in gives you that extra juiciness and richer flavor. For the crispiest results, stick with bone-in, skin-on. Also, if you’re using a different brand of air fryer, cooking times might vary slightly—start checking at the 20-minute mark just to be safe.
Equipment Needed
You don’t need a professional kitchen to make this recipe work. Here’s what you’ll need:
- Air Fryer — Any model will work. I use a 5.8-quart basket-style air fryer, but even a smaller one works if you cook in batches. Just don’t overcrowd the basket.
- Large Mixing Bowl — For combining your coating ingredients and tossing the chicken.
- Small Skillet — For toasting the panko and garlic mixture. A non-stick pan works best here.
- Tongs — For turning the chicken without messing up the coating.
- Meat Thermometer — This is non-negotiable for me. Chicken thighs need to reach 165°F internally, and guessing just doesn’t cut it.
- Cutting Board and Knife — For mincing garlic and chopping parsley.
- Paper Towels — For patting the chicken dry. This step is more important than you think.
- Baking Sheet (optional) — If you need to keep batches warm while the rest cook, place them on a baking sheet in a 200°F oven.
Budget-Friendly Tip: Don’t have an air fryer yet? You can make this recipe in a conventional oven at 400°F for about 30-35 minutes. Place the chicken on a wire rack set over a baking sheet for maximum air circulation. It won’t be quite as crispy as the air fryer version, but it’s still delicious.
Preparation Method
Alright, let’s get cooking. I’ve broken this down step by step so you don’t make the same mistakes I did that first time.
- Prep the chicken (5 minutes). Pat the chicken thighs dry with paper towels. This is crucial—moisture is the enemy of crispiness. Season both sides with salt, pepper, and garlic powder. Set aside while you prepare the coating.
- Toast the coating mixture (5 minutes). Heat a small skillet over medium heat. Add the butter and let it melt completely. Toss in the minced garlic and cook for about 30 seconds until fragrant—don’t let it burn, or it’ll turn bitter. Add the panko breadcrumbs and stir constantly for 2-3 minutes until they turn golden brown. Remove from heat and stir in the Parmesan cheese, Italian seasoning, and red pepper flakes if using. The cheese will melt slightly and coat the breadcrumbs. Let this mixture cool for a couple of minutes.
- Coat the chicken (5 minutes). Drizzle the olive oil over the seasoned chicken thighs and toss to coat. Now, here’s the trick—don’t just dump the coating on top. Take each thigh and press the coating mixture firmly onto both sides. I mean really press it in. The oil helps everything stick, but you want that coating to be part of the chicken, not just sitting on top of it.
- Preheat the air fryer (3 minutes). Set your air fryer to 375°F and let it preheat for about 3 minutes. This step makes a bigger difference than you’d think. Starting with a hot air fryer gives you that immediate sizzle that creates a crispy crust.
- Arrange the chicken in the basket (2 minutes). Place the coated chicken thighs in the air fryer basket in a single layer. Don’t overcrowd—they need space for the hot air to circulate. If you have to cook in batches, that’s fine. I usually do 3 thighs at a time in my 5.8-quart basket.
- Air fry the chicken (22-25 minutes). Cook at 375°F for 12 minutes. Flip the chicken carefully using tongs—try not to knock off the coating. Cook for another 10-13 minutes. The chicken is done when the internal temperature reaches 165°F at the thickest part (avoiding the bone). The coating should be deep golden brown and crispy to the touch.
- Rest and garnish (5 minutes). Let the chicken rest in the air fryer basket (turned off) for 2-3 minutes. This helps the juices redistribute. Transfer to a serving plate, sprinkle with fresh parsley and extra Parmesan, and serve with lemon wedges.
Sensory Cue: When the chicken is done, you should hear a satisfying crunch when you tap the coating with a fork. The meat should be opaque all the way through, and the juices should run clear. If you see any pink near the bone, pop it back in for another 3-4 minutes.
Troubleshooting: If your coating isn’t getting crispy enough, try spraying the chicken lightly with cooking spray before air frying. This helps the breadcrumbs brown more evenly. Also, make sure you’re not using too much oil in the coating mixture—it can make things soggy instead of crispy.
Cooking Tips & Techniques
I’ve learned a few things the hard way so you don’t have to. Here are my best tips for perfect crispy garlic Parmesan chicken thighs every time:
Patience is key with the coating. That first time I made this recipe, I was in a rush and skipped toasting the panko mixture. Big mistake. The coating came out pale and soft instead of golden and crunchy. Taking those extra few minutes to toast the breadcrumbs and garlic in butter makes all the difference. It’s like giving your coating a head start on flavor and texture.
Don’t skip the resting time. I know you’re hungry. I get it. But letting the chicken rest for even 2-3 minutes after cooking allows the juices to settle. If you cut into it right away, all those delicious juices run out onto the plate, and you’re left with dry meat. Trust me on this one.
Temperature matters more than time. Every air fryer runs a little differently. Your 375°F might run hot or cold compared to mine. That’s why a meat thermometer is your best friend. Chicken thighs are done at 165°F, but I actually prefer pulling them at 160°F and letting carryover cooking bring them up to temp. They stay juicier that way.
Batch cooking strategy. If you’re cooking for a crowd, preheat your oven to 200°F. As each batch finishes in the air fryer, transfer the chicken to a wire rack set over a baking sheet in the oven. This keeps them warm and crispy without steaming. I’ve kept chicken warm this way for up to 30 minutes with no loss of quality.
The flip is crucial. Halfway through cooking, flip the chicken carefully. Use tongs and be gentle—the coating is delicate at this stage. If you rush the flip, you’ll end up with half the coating stuck to the air fryer basket. Ask me how I know.
Variations & Adaptations
One of the best things about this recipe is how easily it adapts. Here are some variations I’ve tried and loved:
Spicy Buffalo Version: Toss the cooked chicken in your favorite buffalo sauce (about ¼ cup) right after it comes out of the air fryer. The coating stays crispy for a minute or two, so serve immediately. I like to drizzle ranch dressing over the top and serve with celery sticks.
Herb & Lemon Variation: Add the zest of one lemon and 2 tablespoons of fresh chopped rosemary to the coating mixture. Skip the red pepper flakes. Serve with extra lemon wedges and a sprinkle of fresh dill. This version is bright and fresh—perfect for spring dinners.
Gluten-Free Option: Substitute the panko breadcrumbs with gluten-free panko or crushed pork rinds. I’ve used both, and honestly, the pork rind version is incredibly crispy—almost like fried chicken. Just make sure your Parmesan is certified gluten-free if that’s a concern.
Dairy-Free Adaptation: Use vegan butter or olive oil instead of regular butter in the coating mixture. Nutritional yeast (about 3 tablespoons) can replace the Parmesan for that cheesy, umami flavor. It’s not exactly the same, but it’s surprisingly good.
Oven-Baked Version: Preheat your oven to 400°F. Place the coated chicken on a wire rack set over a baking sheet. Bake for 30-35 minutes, flipping halfway through. The crust won’t be quite as shatteringly crispy as the air fryer version, but it’s still delicious and perfect for feeding a crowd.
Serving & Storage Suggestions
These crispy garlic Parmesan chicken thighs are incredibly versatile. Here’s how I like to serve and store them:
Serving Temperature: Serve hot, straight from the air fryer. The coating is at its crispiest within the first 10 minutes of cooking. If you need to hold them, keep them on a wire rack in a warm oven—never covered, or the steam will soften the crust.
What to Serve With: These chicken thighs pair beautifully with simple sides. I love them with a crisp green salad dressed with lemon vinaigrette, roasted asparagus or broccoli, garlic mashed potatoes, or even just a pile of buttered egg noodles. For a low-carb option, serve with cauliflower rice or zucchini noodles.
Storage Instructions: Store leftover chicken in an airtight container in the refrigerator for up to 4 days. The coating will soften over time, but the flavor remains excellent. To reheat, place the chicken back in the air fryer at 350°F for 3-4 minutes until heated through and crispy again. You can also reheat in a 375°F oven for 8-10 minutes. Avoid the microwave—it turns the coating into a sad, soggy mess.
Freezer Instructions: These freeze surprisingly well. Let the cooked chicken cool completely, then wrap each piece individually in plastic wrap and place in a freezer bag. Freeze for up to 3 months. To reheat, thaw overnight in the refrigerator, then air fry at 350°F for 5-6 minutes until hot and crispy.
Flavor Development: Honestly, these are best the day they’re made. The coating just doesn’t have the same crunch after sitting in the fridge. But the flavor? It actually gets better overnight as the garlic and Parmesan meld together. If you’re meal-prepping, consider cooking the chicken plain and adding the coating fresh before serving.
Nutritional Information & Benefits
Here’s the nutritional breakdown for one serving (one chicken thigh with coating):
- Calories: Approximately 380
- Protein: 28g
- Fat: 26g (including 9g saturated fat)
- Carbohydrates: 8g
- Fiber: 1g
- Sugar: 1g
- Sodium: 520mg
Health Benefits: Chicken thighs are a great source of lean protein, which supports muscle maintenance and keeps you feeling full longer. They’re also rich in B vitamins, particularly B6 and B12, which are important for energy metabolism. The garlic in this recipe isn’t just for flavor—it contains allicin, a compound with anti-inflammatory properties. Parmesan cheese adds calcium and protein, though it’s also higher in sodium, so keep that in mind if you’re watching your salt intake.
Dietary Considerations: This recipe is naturally low-carb (about 8g per serving) and can be made gluten-free and dairy-free with the substitutions mentioned above. It’s not suitable for a vegan or vegetarian diet, but you could try the coating on cauliflower steaks or tofu for a plant-based version.
Personal Note: I love that this recipe feels indulgent while still being relatively balanced. It’s not diet food, but it’s not a calorie bomb either. For me, that’s the sweet spot—food that tastes like a treat but fits into a normal, healthy eating pattern.
Conclusion
This crispy garlic Parmesan chicken thighs recipe has become a staple in my kitchen for good reason. It’s the kind of dish that makes you look like a hero with minimal effort—crispy, golden, packed with flavor, and ready in under 30 minutes. Whether you’re feeding a hungry family on a Tuesday night or impressing guests at a casual dinner party, this recipe delivers every single time.
I love that it started from a completely unassuming moment—my neighbor making dinner on a random Tuesday, not trying to impress anyone. That’s the beauty of great recipes, isn’t it? They come from real life, from real people, and they work because someone figured out exactly what makes them special. This one is special because of that toasted panko-Parmesan coating, the juicy meat underneath, and the way the garlic fills your whole kitchen with the most incredible smell.
I’d love to hear how yours turns out. Did you try any of the variations? Did you discover a new trick that made it even better? Drop a comment below and let me know—I’m always looking for new ideas to try. And if you loved this recipe as much as I do, share it with a friend who needs a reliable weeknight dinner in their life. Happy cooking!
Frequently Asked Questions
Can I use chicken breasts instead of thighs?
Absolutely, but you’ll need to adjust the cooking time. Boneless, skinless chicken breasts cook faster—about 12-15 minutes at 375°F. Check for an internal temperature of 165°F. Keep in mind that breasts are leaner and can dry out more easily, so watch them closely. I recommend pounding them to an even thickness first for consistent cooking.
Why isn’t my coating getting crispy?
This usually happens for one of three reasons: the chicken wasn’t patted dry enough, the air fryer basket was overcrowded, or the coating wasn’t toasted before applying. Make sure you’re patting the chicken completely dry with paper towels, leaving space between pieces in the basket, and toasting the panko mixture in butter until golden before coating the chicken.
Can I make these ahead of time for a party?
You can, but the coating is best fresh. If you need to prep ahead, I recommend coating the chicken and refrigerating it (uncovered) for up to 4 hours before cooking. This actually helps the coating adhere better. Cook just before serving, and keep warm on a wire rack in a 200°F oven for up to 30 minutes.
What’s the best way to reheat leftovers?
The air fryer is your best bet. Reheat at 350°F for 3-4 minutes until the chicken is hot and the coating crisps back up. An oven at 375°F for 8-10 minutes works too. Whatever you do, avoid the microwave—it will turn that beautiful crispy coating into something sad and soggy.
Can I use pre-shredded Parmesan cheese?
I really wouldn’t recommend it. Pre-shredded cheese is coated with anti-caking agents that prevent it from melting and crisping properly. It can also turn grainy when toasted. For the best results, buy a block of Parmesan and grate it yourself. It takes an extra minute, but the difference in texture and flavor is huge.
Pin This Recipe!
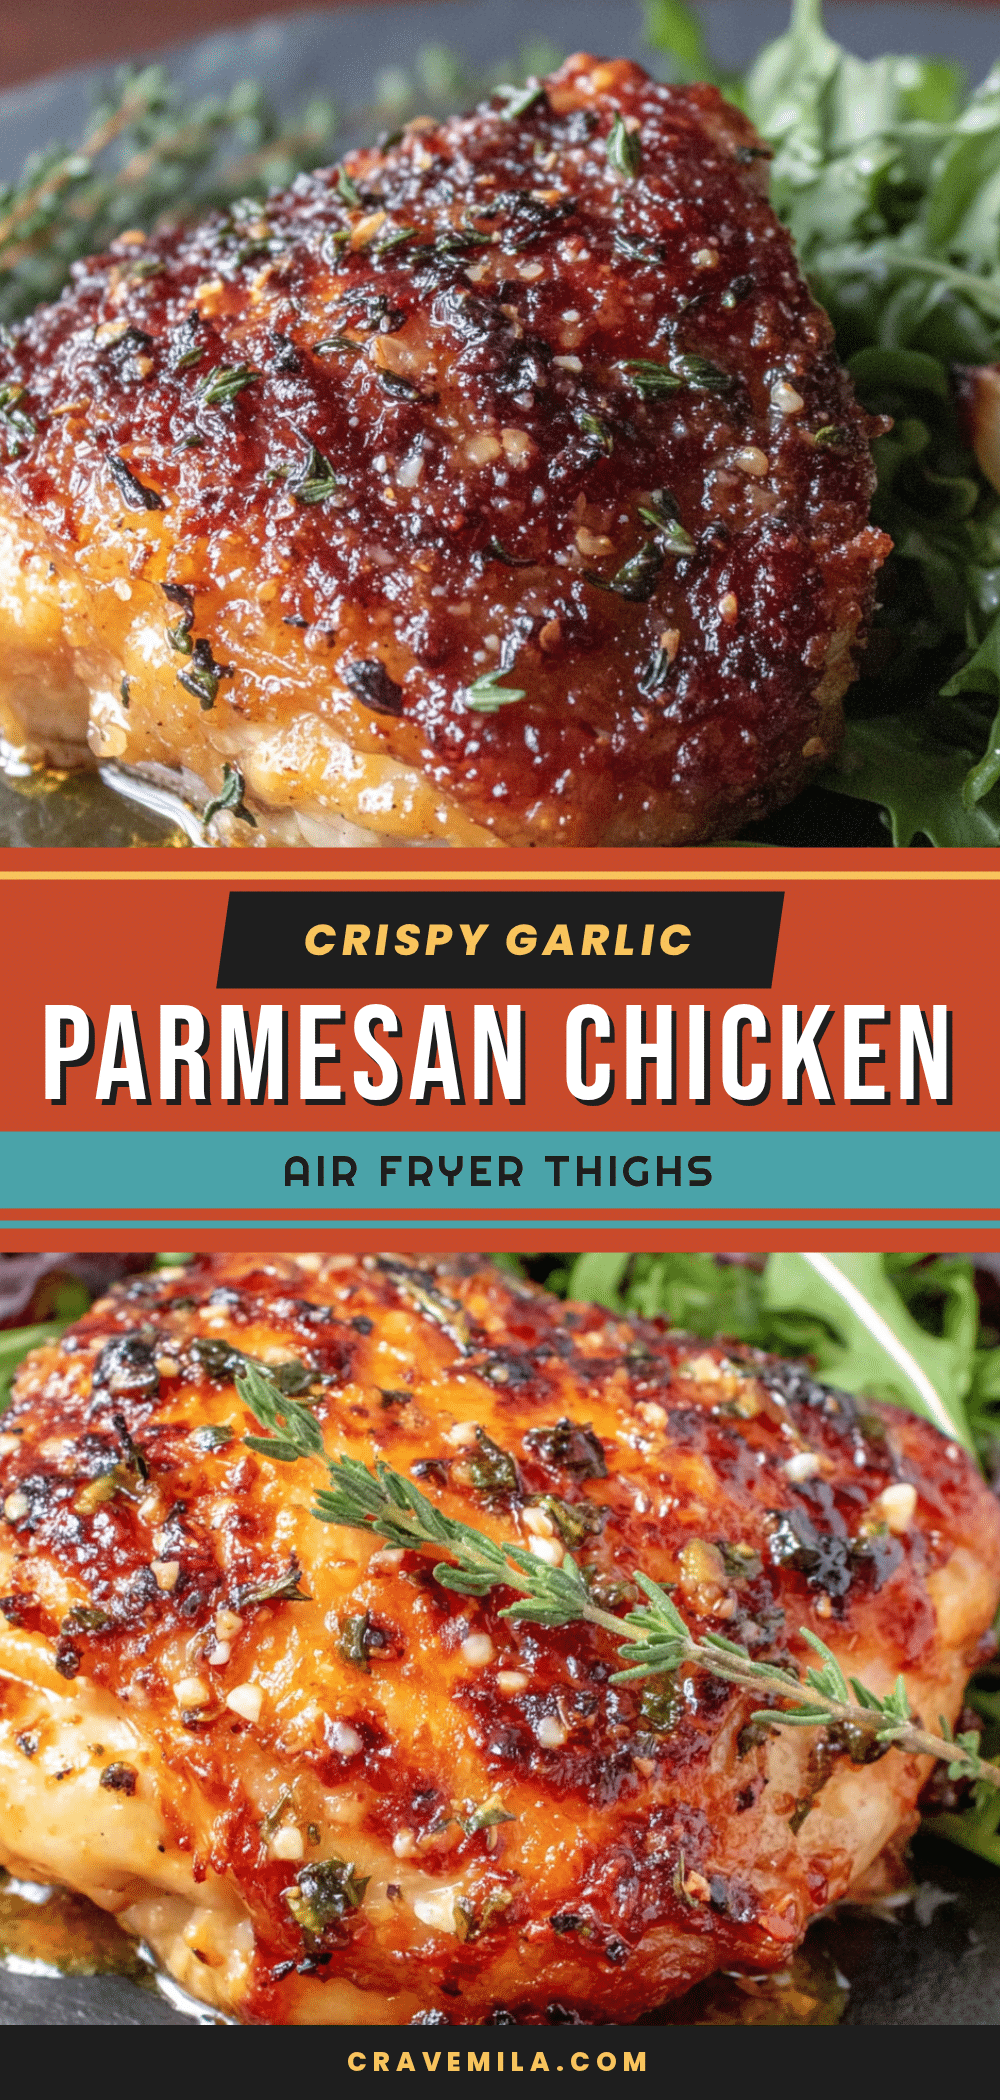
Crispy Garlic Parmesan Chicken Thighs (Easy Air Fryer Recipe)
Crispy, golden air fryer chicken thighs with a toasted garlic Parmesan panko coating. Ready in about 30 minutes, this easy recipe delivers juicy meat and a shatteringly crunchy crust that will make you forget all about takeout.
- Prep Time: 15 minutes
- Cook Time: 25 minutes
- Total Time: 40 minutes
- Yield: 6 servings 1x
- Category: Main Course
- Cuisine: American
Ingredients
- 6 bone-in, skin-on chicken thighs (about 2.5 lbs total)
- 2 tablespoons olive oil
- 1 teaspoon salt
- ½ teaspoon black pepper
- 1 teaspoon garlic powder
- 1 cup panko breadcrumbs
- ½ cup freshly grated Parmesan cheese
- 4 cloves garlic, minced
- 2 tablespoons unsalted butter
- 1 teaspoon dried Italian seasoning
- ½ teaspoon red pepper flakes (optional)
- 2 tablespoons fresh parsley, chopped (for garnish)
- Extra grated Parmesan for serving (optional)
- Lemon wedges (for serving)
Instructions
- Prep the chicken (5 minutes). Pat the chicken thighs dry with paper towels. Season both sides with salt, pepper, and garlic powder. Set aside.
- Toast the coating mixture (5 minutes). Heat a small skillet over medium heat. Add the butter and let it melt completely. Add the minced garlic and cook for about 30 seconds until fragrant. Add the panko breadcrumbs and stir constantly for 2-3 minutes until golden brown. Remove from heat and stir in the Parmesan cheese, Italian seasoning, and red pepper flakes if using. Let cool for a couple of minutes.
- Coat the chicken (5 minutes). Drizzle the olive oil over the seasoned chicken thighs and toss to coat. Press the coating mixture firmly onto both sides of each thigh.
- Preheat the air fryer (3 minutes). Set your air fryer to 375°F and let it preheat for about 3 minutes.
- Arrange the chicken in the basket (2 minutes). Place the coated chicken thighs in the air fryer basket in a single layer without overcrowding. Cook in batches if needed.
- Air fry the chicken (22-25 minutes). Cook at 375°F for 12 minutes. Flip the chicken carefully using tongs. Cook for another 10-13 minutes until the internal temperature reaches 165°F at the thickest part and the coating is deep golden brown and crispy.
- Rest and garnish (5 minutes). Let the chicken rest in the air fryer basket (turned off) for 2-3 minutes. Transfer to a serving plate, sprinkle with fresh parsley and extra Parmesan, and serve with lemon wedges.
Notes
Pat chicken dry thoroughly for maximum crispiness. Toast the panko mixture in butter before coating for best texture. Use a meat thermometer to ensure chicken reaches 165°F. Let chicken rest after cooking to keep juices inside. For oven-baked version, cook at 400°F for 30-35 minutes on a wire rack over a baking sheet.
Nutrition
- Serving Size: 1 chicken thigh with
- Calories: 380
- Sugar: 1
- Sodium: 520
- Fat: 26
- Saturated Fat: 9
- Carbohydrates: 8
- Fiber: 1
- Protein: 28
Keywords: air fryer chicken thighs, crispy chicken, garlic parmesan chicken, easy weeknight dinner, chicken thighs recipe



