I wasn’t expecting baking advice from my accountant, but there I was, sorting through a pile of receipts in his cramped office, listening to him describe exactly how to make pumpkin pie bars with a gingersnap crust. Frank—that’s his name, a man who wears sweater vests and drinks black coffee from a thermos—had somehow turned our tax appointment into a full-blown recipe consultation. “The secret,” he said, not looking up from my W-2s, “is to toast the gingersnaps first. And don’t you dare use a store-bought crust.” I had walked in dreading the conversation about my quarterly estimates, and I walked out with the blueprint for what would become my most requested fall dessert.
Honestly, I almost forgot the recipe. I scribbled it on the back of an envelope—”Frank’s Pumpkin Bars”—and shoved it in my bag. It sat there for two weeks until I found it while looking for a parking receipt. Let me tell you, the moment I read his note about adding a pinch of black pepper to the filling, I knew this wasn’t your typical pumpkin bar. I made them that same afternoon, and the smell alone convinced me Frank had been holding out on me all these years. Maybe you’ve been there—finding a recipe from the most unexpected person and realizing they’ve been hiding a secret talent.
The first batch came out perfectly, but the second batch? I forgot the eggs. That was a mess, let me tell you. But that first perfect pan of pumpkin pie bars with that crunchy, spicy gingersnap crust? It was the kind of dessert that makes you close your eyes after the first bite. I’ve been making these perfect pumpkin pie bars every fall since, and they’ve never let me down. Frank still asks about them every time I see him. “Made those bars yet?” he says, and I just smile.
Why You’ll Love This Recipe
These pumpkin pie bars are everything you want in a fall dessert and nothing you don’t. I’ve tested this recipe at least a dozen times—sometimes on purpose, sometimes because I got distracted and needed a do-over—and I can tell you with confidence that this is the version you want in your life. Here’s why these bars stand out from the crowd:
- Quick & Easy: These bars come together in about 45 minutes of active time, and they’re way easier than wrestling with a traditional pie crust. No rolling, no crimping, no drama.
- Simple Ingredients: You probably have most of these in your pantry already. The gingersnaps might be the only thing you need to grab, and honestly, they’re worth the trip.
- Perfect for Fall Gatherings: Whether it’s Thanksgiving, a potluck, or just a cozy Sunday afternoon, these bars travel well and feed a crowd without the fuss of slicing a pie.
- Crowd-Pleaser: I’ve served these to kids, adults, and that one relative who claims they don’t like pumpkin. Every single person went back for seconds. Every single one.
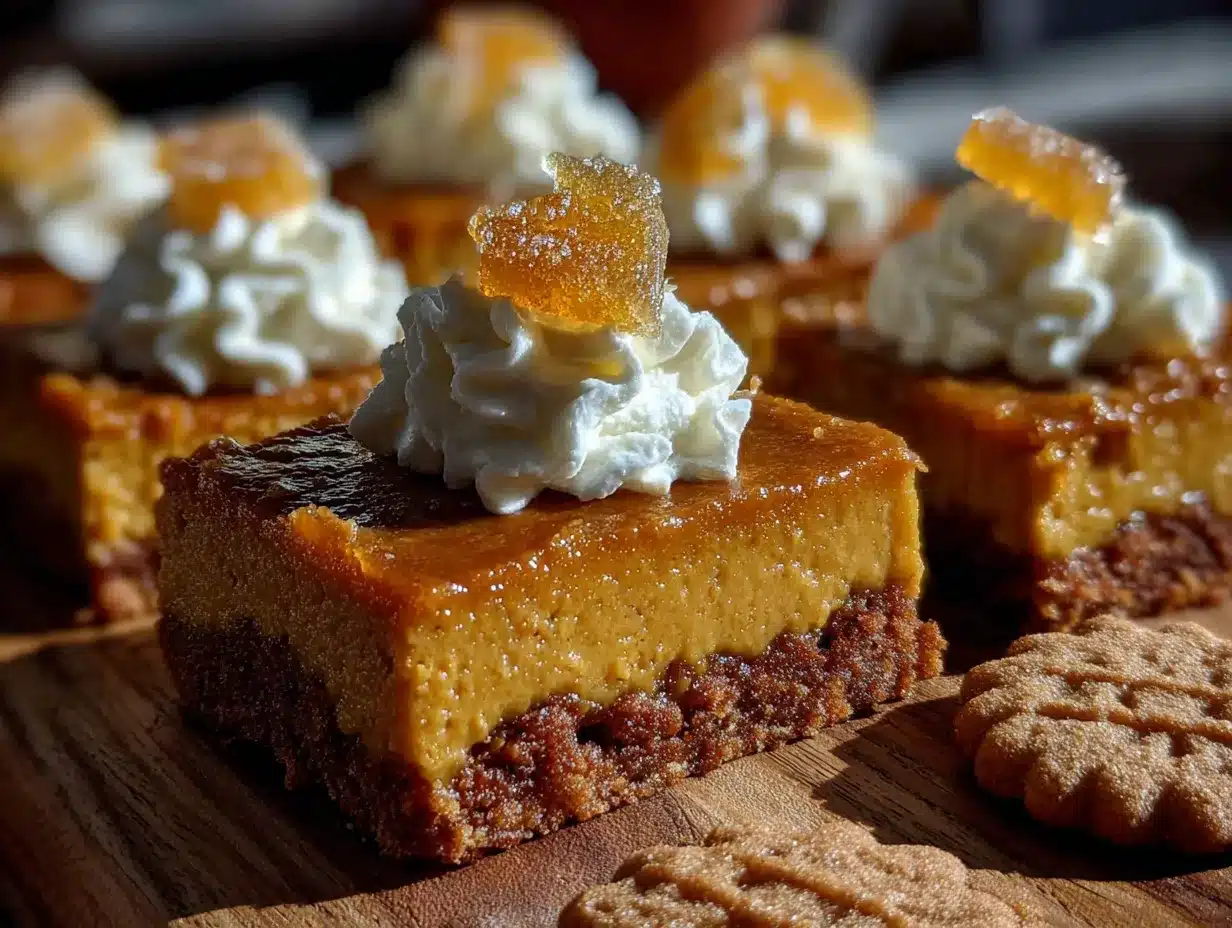
- Unbelievably Delicious: The combination of the spicy, crunchy gingersnap crust with the silky, spiced pumpkin filling is next-level comfort food. It’s like pumpkin pie and gingerbread had a baby, and that baby is perfect.
What makes this recipe different from all the other pumpkin bar recipes out there? It’s the crust, honestly. Most recipes use a graham cracker crust, which is fine, but it doesn’t bring the same warmth and complexity that gingersnaps do. The molasses and ginger in the cookies complement the pumpkin spices in a way that feels intentional, not accidental. Plus, I’ve figured out the exact ratio of filling to crust so you get a perfect bite every time—not too thick, not too thin, just right.
This isn’t just another pumpkin dessert. It’s the kind that makes you close your eyes after the first bite. It’s comfort food reimagined—faster, easier, but with the same soul-soothing satisfaction as a slice of homemade pie. Perfect for impressing guests without stress, or turning a simple fall evening into something memorable.
What Ingredients You Will Need
This recipe uses simple, wholesome ingredients to deliver bold flavor and satisfying texture without the fuss. Most of these are pantry staples, especially if you’re a fall baking enthusiast like me. Let me walk you through what you’ll need and why each ingredient matters.
For the Gingersnap Crust
- 2 cups (about 8 ounces) gingersnap cookies, finely crushed — I recommend Nabisco or Anna’s Ginger Thins for consistent texture. You want a fine, sand-like crumb. A food processor makes this easy, but a rolling pin and a zip-top bag work too.
- 6 tablespoons (85 grams) unsalted butter, melted — Use real butter here, not margarine. It binds the crust and adds richness that you can taste. Let it cool slightly before mixing.
- 2 tablespoons (25 grams) granulated sugar — This adds a touch of sweetness and helps the crust hold together. Brown sugar works too, but it makes the crust slightly softer.
- 1/4 teaspoon salt — Balances the sweetness and enhances the ginger flavor. Don’t skip it.
For the Pumpkin Filling
- 1 can (15 ounces) pumpkin puree — Not pumpkin pie filling. Make sure you grab pure pumpkin puree. Libby’s is my go-to for consistent results.
- 1 can (14 ounces) sweetened condensed milk — This is what gives the filling that silky, creamy texture without needing to cook a custard. Eagle Brand is reliable.
- 2 large eggs, room temperature — Room temperature eggs blend more smoothly into the filling. If you forgot to take them out, place them in a bowl of warm water for 5 minutes.
- 1 teaspoon vanilla extract — Pure vanilla extract, not imitation. It adds depth to the spices.
- 1 1/2 teaspoons ground cinnamon — The backbone of pumpkin spice. Use fresh cinnamon for the best flavor.
- 1 teaspoon ground ginger — This echoes the gingersnap crust and ties the whole dessert together.
- 1/2 teaspoon ground nutmeg — Freshly grated is ideal, but pre-ground works fine.
- 1/4 teaspoon ground cloves — A little goes a long way. It adds that classic pumpkin pie warmth.
- 1/4 teaspoon black pepper — This is Frank’s secret ingredient. Trust me on this. It doesn’t make the filling spicy; it just enhances all the other flavors and adds a subtle warmth you can’t quite identify.
- 1/4 teaspoon salt — Essential for balancing sweetness and bringing out the spices.
For the Optional Topping
- 1 cup (240 ml) heavy cream — For whipped cream. Cold cream whips up better.
- 2 tablespoons (15 grams) powdered sugar — Adds sweetness without grittiness.
- 1/2 teaspoon vanilla extract — For flavor.
- Crushed gingersnaps, for garnish — Because more crunch is always a good idea.
Substitution Guidance: If you need a dairy-free option, use coconut oil instead of butter in the crust and full-fat coconut milk in place of the sweetened condensed milk—though note that the texture will be slightly less creamy. For a gluten-free version, use gluten-free gingersnaps. I’ve tried both, and they work surprisingly well.
Equipment Needed
You don’t need a fancy kitchen to make these perfect pumpkin pie bars. Here’s what you’ll need, along with some tips from my own trial and error.
- 9×13-inch baking pan — This is the sweet spot for these bars. A glass or ceramic pan works best because it distributes heat evenly. If you only have metal, reduce the baking temperature by 25°F to prevent over-browning.
- Food processor or rolling pin — A food processor makes quick work of crushing the gingersnaps, but a rolling pin and a zip-top bag work just fine. I’ve done both, and honestly, the rolling pin method is oddly satisfying.
- Medium mixing bowl — For the crust ingredients.
- Large mixing bowl — For the pumpkin filling.
- Whisk — A good whisk ensures a smooth, lump-free filling. A hand mixer works too, but whisking by hand is easier to control.
- Measuring cups and spoons — Accurate measurements matter here, especially for the spices.
- Rubber spatula — For scraping every last bit of filling into the pan. Waste not, want not.
- Parchment paper — Line your pan with parchment paper, leaving some overhang on the sides. This makes lifting the bars out a breeze. I learned this the hard way after struggling to get the first batch out in one piece.
- Cooling rack — Essential for even cooling. If you don’t have one, you can use the stovetop grates, but a rack is better.
Budget-Friendly Tip: You don’t need a fancy food processor. A sturdy zip-top bag and a heavy skillet or rolling pin will crush those gingersnaps just fine. And if you don’t have a 9×13 pan, an 8×8 pan works—just adjust the baking time and expect thicker bars.
Preparation Method
Let me walk you through this step by step. I’ve made these bars so many times that I could do it in my sleep, but I’ll break it down so you can follow along without any hiccups.
- Preheat your oven to 350°F (175°C). Line a 9×13-inch baking pan with parchment paper, leaving about 2 inches of overhang on the long sides. This will help you lift the bars out later. Lightly grease the paper with cooking spray or butter.
- Make the gingersnap crust. Place the gingersnap cookies in a food processor and pulse until you have fine crumbs. You should have about 2 cups. If you’re using a rolling pin, put the cookies in a zip-top bag and crush them until no large pieces remain. Transfer the crumbs to a medium bowl. Add the melted butter, sugar, and salt, and stir with a fork until the mixture looks like wet sand and holds together when pressed.
- Press the crust into the pan. Pour the crumb mixture into the prepared pan. Use the bottom of a measuring cup or a flat-bottomed glass to press it down firmly and evenly. Don’t skip this step—a tightly packed crust holds together better after baking. Make sure you press it all the way to the edges and into the corners. Bake the crust for 10 minutes, then remove it from the oven and set it aside to cool slightly while you make the filling.
- Prepare the pumpkin filling. In a large bowl, whisk together the pumpkin puree and sweetened condensed milk until smooth. Add the eggs, one at a time, whisking well after each addition. Stir in the vanilla extract. In a small bowl, combine the cinnamon, ginger, nutmeg, cloves, black pepper, and salt. Add the spice mixture to the pumpkin mixture and whisk until everything is evenly incorporated. The filling should be smooth, glossy, and a beautiful deep orange color.
- Pour the filling over the crust. Slowly pour the pumpkin filling over the pre-baked crust. Use a rubber spatula to spread it evenly, making sure it reaches all the corners. Gently tap the pan on the counter a few times to release any air bubbles.
- Bake the bars. Place the pan in the preheated oven and bake for 35 to 40 minutes, or until the edges are set and the center is just slightly jiggly. It will continue to set as it cools. If you insert a knife near the center, it should come out mostly clean. The filling will puff up slightly during baking and settle as it cools—that’s normal.
- Cool completely. Transfer the pan to a wire rack and let it cool to room temperature. This takes about 1 to 2 hours. Once cool, cover the pan with plastic wrap and refrigerate for at least 4 hours, or overnight. Chilling is crucial—it allows the bars to set fully and makes them easier to slice cleanly. I know it’s hard to wait, but trust me, it’s worth it.
- Slice and serve. Once chilled, use the parchment paper overhang to lift the entire block of bars out of the pan. Place it on a cutting board. Use a sharp knife to slice into squares or rectangles. For clean cuts, wipe the knife clean between slices. If you want to get fancy, you can trim the edges first for perfectly uniform bars, but I like the rustic look.
- Make the whipped cream (optional). In a medium bowl, combine the cold heavy cream, powdered sugar, and vanilla extract. Use a hand mixer or a whisk to beat until soft peaks form. Don’t over-whip, or you’ll end up with butter. Dollop or pipe the whipped cream onto each bar before serving, and sprinkle with crushed gingersnaps for extra crunch.
Sensory Cue: When the bars are done, your kitchen will smell like a fall candle factory exploded—in the best way possible. The crust should be golden brown around the edges, and the filling should be set with a slight wobble in the center, like a perfectly baked cheesecake.
Cooking Tips & Techniques
I’ve made my fair share of mistakes with these bars, and I’m sharing them so you don’t have to. Here are the tips that make the difference between good bars and unforgettable ones.
- Toast the gingersnaps first. Frank was right about this. Spread the crushed gingersnaps on a baking sheet and toast them at 350°F for 5 minutes before mixing them with the butter. This deepens their flavor and adds an extra layer of crunch. I didn’t do this the first time, and the difference is noticeable.
- Don’t overmix the filling. Once you add the eggs, whisk just until combined. Overmixing incorporates too much air, which can cause the filling to puff up too much and then crack as it cools. You want a smooth, dense texture, not a soufflé.
- Use room temperature ingredients. Cold eggs and cold pumpkin puree can cause the filling to seize up and become lumpy. Let everything sit on the counter for about 30 minutes before you start. I once used cold eggs straight from the fridge, and the filling had little bits of solidified butter floating in it. Not pretty.
- Press the crust firmly. This is non-negotiable. A loosely packed crust will crumble when you try to cut the bars. Use the bottom of a measuring cup and really lean into it. I press until the crumbs feel almost like a solid surface.
- Let the bars chill overnight. I know it’s tempting to dig in after a few hours, but overnight chilling gives the filling time to set completely. The texture is silkier, the slices are cleaner, and the flavors meld together beautifully. I’ve tested this side by side, and the overnight batch always wins.
- Use a sharp knife for slicing. A dull knife will drag through the filling and mess up your clean edges. Run the knife under hot water, wipe it dry, and then slice. Repeat between cuts for the best results.
Common Mistake to Avoid: Don’t overbake the bars. The center should still have a slight jiggle when you take them out of the oven. If you wait until the center is completely firm, you’ll end up with dry, cracked bars. Remember, they continue to cook from residual heat as they cool.
Variations & Adaptations
One of the best things about this recipe is how adaptable it is. I’ve tried several variations over the years, and here are my favorites.
Gluten-Free Version
Swap the regular gingersnaps for gluten-free gingersnaps. Most brands work well, but I’ve had the best luck with Pamela’s or Partake. The rest of the recipe is naturally gluten-free, so this is an easy switch. I made this for a friend with celiac disease, and she said it was the best pumpkin dessert she’d had in years.
Vegan Adaptation
Use coconut oil instead of butter in the crust. For the filling, replace the sweetened condensed milk with a can of full-fat coconut milk plus 1/3 cup of maple syrup, and use flax eggs (2 tablespoons ground flaxseed mixed with 6 tablespoons water) instead of regular eggs. The texture is slightly less creamy, but the flavor is still fantastic. I tested this version last Thanksgiving, and my vegan cousin asked for the recipe.
Spiced-Up Version
Add 1/4 teaspoon of cayenne pepper to the filling along with the other spices. This gives the bars a subtle heat that pairs beautifully with the sweetness. I tried this on a whim one afternoon, and now it’s my secret weapon for dinner parties. Just don’t tell anyone until after they’ve taken a bite—the surprise on their faces is priceless.
Mini Bar Version
Use a mini muffin tin instead of a 9×13 pan. Press the crust into each cup, fill with the pumpkin mixture, and bake for about 15 to 18 minutes. These are perfect for parties or portion control. I made these for a holiday cookie exchange, and they disappeared faster than anything else on the table.
Chocolate Twist
Melt 1/2 cup of semi-sweet chocolate chips and drizzle it over the crust before adding the filling. The chocolate and ginger combination is surprisingly good. I was skeptical the first time I tried this, but now I’m a convert. It adds a richness that takes the bars to another level.
Serving & Storage Suggestions
These pumpkin pie bars are versatile when it comes to serving. Here’s how I like to do it.
Serving Temperature: Serve the bars chilled or at room temperature. I prefer them straight from the fridge because the filling is firmer and the crust is crunchier. If you’re serving them at room temperature, let them sit out for about 15 minutes before serving. Top each bar with a dollop of whipped cream and a sprinkle of crushed gingersnaps for that extra wow factor.
Complementary Dishes: These bars pair beautifully with a cup of hot coffee, a chai latte, or a glass of cold milk. For a full dessert spread, serve them alongside apple crisp, pecan pie, or a simple vanilla ice cream. They also work well as part of a Thanksgiving dessert table—they hold their own against the traditional pies.
Storage Instructions: Store the bars in an airtight container in the refrigerator for up to 5 days. Place a layer of parchment paper between the bars to prevent them from sticking together. If you’ve already topped them with whipped cream, store them uncovered in the fridge and add the cream fresh before serving.
Freezing Instructions: These bars freeze beautifully. Once they’re fully chilled and set, slice them into individual portions. Wrap each bar tightly in plastic wrap, then place them in a freezer-safe bag or container. They’ll keep for up to 3 months. To thaw, transfer a bar to the refrigerator overnight or let it sit at room temperature for about 30 minutes.
Reheating Tips: If you prefer your bars warm, pop an individual bar in the microwave for about 10 to 15 seconds. The crust will soften slightly, but the filling will become wonderfully gooey. For a larger batch, reheat in a 300°F oven for about 5 to 7 minutes.
Flavor Development: Honestly, these bars taste even better the next day. The spices have time to meld, and the crust absorbs just a little moisture from the filling, creating a perfect texture. I always try to make these a day ahead if I’m serving them for a special occasion.
Nutritional Information & Benefits
These pumpkin pie bars are a treat, but they also have some redeeming qualities. Here’s a rough estimate of the nutritional values per bar (based on 12 servings).
| Nutrient | Amount Per Bar |
|---|---|
| Calories | 320 |
| Total Fat | 15g |
| Saturated Fat | 8g |
| Cholesterol | 65mg |
| Sodium | 280mg |
| Total Carbohydrates | 42g |
| Dietary Fiber | 2g |
| Sugars | 30g |
| Protein | 5g |
| Vitamin A | 120% DV |
| Vitamin C | 4% DV |
| Calcium | 15% DV |
| Iron | 8% DV |
Health Benefits: Pumpkin is packed with vitamin A, which supports eye health and immune function. It’s also a good source of fiber, which aids digestion. The spices—cinnamon, ginger, and cloves—have anti-inflammatory properties and can help regulate blood sugar. Of course, these bars are still a dessert, so enjoy them in moderation. But I like to think of them as a dessert that does a little good while tasting amazing.
Dietary Considerations: This recipe contains gluten (from the gingersnaps), dairy (butter, sweetened condensed milk, heavy cream), and eggs. For gluten-free and vegan options, see the Variations section above. If you’re watching your sugar intake, you can reduce the sugar in the crust by a tablespoon or two, but the filling relies on the sweetened condensed milk for its texture, so I wouldn’t recommend cutting it there.
Conclusion
These perfect pumpkin pie bars with gingersnap crust have become a staple in my kitchen, and I have a feeling they’ll become one in yours too. They’re everything I want in a fall dessert—easy to make, impressive to serve, and absolutely delicious. The combination of the spicy, crunchy crust and the silky, spiced filling is something you have to taste to believe.
I love that this recipe came from such an unexpected place. It reminds me that good ideas can come from anyone, anywhere—even from your accountant while you’re discussing tax deductions. It’s a recipe that has brought me so much joy, and I hope it brings the same to you.
Now I want to hear from you. Have you tried these bars? Did you add your own twist? Did Frank’s secret black pepper surprise you as much as it surprised me? Drop a comment below and let me know how they turned out. And if you’re feeling generous, share this recipe with a friend who needs a little fall baking inspiration. Happy baking, friends!
Frequently Asked Questions
Can I use a different type of cookie for the crust?
Absolutely. While gingersnaps are my favorite for their spicy flavor, you can use graham crackers, shortbread cookies, or even vanilla wafers. Just keep in mind that the flavor profile will change. If you use a milder cookie, you might want to add a little extra ginger or cinnamon to the crust to compensate.
Why did my crust turn out soggy?
A soggy crust usually means it wasn’t baked long enough before adding the filling, or the filling was too wet. Make sure you bake the crust for the full 10 minutes and let it cool slightly before adding the filling. Also, press the crust firmly into the pan—a loose crust absorbs more moisture.
Can I use fresh pumpkin instead of canned?
You can, but you’ll need to roast and puree the pumpkin first, and then strain it to remove excess moisture. Canned pumpkin is more consistent and has a lower water content, which gives the bars a better texture. If you use fresh, expect a slightly looser filling that may need a few extra minutes of baking time.
How do I know when the bars are done baking?
The edges should be set and slightly puffed, while the center should still have a gentle jiggle when you shake the pan. A knife inserted near the center should come out mostly clean, with a few moist crumbs. Don’t wait until the center is completely firm, or the bars will be overbaked.
Can I make these bars ahead of time?
Yes! These bars are actually better when made a day ahead. Prepare them completely, chill them overnight, and slice them the next day. They’ll hold up beautifully in the refrigerator for up to 5 days. You can also freeze them for up to 3 months—just wrap them tightly and thaw in the refrigerator before serving.
Pin This Recipe!
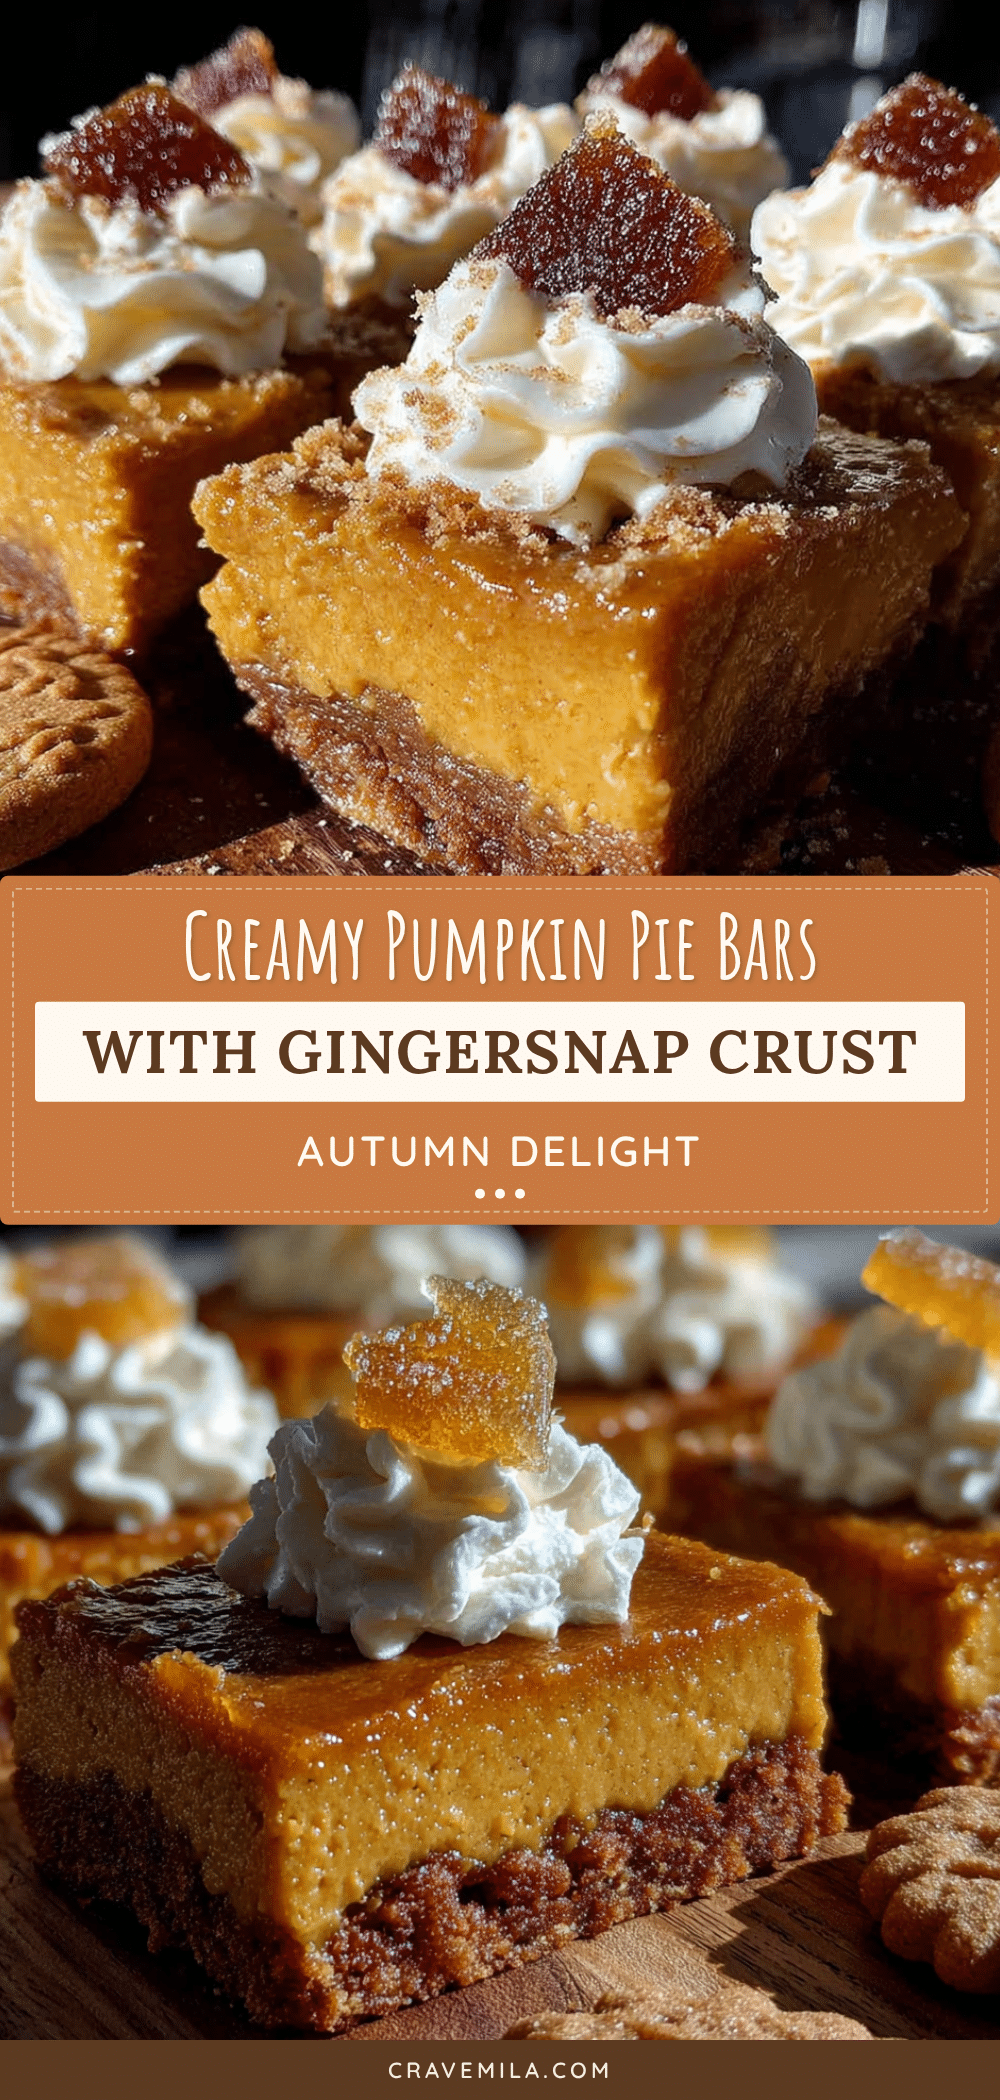
Perfect Pumpkin Pie Bars with Gingersnap Crust
These pumpkin pie bars feature a spicy, crunchy gingersnap crust and a silky, spiced pumpkin filling. They’re easier than traditional pie, perfect for fall gatherings, and absolutely delicious.
- Prep Time: 45 minutes
- Cook Time: 35-40 minutes
- Total Time: 1 hour 20 minutes (plus 4 hours chilling)
- Yield: 12 servings 1x
- Category: Dessert
- Cuisine: American
Ingredients
- 2 cups (about 8 ounces) gingersnap cookies, finely crushed
- 6 tablespoons (85 grams) unsalted butter, melted
- 2 tablespoons (25 grams) granulated sugar
- 1/4 teaspoon salt
- 1 can (15 ounces) pumpkin puree
- 1 can (14 ounces) sweetened condensed milk
- 2 large eggs, room temperature
- 1 teaspoon vanilla extract
- 1 1/2 teaspoons ground cinnamon
- 1 teaspoon ground ginger
- 1/2 teaspoon ground nutmeg
- 1/4 teaspoon ground cloves
- 1/4 teaspoon black pepper
- 1/4 teaspoon salt
- 1 cup (240 ml) heavy cream (optional, for topping)
- 2 tablespoons (15 grams) powdered sugar (optional, for topping)
- 1/2 teaspoon vanilla extract (optional, for topping)
- Crushed gingersnaps for garnish (optional)
Instructions
- Preheat your oven to 350°F (175°C). Line a 9×13-inch baking pan with parchment paper, leaving about 2 inches of overhang on the long sides. Lightly grease the paper with cooking spray or butter.
- Make the gingersnap crust: Place the gingersnap cookies in a food processor and pulse until you have fine crumbs (about 2 cups). Alternatively, crush them in a zip-top bag with a rolling pin. Transfer crumbs to a medium bowl. Add melted butter, sugar, and salt; stir with a fork until the mixture looks like wet sand and holds together when pressed.
- Press the crust into the pan: Pour the crumb mixture into the prepared pan. Use the bottom of a measuring cup or a flat-bottomed glass to press it down firmly and evenly, making sure it reaches the edges and corners. Bake the crust for 10 minutes, then remove and set aside to cool slightly.
- Prepare the pumpkin filling: In a large bowl, whisk together the pumpkin puree and sweetened condensed milk until smooth. Add the eggs one at a time, whisking well after each addition. Stir in the vanilla extract. In a small bowl, combine cinnamon, ginger, nutmeg, cloves, black pepper, and salt. Add the spice mixture to the pumpkin mixture and whisk until evenly incorporated. The filling should be smooth, glossy, and deep orange.
- Pour the filling over the crust: Slowly pour the pumpkin filling over the pre-baked crust. Use a rubber spatula to spread it evenly, reaching all corners. Gently tap the pan on the counter a few times to release air bubbles.
- Bake the bars: Place the pan in the preheated oven and bake for 35 to 40 minutes, or until the edges are set and the center is just slightly jiggly. It will continue to set as it cools. A knife inserted near the center should come out mostly clean.
- Cool completely: Transfer the pan to a wire rack and let it cool to room temperature (about 1 to 2 hours). Once cool, cover with plastic wrap and refrigerate for at least 4 hours, or overnight. Chilling is crucial for clean slicing.
- Slice and serve: Once chilled, use the parchment paper overhang to lift the entire block of bars out of the pan. Place on a cutting board. Use a sharp knife to slice into squares or rectangles, wiping the knife clean between cuts for neat edges.
- Make the whipped cream (optional): In a medium bowl, combine cold heavy cream, powdered sugar, and vanilla extract. Beat with a hand mixer or whisk until soft peaks form. Dollop or pipe onto each bar before serving, and sprinkle with crushed gingersnaps.
Notes
Toast the crushed gingersnaps at 350°F for 5 minutes before mixing with butter for deeper flavor. Don’t overmix the filling to avoid cracks. Use room temperature ingredients for a smooth filling. Press the crust firmly to prevent crumbling. Chill overnight for best texture and flavor. Use a sharp knife for clean slices.
Nutrition
- Serving Size: 1 bar
- Calories: 320
- Sugar: 30
- Sodium: 280
- Fat: 15
- Saturated Fat: 8
- Carbohydrates: 42
- Fiber: 2
- Protein: 5
Keywords: pumpkin pie bars, gingersnap crust, fall dessert, pumpkin bars, Thanksgiving dessert, easy pumpkin recipe



