I was never the person with perfectly decorated Halloween cookies. Every October, I’d scroll through social media, staring at those flawlessly iced sugar cookies with geometric spiderwebs, and feel a familiar mix of admiration and defeat. My own attempts usually ended with a butter knife, a smear of black icing that looked more like a crime scene, and a quiet promise to try again next year. Then, one rainy Tuesday afternoon, my neighbor Margot knocked on my door holding a baking sheet covered in the most wonderfully grotesque things I’d ever seen. They looked like actual fingers—knobby knuckles, wrinkled skin, and a single almond for a nail. She watched me stare, then just shrugged and said, “They’re easier than they look. The secret is not trying too hard.”
That’s the thing about witch finger cookies, you know? They’re supposed to look a little messed up. A crooked knuckle, a slightly cracked nail, a finger that’s a bit too long—it all adds to the creepy effect. Honestly, the first batch I made on my own, I forgot to score the knuckles. They looked like weird, smooth little sausages with almonds stuck on the end. But you know what? They were still terrifyingly delicious. The imperfections are the whole point. This recipe for easy witch finger cookies with almond nails is a total game-changer for anyone who wants a show-stopping Halloween treat without needing a pastry degree. It’s the kind of thing that makes people do a double-take, then laugh, then grab three more. And that’s why it’s stayed in my Halloween rotation ever since.
Why You’ll Love This Recipe
Let’s be real for a second. Halloween baking can be stressful. You’re already juggling costumes, candy, and trying to keep the kids from eating their body weight in sugar before the sun goes down. This recipe is your sanity-saver. It delivers maximum creepy factor with minimal fuss. I’ve tested this exact method at least a dozen times, tweaking the butter temperature and chilling times, and this is the version that works every single time without fail.
- Quick & Easy: From start to finish, you’re looking at about 45 minutes of active time. The dough comes together in one bowl, no electric mixer required if your butter is soft enough.
- Simple Ingredients: You probably have everything in your pantry right now. Flour, sugar, butter, an egg, vanilla, and a bag of whole almonds. No weird specialty extracts or hard-to-find decorating gels.
- Perfect for Halloween Parties: These are the undisputed stars of any spooky spread. They’re a conversation starter, a photo op, and a delicious treat all in one. Kids absolutely lose their minds over them.
- Crowd-Pleaser: They’re basically a buttery shortbread cookie disguised as something horrifying. Everyone loves shortbread. The almond adds a lovely, subtle crunch and flavor that complements the sweet cookie perfectly.
- Unbelievably Delicious: Forget those bland, dry sugar cookies that are just a vehicle for icing. These are rich, tender, and melt-in-your-mouth good. The almond extract in the dough gives them that classic bakery flavor.
What makes this recipe different from the hundreds of other versions out there? It’s the chilling time. I know, I know, waiting is the worst part. But giving the shaped fingers a solid 30 minutes in the freezer is the non-negotiable secret to keeping their shape. Without it, the butter melts too fast, and your witches end up with pudgy, blob-like hands. This method guarantees distinct, creepy fingers that hold their knuckles and nail beds perfectly. It’s a small sacrifice for a big payoff.
This recipe isn’t just good—it’s the kind that makes you text a photo to your group chat with the caption “Look what I made!” and then immediately eat three before anyone else can see them. It’s Halloween fun without the Halloween stress.
What Ingredients You Will Need
This recipe uses simple, classic ingredients to create a buttery, tender cookie that’s perfect for shaping. Most of these are standard baking staples you likely already have on hand. The whole almonds are the only special item, and they’re easy to find in any grocery store.
- 1 cup (226g) unsalted butter, softened: Make sure it’s truly soft—you should be able to press a finger into it easily, but it shouldn’t be melted or greasy. I prefer using unsalted so I can control the salt level.
- 1 cup (200g) granulated sugar: Regular white sugar gives the cookies a nice, clean sweetness and a slightly crisp edge.
- 1 large egg: This binds the dough together. Take it out of the fridge about 30 minutes before you start so it comes to room temperature, which helps it emulsify into the butter better.
- 1 teaspoon vanilla extract: Use pure vanilla extract if you have it—the flavor is noticeably richer than imitation.
- 1 teaspoon almond extract: This is the secret weapon. It gives the cookies that distinct, almost marzipan-like flavor that makes them taste so professional. Don’t skip it!
- ½ teaspoon salt: Balances the sweetness and enhances the buttery flavor. I use fine sea salt for baking.
- 2 ½ cups (312g) all-purpose flour: Spoon and level your flour into the measuring cup. Scooping directly from the bag can pack it down and give you too much, resulting in dry cookies.
- 1-2 tablespoons milk (if needed): You may need a splash of milk if your dough feels too crumbly. Humidity and flour brands vary, so this is your safety net for a smooth dough.
- For the “Nails”: About 30-36 whole blanched almonds. You can use raw almonds with skins on, but the blanched ones give a much more realistic “nail bed” look. I’ve used both, and the blanched ones are definitely creepier.
- For the “Blood” (optional but recommended): 2-3 tablespoons raspberry or strawberry jam, warmed slightly. You can also use red gel food coloring mixed with a tiny bit of corn syrup. The jam looks more realistic and tastes better.
Ingredient Tip: For the most realistic effect, look for almonds that are uniform in size and shape. I personally like the ones from Blue Diamond for their consistent quality. If you can only find slivered almonds, you can use those for smaller, more delicate “fingernails” on smaller cookies.
Equipment Needed
You don’t need any fancy gadgets for these cookies, which is another reason I love them. Here’s what you’ll need:
- Large mixing bowl: Any bowl will do, but a wide, shallow one makes it easier to cream the butter and sugar.
- Electric hand mixer or stand mixer: A hand mixer is perfectly fine. You could even do this by hand with a wooden spoon if your butter is very soft, but a mixer makes it quick and effortless.
- Rubber spatula: Essential for scraping down the sides of the bowl and folding in the flour.
- Baking sheets: Two standard 13×18 inch baking sheets work well. No need to grease them—the cookies have enough butter.
- Parchment paper or silicone baking mats: This is a must. It prevents sticking and makes cleanup a breeze. I prefer parchment paper because it’s disposable.
- Sharp knife or bench scraper: For making the knuckle marks. A sharp knife gives cleaner lines, but a bench scraper works in a pinch.
- Small bowl: For the jam or red “blood” mixture.
- Pastry brush or small spoon: For applying the jam to the nail bed. A clean fingertip works too, honestly.
- Cooling rack: For letting the cookies cool completely so the jam sets.
Budget-Friendly Tip: Don’t have a pastry brush? No problem. Just dip a clean finger into the jam and gently smear it onto the almond. It adds a wonderfully messy, realistic touch.
Preparation Method
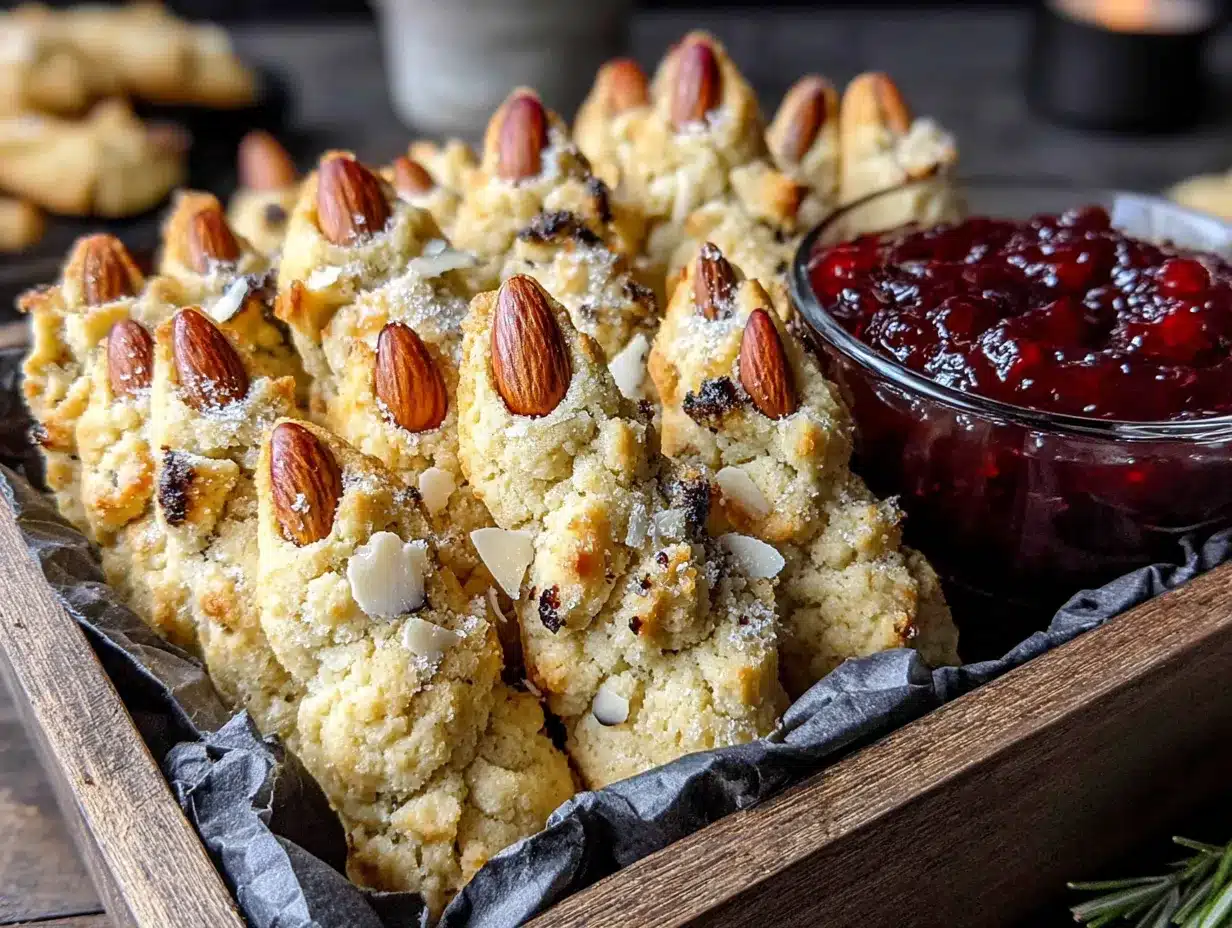
Alright, let’s get our hands dirty. Or, you know, cookie-dough-y. This is the fun part. Take your time shaping each finger—think of it as a tiny, edible sculpture.
- Cream the butter and sugar. In your large mixing bowl, beat the softened butter and granulated sugar together on medium speed until light, fluffy, and pale in color. This takes about 2-3 minutes with a hand mixer. You’re looking for a texture that’s almost like a thick, creamy paste. Scrape down the sides and bottom of the bowl with your spatula once halfway through.
- Add the wet ingredients. Beat in the egg, vanilla extract, and almond extract until everything is fully combined and smooth. The mixture might look a little separated or curdled at this point—don’t panic! That’s perfectly normal. It will come together once you add the flour.
- Mix in the dry ingredients. In a separate small bowl, whisk together the all-purpose flour and salt. Gradually add the flour mixture to the wet ingredients, mixing on low speed. Mix just until the dough comes together and no streaks of flour remain. Be careful not to overmix, or your cookies will be tough. If the dough seems too dry and crumbly, add one tablespoon of milk at a time, mixing until it just comes together.
- Chill the dough. This is a crucial step. Wrap the dough tightly in plastic wrap and flatten it into a disc. Refrigerate for at least 30 minutes, or up to 3 days. Chilling the dough makes it much easier to handle and prevents the cookies from spreading too much in the oven. Trust me, don’t skip this.
- Preheat and prepare. When you’re ready to bake, preheat your oven to 325°F (163°C). Line your baking sheets with parchment paper or silicone mats.
- Shape the fingers. Take the chilled dough and scoop out about one tablespoon of dough. Roll it between your palms into a log shape. Then, using your fingers, gently shape one end to be slightly wider (the “knuckle” area) and taper the other end slightly. Place it on the prepared baking sheet. Repeat with the remaining dough, placing the fingers about 2 inches apart. They won’t spread much, but they need a little breathing room. You should get about 28-32 fingers.
- Add the knuckles. Using the back of a sharp knife or a bench scraper, gently press 2-3 horizontal lines into each finger to create the knuckles. Don’t press too hard—you just want an indentation, not to cut the cookie in half. You can also gently squeeze the sides of the finger between your thumb and forefinger to give it a more natural, slightly irregular shape.
- Attach the nails. Press one whole almond firmly onto the wider end of each finger, pointed end facing outward. The almond should sit in the “nail bed” indentation you’ve created. Press it in just enough so it stays put.
- Final chill. This is the most important step for shape retention. Place the baking sheets with the shaped fingers into the freezer for 15-20 minutes. This solidifies the butter and ensures your witches’ fingers stay perfectly creepy and don’t turn into sad, flat blobs.
- Bake. Bake the chilled cookies for 12-15 minutes, or until the edges are just barely starting to turn a light golden brown. The centers will still look pale and slightly soft—that’s perfect. They will continue to set as they cool. Overbaking will make them dry.
- Cool and decorate. Let the cookies cool on the baking sheet for 5 minutes, then carefully transfer them to a cooling rack to cool completely. Once cool, warm your raspberry or strawberry jam in a small bowl for about 10 seconds in the microwave. Using a small brush or your finger, dab a tiny amount of jam at the base of the almond “nail” to look like blood or nail bed. A little goes a long way—you want it to look like a fresh, grisly wound, not a jam sandwich.
Sensory Cue: When you press the knuckle marks, the dough should feel cool and firm, not sticky. When you pick up a baked cookie, it should feel firm but still have a slight give. The jam should look glossy and deep red against the pale cookie.
Cooking Tips & Techniques
I’ve made a lot of mistakes with these cookies over the years, so you don’t have to. Here’s what I’ve learned the hard way.
The butter temperature is everything. I cannot stress this enough. If your butter is too cold, it won’t cream properly with the sugar, and you’ll end up with a lumpy dough. If it’s too warm or melted, the cookies will spread into flat, shapeless pancakes. The perfect state is when you can press it with your finger and it leaves an indent without sinking in. Leave it on the counter for about an hour before you start. I once tried to speed things up by microwaving it for 15 seconds and ended up with a greasy mess. Don’t be like me.
Don’t overwork the dough. When you’re mixing in the flour, stop as soon as it comes together. Overmixing develops the gluten, which makes your cookies tough and dense instead of tender and melt-in-your-mouth. A few streaks of flour are totally fine—they’ll disappear as you shape the dough.
Embrace the imperfections. The whole point of these cookies is that they look like actual human fingers. They shouldn’t be uniform. Some should be fatter, some thinner. Some should have a crooked knuckle. I’ve found that rolling the dough between my palms with slightly uneven pressure creates the most realistic, knobby shapes. If you try to make them all perfect, they’ll look like alien fingers. And not in a good way.
Timing is key. Bake these cookies in the center of the oven. If you’re baking two sheets at once, rotate them halfway through and switch the racks. Ovens can have hot spots, and you want even baking. Start checking them at the 10-minute mark. The edges should be just barely golden. They will look underdone in the center, but that’s exactly what you want.
Make-ahead magic. You can prepare the dough up to 3 days in advance and keep it wrapped in the fridge. You can also freeze the shaped, unbaked fingers on a baking sheet, then transfer them to a freezer bag for up to 3 months. Bake them straight from the freezer, just add 2-3 extra minutes to the baking time. This is a lifesaver for Halloween parties.
Variations & Adaptations
One of the best things about this recipe is how easy it is to customize. Here are some of my favorite twists.
- Chocolate Witch Fingers: Replace ¼ cup (30g) of the all-purpose flour with ¼ cup (20g) of unsweetened cocoa powder. This gives the cookies a dark, sinister look that’s perfect for a more ghoulish vibe. The chocolate flavor pairs beautifully with the almond extract.
- Gluten-Free Version: Use a good quality 1:1 gluten-free baking flour blend that contains xanthan gum. I’ve had great success with Bob’s Red Mill 1-to-1 Baking Flour. The texture will be slightly more crumbly, but they’ll still taste amazing and look just as creepy.
- Vegan Adaptation: Substitute the butter with a high-quality vegan butter stick (like Earth Balance or Miyoko’s). Use a flax egg (1 tablespoon ground flaxseed mixed with 3 tablespoons water, let sit for 5 minutes) instead of the regular egg. The cookies will be a bit more delicate, so handle them gently. They still taste fantastic.
- Spooky “Bone” Fingers: Instead of shaping them like fingers, roll the dough into longer, thinner logs. After baking, dip one end in melted white chocolate to look like a bone. It’s a fun alternative if you want to mix things up for a different Halloween party.
- Peanut Butter Fingers: Reduce the butter to ¾ cup (170g) and add ½ cup (130g) of creamy peanut butter. Cream it together with the butter and sugar. The peanut butter adds a savory, salty note that’s incredible with the sweet almond. Use a peanut for the nail instead of an almond for a fully nutty experience.
Serving & Storage Suggestions
These cookies are best served at a Halloween party where they can be the centerpiece of the dessert table. Arrange them on a dark platter or a black cake stand for maximum dramatic effect. I like to scatter a few extra almonds around the plate to look like “clippings,” which always gets a laugh. You can serve them slightly warm if you’d like, but they’re perfectly delicious at room temperature.
For drinks, these pair wonderfully with a glass of cold milk, a hot apple cider, or even a dark beer for the adults. The buttery, almond flavor of the cookies is a fantastic complement to the tartness of apple cider or the richness of a stout. I’ve also served them alongside a bowl of vanilla ice cream for a truly decadent dessert.
Storage: Store the baked cookies in an airtight container at room temperature for up to 5 days. The jam might make the cookie slightly soft underneath, but that’s part of the charm. To keep them crispier, store them without the jam and add the jam just before serving.
Freezing: Baked cookies freeze beautifully for up to 3 months. Place them in a single layer in a freezer-safe container, separated by parchment paper. Thaw at room temperature for about 30 minutes before serving. The jam might lose a bit of its gloss after freezing, so I recommend adding fresh jam after thawing for the best presentation.
Flavor Development: Honestly, these cookies taste even better the next day. The almond flavor mellows and melds with the buttery base, creating a more complex, delicious cookie. So don’t be afraid to make them a day ahead. Your future self will thank you.
Nutritional Information & Benefits
While these are definitely a treat, let’s be honest—they’re cookies! But they do have a few redeeming qualities. The almonds provide a good source of healthy fats, vitamin E, and magnesium. The butter, in moderation, contains fat-soluble vitamins like A and D. And hey, you’re controlling the ingredients, so there are no weird preservatives or artificial flavors like you’d find in store-bought Halloween cookies.
Estimated Nutritional Values (per cookie, based on 32 cookies):
| Nutrient | Amount |
|---|---|
| Calories | 135 kcal |
| Fat | 8g |
| Saturated Fat | 4.5g |
| Carbohydrates | 14g |
| Sugar | 7g |
| Protein | 2g |
| Fiber | 0.5g |
Dietary Considerations: This recipe contains dairy (butter), eggs, gluten (flour), and tree nuts (almonds). For a vegan or gluten-free version, please see the variations above. The almond extract is usually gluten-free, but always check the label if you have severe sensitivities.
I personally love that this recipe lets me indulge in a fun, nostalgic Halloween tradition without feeling like I’m eating pure junk. The almonds add a little bit of substance, and the homemade nature makes it feel more like a special occasion than a processed snack. It’s a win-win in my book.
Conclusion
Look, I get it. Halloween baking can feel intimidating. There are so many elaborate, multi-day projects out there that look amazing but require the patience of a saint and the precision of a surgeon. This recipe is not that. It’s the perfect entry point for anyone who wants to make something impressive without the stress. It’s forgiving, it’s fun, and it’s genuinely delicious.
These witch finger cookies with almond nails are the kind of recipe that becomes a tradition. You’ll find yourself making them year after year, tweaking the shape, trying different jams, and laughing at how perfectly creepy they turn out. They’re a reminder that baking doesn’t have to be perfect to be wonderful. Sometimes, the best things are a little bit crooked, a little bit messy, and a whole lot of fun.
So go ahead—grab that butter, dig out the almonds, and get ready to create something gloriously grotesque. I’d love to hear how yours turn out! Did you try the chocolate version? Did your kids help shape the fingers? Drop a comment below and share your spooky creations. And if you loved this recipe, share it with a friend who needs a little Halloween magic in their life. Happy baking, you wonderfully weird human!
Frequently Asked Questions
Can I use margarine instead of butter?
I wouldn’t recommend it. Butter has a lower water content and a higher fat content than most margarines, which is essential for creating a tender, shortbread-like cookie. Margarine can make the cookies spread too much and lose their shape. Stick with real butter for the best results.
My dough is too sticky to handle. What should I do?
Don’t worry, this happens! If your dough is too sticky, simply wrap it in plastic wrap and refrigerate it for an additional 30-60 minutes. The chilling process will firm up the butter and make the dough much easier to handle. If it’s still sticky after that, you can lightly dust your hands with a little flour while shaping.
Can I use a different nut for the nails?
Absolutely! While almonds give the most realistic look, you can use whole cashews, pecans, or even a small slice of Brazil nut. For a nut-free version, you can use a small piece of dried apricot or a candy corn for a fun, colorful nail. Just keep in mind that the baking time might need a slight adjustment depending on the nut you choose.
How do I get the jam to look like real blood?
The key is to use a deep, dark red jam and warm it slightly so it’s spreadable. Raspberry jam is my go-to because it has a rich, dark color and a slightly seedy texture that looks like congealed blood. A tiny drop of red food coloring can deepen the color if needed. Apply it sparingly—a little dab at the base of the nail is all you need for that gruesome effect.
Can I make these cookies ahead of time for a party?
Yes, and I actually recommend it! You can make the dough up to 3 days in advance and keep it in the fridge. You can also freeze the baked, undecorated cookies for up to 3 months. On the day of your party, simply thaw the cookies and add the jam “blood” just before serving for the freshest, most dramatic look.
Pin This Recipe!
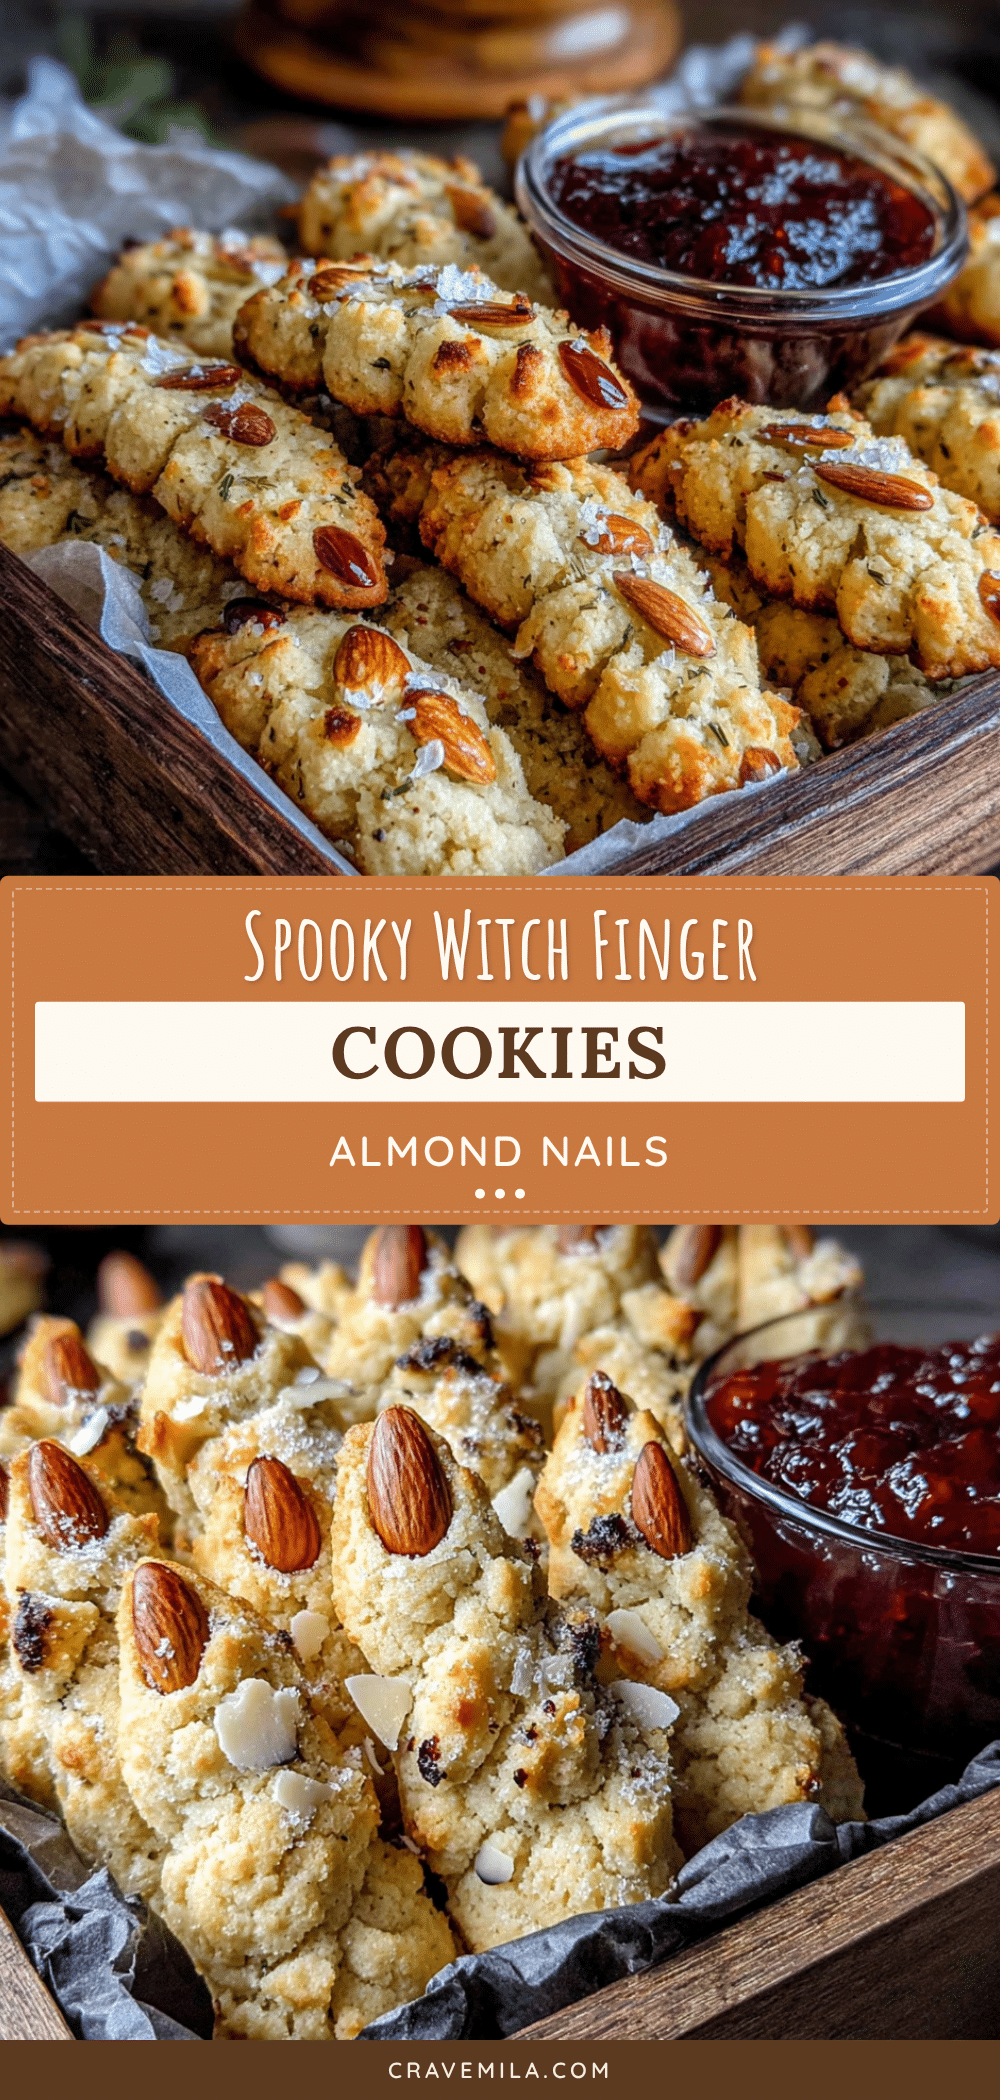
Halloween Witch Finger Cookies – Easy Almond Nail Recipe
These creepy witch finger cookies with almond nails are a show-stopping Halloween treat that’s surprisingly easy to make. With a buttery shortbread base and a realistic, ghoulish appearance, they’re perfect for parties and guaranteed to get a reaction.
- Prep Time: 45 minutes
- Cook Time: 15 minutes
- Total Time: 1 hour 30 minutes (includes chilling time)
- Yield: 28-32 cookies 1x
- Category: Dessert
- Cuisine: American
Ingredients
- 1 cup (226g) unsalted butter, softened
- 1 cup (200g) granulated sugar
- 1 large egg
- 1 teaspoon vanilla extract
- 1 teaspoon almond extract
- ½ teaspoon salt
- 2 ½ cups (312g) all-purpose flour
- 1–2 tablespoons milk (if needed)
- About 30–36 whole blanched almonds
- 2–3 tablespoons raspberry or strawberry jam, warmed (optional)
Instructions
- Cream the butter and sugar: In a large mixing bowl, beat the softened butter and granulated sugar together on medium speed until light, fluffy, and pale in color, about 2-3 minutes. Scrape down the sides and bottom of the bowl once halfway through.
- Add the wet ingredients: Beat in the egg, vanilla extract, and almond extract until fully combined and smooth. The mixture may look slightly separated; this is normal.
- Mix in the dry ingredients: In a separate small bowl, whisk together the all-purpose flour and salt. Gradually add the flour mixture to the wet ingredients, mixing on low speed just until the dough comes together and no streaks of flour remain. Do not overmix. If the dough seems too dry and crumbly, add one tablespoon of milk at a time until it just comes together.
- Chill the dough: Wrap the dough tightly in plastic wrap and flatten it into a disc. Refrigerate for at least 30 minutes, or up to 3 days.
- Preheat and prepare: When ready to bake, preheat the oven to 325°F (163°C). Line baking sheets with parchment paper or silicone mats.
- Shape the fingers: Scoop about one tablespoon of dough and roll it between your palms into a log shape. Gently shape one end to be slightly wider (the knuckle area) and taper the other end slightly. Place on the prepared baking sheet, spacing about 2 inches apart. Repeat with remaining dough (about 28-32 fingers).
- Add the knuckles: Using the back of a sharp knife or bench scraper, gently press 2-3 horizontal lines into each finger to create knuckles. Do not press too hard. Gently squeeze the sides of the finger to give it a natural, slightly irregular shape.
- Attach the nails: Press one whole almond firmly onto the wider end of each finger, pointed end facing outward, so it sits in the nail bed indentation.
- Final chill: Place the baking sheets with the shaped fingers into the freezer for 15-20 minutes.
- Bake: Bake the chilled cookies for 12-15 minutes, or until the edges are just barely starting to turn a light golden brown. The centers will still look pale and slightly soft. Let cool on the baking sheet for 5 minutes, then transfer to a cooling rack to cool completely.
- Cool and decorate: Once cool, warm the raspberry or strawberry jam in a small bowl for about 10 seconds in the microwave. Using a small brush or your finger, dab a tiny amount of jam at the base of the almond nail to look like blood or nail bed.
Notes
The final chill in the freezer is crucial for keeping the finger shapes. Embrace imperfections—crooked knuckles and uneven shapes add to the creepy effect. For best results, use blanched almonds for a more realistic nail bed. The jam can be replaced with red gel food coloring mixed with corn syrup if desired.
Nutrition
- Serving Size: 1 cookie
- Calories: 135
- Sugar: 7
- Sodium: 50
- Fat: 8
- Saturated Fat: 4.5
- Carbohydrates: 14
- Fiber: 0.5
- Protein: 2
Keywords: Halloween cookies, witch finger cookies, almond nail cookies, shortbread cookies, spooky treats, easy Halloween recipe



