The school bake sale was in twelve hours and I’d completely forgotten. I mean, completely. My daughter had reminded me that morning, and I’d nodded along while packing lunches, and it had evaporated from my brain like steam off a hot pan. By the time I remembered, it was 9 PM on a Tuesday, the grocery stores were closed, and all I had in my pantry was a bag of flour, some butter that was definitely past its prime, and a container of sprinkles from a birthday party six months ago. I stood in my kitchen, staring at those sprinkles, and thought, “Well, this is going to be a disaster.”
But here’s the thing about desperation—it makes you creative. My daughter was already in bed, and I couldn’t face the idea of showing up empty-handed. So I whipped up a batch of my go-to sugar cookie dough (the one I could make in my sleep), grabbed that sad container of sprinkles, and decided to make the ugliest cookies I could possibly manage. If they were going to be bad, I figured, they might as well be intentionally bad. You know that feeling when you’re just trying to survive a situation, and somehow the universe decides to throw you a bone? That was this night.
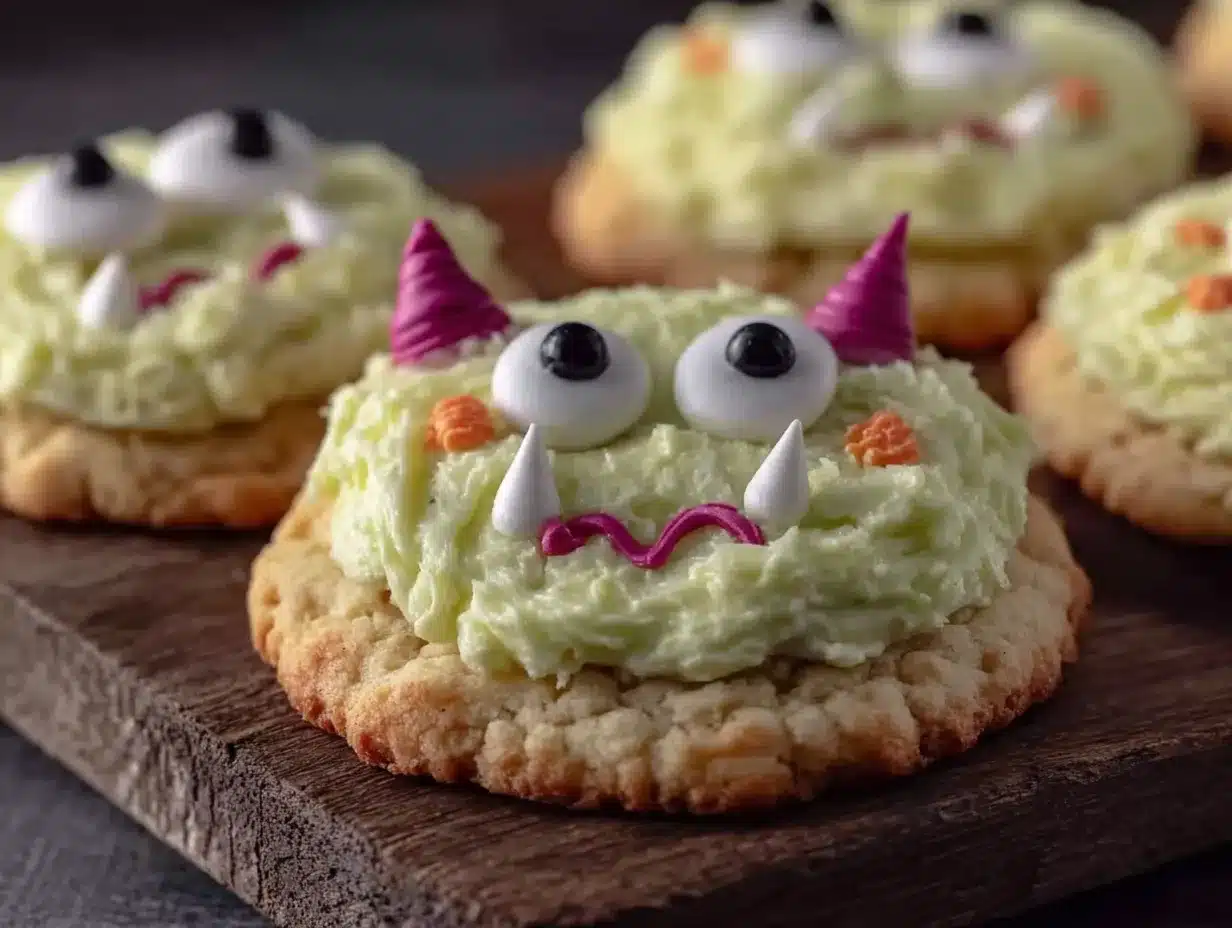
I rolled the dough, cut it into rounds, and started decorating with royal icing I mixed in a hurry. I gave them googly eyes. I made crooked smiles. I added messy little horns and fur. And you know what? They weren’t ugly. They were monsters. Adorable, silly, absolutely ridiculous monsters. The next day, those cookies sold out in twenty minutes. Kids were dragging their parents over to the table, pointing at the funny faces. A mom asked me if I had a recipe she could use for her son’s birthday party. I just laughed and said, “Honestly, they were an accident.” But that accident turned into something I’ve made a dozen times since, and these Adorable Monster Sugar Cookies with Royal Icing have become my secret weapon for every occasion that needs a little fun.
Why You’ll Love This Recipe
Let me tell you why these cookies have earned a permanent spot in my recipe box. I’ve tested this recipe more times than I care to count, and every single time, it delivers. Here’s what makes it special:
- Quick & Easy: From start to finish, you’re looking at about an hour of active time. The dough comes together in ten minutes, and the decorating is fast once you get the hang of it. Perfect for last-minute school events or surprise playdates.
- Simple Ingredients: You probably have everything in your kitchen right now. No weird extracts, no specialty flours, no trips to a fancy baking store. Just butter, sugar, flour, eggs, and a few basic pantry staples.
- Perfect for Parties: These are the life of any party. Birthday parties, Halloween gatherings, classroom celebrations—kids go absolutely wild for them. But honestly? Adults love them just as much.
- Crowd-Pleaser: I’ve brought these to potlucks, cookie swaps, and neighborhood gatherings. They always get the most comments and the most smiles. There’s something about a cookie that looks back at you that people can’t resist.
- Unbelievably Delicious: Underneath all that frosting and those silly faces is a genuinely good sugar cookie. It’s soft in the middle, slightly crisp at the edges, and has that perfect buttery vanilla flavor that reminds you of childhood.
What makes this recipe different from every other decorated cookie out there is the approach. I’m not asking you to be a professional baker with perfect piping skills. These monsters are supposed to look messy. They’re supposed to be imperfect. That’s the whole point. The technique is forgiving, the design is flexible, and the result is always charming. It’s comfort food with a sense of humor—the kind of cookie that makes you close your eyes after the first bite and smile.
What Ingredients You Will Need
This recipe uses simple, wholesome ingredients to create cookies that taste as good as they look. Nothing fancy here—just the basics, used well. Here’s what you’ll need to gather:
For the Sugar Cookies
- 2 ¾ cups all-purpose flour (spooned and leveled—don’t scoop directly from the bag or you’ll end up with dense cookies)
- 1 cup unsalted butter, softened to room temperature (I use Kerrygold for the best flavor, but any good butter works)
- 1 cup granulated sugar
- 1 large egg, room temperature
- 2 teaspoons vanilla extract (pure, not imitation—it makes a real difference)
- ½ teaspoon baking powder
- ½ teaspoon salt
For the Royal Icing
- 4 cups powdered sugar, sifted (lumps are the enemy of smooth icing)
- 3 tablespoons meringue powder (I recommend Wilton brand for consistent results)
- 5-6 tablespoons water, room temperature (add slowly—you might not need all of it)
- ½ teaspoon vanilla extract (optional, but I like the flavor it adds)
- Gel food coloring in various colors (avoid liquid food coloring—it thins the icing too much)
For Decorating
- Candy eyes (you can find these at any craft store or online—the 12mm size works best)
- Assorted sprinkles (think about colors that match your monster theme—neon, pastel, or classic rainbow)
- Black decorating gel (for drawing mouths and details—easier than piping with royal icing)
- Optional: colored sanding sugar (adds texture and sparkle to your monsters)
One note about butter: make sure it’s truly softened, not melted. If you microwave it, you risk melting it, which changes the texture of the dough. Leave it on the counter for about an hour before you start baking. For the egg, same thing—room temperature eggs incorporate better into the creamed butter and sugar. If you forget to take it out ahead of time, place it in a bowl of warm water for five minutes.
Equipment Needed
You don’t need a professional bakery setup to make these cookies. Here’s what you’ll actually use:
- Stand mixer or hand mixer: Either works fine. I use my KitchenAid for the dough and the icing, but a hand mixer does the job just as well.
- Large mixing bowls: One for the dough, one for the icing.
- Rolling pin: A standard rolling pin is perfect. If you don’t have one, a wine bottle works in a pinch—I’ve done it.
- Round cookie cutters: I use a 3-inch round cutter for the base shape. You can also use a 2.5-inch cutter for smaller monsters.
- Baking sheets: At least two, so you can rotate them in and out of the oven.
- Parchment paper or silicone baking mats: Parchment is cheaper and works great. Silicone mats are reusable and non-stick.
- Piping bags or zip-top bags: For the royal icing. I actually prefer zip-top bags because they’re cheaper and I can just snip the corner.
- Small round piping tip (optional): If you want more control over the icing lines.
- Cooling rack: Essential for letting cookies cool completely before decorating.
- Small bowls or cups: For dividing and coloring the icing.
- Toothpicks: For spreading icing into tight spots and popping air bubbles.
If you’re just starting out, don’t stress about the piping tips. A zip-top bag with a tiny snip in the corner works perfectly for the icing consistency we’re using. I’ve been doing this for years and I still use the bag method half the time.
Preparation Method
Alright, let’s make some monsters. Follow these steps carefully, and you’ll have a batch of cookies that are as fun to make as they are to eat.
Step 1: Make the Cookie Dough
In your stand mixer bowl (or a large bowl if using a hand mixer), cream together the softened butter and granulated sugar on medium speed until light and fluffy. This takes about 3 minutes. You want the mixture to look pale and airy—that’s how you know it’s ready. Add the egg and vanilla extract, then mix on low until just combined. Don’t overmix here.
In a separate bowl, whisk together the flour, baking powder, and salt. Gradually add the dry ingredients to the wet ingredients, mixing on low speed. Stop as soon as the dough comes together. It should be soft but not sticky. If it feels too sticky, add a tablespoon more flour. If it’s crumbly, add a teaspoon of water.
Step 2: Chill the Dough
Divide the dough in half, shape each half into a flat disc, wrap tightly in plastic wrap, and refrigerate for at least 1 hour. This is not optional—chilled dough is much easier to roll out and holds its shape better during baking. You can chill it overnight if you’re planning ahead. I’ve left it for two days and it was fine.
Step 3: Roll and Cut the Cookies
Preheat your oven to 350°F (175°C). Line your baking sheets with parchment paper or silicone mats. Lightly flour your work surface and rolling pin. Roll one disc of dough to about ¼-inch thickness. Try to keep it even—if some parts are thinner, they’ll bake faster and might burn. Use your round cookie cutter to cut out shapes, and transfer them to the prepared baking sheets, spacing them about 2 inches apart.
Gather the scraps, re-roll them, and cut more cookies until you’ve used all the dough. Pop the baking sheets into the refrigerator for 10 minutes before baking. This helps the cookies hold their shape.
Step 4: Bake the Cookies
Bake for 8-10 minutes, or until the edges are just barely golden. The centers should still look slightly pale. Every oven is different, so start checking at 8 minutes. Let the cookies cool on the baking sheet for 5 minutes, then transfer them to a wire rack to cool completely. Do not try to decorate warm cookies—the icing will melt and slide right off.
Step 5: Make the Royal Icing
In your stand mixer bowl (or a large bowl), combine the sifted powdered sugar and meringue powder. Add 5 tablespoons of water and the vanilla extract. Beat on low speed until combined, then increase to medium-high and beat for 5-7 minutes. The icing should be thick and glossy, with stiff peaks that hold their shape. If it’s too thick, add water a teaspoon at a time. If it’s too thin, add more powdered sugar.
Divide the icing into separate bowls for each color you want to use. Add gel food coloring a little at a time until you reach the desired shade. Remember, the color will darken slightly as it dries. Cover each bowl with a damp paper towel to prevent the icing from drying out.
Step 6: Decorate the Monsters
This is where the fun begins. Transfer each color of icing to a piping bag or zip-top bag with a tiny corner snipped off. Outline the cookie with your base color, then fill in the outline by piping more icing and spreading it with a toothpick. Let the base layer dry for about 30 minutes before adding details.
Once the base is dry, pipe on monster features. Add candy eyes while the icing is still wet so they stick. Use black decorating gel to draw mouths, eyebrows, and little horns. Add sprinkles for fur, warts, or crazy hair. There’s no wrong way to do this—let your imagination run wild. I’ve made monsters with three eyes, monsters with no eyes, monsters that look grumpy, and monsters that look like they just told a bad joke.
Cooking Tips & Techniques
After making these cookies more times than I can count, I’ve learned a few things the hard way. Here are my best tips to save you from the same mistakes I made.
Don’t skip the chill time. I know it’s tempting to rush, but warm dough spreads like crazy in the oven. You’ll end up with flat, shapeless blobs instead of round cookies. I learned this the night I was in a hurry and ended up with cookies that looked more like pancakes than monsters. Trust me, the hour in the fridge is worth it.
Check your icing consistency. Royal icing should be thick enough to hold its shape but thin enough to spread smoothly. The test I use: drag a knife through the icing. If the line disappears in about 10 seconds, you’re good. If it disappears instantly, the icing is too thin. If it stays forever, it’s too thick. Add water or powdered sugar accordingly.
Work in batches. Don’t try to decorate all the cookies at once. Decorate 4-5 cookies at a time, letting the icing set before adding details. If you try to do everything at once, the colors will bleed into each other and you’ll end up with muddy monsters.
Use a toothpick for details. For small dots, tiny lines, or filling tight corners, a toothpick is way more precise than a piping tip. Dip it in the icing and use it like a tiny paintbrush. This is how I add little freckles and spots to my monsters.
Let the icing dry completely. This takes at least 4-6 hours at room temperature. If you stack the cookies before the icing is fully dry, you’ll smudge all your hard work. I usually decorate in the evening and leave them out overnight.
Practice on parchment first. Before you decorate your first cookie, practice piping a few monster faces on a piece of parchment paper. It helps you get a feel for the pressure and flow of the icing without ruining a cookie. I still do this every time I try a new design.
Variations & Adaptations
One of the best things about this recipe is how flexible it is. Here are some ways to make it your own:
Dietary Adaptations
Gluten-Free Version: Substitute the all-purpose flour with a 1:1 gluten-free baking flour blend. I’ve used Bob’s Red Mill with great results. The cookies will be slightly more delicate, so handle them gently. For the royal icing, make sure your meringue powder is gluten-free—most brands are, but double-check the label.
Dairy-Free Version: Replace the butter with a high-quality vegan butter stick (not the spreadable kind in a tub). I like Earth Balance for baking. The texture will be slightly different, but the cookies will still be delicious.
Seasonal Variations
Halloween Monsters: Use orange, purple, and black icing. Add spider rings, candy corn teeth, or bat-shaped sprinkles. This is my most popular version by far.
Christmas Monsters: Make them in red and green, add little Santa hats or reindeer antlers. The contrast between “monster” and “Christmas” is hilarious and always gets laughs.
Easter Monsters: Pastel colors with bunny ears and little carrot noses. They’re less scary and more sweet.
Flavor Twists
Lemon Monster Cookies: Add the zest of one lemon to the dough and substitute lemon extract for the vanilla in the icing. The citrus flavor pairs beautifully with the sweet royal icing.
Chocolate Monster Cookies: Replace ¼ cup of the flour with unsweetened cocoa powder. The chocolate base makes the colorful icing pop even more.
Almond Monster Cookies: Add ½ teaspoon of almond extract to the dough along with the vanilla. The subtle nutty flavor is unexpected and lovely.
Serving & Storage Suggestions
These cookies are best served at room temperature, which is convenient because that’s how they naturally are. Arrange them on a platter with the monster faces facing up so everyone can see the silly expressions. I like to serve them alongside a glass of cold milk or a warm cup of tea for the adults.
For parties, consider creating a “monster display.” I once set up a cookie decorating station at a birthday party where kids could add their own candy eyes and sprinkles to pre-iced cookies. It was a huge hit. The kids loved making their own monsters, and the parents loved that the mess was contained to one table.
Storage Instructions: Store the decorated cookies in an airtight container at room temperature for up to one week. Layer them between sheets of parchment paper to prevent the icing from sticking. Do not refrigerate—the moisture in the fridge can cause the icing to become sticky and the cookies to soften.
Freezer Instructions: You can freeze the undecorated baked cookies for up to three months. Wrap them tightly in plastic wrap and place them in a freezer bag. When you’re ready to decorate, thaw them at room temperature and proceed with the icing. I’ve also frozen the raw dough discs for up to three months—just thaw them in the fridge overnight before rolling and baking.
Flavor Development: Here’s a secret: these cookies actually taste better the next day. The flavors meld together, the icing sets perfectly, and the texture becomes wonderfully tender. If you can resist eating them right away, they’re even better after 24 hours.
Nutritional Information & Benefits
Let’s be honest—these are sugar cookies with royal icing. They’re a treat, not a health food. But here’s the estimated nutritional information per cookie (based on a 3-inch cookie with icing):
- Calories: Approximately 180-200
- Total Fat: 8g
- Saturated Fat: 5g
- Carbohydrates: 28g
- Sugar: 18g
- Protein: 2g
While these aren’t exactly a nutritional powerhouse, there are a few redeeming qualities. The butter provides a small amount of vitamin A, and the egg adds a bit of protein. Plus, there’s something to be said for the mental health benefits of spending time in the kitchen, creating something silly and joyful. I firmly believe that every kitchen should have room for treats like this—food that’s made for fun, not for fuel.
If you’re concerned about sugar, you can reduce the amount in the dough slightly (use ¾ cup instead of 1 cup), but the royal icing needs the full amount of powdered sugar to achieve the right consistency. Consider these an occasional indulgence, not an everyday snack.
FAQs
Can I use store-bought sugar cookie dough?
You can, but the texture won’t be as good. Homemade dough has a better flavor and holds its shape more reliably during baking. If you’re in a pinch, refrigerated dough from the store works—just skip the chilling step since it’s already chilled.
Why did my royal icing turn out runny?
You probably added too much water. Royal icing is finicky about liquid ratios. If it’s runny, add more sifted powdered sugar a tablespoon at a time until it thickens up. Also, make sure you’re using meringue powder and not just egg whites—meringue powder provides stability that fresh egg whites don’t.
Can I make these cookies without royal icing?
Absolutely. You can use store-bought frosting, a simple buttercream, or even just dust the cookies with powdered sugar and add candy eyes. They won’t look as crisp and detailed, but they’ll still be adorable. I’ve made a batch with just buttercream and sprinkles, and they were a hit.
How do I get the candy eyes to stay on?
Place the eyes on the icing while it’s still wet. Press them gently so they sink in slightly. As the icing dries, it will hold them in place. If you’re adding them after the icing has dried, use a tiny dab of fresh icing as “glue.”
My cookies spread too much in the oven. What went wrong?
Most likely, the dough wasn’t chilled enough. Next time, chill the cut-out cookies on the baking sheet for 10-15 minutes before baking. Also, make sure your butter was softened but not too warm. If your kitchen is hot, the dough will soften faster.
Conclusion
These Adorable Monster Sugar Cookies with Royal Icing have become a staple in my kitchen for a reason. They’re forgiving, they’re fun, and they never fail to make people smile. Whether you’re making them for a school event, a birthday party, or just a Tuesday afternoon that needs a little silliness, these cookies deliver. The recipe is simple enough for beginners but flexible enough for experienced bakers to experiment with.
I love that these cookies don’t take themselves too seriously. In a world where everything has to be perfect and Instagram-worthy, there’s something liberating about making a cookie that’s supposed to look messy. The crooked smiles, the mismatched eyes, the sprinkles that went everywhere—that’s the charm. That’s what makes them memorable.
So grab your ingredients, preheat your oven, and let yourself be a little silly. Give your monsters three eyes or no eyes. Make one that looks grumpy and one that looks like it just told a bad joke. There’s no wrong way to do this. And when you’re done, I’d love to hear about it. Leave a comment below and tell me what kind of monsters you created. Share a photo if you’re feeling brave. And if you’ve got a variation that worked particularly well, I’m all ears. Happy baking, and may your monsters always be adorable.
Pin This Recipe!
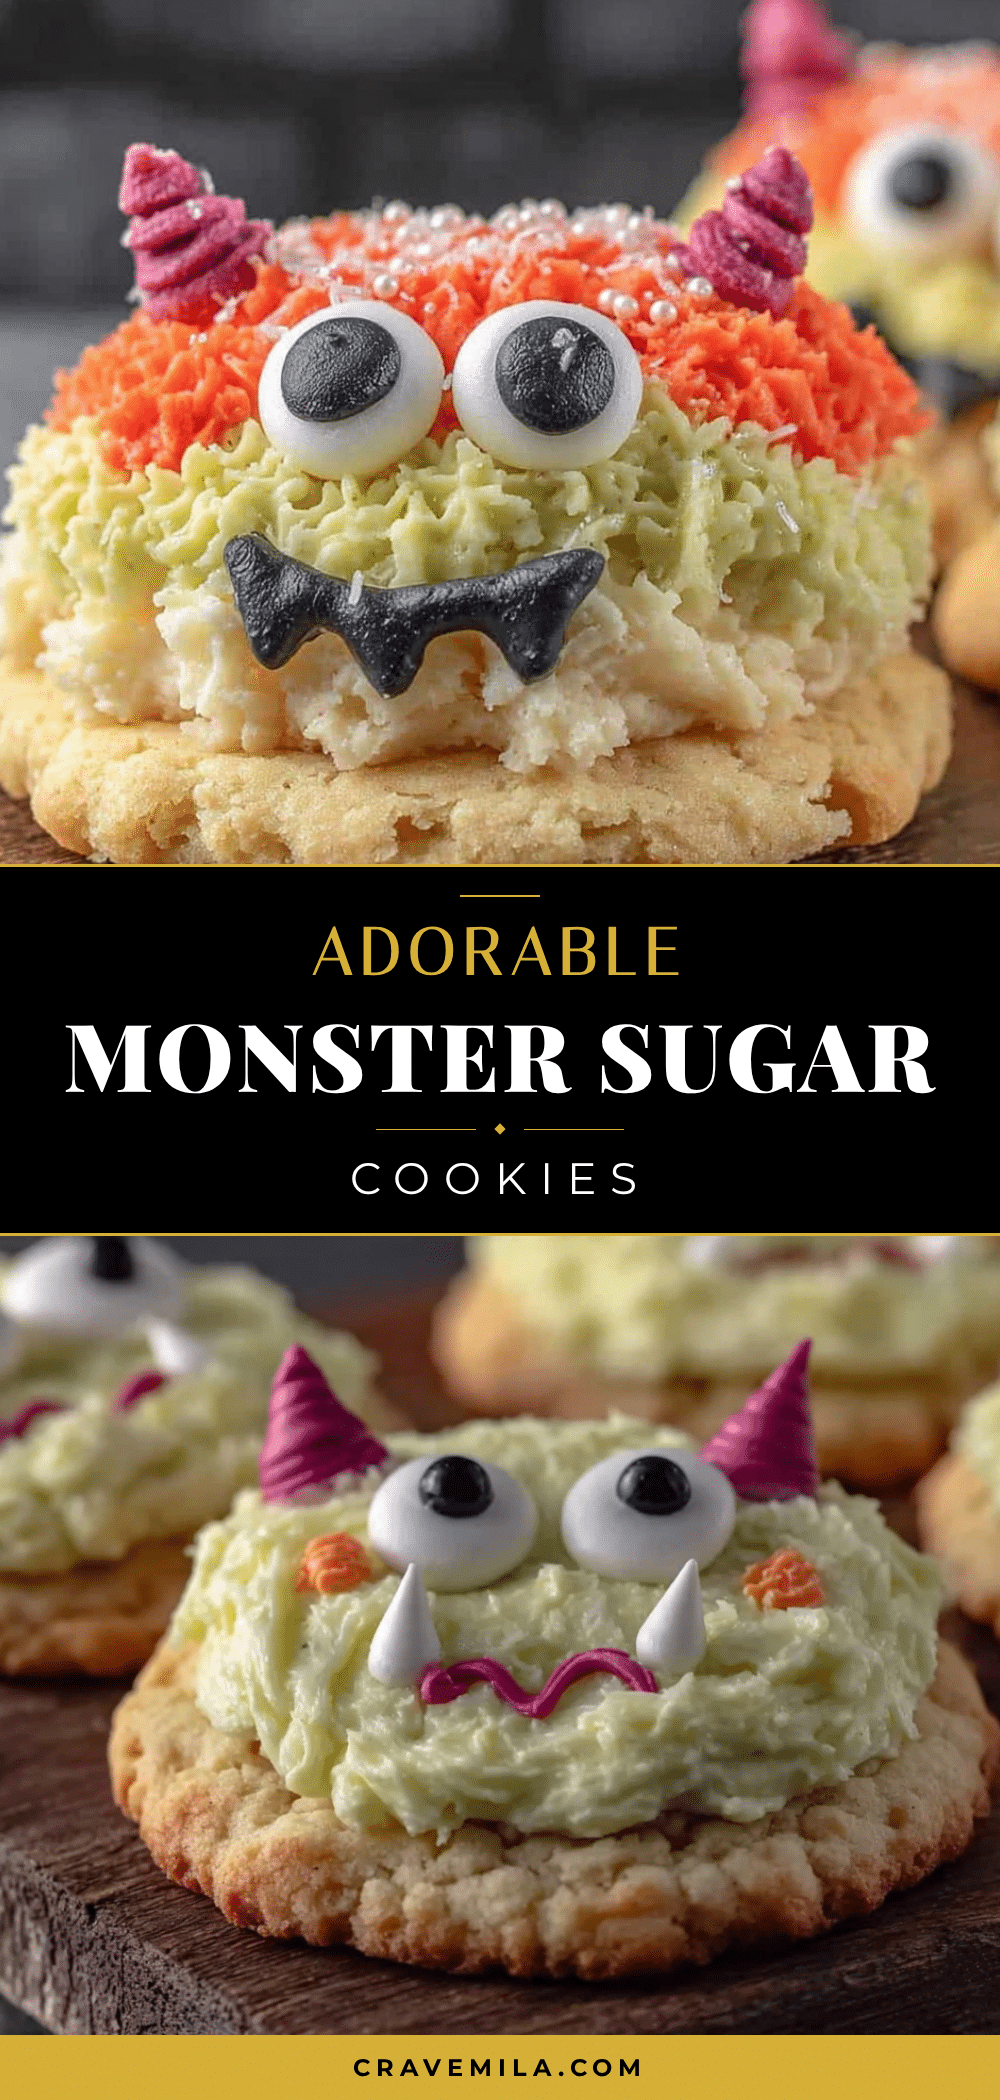
Adorable Monster Sugar Cookies with Royal Icing: Easy Recipe

These adorable monster sugar cookies are soft, buttery, and topped with colorful royal icing and candy eyes. Perfect for parties, bake sales, or any occasion that needs a little fun, this forgiving recipe yields charmingly imperfect cookies that taste as good as they look.
- Prep Time: 15 minutes
- Cook Time: 10 minutes
- Total Time: 1 hour 25 minutes (includes 1 hour chilling)
- Yield: 24 servings 1x
- Category: Dessert
- Cuisine: American
Ingredients
- 2 ¾ cups all-purpose flour (spooned and leveled)
- 1 cup unsalted butter, softened to room temperature
- 1 cup granulated sugar
- 1 large egg, room temperature
- 2 teaspoons vanilla extract (pure)
- ½ teaspoon baking powder
- ½ teaspoon salt
- 4 cups powdered sugar, sifted
- 3 tablespoons meringue powder
- 5–6 tablespoons water, room temperature
- ½ teaspoon vanilla extract (optional)
- Gel food coloring in various colors
- Candy eyes (12mm size)
- Assorted sprinkles
- Black decorating gel
- Colored sanding sugar (optional)
Instructions
- In a stand mixer bowl, cream together the softened butter and granulated sugar on medium speed until light and fluffy, about 3 minutes. Add the egg and vanilla extract, then mix on low until just combined.
- In a separate bowl, whisk together the flour, baking powder, and salt. Gradually add the dry ingredients to the wet ingredients, mixing on low speed until the dough comes together. It should be soft but not sticky.
- Divide the dough in half, shape each half into a flat disc, wrap tightly in plastic wrap, and refrigerate for at least 1 hour (or up to overnight).
- Preheat oven to 350°F (175°C). Line baking sheets with parchment paper or silicone mats. Lightly flour your work surface and rolling pin. Roll one disc of dough to about ¼-inch thickness. Use a round cookie cutter to cut out shapes, and transfer to prepared baking sheets, spacing about 2 inches apart. Gather scraps, re-roll, and cut more cookies. Refrigerate the baking sheets for 10 minutes before baking.
- Bake for 8-10 minutes, or until edges are just barely golden. Let cool on baking sheet for 5 minutes, then transfer to a wire rack to cool completely.
- In a stand mixer bowl, combine sifted powdered sugar and meringue powder. Add 5 tablespoons of water and vanilla extract. Beat on low until combined, then increase to medium-high and beat for 5-7 minutes until thick and glossy with stiff peaks. Adjust consistency with water or powdered sugar as needed.
- Divide icing into separate bowls for each color. Add gel food coloring a little at a time until desired shade is reached. Cover each bowl with a damp paper towel.
- Transfer each color of icing to a piping bag or zip-top bag with a tiny corner snipped off. Outline the cookie with base color, then fill in by piping more icing and spreading with a toothpick. Let base layer dry for about 30 minutes.
- Pipe on monster features. Add candy eyes while icing is still wet. Use black decorating gel to draw mouths, eyebrows, and horns. Add sprinkles for fur, warts, or hair. Let icing dry completely (4-6 hours) before stacking.
Notes
Don’t skip the chill time—warm dough spreads. Check icing consistency: drag a knife through; line should disappear in about 10 seconds. Work in batches to avoid color bleeding. Use a toothpick for small details. Let icing dry completely (4-6 hours) before stacking. Cookies taste even better the next day.
Nutrition
- Serving Size: 1 cookie
- Calories: 190
- Sugar: 18
- Sodium: 80
- Fat: 8
- Saturated Fat: 5
- Carbohydrates: 28
- Protein: 2
Keywords: sugar cookies, monster cookies, royal icing, decorated cookies, easy cookie recipe, party cookies, bake sale cookies



