My neighbor wasn’t trying to impress anyone. I’d stopped by to borrow a ladder on a Tuesday afternoon, and the smell of something warm and buttery hit me before I even got past her screen door. Honestly, I thought she was baking cookies. But there she was, standing at her kitchen counter, nonchalantly sliding the last few crackers into a little compartmentalized container while her toddler happily munched on cheese cubes at her feet. She shrugged when I asked what she was making. “Oh, just snacks for the week,” she said, like it was nothing.
But let me tell you—it wasn’t nothing. It was a revelation. She had these little boxes filled with crackers, cheese, meat, fruit, and even a tiny treat, all neatly arranged like those store-bought lunchables you see in the grocery aisle. Except these looked better. Fresher. And honestly, probably cheaper. I stood there, ladder forgotten, watching her assemble a second box in under two minutes flat. She used cookie cutters on the cheese, for crying out loud. Who does that on a random Tuesday?
That moment stuck with me. Maybe you’ve been there—standing in the snack aisle, staring at those plastic trays, knowing they’re convenient but also knowing they’re packed with preservatives and barely enough food to satisfy a toddler. I kept thinking about my neighbor’s simple, beautiful boxes. So I went home, raided my fridge, and started experimenting. This recipe is the result of that afternoon. It’s the kind of thing you make once and never go back to the store-bought version. I mean, why would you?
Why You’ll Love This Recipe
These Easy Homemade Lunchable Snack Boxes are about to change your snack game. I have tested countless combinations over the past few months, and I can honestly say this version hits the sweet spot between convenience, nutrition, and pure fun. Here is why you will absolutely love making these:
- Quick & Easy: Comes together in under 10 minutes per box. Seriously, once your ingredients are prepped, assembly is faster than deciding what to order for takeout.
- Simple Ingredients: No weird preservatives, no mystery meats. You control exactly what goes in—real cheese, quality crackers, and fresh fruit.
- Perfect for Busy Days: Great for lunchboxes, road trips, picnic baskets, or those afternoons when the kids are hangry and you need something fast.
- Crowd-Pleaser: Kids love the playful presentation, and adults appreciate the wholesome ingredients. It is a win-win.
- Unbelievably Customizable: The flavor combos are endless. Swap proteins, switch up cheeses, or go seasonal with your fruit choices.
What makes this recipe different from the rest? It is the method. Instead of tossing everything in a container and hoping for the best, I have perfected the art of layering and separating ingredients so nothing gets soggy or squished. The crackers stay crunchy. The cheese stays firm. The fruit stays fresh. It is not just another snack box—it is the snack box.
This recipe is the kind that makes you feel like a kitchen superhero. It is comfort food reimagined—healthier, faster, but with the same soul-soothing satisfaction of opening a little tray of goodies. Perfect for impressing your kids without stress, or turning a simple snack into something memorable.
What Ingredients You Will Need
This recipe uses simple, wholesome ingredients to deliver big flavor and satisfying texture without the fuss. Most of these are pantry staples or easy to find at your local grocery store. Here is what you will need:
For the Base Box
- Crackers: 8 to 10 mini crackers per box (I recommend Ritz or Club crackers for buttery flavor; whole wheat versions work great too)
- Cheese: 2 to 3 slices of cheddar, Swiss, or Colby Jack, cut into small squares or fun shapes using cookie cutters (adds a playful touch)
- Meat: 3 to 4 slices of turkey, ham, or salami, rolled or folded into bite-sized pieces (look for nitrate-free options if possible)
For the Fruit & Veggie Component
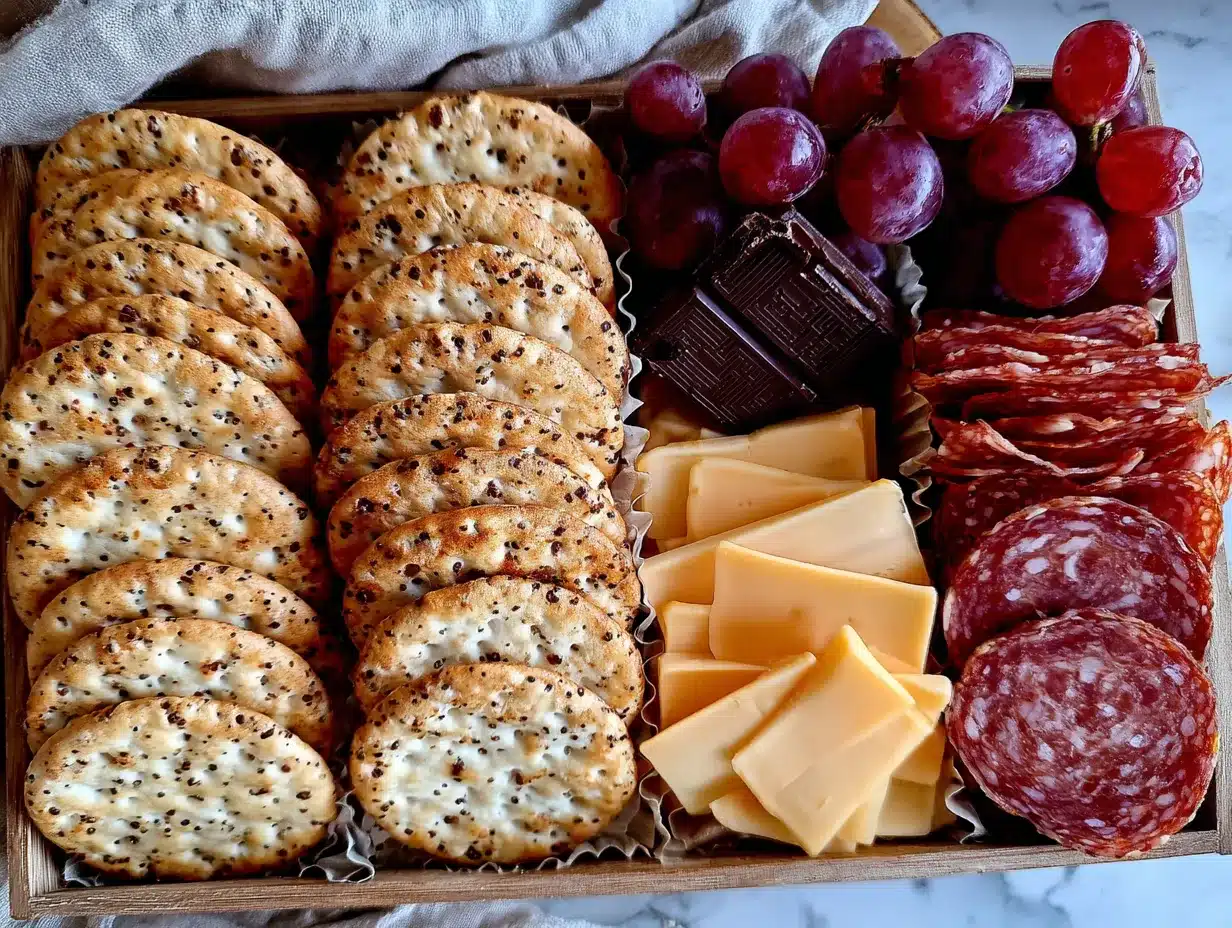
- Fresh Fruit: ¼ cup of grapes, apple slices, or berries per box (use seasonal fruit for best flavor and cost)
- Vegetable Sticks: Optional—carrot sticks, cucumber rounds, or bell pepper strips (adds crunch and color)
For the Sweet Treat
- Chocolate Chips: 1 tablespoon of dark or milk chocolate chips (mini ones work best for little hands)
- Dried Fruit: Optional—a few raisins, dried cranberries, or apricot pieces (adds natural sweetness)
For the Dip (Optional but Recommended)
- Hummus: 2 tablespoons per box (store-bought or homemade; I love the roasted red pepper variety)
- Yogurt Dip: 2 tablespoons of Greek yogurt mixed with a drizzle of honey (perfect for fruit dipping)
Ingredient Selection Tips: For the best texture, choose firm cheese that holds its shape when cut. Pre-sliced cheese works fine, but block cheese gives you more control over thickness. When selecting crackers, go for sturdy varieties that won’t crumble easily in the box. I personally prefer organic grapes and apples since you are eating the skin.
Substitution Guidance: Use gluten-free crackers for a gluten-free option. Swap cheese with dairy-free alternatives like Violife or Daiya if needed. For a vegetarian version, skip the meat and add extra hummus or hard-boiled egg slices. For nut-free schools, replace chocolate chips with sunflower seed butter cups or yogurt-covered raisins.
Equipment Needed
You do not need fancy equipment to make these snack boxes, but a few tools make the process smoother and more fun:
- Bento Boxes or Divided Containers: The star of the show. Look for containers with 3 to 5 compartments. I use the EasyLunchboxes brand (they are BPA-free and dishwasher safe). Alternatively, use small silicone muffin cups placed inside a standard lunch container.
- Small Cookie Cutters: Optional but delightful. Star, heart, or animal shapes make cheese and fruit more exciting for kids. A basic set costs under $10.
- Sharp Knife and Cutting Board: For slicing cheese, fruit, and vegetables with precision. A paring knife works best for small details.
- Mandoline Slicer: Optional, but great for getting uniform cucumber or apple slices quickly. Just watch your fingers—I have the scars to prove it.
- Small Bowls or Ramekins: For holding dips and wet ingredients separately to prevent sogginess.
- Measuring Spoons and Cups: For portioning dips, fruit, and treats consistently.
Budget-Friendly Tip: You can absolutely use regular plastic containers with lids. Just add silicone cupcake liners to create separate compartments. It works like a charm and costs next to nothing.
Preparation Method
Follow these steps to assemble your Easy Homemade Lunchable Snack Boxes like a pro. Total active time is about 10 minutes per box, but you can batch-prep ingredients to speed things up.
- Prep Your Ingredients (5 minutes): Start by washing and drying all fruits and vegetables thoroughly. Moisture is the enemy of crunchy crackers, so pat everything dry with a clean kitchen towel. Slice cheese into ½-inch cubes or use cookie cutters for fun shapes. Roll or fold meat slices into bite-sized pieces. Cut fruit into manageable portions—halve grapes lengthwise for young children to prevent choking.
- Set Up Your Assembly Station (1 minute): Arrange your containers, ingredients, and tools within easy reach. I like to work in an assembly line: containers on the left, ingredients in the middle, finished boxes on the right. This saves time and keeps things organized, especially if you are making multiple boxes.
- Layer the Base (2 minutes): Place crackers in the largest compartment of your container. Arrange them in a single layer, slightly overlapping if needed. For extra crunch, add a small packet of silica gel (food-grade, of course) if you are prepping these a day ahead—but honestly, just keep them separate from wet ingredients.
- Add the Protein (1 minute): Place cheese and meat in separate compartments. If your container has only one large compartment, use silicone liners or parchment paper squares to separate them. This prevents flavors from mingling and keeps everything looking neat.
- Add Fruits and Vegetables (1 minute): Fill another compartment with fruit and veggies. Keep wet items like cucumber slices or apple wedges away from crackers. A small piece of paper towel at the bottom of the fruit compartment absorbs excess moisture and keeps everything fresh.
- Include the Sweet Treat (30 seconds): Place chocolate chips or dried fruit in a small compartment or liner. Mini silicone cups work perfectly here. If using chocolate chips, store the box in a cool place to prevent melting.
- Add the Dip (1 minute): Spoon hummus or yogurt dip into a small, leak-proof container. Place it in the largest remaining compartment or nestle it between other items. Secure the lid tightly to prevent spills.
- Seal and Store (30 seconds): Close the container lid firmly. If stacking multiple boxes, place a sheet of parchment paper between each to prevent scratches. Refrigerate until ready to serve. For best results, consume within 24 hours.
Troubleshooting Tip: If your crackers get soggy, you are likely adding them too early or storing them next to wet fruit. Always add crackers just before serving, or use a separate small container within the box. I learned this the hard way after a particularly sad batch of limp Ritz crackers.
Cooking Tips & Techniques
Over the months of perfecting these snack boxes, I have gathered some hard-won wisdom. Here are my best tips to ensure success every time:
- Keep It Dry: Patience pays off. After washing fruit, let it air-dry on a towel for 10 minutes before packing. Even a drop of water can turn crispy crackers into sad, soggy disappointments.
- Use the Freezer Trick: For yogurt-based dips, freeze a small dollop the night before and add it to the box in the morning. It thaws by lunchtime and keeps everything cold. Genius, right?
- Pre-Slice for the Week: Spend 30 minutes on Sunday prepping all your ingredients. Store cheese, meat, and fruit in separate airtight containers. Then assembly takes just 2 minutes per box each morning.
- Temperature Matters: If your child has a lunchbox with an ice pack, great. If not, use frozen grapes or a frozen water bottle to keep everything chilled. Nobody wants warm cheese.
- One Mistake I Made: I once packed apple slices without tossing them in lemon juice first. By lunchtime, they were brown and unappealing. Now I always give them a quick spritz of lemon or lime juice to keep them bright.
- Multitasking Strategy: While your morning coffee brews, assemble the boxes. It takes less time than scrolling through social media, I promise.
Variations & Adaptations
One of the best things about these snack boxes is how endlessly adaptable they are. Here are some of my favorite variations:
Dietary Variations
- Gluten-Free: Swap regular crackers for gluten-free rice crackers or seed-based crackers. Ensure deli meats are certified gluten-free (some brands contain additives).
- Dairy-Free: Use dairy-free cheese slices or skip cheese entirely and add extra protein like roasted chickpeas or turkey slices.
- Low-Carb: Replace crackers with cucumber rounds or bell pepper slices. Use full-fat cheese and meat for satiety.
Seasonal Twists
- Summer: Add fresh berries, peach slices, or watermelon cubes. Swap chocolate chips for frozen yogurt drops.
- Fall: Include apple slices, pear chunks, and a small handful of pumpkin seeds. Use sharp cheddar for a cozy flavor profile.
- Winter: Pack clementine segments, dried cranberries, and a dark chocolate square. Add a thermos of warm soup for a complete meal.
Flavor Adventures
- Italian-Inspired: Use salami, provolone cheese, and rosemary crackers. Add a small container of marinara for dipping.
- Sweet Tooth: Include graham crackers, marshmallows, and a small piece of chocolate for a mini s’mores kit. Add strawberries for freshness.
- Breakfast Box: Use mini pancakes or waffles, scrambled egg bites, and fresh fruit. Add a small container of maple syrup for dipping.
I personally tried the Italian-inspired version last week, and it was a hit with my neighbor’s toddler. The kid dipped everything in marinara—even the grapes. Sometimes you just have to roll with it.
Serving & Storage Suggestions
These snack boxes are designed for convenience, but a few serving and storage tips will keep them at their best.
Serving Temperature: Serve chilled or at room temperature. If your child prefers cold cheese, keep the box refrigerated until they leave for school. For road trips, pack the box in a small cooler with an ice pack.
Presentation Ideas: Arrange ingredients by color for a visually appealing box. Use small cookie cutters for cheese and fruit to make it fun. Add a handwritten note or sticker on the lid for a personal touch. Pinterest-worthy, I promise.
Complementary Dishes: Pair with a small thermos of soup, a yogurt tube, or a juice box for a complete lunch. For adults, serve with a side of mixed greens or a sparkling water.
Storage Instructions: Refrigerate assembled boxes for up to 3 days in an airtight container. Keep crackers and dips separate until serving to maintain texture. Do not freeze assembled boxes—the texture of cheese and fruit suffers.
Reheating Tips: This recipe is best enjoyed cold or at room temperature. If you must reheat meat or cheese, do so separately in the microwave for 10 seconds, then add to the box. Honestly, just skip the reheating—it is a cold snack for a reason.
Flavor Development: Surprisingly, the flavors meld beautifully after a few hours in the fridge. The cheese absorbs a hint of fruit sweetness, and the crackers take on a subtle savory note. It is a happy accident I discovered when I prepped boxes the night before a picnic.
Nutritional Information & Benefits
Here is an approximate nutritional breakdown for one standard snack box (without dip):
| Nutrient | Amount |
|---|---|
| Calories | 350-400 |
| Protein | 15-20g |
| Carbohydrates | 30-35g |
| Fat | 18-22g |
| Fiber | 4-6g |
| Sugar | 12-15g (mostly from fruit) |
Health Benefits: This snack box is packed with protein from cheese and meat, which keeps energy levels steady. The fruit provides essential vitamins and antioxidants, while the crackers offer quick energy for active kids. The combination of protein, fat, and fiber helps maintain stable blood sugar—no afternoon crash here.
Dietary Considerations: This recipe is naturally vegetarian-friendly if you skip the meat. For a lower-sodium option, choose low-sodium deli meats and unsalted crackers. Potential allergens include dairy (cheese) and gluten (crackers), so adjust accordingly.
Personal Wellness Perspective: I love that this recipe lets me control exactly what my family eats. No artificial colors, no high-fructose corn syrup, no mystery ingredients. It is real food, packed with love, and that makes every bite better.
FAQs
Can I make these snack boxes ahead of time?
Absolutely! You can assemble them up to 3 days in advance. Just keep crackers and dips separate until serving to maintain crunch. Store in an airtight container in the refrigerator.
How do I keep crackers from getting soggy?
The key is moisture control. Dry all fruits and vegetables thoroughly before packing. Use separate compartments or silicone liners to keep crackers away from wet ingredients. Add crackers just before serving if possible.
Can I use this recipe for school lunches?
Yes! These snack boxes are perfect for school lunches. Check your school’s nut policy and avoid nut-containing ingredients if needed. Use an ice pack to keep everything fresh until lunchtime.
What are the best containers to use?
Look for divided containers with tight-sealing lids. Bento boxes, EasyLunchboxes, or even reusable plastic containers with silicone muffin cups work great. Avoid containers with weak latches—they can pop open in a backpack.
Can I make these snack boxes for adults?
Definitely! Upgrade the ingredients for an adult version—try prosciutto, aged gouda, fig crackers, and dried apricots. Add a small square of dark chocolate for a sophisticated touch. Perfect for work lunches or hiking snacks.
Conclusion
These Easy Homemade Lunchable Snack Boxes are more than just a convenient snack—they are a little act of love. They save you money, reduce waste, and give you total control over what goes into your family’s bodies. Plus, they are genuinely fun to make and eat. I have not bought a store-bought lunchable since that Tuesday afternoon at my neighbor’s house, and I do not miss them one bit.
I encourage you to experiment with your own combinations. Swap in your family’s favorite crackers, try a new cheese, or add a seasonal fruit. This recipe is a template, not a rulebook. Make it your own. And when you do, come back and tell me about it in the comments. I would love to hear what creative combinations you come up with.
So go ahead—raid your fridge, grab a container, and start building. Your future self (and your hungry kids) will thank you. Happy snacking!
Pin This Recipe!
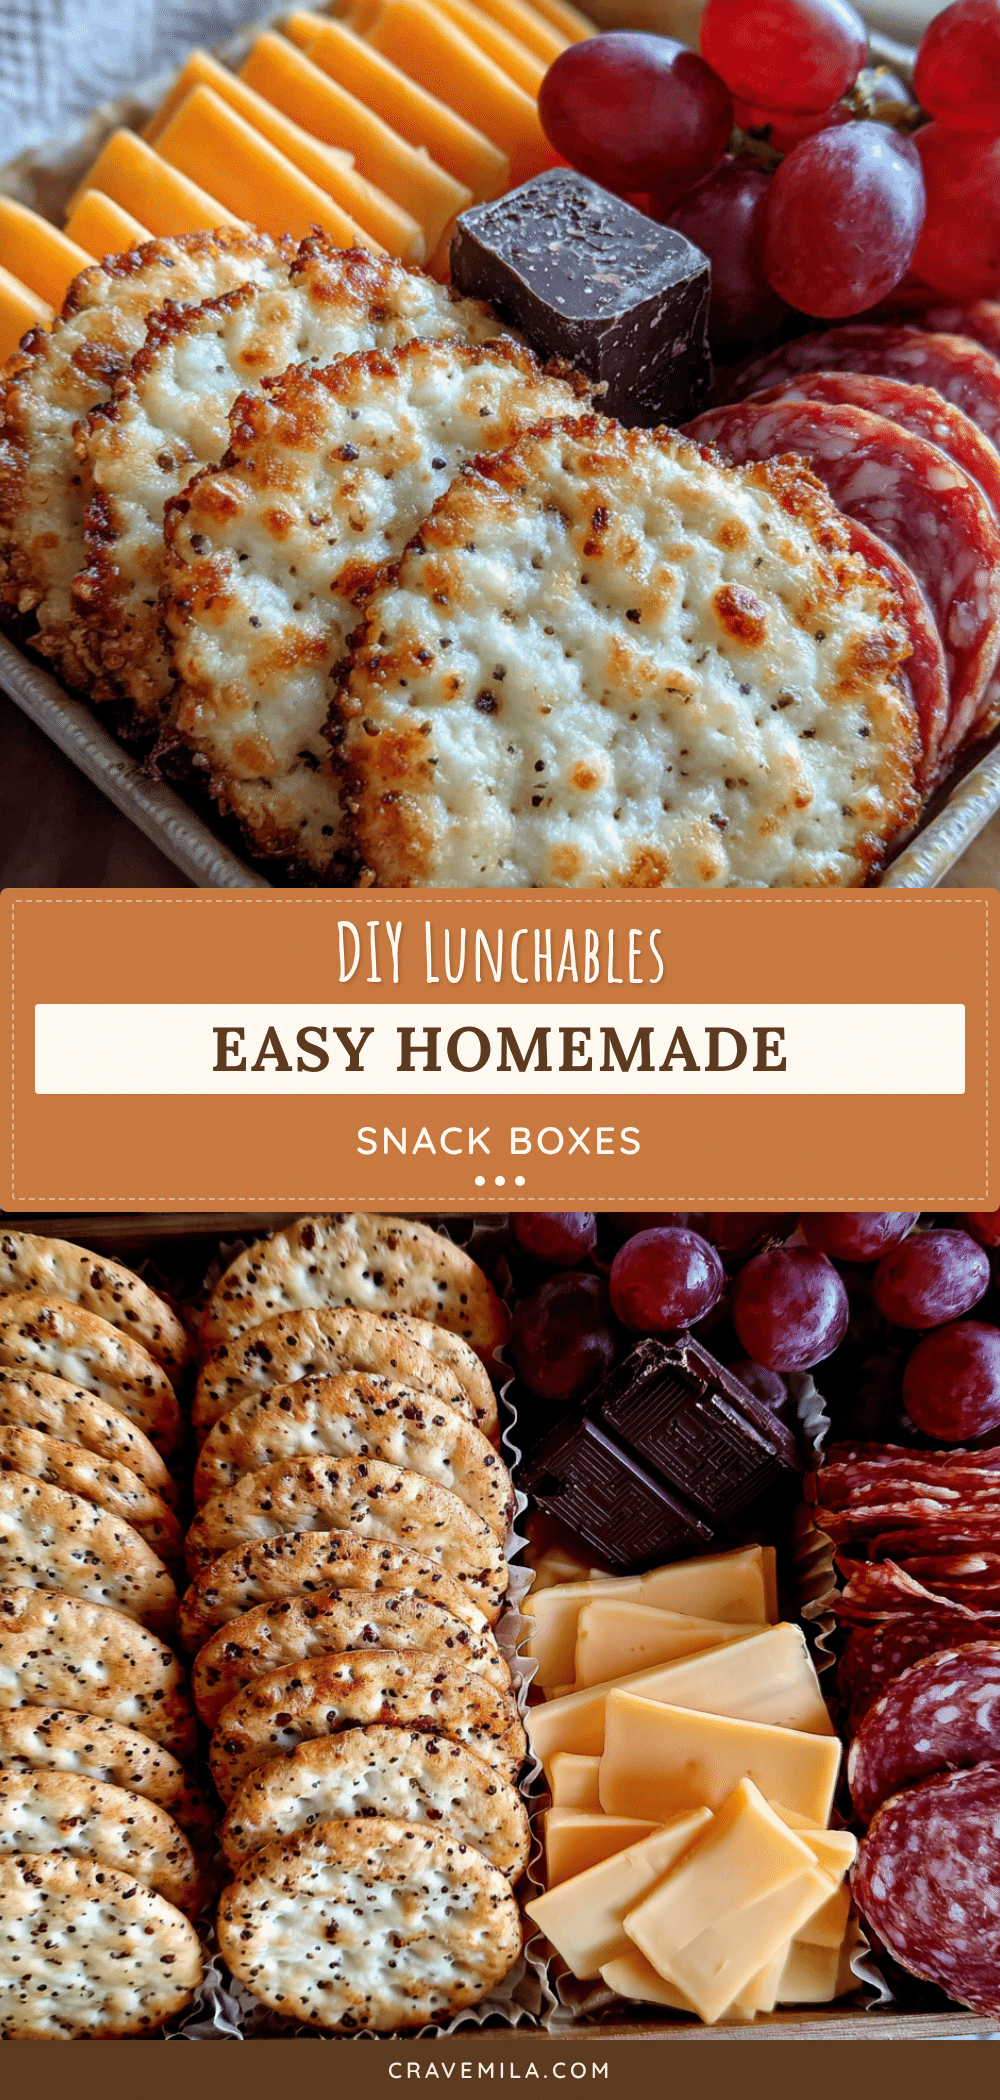
Easy Homemade Lunchable Snack Boxes
These Easy Homemade Lunchable Snack Boxes are a quick, customizable, and healthier alternative to store-bought versions. Perfect for busy days, they combine crunchy crackers, cheese, meat, fresh fruit, and a sweet treat in under 10 minutes.
- Prep Time: 10 minutes
- Cook Time: 0 minutes
- Total Time: 10 minutes
- Yield: 1 serving 1x
- Category: Snack
- Cuisine: American
Ingredients
- 8 to 10 mini crackers (e.g., Ritz or Club crackers)
- 2 to 3 slices of cheddar, Swiss, or Colby Jack cheese, cut into small squares or fun shapes
- 3 to 4 slices of turkey, ham, or salami, rolled or folded into bite-sized pieces
- 1/4 cup fresh fruit (grapes, apple slices, or berries)
- Optional: carrot sticks, cucumber rounds, or bell pepper strips
- 1 tablespoon dark or milk chocolate chips (mini ones work best)
- Optional: a few raisins, dried cranberries, or apricot pieces
- 2 tablespoons hummus (optional, for dip)
- 2 tablespoons Greek yogurt mixed with a drizzle of honey (optional, for dip)
Instructions
- Prep your ingredients: Wash and dry all fruits and vegetables thoroughly. Slice cheese into 1/2-inch cubes or use cookie cutters for fun shapes. Roll or fold meat slices into bite-sized pieces. Cut fruit into manageable portions (halve grapes lengthwise for young children).
- Set up your assembly station: Arrange containers, ingredients, and tools within easy reach. Work in an assembly line: containers on the left, ingredients in the middle, finished boxes on the right.
- Layer the base: Place crackers in the largest compartment of your container in a single layer, slightly overlapping if needed.
- Add the protein: Place cheese and meat in separate compartments. Use silicone liners or parchment paper squares if needed to separate them.
- Add fruits and vegetables: Fill another compartment with fruit and veggies. Keep wet items away from crackers. Place a small piece of paper towel at the bottom of the fruit compartment to absorb excess moisture.
- Include the sweet treat: Place chocolate chips or dried fruit in a small compartment or liner (mini silicone cups work perfectly).
- Add the dip: Spoon hummus or yogurt dip into a small, leak-proof container and place it in the largest remaining compartment or nestle it between other items. Secure the lid tightly.
- Seal and store: Close the container lid firmly. If stacking multiple boxes, place a sheet of parchment paper between each to prevent scratches. Refrigerate until ready to serve. For best results, consume within 24 hours.
Notes
Keep crackers and dips separate until serving to maintain crunch. For best results, consume within 24 hours. Use gluten-free crackers for a gluten-free option. Swap cheese with dairy-free alternatives if needed. For a vegetarian version, skip the meat and add extra hummus or hard-boiled egg slices.
Nutrition
- Serving Size: 1 snack box
- Calories: 375
- Sugar: 14
- Sodium: 600
- Fat: 20
- Saturated Fat: 8
- Carbohydrates: 33
- Fiber: 5
- Protein: 18
Keywords: homemade lunchable, snack boxes, bento box, kids lunch, healthy snack, easy snack, lunchbox ideas



